Making the preparations to enter the next dungeon in Link’s Awakening, Catfish’s Maw was a bit of an “on rails” experience, with the game guiding me through most of it.
I Met a Ghost
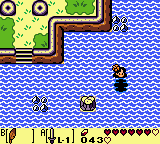
I got out of the Angler’s Tunnel and realized I can swim now, making most bodies of water easy to traverse and handle. Why “most” and not “all”? I’ll get to that.
In any case, a few moments after I got out of the dungeon, a ghost suddenly appeared and started following me. Eventually, after running around with it on my back for a while, it spoke to me and told me to take him to the house by the bay.
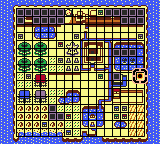
I explored a big part of the map today.
I couldn’t remember it at first, but looking on the map refreshed my memory. There’s a ruined, abandoned house to the south. When I first found it, I thought that’s where Richard was supposed to be, but now I knew who it belongs to. I took the ghost there, using the dash + jump shortcut at the bay, instead of going the long way around, through Mabe Village. Once there, the ghost said something about nostalgia and then asked me to take him back to his grave, at the graveyard.
I Bought a Bow
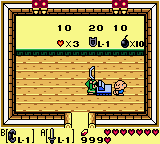
On the way to the graveyard, I went through Mabe Village and finally bought the bow. I should have done that much earlier, since it turned out 999 is the maximum amount of rupees I can carry, so I was wasting my pickups through most of the Angler’s Tunnel.
You can actually rob the store, but I prefer not to. It’s scary.
I Brought the Ghost to Its Grave
I got the ghost to the graveyard, but it took me a while to figure out where his grave actually was. On the plus side, while trying to figure this out, I found the screen with the graves mentioned in the Color Dungeon book at the library. It’s the lower right screen with five gravestones, three at the top and two at the bottom. Sadly, I didn’t write down the info from the book, so I’ll have to come back to it.
These are the five graves related to the book in the library.
- Use the book info to move the five gravestones at the graveyard
In any case, the lower left screen of the graveyard had a hidden staircase under one of the gravestones. This led me to another two-screen area with the ghost’s grave on the second screen. I took him there and he left me, telling me to go back to his house for my reward. As the ghost was gone, the owl appeared and told me the Catfish’s Maw is now open and I should go to Martha’s Bay to enter it. I’m not sure, but I think the Owl also hinted diving will be involved. I’m absolutely positive that Ulrira strongly hinted at this in the phone hint house.
What a nice, quiet spot for a final resting place.
During all of this, I had to take a few notes:
- There’s a heart piece at the underground area towards the ghost’s grave. It might need the hook.
- I need to go to the ghost’s home for my reward, hidden under a jar.
- There’s a cave behind some rocks in Mystery Woods with a chest inside. Also needs the hook.
The best way to take notes with modern technology – a screenshot.
I Went Back to the Ghost’s House
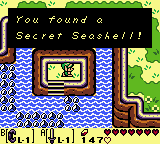
On the way back to the ghost’s house, I stopped by the library and read the book again. I didn’t take a note this time either, but I took a screenshot. Technology! The reward at the ghost’s house was another secret seashell. I was hoping it would be something more, but I guess opening the Catfish’s Maw was reward enough.
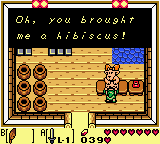
I Stopped By the Animal Village
Since I was relatively close, I went back to the Animal Village, to give the Hibiscus to the “Girl” writer. She was now much nicer and asked me to deliver her letter to Mr. Write, the guy I met north of the Mystery Woods. Since I could swim now and I also had bombs, I could do a few other things:
This is Mr. Write’s pen pal and a blatant liar.
- The cave behind the animal village needs a bomb to enter, but it also needs the hook to get the treasure.
- There’s a warp/ teleport in the water one screen down from the Animal Village.
I Made some Trades
I used the warp to get to the Savannah and then walked to Mr. White’s house to deliver the letter. Apparently, the “girl” also sent him a photo of herself, except it’s not her photo at all. In any case, Mr. White was happy and gave me a Broom.
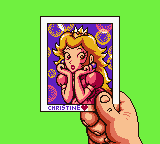
Another Mario reference! This is the photo of Mr. Write’s pen pal. Yeah, right…
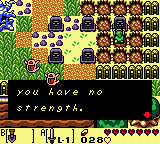
I made the obvious conclusion here and tried to deliver the broom to the witch, with no luck. I then went back to Mabe Village and tried with my second choice – the old lady in front of Ulrira’s house. This time, I was right and got the Fishing Hook. Again, I tried with the obvious choice – the Angler north of Madam Meow Meow’s house. Again, I had no luck, but this was my only guess, so I couldn’t do anything else for now.
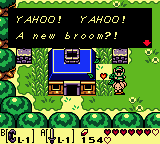
No one should be this happy to be able to do housework.
I Made My Way towards the Catfish’s Maw
I decided to put side questing on hold for now and make my way towards the next dungeon, the Catfish’s Maw. I already knew exactly where it was because leading the ghost around made me stumble into it. Now, I also knew how to enter it.

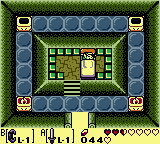
Diving at the right spot takes link to this screen and let’s him emerge right next to the dungeon entrance.
I got there, dove at the obvious spot in the lower left of the screen, and this took me to a side scrolling area that led me to the entrance. However, I wasn’t ready to get in yet.
I Did Some More Exploring
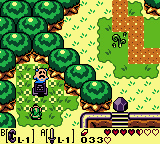
I first explored the outlying areas and found another secret shell a few screens east of the ghost’s house. This one was on a small island on a small lake, hidden under a bush.
This island is mid-way between the bay and the ghost’s house.
After that, I started swimming and searching through the entire region, hoping to find more secrets. I stumbled back to the seashell manor and realized I can track my progress on seashell collections there. According to the indicator, I was actually very close to getting enough of them. It was nearly three quarters of the way to the top, and I was at 12 seashells. One screen east of the manor, I also found the 13th seashell, so I got even closer.
I’m actually getting there. I think I need 20 seashells total.
After that, I went all the way east via a river, to the only southern region (as in, not in the mountains to the north) I haven’t explored yet. First, I found an island with two Armos on it, and a staircase bellow the one that was alive. The staircase lead to a cave, but I needed the hook for this one as well.
- There’s a cave at the island with two Armos. It needs the hook item.
Finally, I went north of that island and after a while, finally found the raft Sale was talking about. I had to pay the owner 100 rupees to use it. Getting on the raft sends Link on a ride through the rapids, with the ability to pick up rupees, bombs, magic powder and arrows. If you do a good job, you can probably get back the 100 rupees and even stock up on consumables, but I tried it twice and I didn’t do a very good job. I’m more or less broke now.
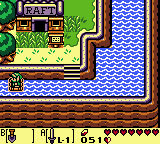
For 100 rupees, this is where the raft ride starts.
By the way, this is why I said “most”, in relation to swimming before. As far as I know, I can’t enter the rapids without the raft.
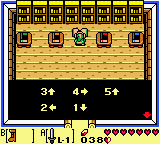
I Found a Hidden Dungeon in Mabe Village
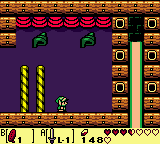
I went back to Mabe Village and found a house in the north part of it, behind three boulders. There was a bed inside. Sleeping in the bed transports link to a small dungeon, filled with Arm Mimics. I’m not sure if there’s another way, but sword attacks wouldn’t kill these guys. Instead, I just used the Pegasus Boots and the Roc Feather to jump over them.
The bed is how you enter the Ocarina dungeon.
Inside were two chests. One had 50 rupees in it, while the other contained an Ocarina. I’m not sure what the ocarina was for, but the game hinted I needed to learn some tunes for it. For now, Link didn’t know how to play it, but he could try it anyway and using it froze everything on the screen for a short time, giving me the chance to reassess my situation, so it might be useful.

This was a beautiful moment in the game. I’d remember it fondly if I had it as a kid.
Of course, there was on obvious tune I could learn. I went to the Animal Village and spoke to Marin. We did a duet and she taught me the Balad of the Wind Fish. This was a very memorable moment. I’m sad I didn’t record it.
I Helped Out a Mermaid
I went back to the Catfish’s Maw and found a mermaid on the screen north of the dungeon. She said she lost her necklace somewhere in the bay and will give me one of the scales off her tail if I find it. Again, my first assumption was sort of wrong. I thought I needed to dive for it, so I spent a long time diving in every tile in the bay. Finally, I got to a bridge and dove under it.

This guy is fishing under the bridge and get’s the necklace in exchange for the fishing hook.
There was a fisherman under the bridge. He asked for my fishing hook, so I gave it to him. He offered to give me his next catch and who would have guessed it, he fished up the necklace. I delivered the necklace to the mermaid and she gave me one of her scales. The delivery quest goes on!
Don’t mind me, I’m just taking a scale off your tail. Totally not a perv.
Now, it was finally time to enter the Catfish’s Maw.


