This report spanned over a couple of days of gameplay. My new schedule of posting three times a week sort of makes individual updates impossible, so I’ll try and do it this way.
Blithes Peak
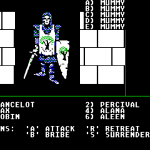
The first thing I did was to go to Lord Inspectron because I thought the lookout in B-3 might be Blithes Peak. It was and I got 2000 experience, as well as another quest – go to the desert people and bring a sample of their trade goods.
One more quest completed!
I freed the prisoners of both Blackridge castles, but nothing happened, other than the prisoners leaving.
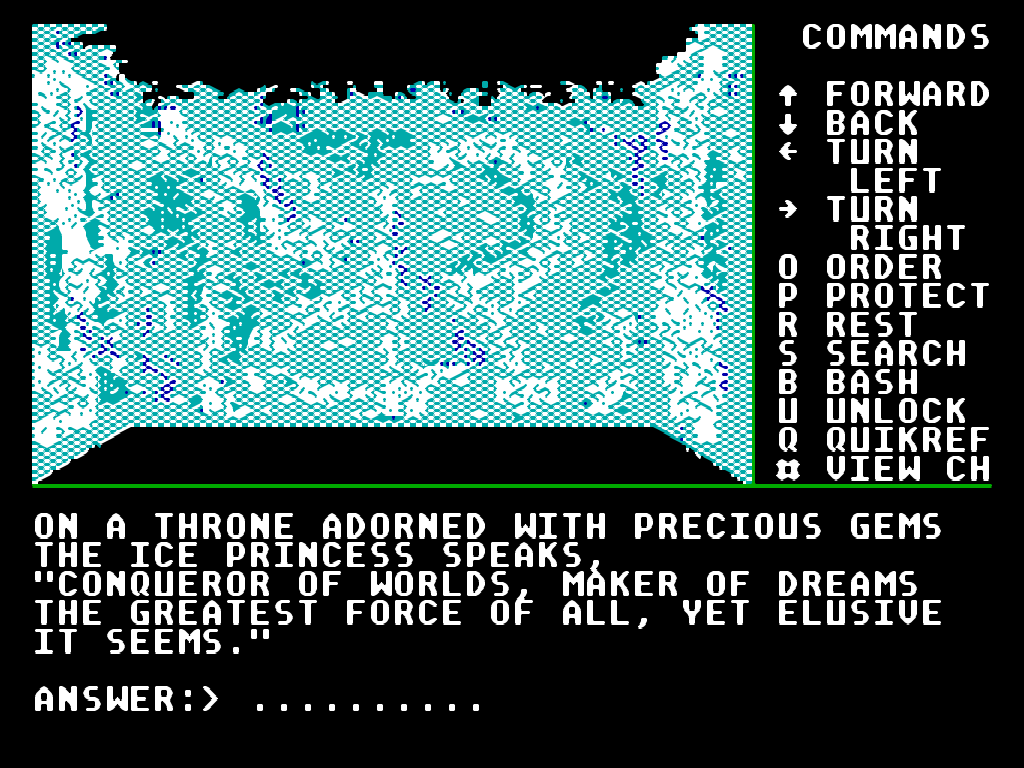
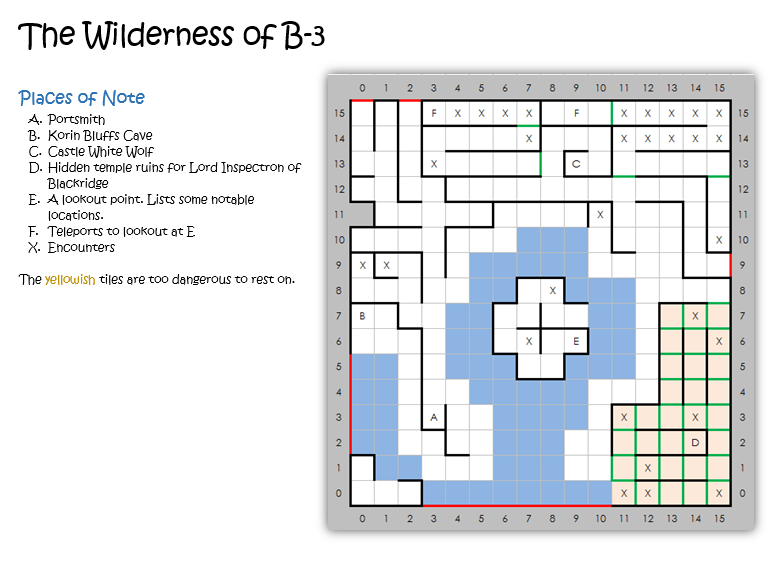
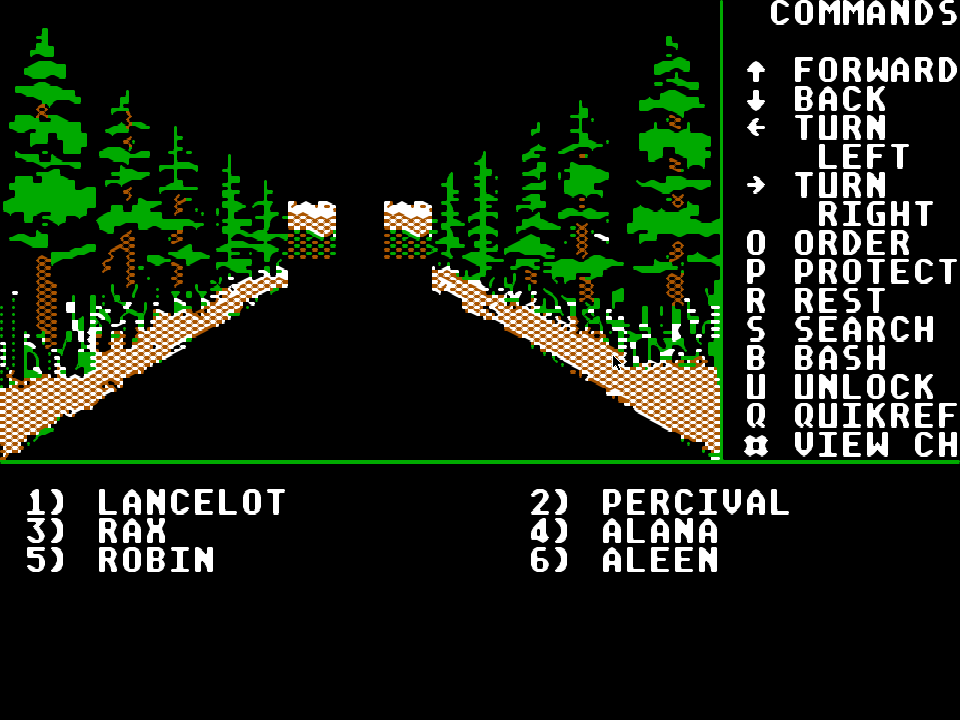
C-3 Wilderness, Wyvern Peaks
I went to explore C-3, to make a nice rectangle on the world map. It seemed empty at first. I ended up in both D-3 and C-4 briefly. I now know there’s a bunch of trees in D-3, with some guy wanting me to climb all of them without leaving the area. I also know there’s something screaming in C-4, and I couldn’t cast spells on the few tiles I’ve been on. My RPG experience tells me it’s a banshee or something of the sort.
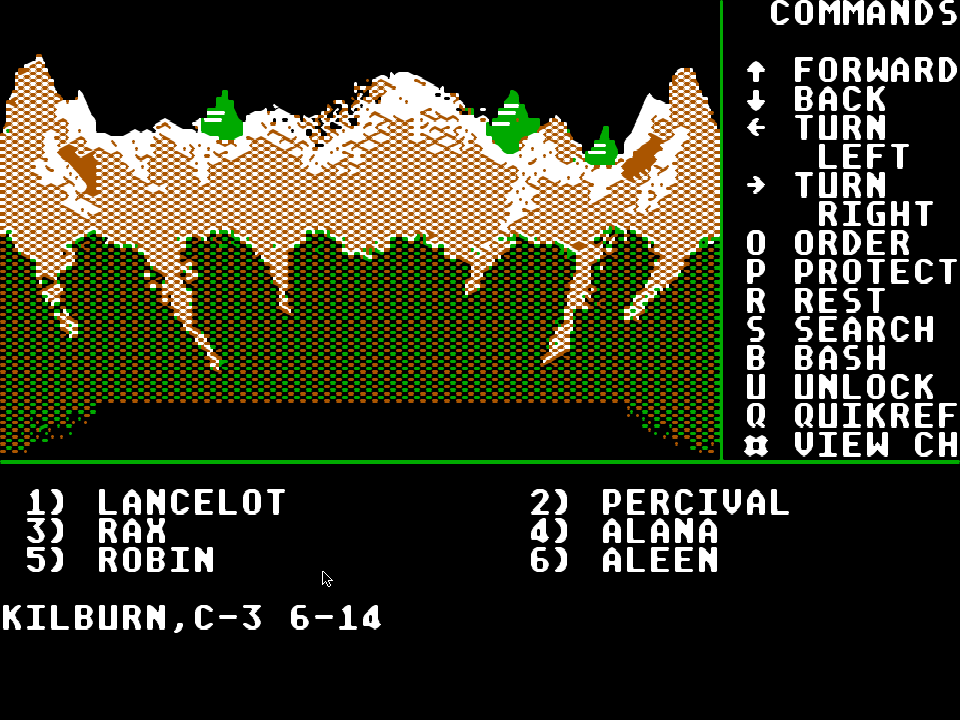
Killburn is, at least, a more appropriate name than Hacker or Inspectron, though only slightly.
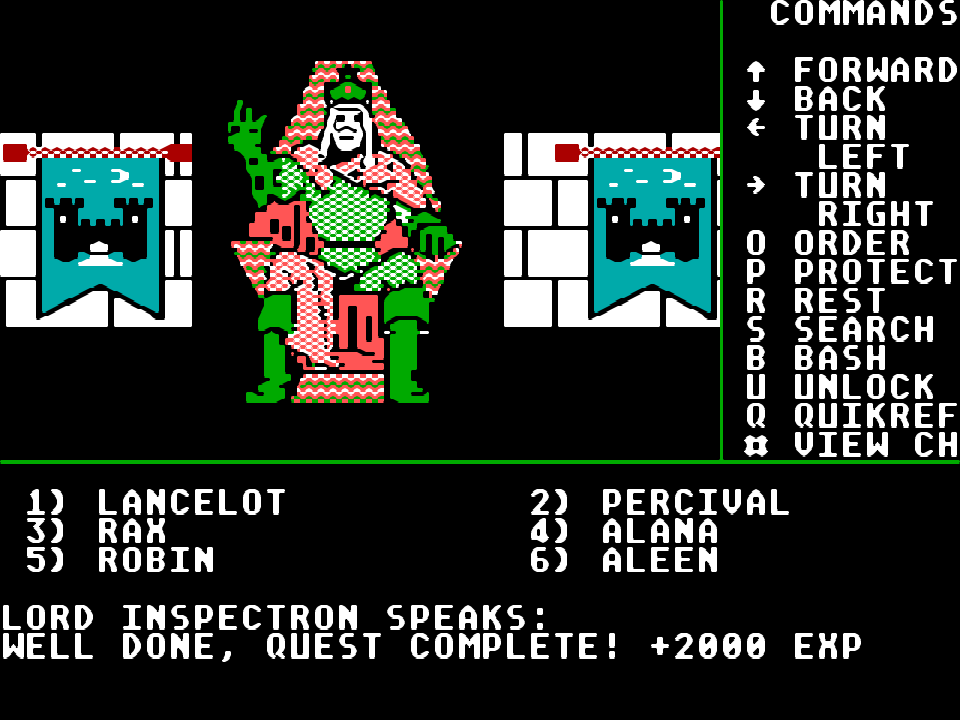
Eventually, I found the exiled Lord Kilburn to the north, past a few secret passages. He gave me a map to the desert lands, told me to go there and report my findings to the other lords. I didn’t have a quest, so I accepted, simply to get the map. It looks like the game handles quests without too many limitations. I can only have one active at a time, but I can complete other quests without actually having them active.
The Exiled Lord Kilburn Speaks: “Take this map and explore the desert. Report your findings to the other lords. Then they will understand!”
He disappears after this so I have no idea how to retake this quest if you remove it with the clerical spell (3-7). I actually tried removing it and was forced to reload. Luckily, I saved in Sorpigal right after taking it, because to the north west of C-3, I soon found a hermit ho offered to “trade items”. Accepting removed everything from my inventory, gave me Pirate Map A and Pirate Map B and filled the rest of my slot with (USELESS ITEM). Naturally, I immediately reloaded. If there’s a reason to do this, I’ll probably have to make a fake party, get here from Sorpigal and take the items that way, or at least use a fake party to store my current items with them before going here to trade. For now, I won’t be doing that, since it’s basically cheating and there might be another way.
Wyverns are a lot of experience.
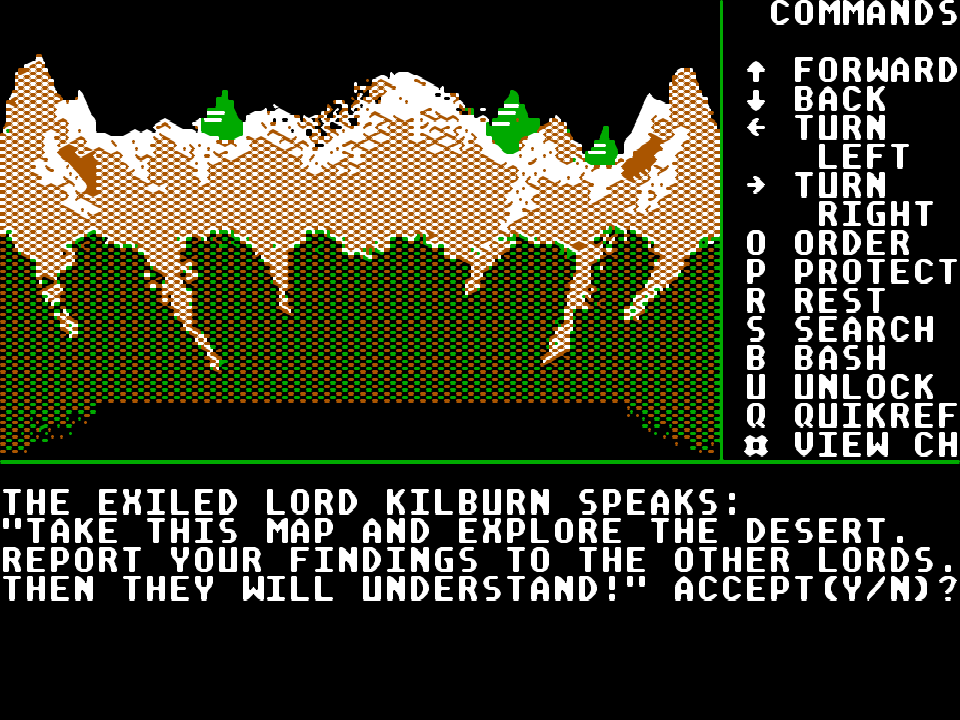
As expected (for the most part), in the central region of C-3, there was a series of winding passages with a Wyvern ambush every few steps. These are the Wyvern Peaks I’ve seen from Blithes Peak in B-3. Wyverns are tough monsters. They don’t have that much health (about 50), but they hit by a lot, so it was really difficult to defeat them and I had to do it several times in a row to get to the center of the area. I managed to win a few battles, which gave me nice gold and experience, but I decided to save the rest of it for a later time.
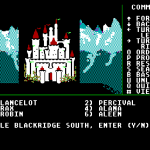
Castle White Wolf, B-3
The castle was mostly empty. The throne room was straight from the entrance and the lord’s name was Ironfist. I couldn’t take his quests because I was on the quest for lord Kilburn and I didn’t want to abandon it.
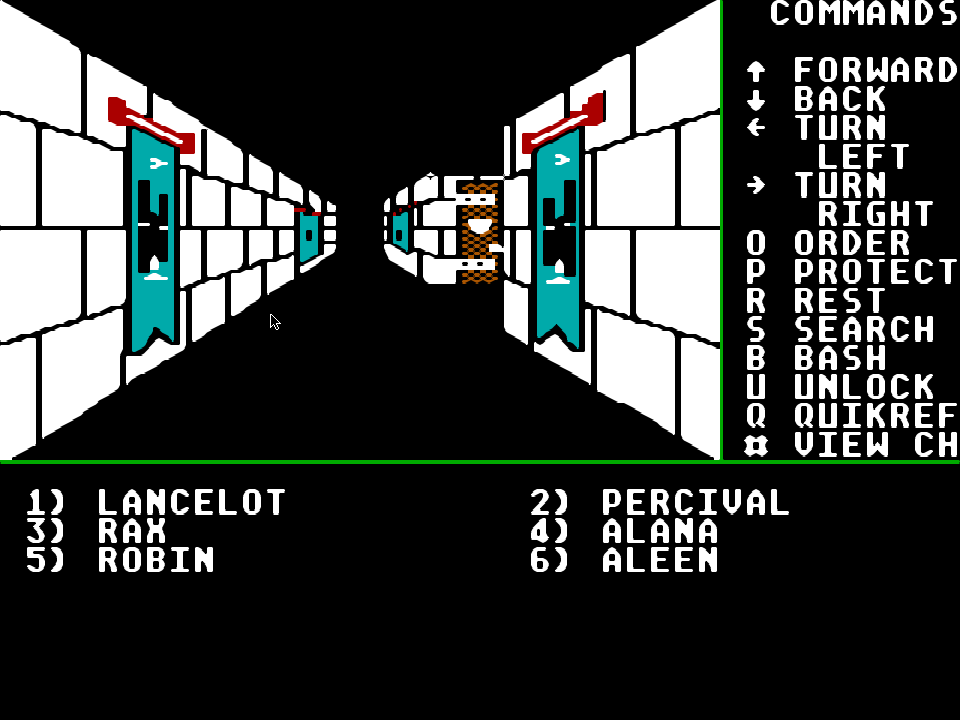
White Wolf looks just like castles Blackburn.
There was another message here, this one labeled B, so I have A, B and C now:
- ATIS-19-31UD54AEUPI1
- RSTIA-,E1,;/11RN;/M-
- IACI1;-2;ONU–G,NOT2
The messages are of the same length, so it’s definitely some sort of code, though probably not programming, as I though earlier. I’m guessing there’s one in each castle, so I won’t try to decipher them yet.
There was also a prisoner, in a long spiral area called the tower. I guess spiraling passages were the only way to (poorly) portray slopes in this game, since there is no vertical dimension. This is why both the Blithes Peak and the Wyvern peaks were confusing to me. I freed him immediately, since there seems to be no downside to it.
Other than that, there was a bunch of empty rooms, some random encounters and nothing else. I guess I explored Castle White Wolf quite quickly.
D-1 Wilderness
This was the next one I wanted to visit, because I’ve seen the drawn map of the world of Might and Magic and the deserts were definitely in the east. At first glance, D-1 didn’t look like a desert.
No desert here, or is there?
On second glance, they either picked a weird color or for a desert, or I’ve just reached hell.

That’s a hot looking desert, literally.
I didn’t want to go in yet, so I explored the small area I started in when I entered from C-1. I found a message telling me where Kilburn was, but nothing else.
It’s awesome when you get a hint AFTER you do the thing.
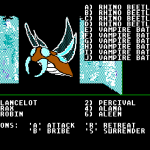
It was really the desert and the mechanic is that if you stay in it for too long, people start dying, so you need to move from oasis to oasis.
In one such oasis, to the north, there was a tribe of nomad people who I could trade with for the quest for lord Inspectron. After dying in the desert once, I got the quest a second time and immediately turned it in for 3000 experience. Now, lord Inspectron wants me to find the shrine of Okzar under the town of Dusk.
The fact that I actually had Inspectron’s quest confused me, since I also had Kilburn’s quest. It looks like I’m missing something. Maybe there are different types of quests I can be on at the same time?
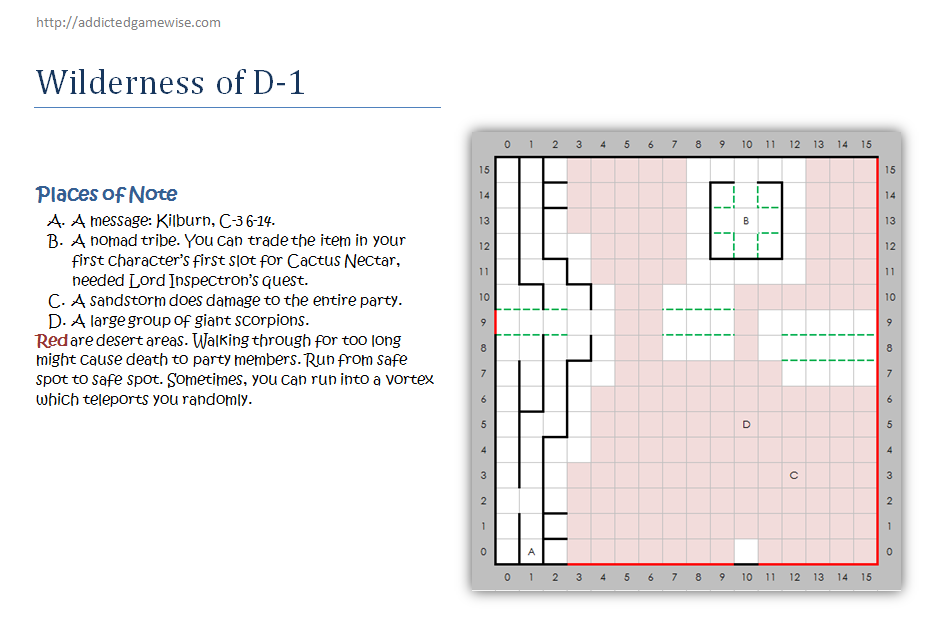
Map of D-1, with notes.
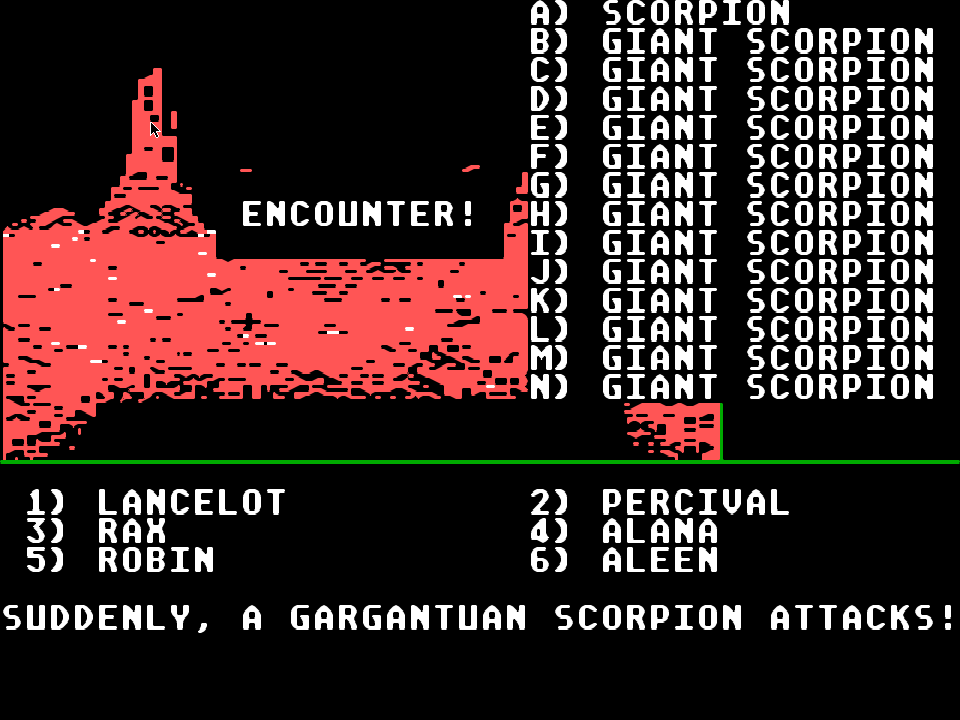
Other than this oasis, there wasn’t much else in D-1. There was a sandstorm that does damage to the party, an encounter with a huge group of giant scorpions I couldn’t beat yet and a random whirlwind which can apparently appear anywhere and transport the party to safety, next to the entrance to the desert.
I had no chance at beating this right now. I need more health and stronger spells.
There’s more desert in E-1 and D-2, though.
D-2 Wilderness
Desert was only to the north and I started in the south. There are many encounters in this area. One long corridor on the western side is encounter after encounter, which ended in an encounter with two medusas and a bunch of trolls. No head was dropped, but I went to see lord Hacker anyway. He just said I was already quested. There are two possibilities here:
- I need to be on the quest to get a head.
- There’s a special medusa somewhere, which drops a head.
I can’t drop the quest until I’m done with the desert, so there’s nothing I can do there.
After fighting lots and lots of encounters with very little reward other than the experience (which is a great reward to), I finally explored everything other than the desert area. Since I have to fight through a bunch of encounters to even get to the desert area, I decided to approach it from D-1 and use suicide runs to map everything.
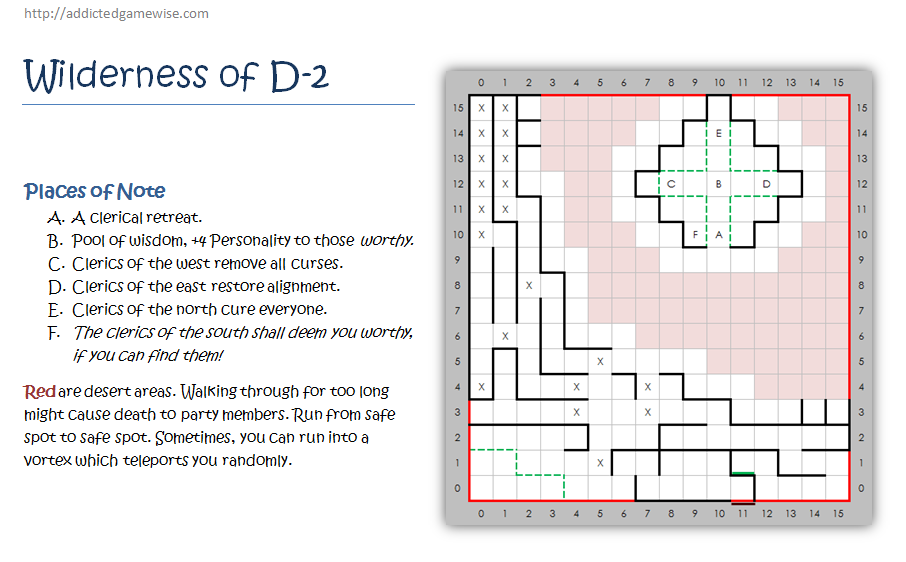
D-2, map with notes. Enjoy!
Pretty soon, I found a central oasis, this time a “Clerical retreat”. Inside was a pool giving everyone “worthy” +4 wisdom. I believe everyone got it. I didn’t have any evil characters, but most of them were neutral and they still got the bonus.
There were also three groups of clerics. The northern clerics cure the entire party, the eastern restore their alignment and the western uncurse all of their items. Finally, there was a message about the southern clerics:
The clerics of the south shall deem you worthy, if you can find them!
This probably refers to a whole different area, either D-3 or D-4, since I couldn’t find them in D-2.
Other than this oasis, which is a huge thing for this area, there was nothing else in the desert, so I guess D-2 is now also explored.
E-1 Wilderness
This is where the town of Dusk was located, so using fly took me straight to the town entrance. I decided to explore the wilderness first, though. Dusk was on one large oasis, sharing it with the ruins of castle Dragadune and a strange statue of a giant holding some scales. Stepping on it did nothing, but the statue did indicate I need to be worthy somehow, so apparently, I wasn’t.
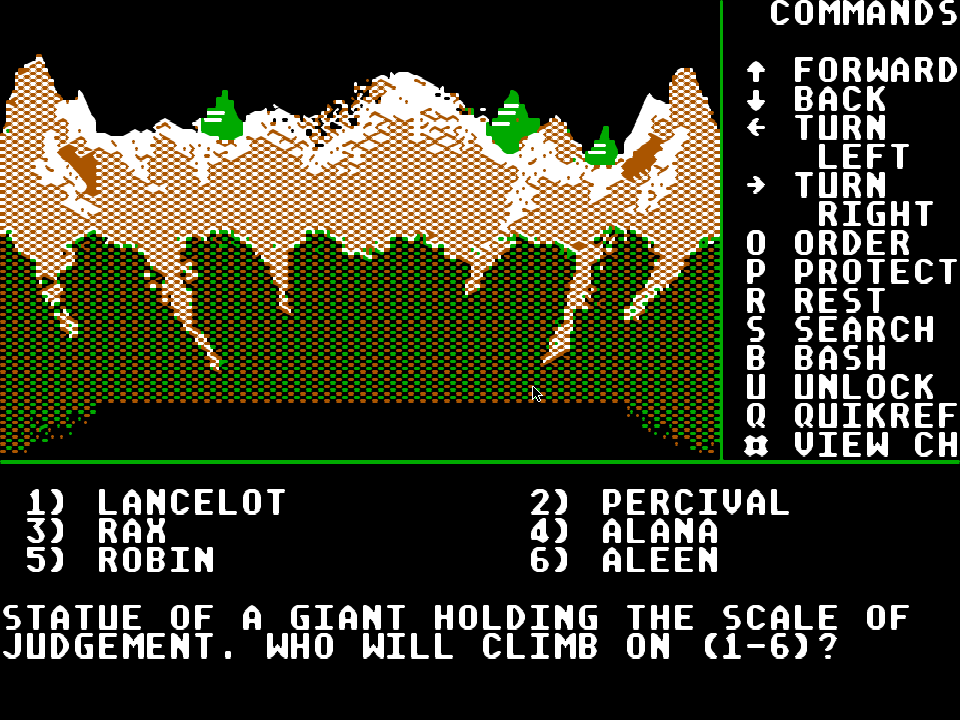
Whatever it is that I get here, none of my characters are worthy now.
A second oasis was in the south western corner and it was in perpetual darkness, so I had to use Lasting Light to explore it. There was a large square with a path around it, but I couldn’t get inside the square. I didn’t find a secret entrance, so I assumed there’s a way to teleport in there.
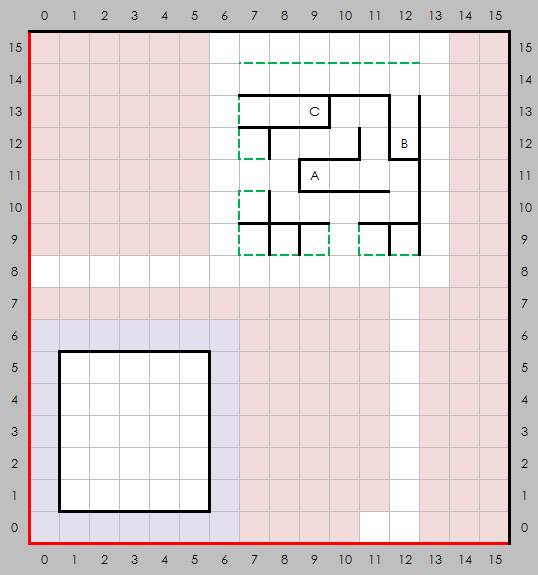
I haven’t mapped the big block in the southwest, so there’s no complete map of E-1 yet.
There were also two “roads” through the desert – places where it in fact wasn’t “too hot”, so I was able to roam freely. These connect the Dusk oasis with more roads in adjacent regions and now that I think about it, actually provide a convenient foot route through the desert.
Town of Dusk, E-1
Dusk is supposed to be the last town of the game, I guess. It’s filled with higher level encounters, including one I had with white dragons, and its store is selling enchanted equipment. The whole town also has an undead theme, with NPC-s being ghosts, location names being related to ghosts, etc.
I’m thinking he wants the message from Agar in Erliquin.
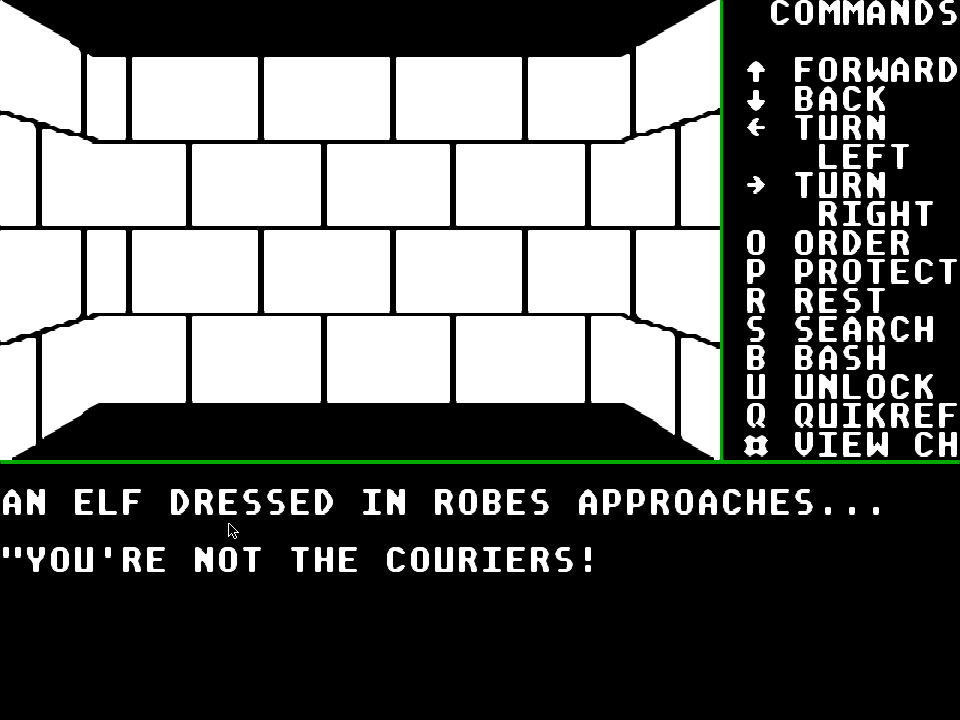
The front area had all the regular stuff, including some stairs to the dungeon bellow, while the back area was a huge maze. The southern area was empty, except for an elf waiting for some couriers. The northern area ended in a zone where you can’t rest, and some parts where you also can’t cast spells. The final part was called the forbidden crypt and it was filled with undead encounters. I didn’t manage to fully clear it yet.
Below Dusk, E-1
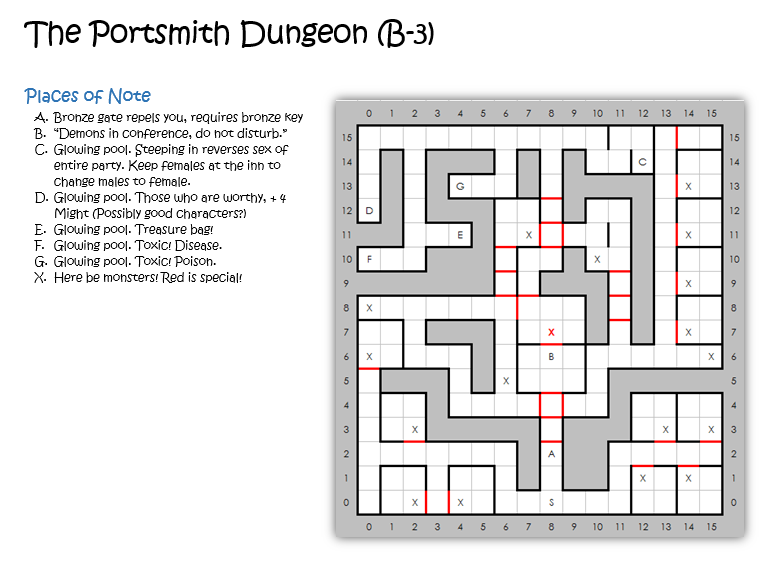
The area below Dusk was just filled with traps and when I say traps, I mean traps that can outright kill you, not just do some minor damage. Some of these traps were avoidable (jumpable), but a lot of them weren’t, so I guess the trick was to figure out which ones to take head on and which ones to avoid. Luckily, the temple in Dusk brings dead people back to life cheaply, at just 200 gold a pop.
The dungeon also had several portals, leading to different places in the world:
- The portal at 13-1 led to the other cave in B-2, the one at 8-4.
- The portal at 11-1 led to some random cave in D-3, which I haven’t visited yet.
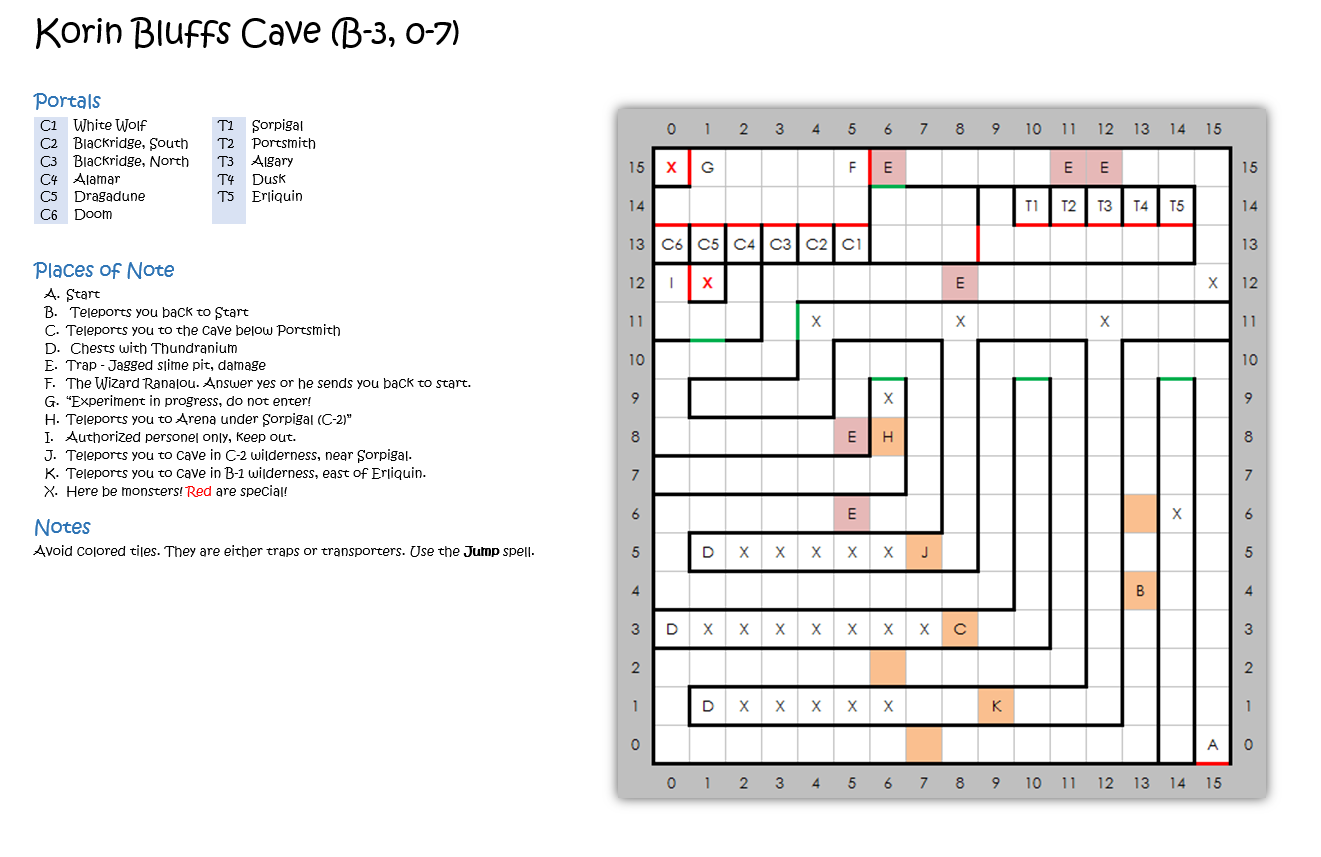
- The portal at 9-1 led to the Korin Bluffs cave in B-3.
- The portal at 15-0 led to the inn of Sorpigal. This one was extremely random.
There was also what the game described as “a cavernous passage” to the Ruins of Castle Dragadune, which I also haven’t explored yet.
Now, I am not a smart guy. I mean, I am with some things, but not when it comes to using the tools at my disposal. I’ve explored most of this floor, taking trap after trap, before I remembered there’s this not-at-all weird spell called Levitate (2-5). What does this spell do? It helps avoid trap damage. Yup! Except it didn’t work, which should tell you how smart I really am – I went ahead and wrote this passage before actually trying the spell out. I guess levitate only works on certain traps and on floor damage, such as the acid floors from that cave in C-2.
One thing did work, though. Psychic Protection (Sorceror, 4-6) worked like a charm against Mind Blast traps. Since these are the traps that can outright kill anyone, this was extremely useful.
Most of the place was just encounter after encounter, but eventually, I got to the end of it and my reward was a pool which gave everyone “worthy” +4 Accuracy. My entire party got it, so I guess everyone was worthy, whatever that means.