I decided to go with Castle Blackridge next. It was a big step, entering my first castle, but in my head, it was either that, or mapping C-1, to the east of B-1, just so I could try and make it to C-2 on foot, without using any portals.
Castle Blackridge, West
It was a mistake. I entered the castle, but upon trying to enter the inner area, I would simply get cast out. Instead, I explored the outer corridor, mapping the map borders, but I never managed to get inside.

All of the castles look the same from the outside, I believe.
To the north and to the south, I’ve found some strange alcoves. To the east, there was something that looked like a dungeon of some sort, with some sporadic random encounters, mostly empty rooms which lock you in once you enter, and one room where I found a message:
Etched in silver, Message C reads: IACI1;-2;ONU–G,NOT2
This kind of, sort of looks like program code, which is a possibility, since I’m aware there’s some sort of real world programmer reference in the game or something (or I might be thinking of a different game), or it might just be cipher. For now, I wrote it down and that’s it.
Back at the entrance, two locked rooms remained. I picked both locks and fought a random encounter in each of them, with one of those encounters causing me to reload. The northern room had nothing in it, and the southern room had an empty vault, which triggered an alarm. I didn’t experience any downside from the alarm, but since the other room caused me to reload, I didn’t trigger it the second time. For good measure, I went around and tried finding a secret entrance to the inner area, but with no luck.

No merchant pass, no entry. I only read the note later on.
Additionally, I tried finding the entrance which would correspond to Castle Blackridge, North, which I found in the wilderness of B-1, but there was no other exit from the castle. I assumed Castle Blackridge North is a separate area in that case, so that’s where I decided to go next.
Castle Blackridge, North
At first glance, it was the exact same location, with the exact same entrance. I was about to go out, but luckily, I decided to cast Location, just in case. It turns out, while the layout might be the same, the orientation is shifted by 90 degrees, so it’s actually a different location altogether. Even the first two rooms made it obvious, since there was no vault in any of them and the doors weren’t locked.

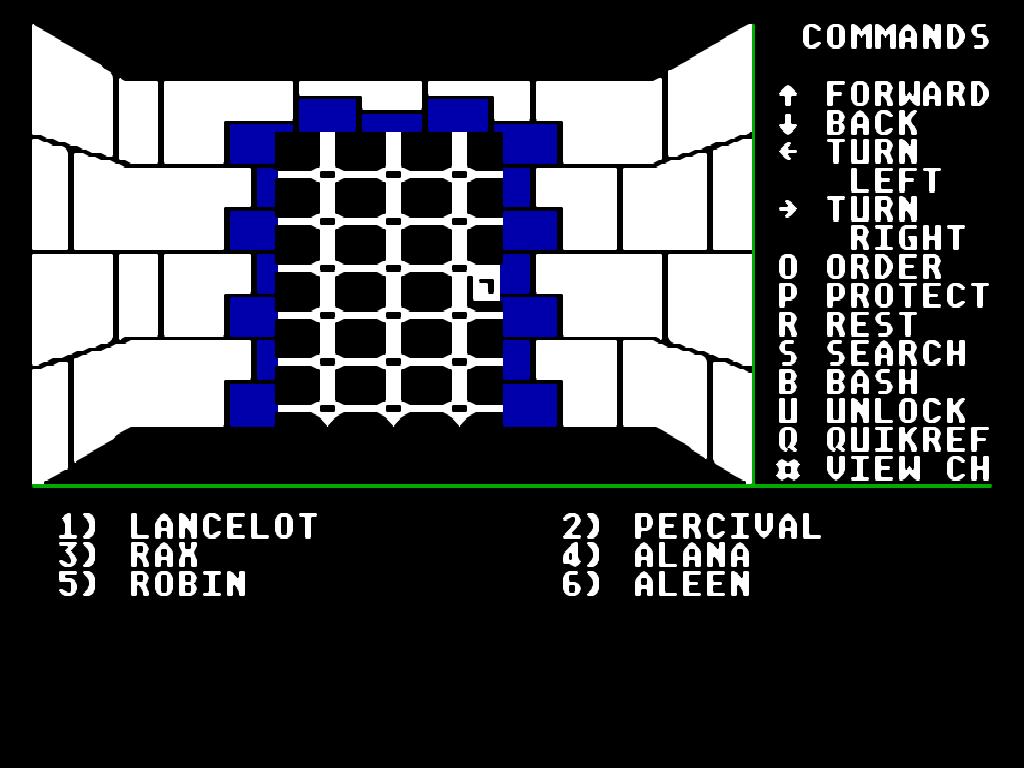
Images like this one decorate the walls of Blackridge.
This time, the alcoves were to the east and the west, the entrance with the two rooms was in the north, and the dungeon was to the south. One thing didn’t change, though – the guards still wouldn’t let me in, though I did read the whole message this time. It seems I need a merchant pass.
The peculiar thing about the northern version of Castle Blackridge was that, other than the guards at the inner area, it appeared to be empty – no fixed encounters, no places of note, no messages, nothing. I also noticed random encounters were far more frequent. I got at most one or two during my exploration of Castle Blackridge, West, but I got a bunch of them in Castle Blackridge, North.
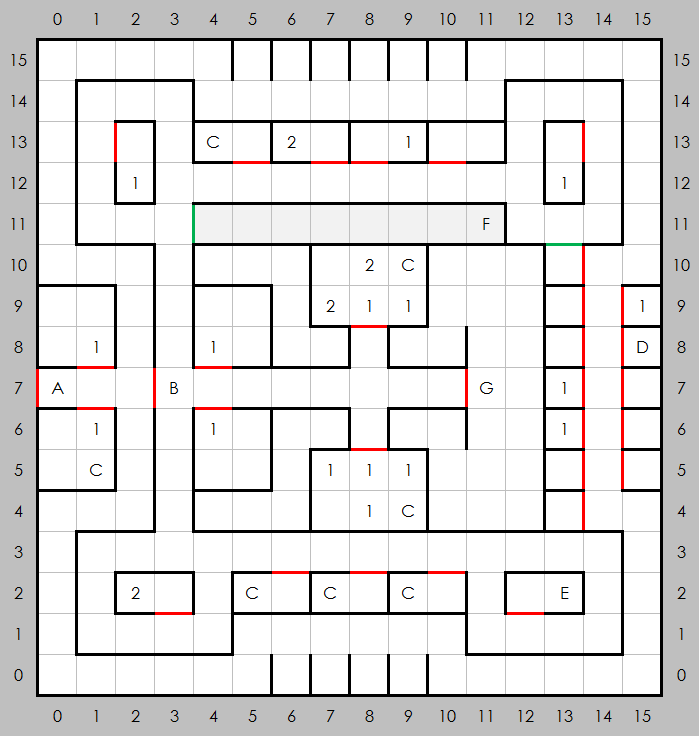
C-1 Wilderness
Since both castles were a bust, it was time to go to the wilderness of the C-1 area. I saved my game at the Erliquin in and went for it, through the passage past Blackridge, North.
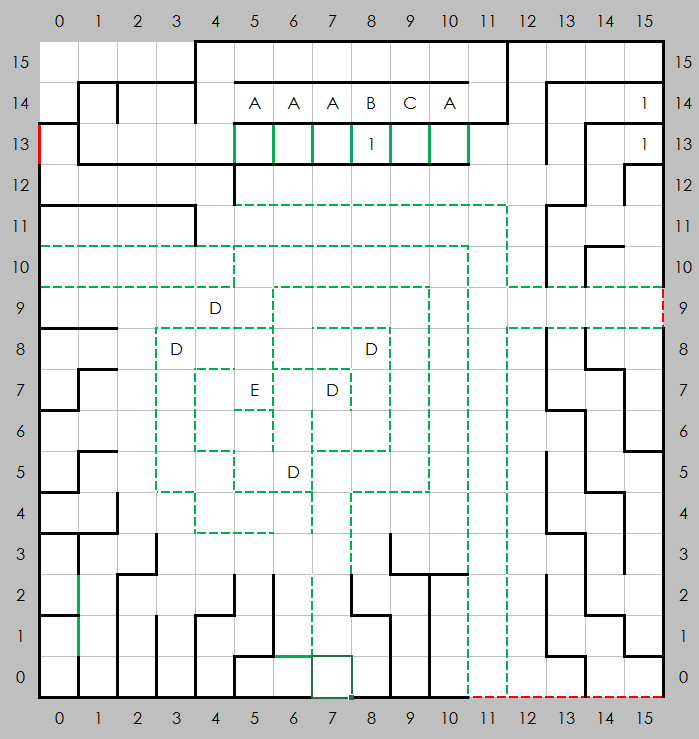
Here’s just the map, without any notes.
I actually found the passage to C-2 really quickly, simply by following the road through the forest and paying attention to the sign post. However, I wanted to map the entire area as well, so that’s what I did next, by going through the passable trees, which the area is full of, just like the C-2 wilderness was.
Some of the things I found include:
- An appropriate amount of appropriate level encounters, which is something I really like.
- A series of secret passages which eventually leads to a series of secret “rooms” to the north. Each of these contains a fountain, for a total of six. Four of those fountains poison the party, but two of them are pretty cool. One of the two gives 50 might for a day, while the other gives “Spell Today”, which I haven’t quite figured out the meaning of. The two good fountains are fountains #4 and #5, approaching from the west, or #2 and #3 from the east.
- Lots and lots of woods, which look like walls but can all be passed through, so it gets very confusing.
- A bunch of deserted caravans in the central area, I counted six in total. Searching them causes an ambush by trolls, swordsmen or ogres, which can be tough. One of them contains the merchant pass, needed for castle Blackridge. For me, it was the one at 5-7, but it might vary from game to game, or it might be random every time.
Once I started exploring the southern two areas, I moved my party to the Inn at Sorpigal, since it was closer. It took me about an hour to map everything and search every deserted wagon before finally finding the merchant pass. Once I did, I returned to Erliquin, on foot, to visit the inn before going to Castle Blackridge again.
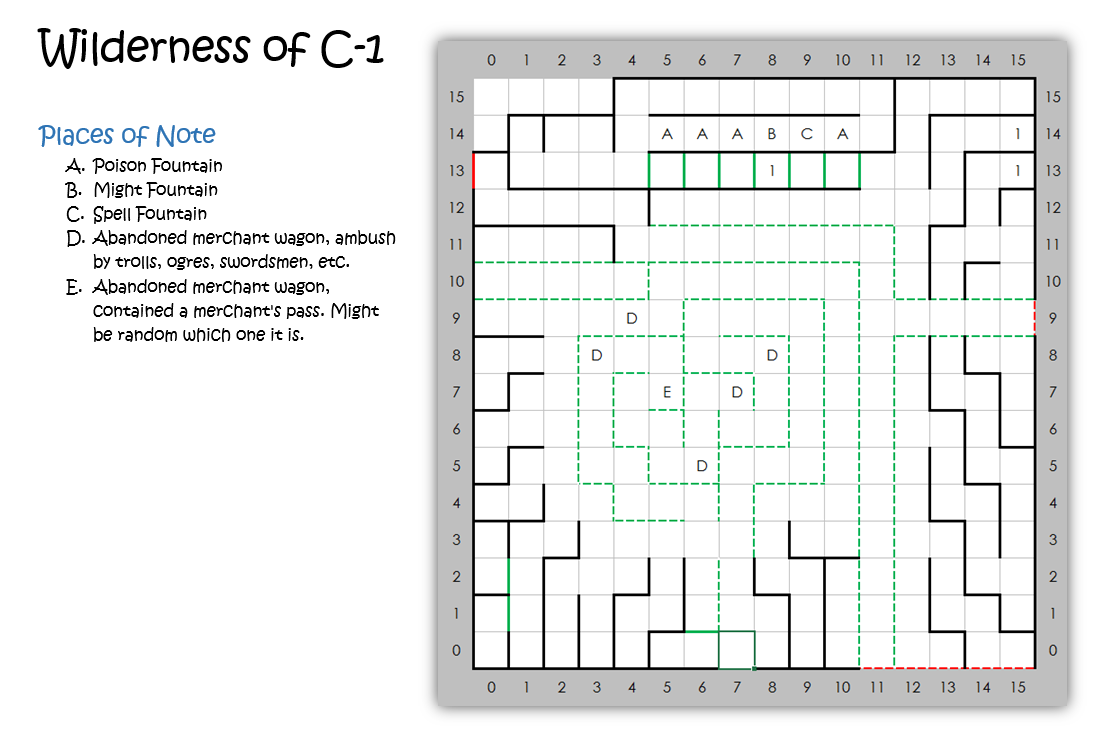
The full map of C-1, with all the notes I took.
Some of the items that dropped:
- Another flying carpet. I still haven’t tried using the first one outside.
- Random +1 weapons and armors, good for selling but hardly any upgrades
- A bag of silver. I have no idea what the use for it is, but I will definitely hold on to it for now.
Castle Blackridge, West, Again
I used my merchant pass to enter Castle Blackridge, West and start exploring it.
There was a huge amount of encounters there, most of which were level appropriate and provided some nice experience and loot. Some of them were high level, though, so I had to restart at the Erliquin inn several times.
Based on the layout of the place, I assumed one of the rooms was the throne room, so I kept that one for last, scouting the outer rooms first. Several times, I triggered an empty vault alarm. I’m still not sure what the alarm does, but luckily, I ran into a high level encounter every time after triggering, so it never lasted for too long.
Eventually, I explored all the rooms I could see, except for the throne room, so I started looking for secret passages. I found a secret hallway to the north, which led me to a slide, which threw me out of the castle, to coordinates 12-2 of B-1, which put me in the unexplored area I couldn’t reach while exploring the B-1 wilderness a few days ago.
This time, I was able to explore, but it was tough, mostly because a big part of the area was a forest maze with tiles that were “too dangerous to rest here”.
I somehow managed to get to a safe place and rest, but then I realized I was stuck, with no way to return to the main area of B-1 and, more importantly, no way to return to Erliquin and save. I had plenty of food left, but I knew I’d lose all of my progress and all of my loot if I died here, so it kind of sucked.
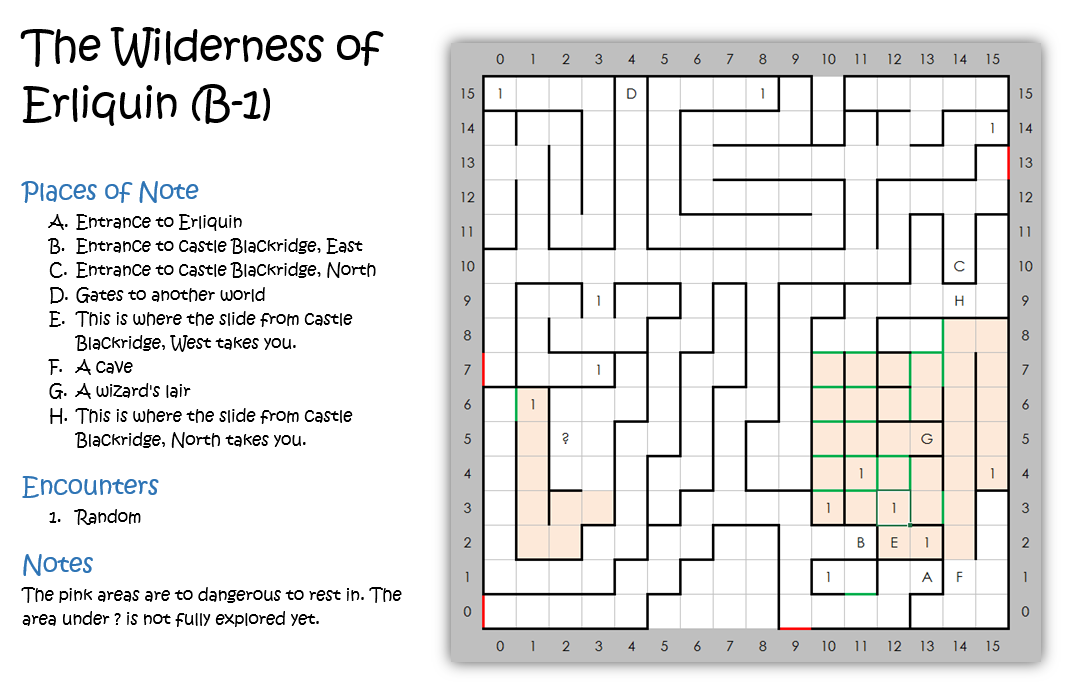
B-1 Cave
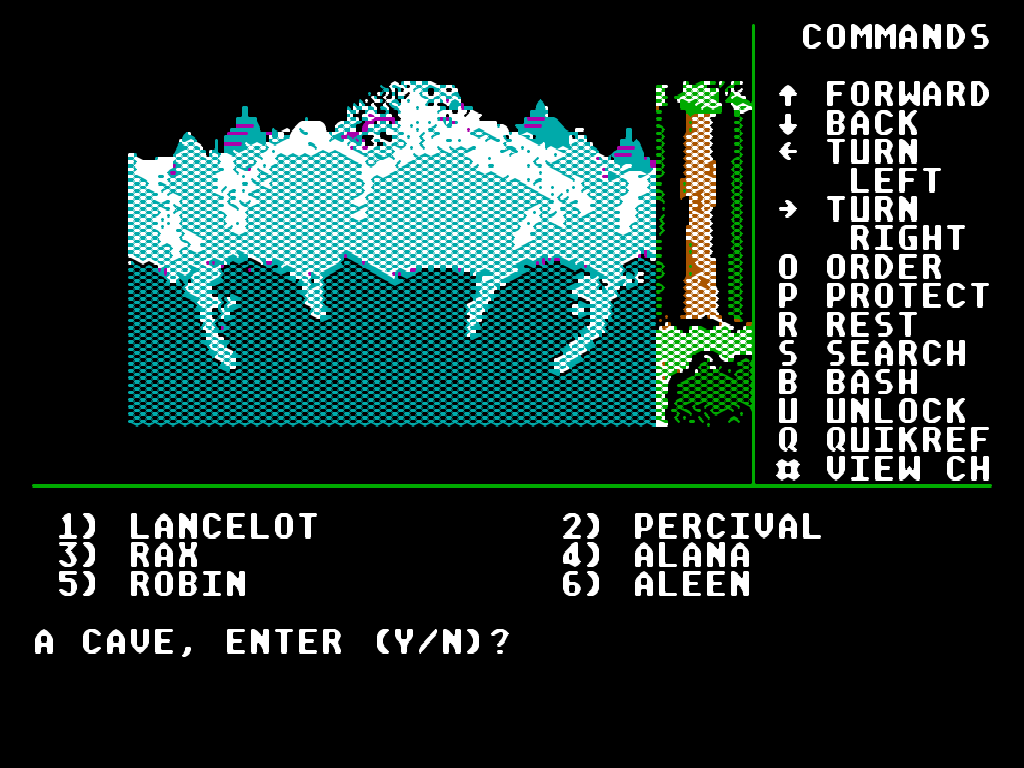
What made it worse was that I found a cave and a deserted wizard’s lair in this area, so I had two dungeons to explore.
This is likely an alternate entrance to the dungeon below Erliquin, but I can’t be sure.
I went for the cave first, but the layout was very familiar. It looked like the dungeon bellow Erliquin, with a room with an access console asking for a code and lots of flickering dancing lights. I assume this is actually the same dungeon, but entered from another side. The problem is, I don’t have the access code, so I can’t use it as a way to go back to Erliquin.
Here’s just my current map of B-1, without notes.
Wizard’s Lair
Next, I tried the wizard’s lair. It brought a refreshing new style of graphics, which seemed a bit more modern, but it also brought stronger enemies. The first group I fought consisted of Druids and a Cockatrice. I managed the win the fight, barely, but it was definitely too risky to stay here, so I ran out.
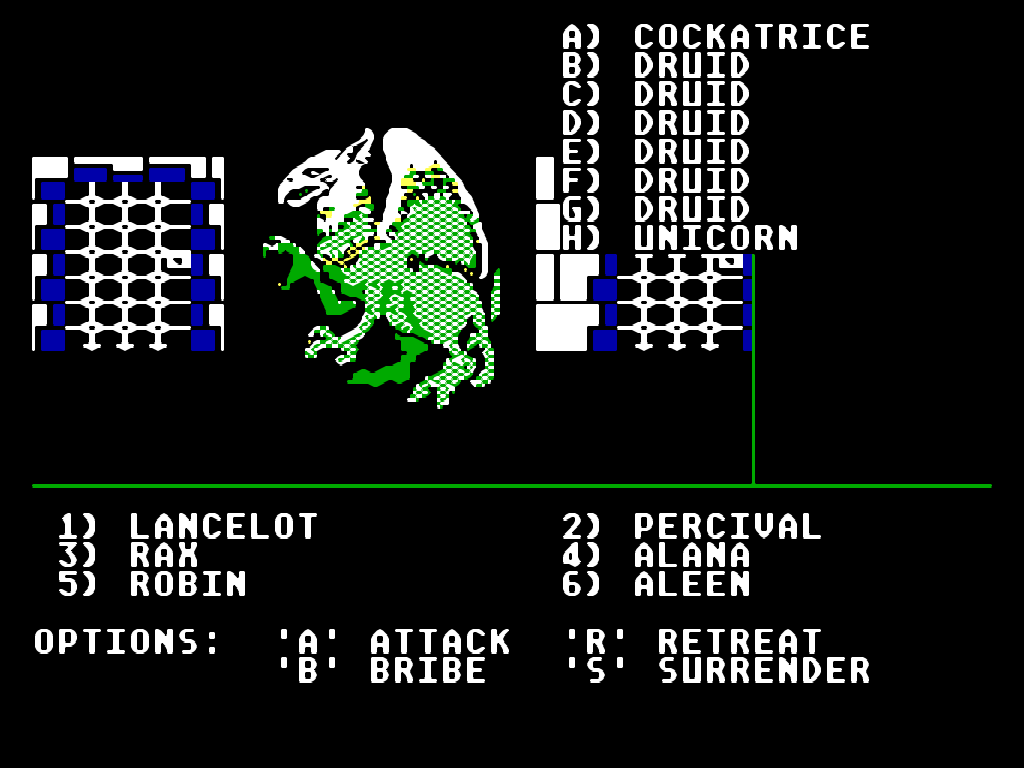
The cockatrice fell quickly, but the druids didn’t.
Then I remembered I could try using a trick. I went to the small northern section, just below Castle Blackridge, North and wandered around until I got attacked by a band of centaurs. I managed to run away from this fight, which transported my party to the main area of B-1 allowing me to go back to Erliquin. It feels a bit like cheating, but the alternative was to just lay down and die, so I decided it was OK to do it.
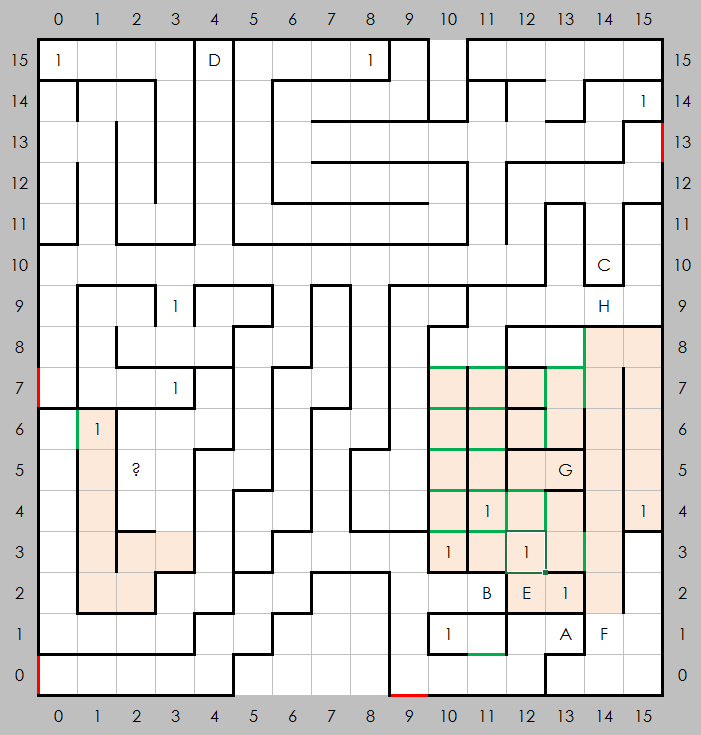
I haven’t mapped it all yet, but here it is, with the notes I have so far.
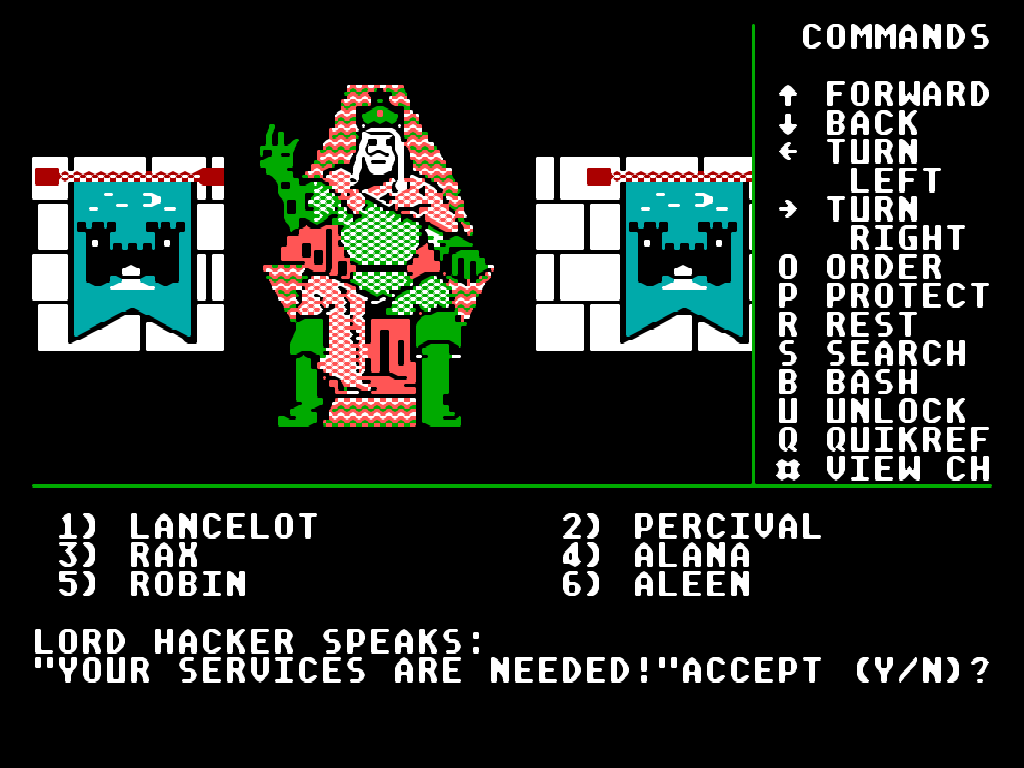
Castle Blackridge, West, AGAIN
After some rest and inventory management in Erliquin, I got back to Castle Blackridge and finally entered the throne room. The king gave me a quest to bring him garlic. I didn’t have any, and there was none to buy in Erliquin, so I ran back to Sorpigal to buy it there. This got me 1000 experience and another quest, this time for some wolfsbane. I had that on me, so I got 2000 more experience points, as well as the 3000 for the next quest – getting some belladonna. The final quest was a bit of a leap in difficulty, though the king wants the head of (a) Medusa.
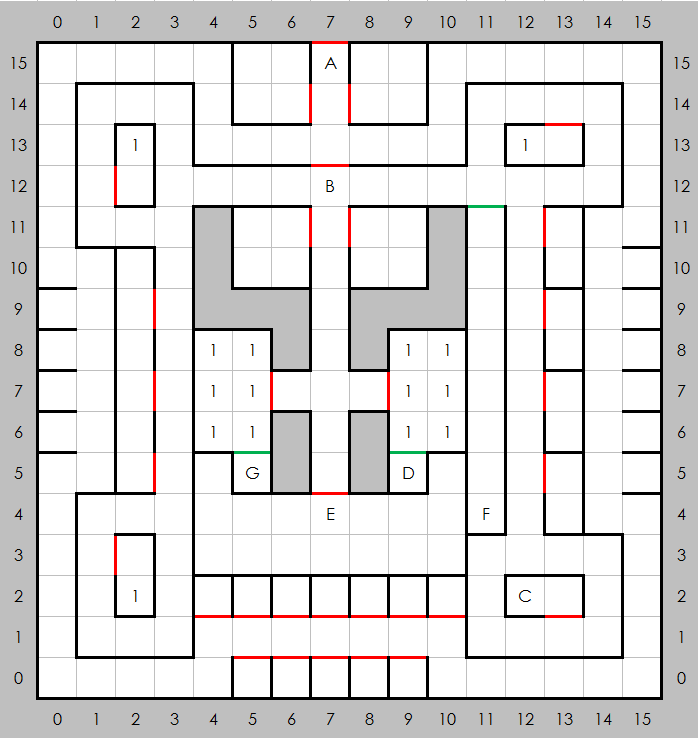
Just the map for Blackridge, West, without notes.
On that note, it was time to go to the other Blackridge castle, Castle Blackridge, North. I mapped the western castle almost entirely, except for the throne room, since I can’t freely walk through it.
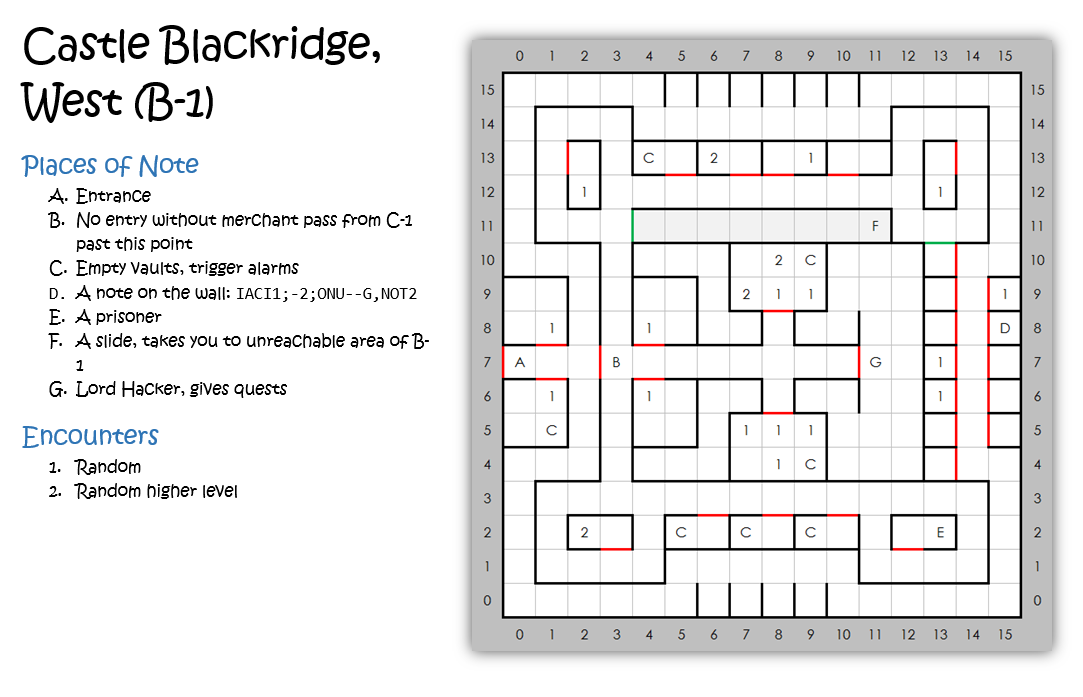
Full map of Blackridge, West, with notes for those who don’t mind.
Castle Blackridge, North, Take Two
The other Blackridge Castle was pretty much a carbon copy of the western one, even concerning the stuff I found in there. There were no vaults, but I managed to find another message that looks like programming code on a wall in a hidden room.
Etched in silver, a message reads: ATIS-19-31UD54AEUPI1
Since it was a secret room that I haven’t found on the equivalent spot in Blackridge, West, I’ll have to go back there and check it out. There was another secret room that mirrored this one, but that one just contained a small bag of treasure.
Hopefully, this is fully mapped. If there are any changes in the future, I’ll update them in the final package.
The lord of castle Blackridge North was Lord Inspectron. Since I was on a quest for Lord Hacker, I couldn’t take Lord Inspectron’s quests. I decided to risk it and use the third level clerical spell to remove the quest and try to help Lord Inspectron first.
- His first quest was to find the hidden temple ruins in the forest in B-3, which I already did, so that netted me 1000 experience.
- His second quest was to visit a place called Blithes Peak, and report back. I have yet to do this one.
- He probably has more quests, but I have yet to get to those.
Full map of Blackridge, West, with notes for those who don’t mind.
With the two castles fully explored, I decided that this was a good time to wrap things up.
Party Progress
All of my characters are level 7 now, so from this point on, Lancelot has access to the first level of clerical and Robin has access to the first level of sorceror spells. They won’t be true spell casters, probably ever, but a spell every now and then can be useful. I’m thinking I’ll especially like Awaken, which is the first spell in both the clerical and the sorceror school. Also, Power Cure is level dependent, so it might be useful, though the cost is also level dependent, so I can’t use it right now.
Lord Hacker gave me some free experience, basically.
I decided to switch Lancelot to a Sword&Board combination, but I’m having trouble finding a nice enchanted sword. I found a Broad Sword+1, but it turns out good characters can’t use it for some reason. He hits nicely with his Bardiche+2 right now, but I’d prefer more survivability over damage.
Notes!
I decided to take even more notes. Other than mapping, I started tracking weapon and armor stats, class access to items, alignments, etc. My bestiary is also progressing nicely, though it might not be completely accurate in regards to monster health, since this is the only stat that seems to vary from monster to monster. Right now, I’m writing down the range of health I’ve seen a monster have, but I can’t be sure about the exact distribution. I’m also writing down all of the quests and “prerequisites”, such as the merchant pass.
This is the door look I found in the wizard’s lair. I like it!
Lastly, I’m writing down tavern rumors and bartender tips, though both of these are currently in the same bunch, which might have been an oversight on my part, because it seems like the bartender tips refer to the current town, while tavern rumors are more general.
I have all of this in my notebook and I’ll put them up when I’m done with the game, but if anyone want’s the “In progress” files, they can let me know and I’ll find a way to share them. Maybe a Google doc would work for this?
Goodies
- Map of B-1, Erliquin Wilderness, PDF
- Map of B-1, Erliquin Wilderness, DOCX
- Map of B-1, Erliquin Wilderness, DOCX, Landscape
- Map of B-1 Castle Blackridge, North, Full, With Notes, DOCX, Landscape
- Map of B-1 Castle Blackridge, North, Full, With Notes, DOCX
- Map of B-1 Castle Blackridge, North, Full, With Notes, PDF
- Map of B-1 Castle Blackridge, West, Full, with Notes, DOCX, Landscape
- Map of B-1 Castle Blackridge, West, Full, with Notes, DOCX
- Map of B-1 Castle Blackridge, West, Full, with Notes, PDF
- Map of C-1 Wilderness with Notes, PDF
- Map of C-1 Wilderness with Notes, DOCX
- Map of C-1 Wilderness with Notes, DOCX, Landscape


