Might and Magic Book One is all about drawing your own maps, so that’s what I did, from beginning to end. This is my pride and joy I’m making available here – all the maps of Might and Magic Book One.
Notice!
These are just the maps for Might and Magic Book One. For other parts of my guide, visit my two other pages:
- Might and Magic Book One: Newbie-Friendly Walkthrough
- Might and Magic Book One: Optional Content Guide
Caution!
This page will majorly spoil Might and Magic Book One to you. The game is by far the most fun if you figure it out on your own, so I recommend you to stop reading this guide after the Useful Spells chapter. Feel free to do it anyway, but I urge you to reconsider. You’ll be cheating yourself out of a large amount of enjoyment by following a guide the first time around.
The World of Varn
This is something I’m most proud of. I’ve combined all of the overworld maps into one huge map, improved some details and added labels for important locations, creating an awesome world map. Enjoy!
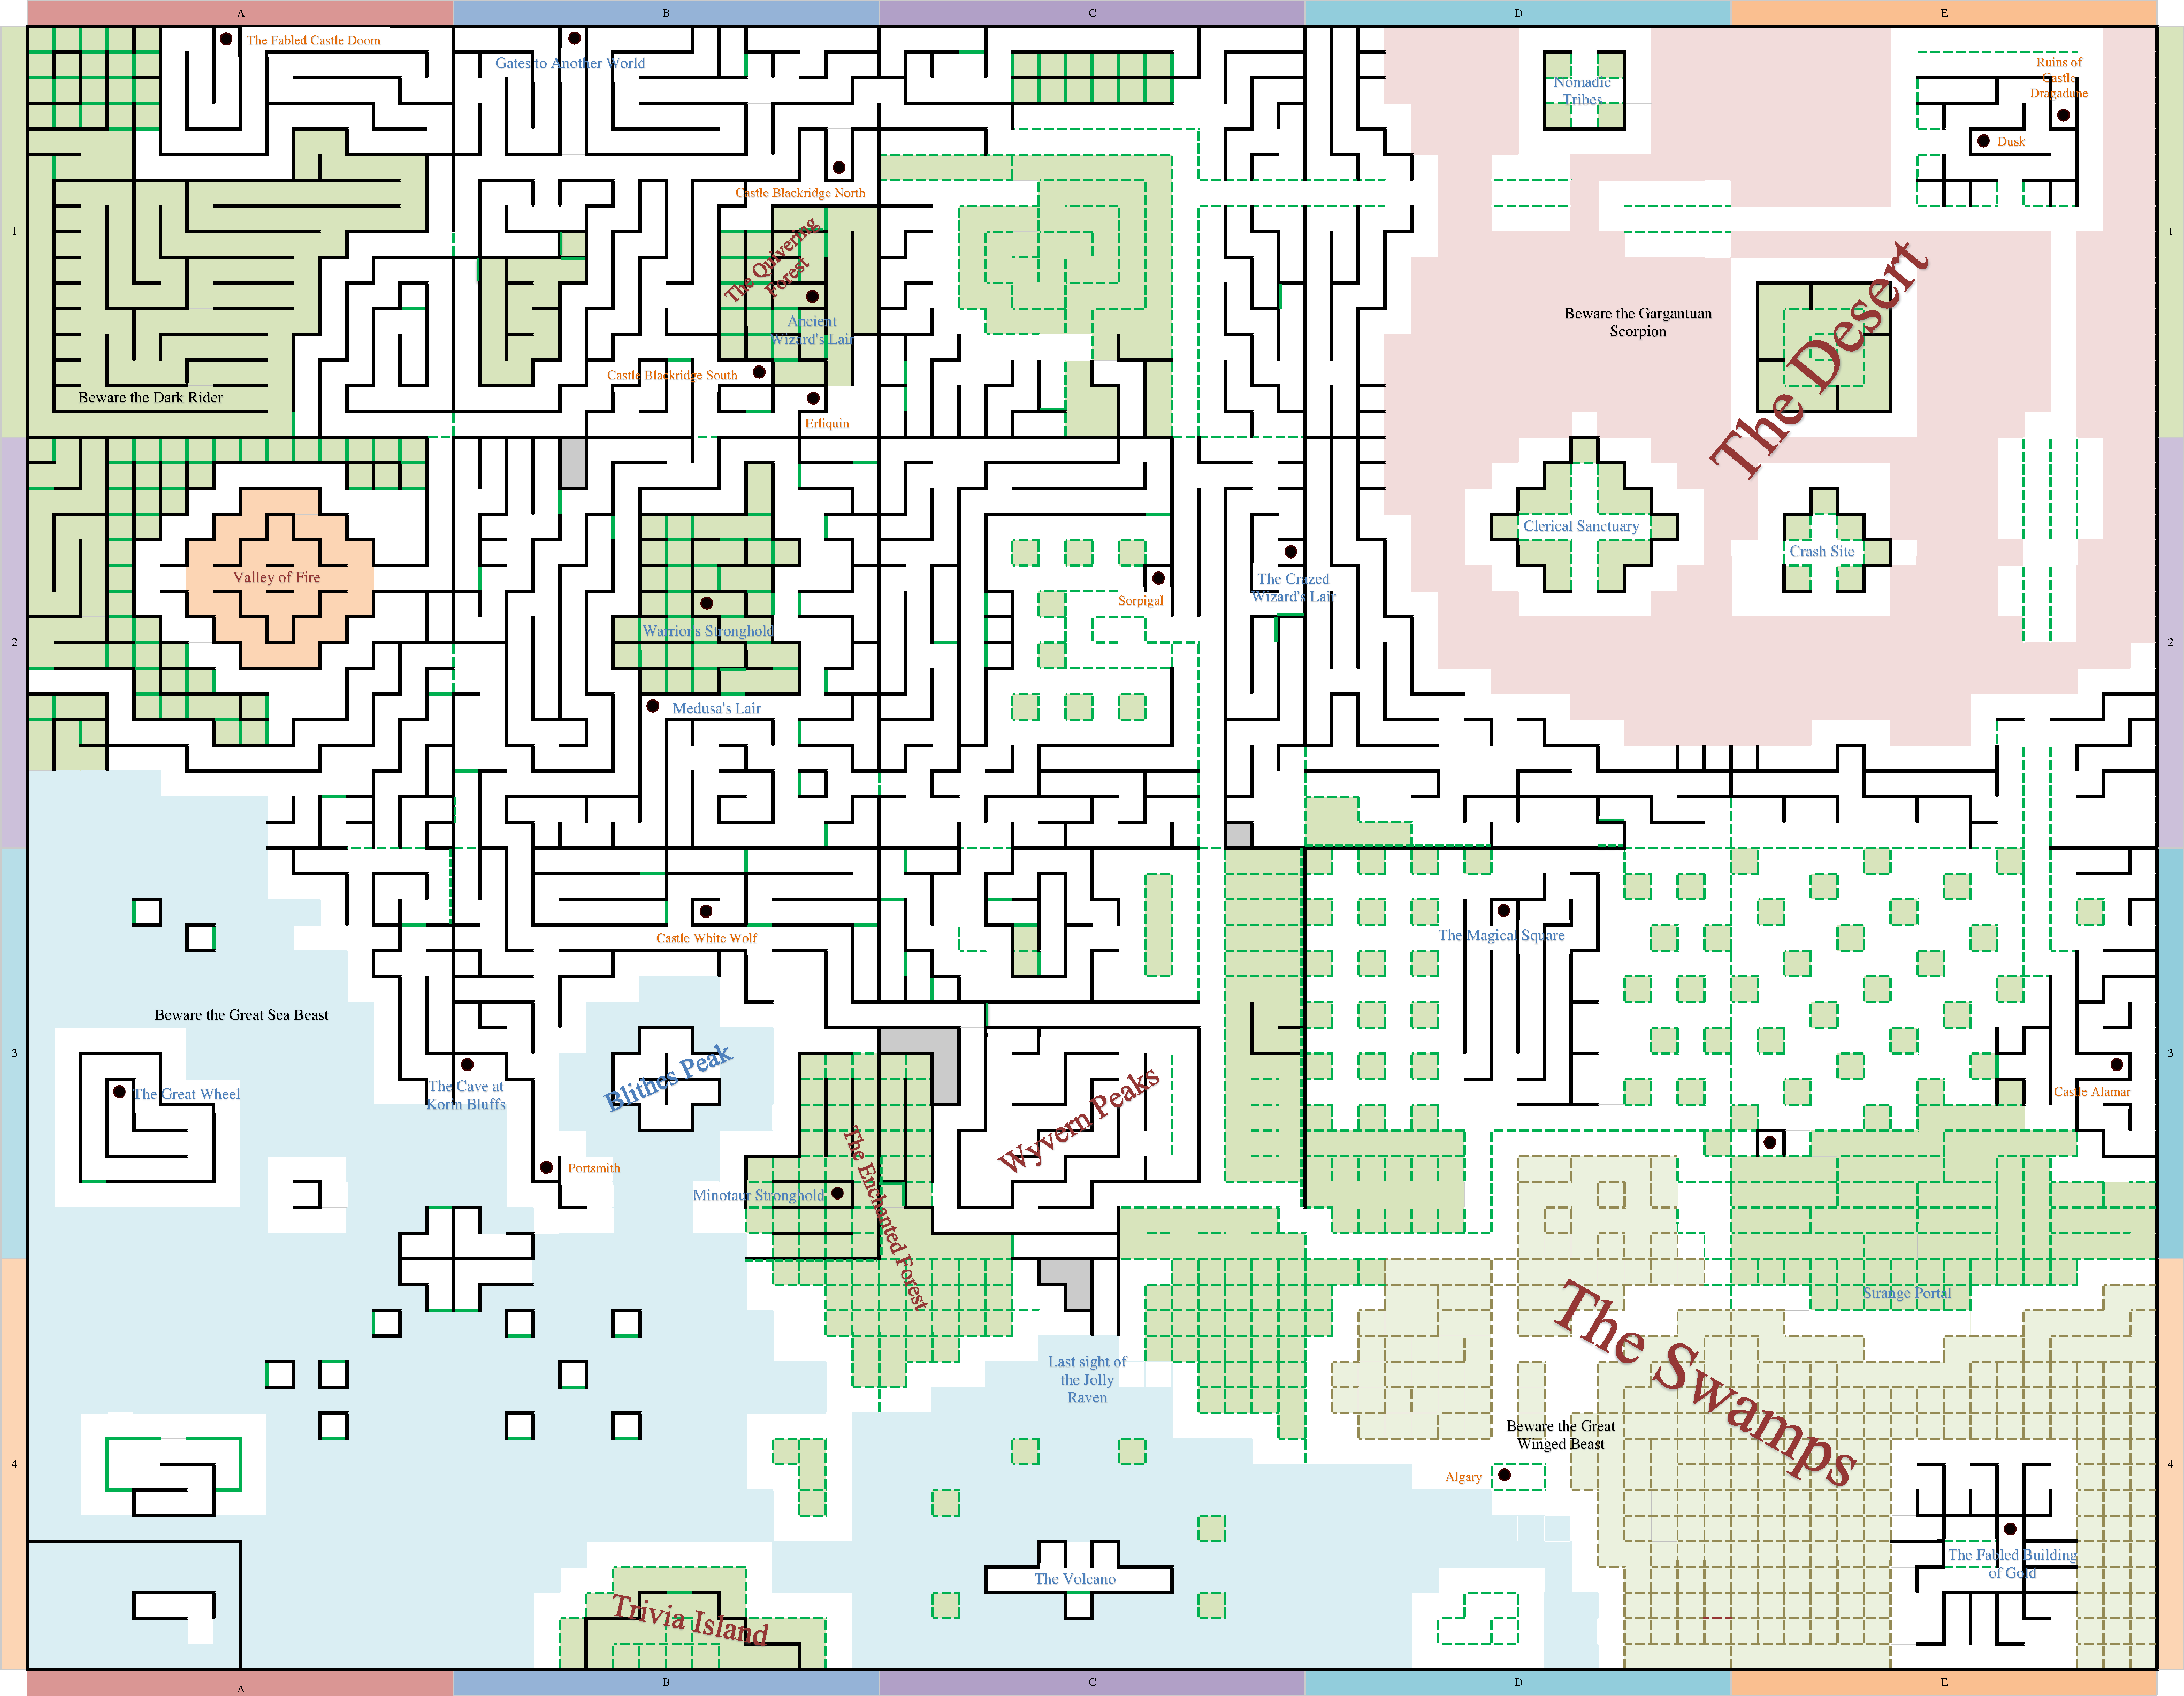
My pride and joy! All overworld areas combined into one huge map.
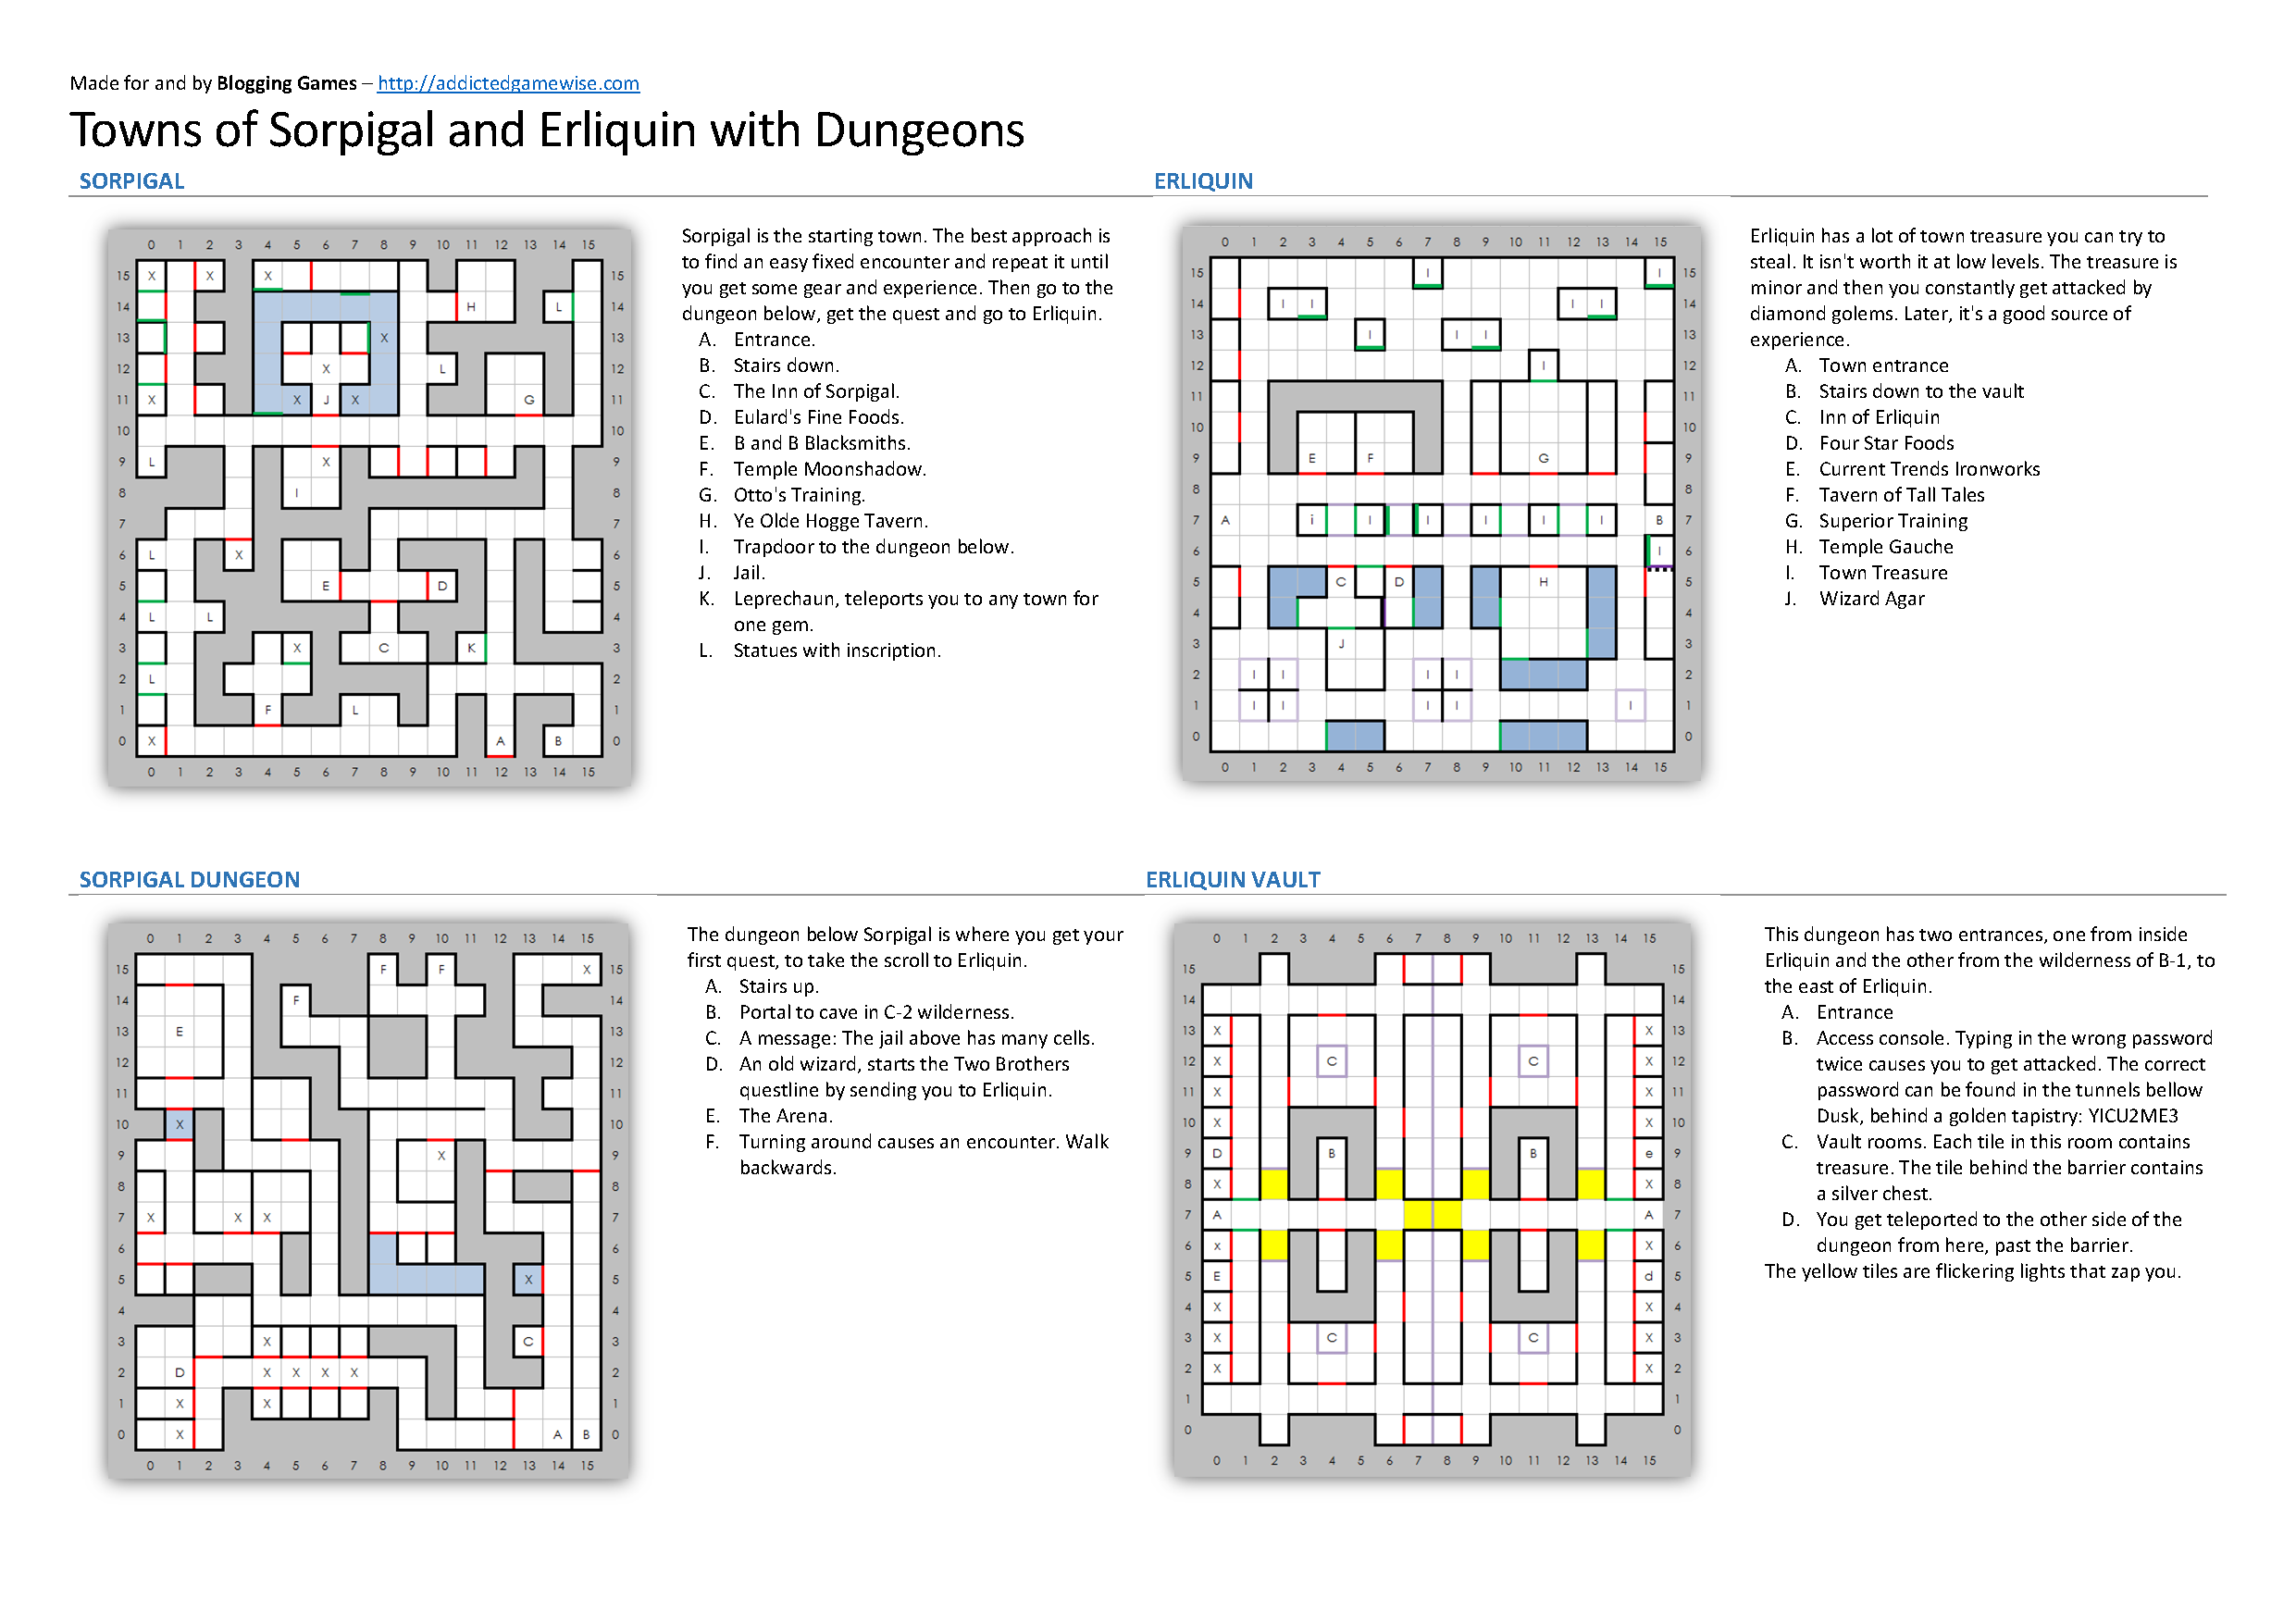
Sorpigal and Erliquin, with Dungeons
Sorpigal is the starting town, and Erliquin is the town where the main quest sends you next. The Sorpigal Dungeon is visited and start, while the Erliquin Vault can be looted later in the game.
Click to expand.
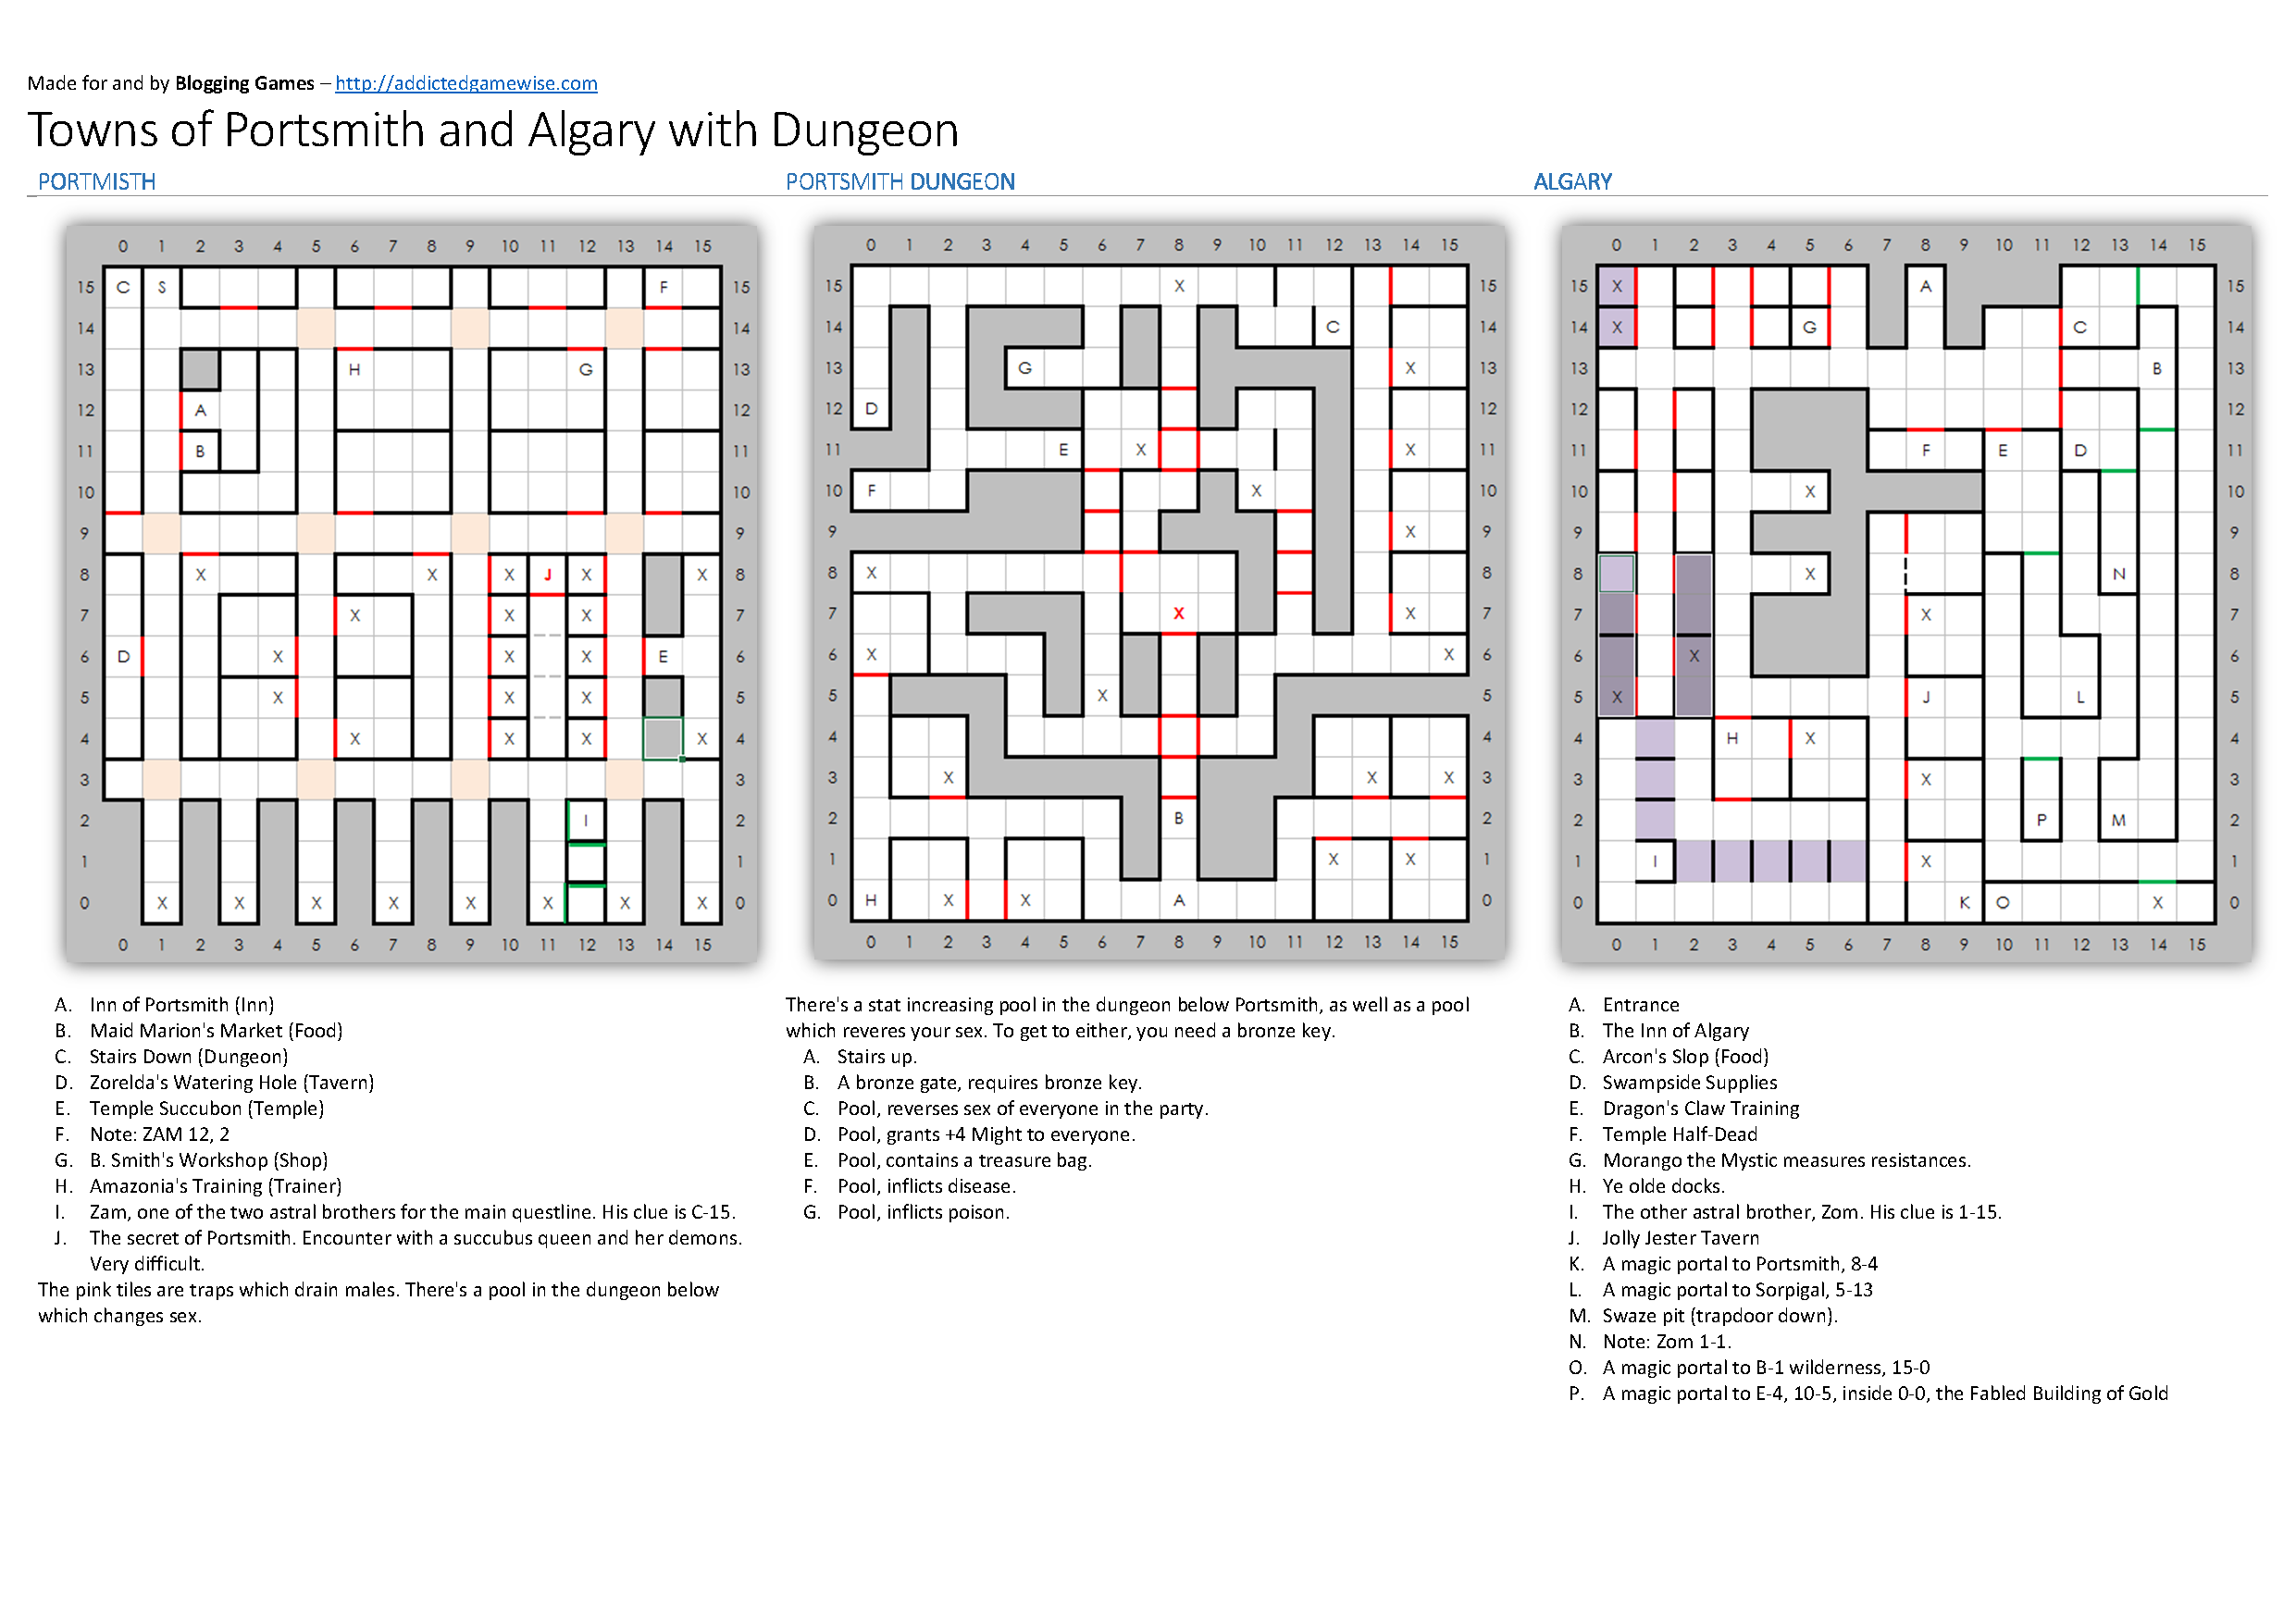
Portsmith and Algary, with Portsmith Dungeon
Algary is in a swamp, so there’s no dungeon below. The Portsmith Dungeon holds a stat increasing pool, as well as one which changes the sex of your characters, but you need the bronze key to fully explore it.
Click to expand.
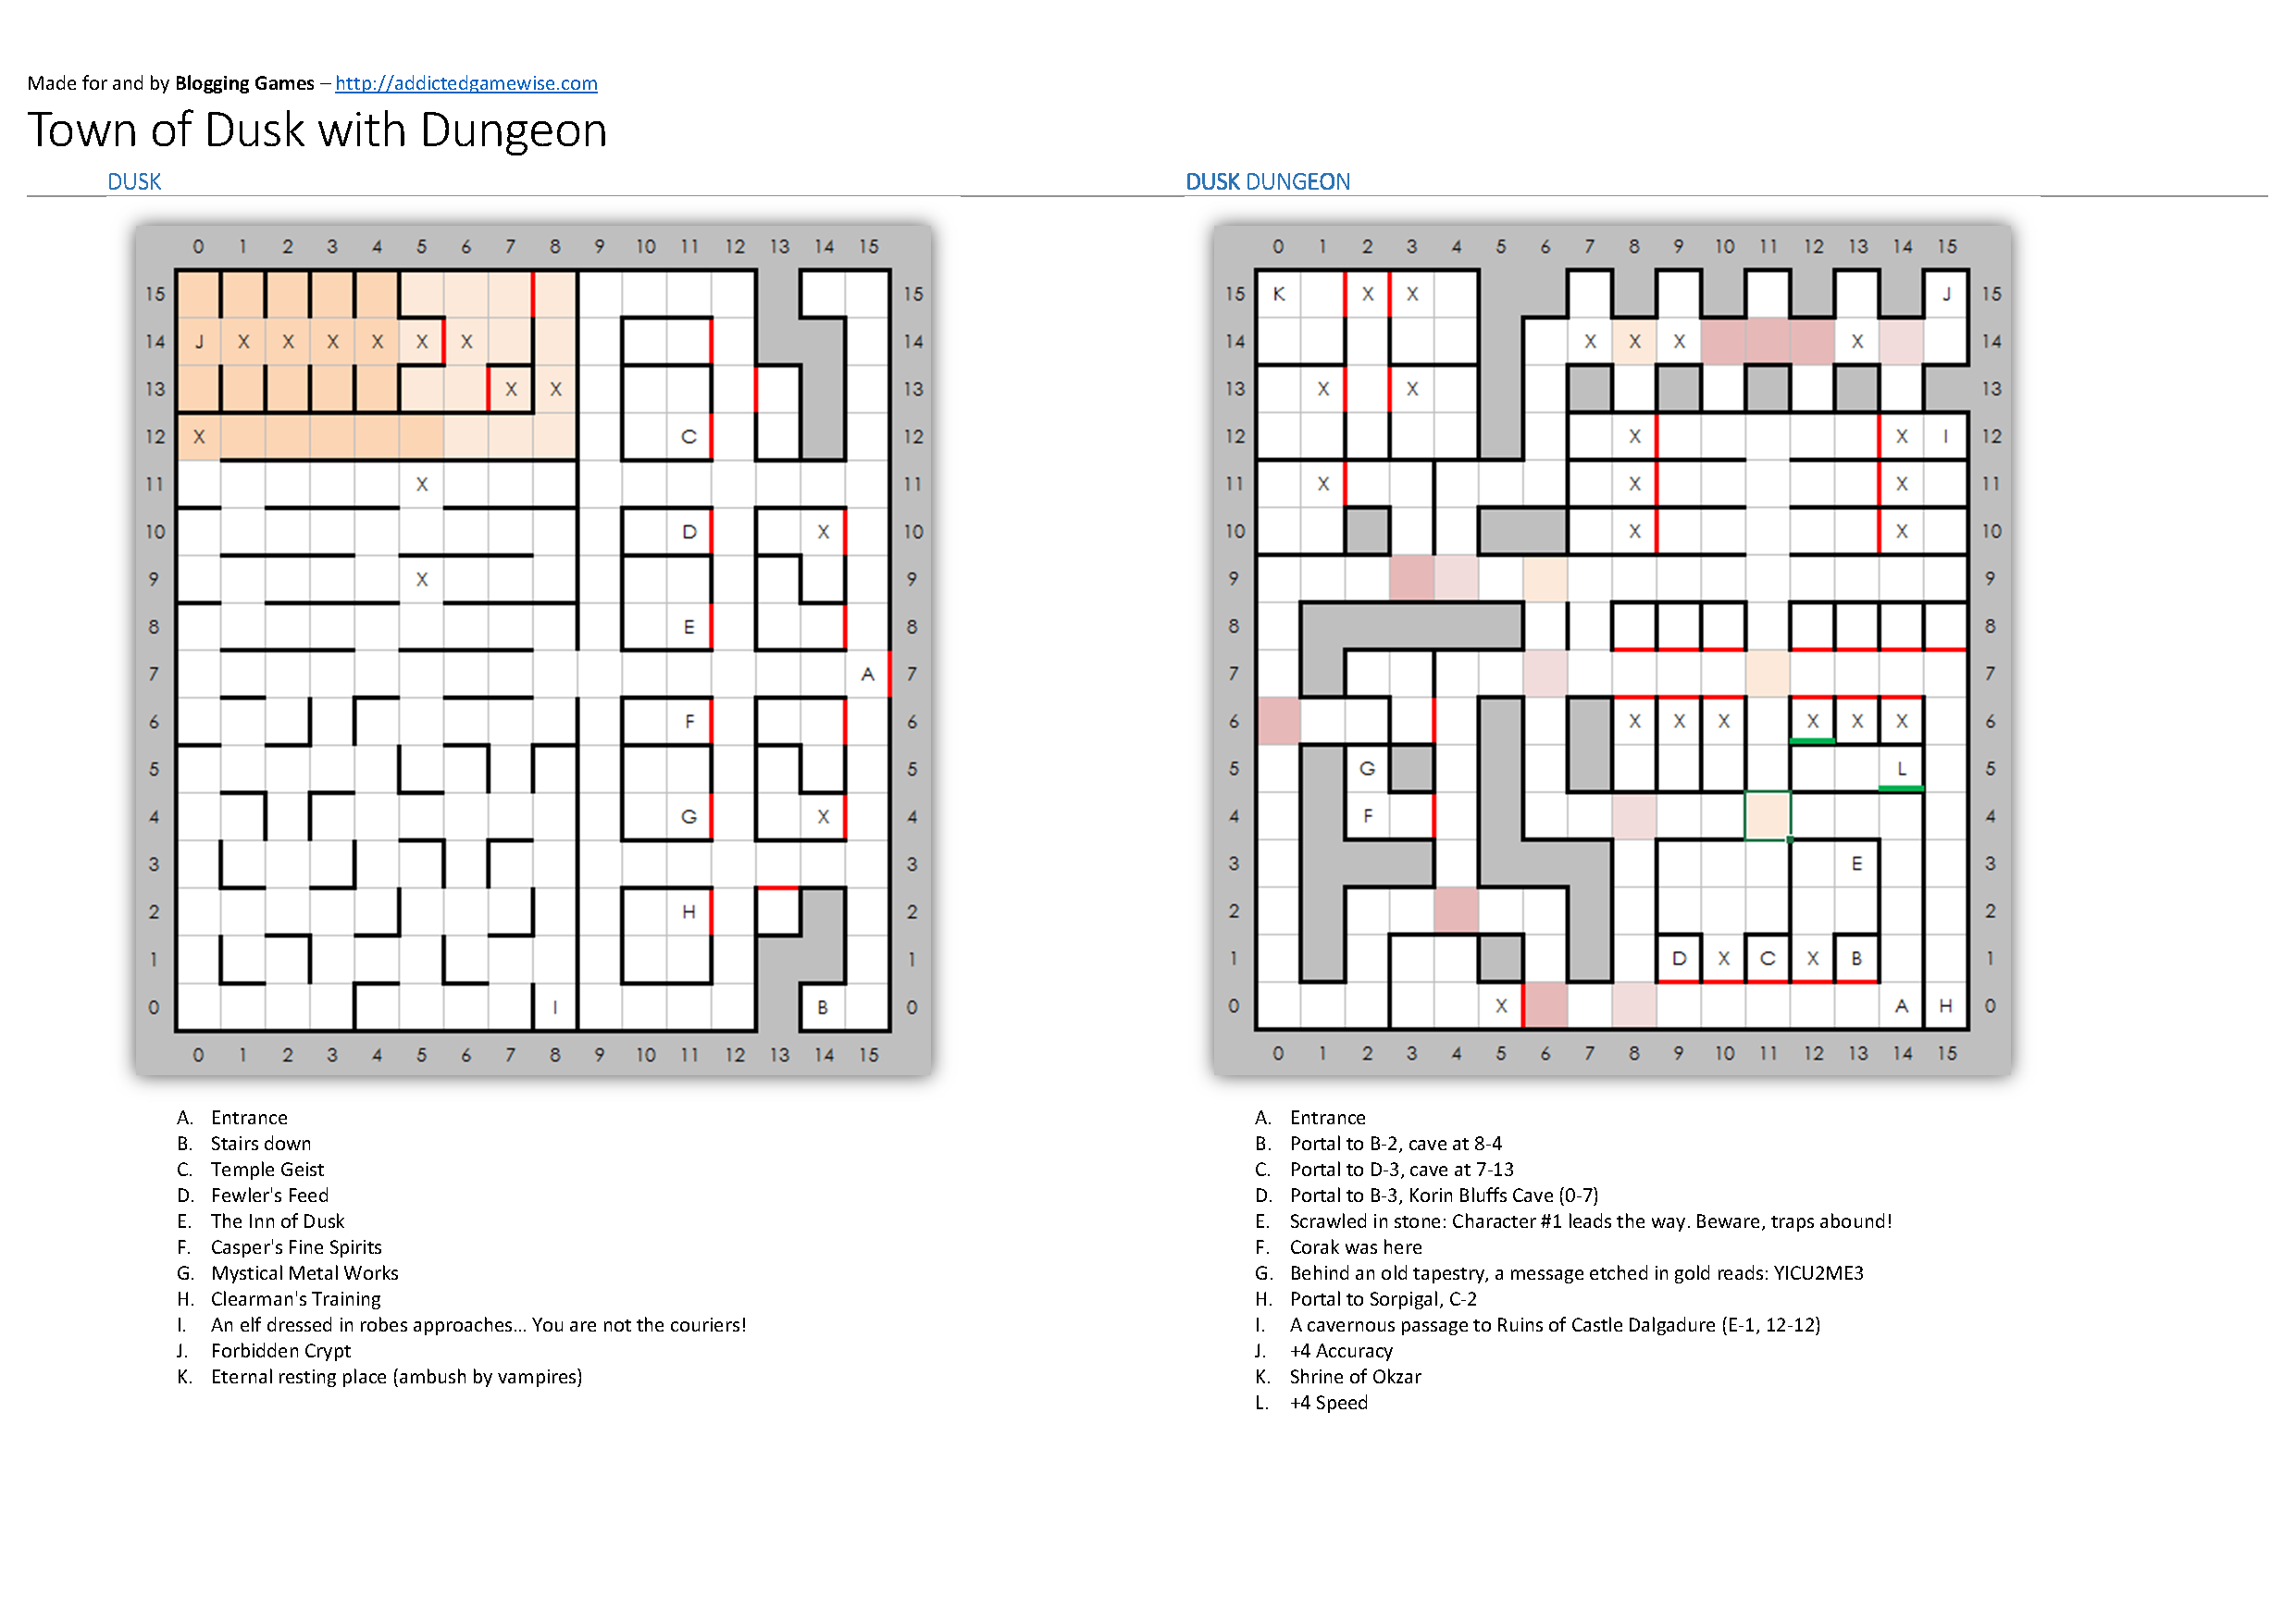
Dusk with Dungeon
Dusk is the third city the main quest takes you to, but it’s by far the most dangerous. Luckily, you don’t have to stay there long.
Click to expand.
Castles Blackridge and White Wolf
The two Castles Blackridge are the easiest of the castles to visit and explore, with White Wolf following in difficulty.
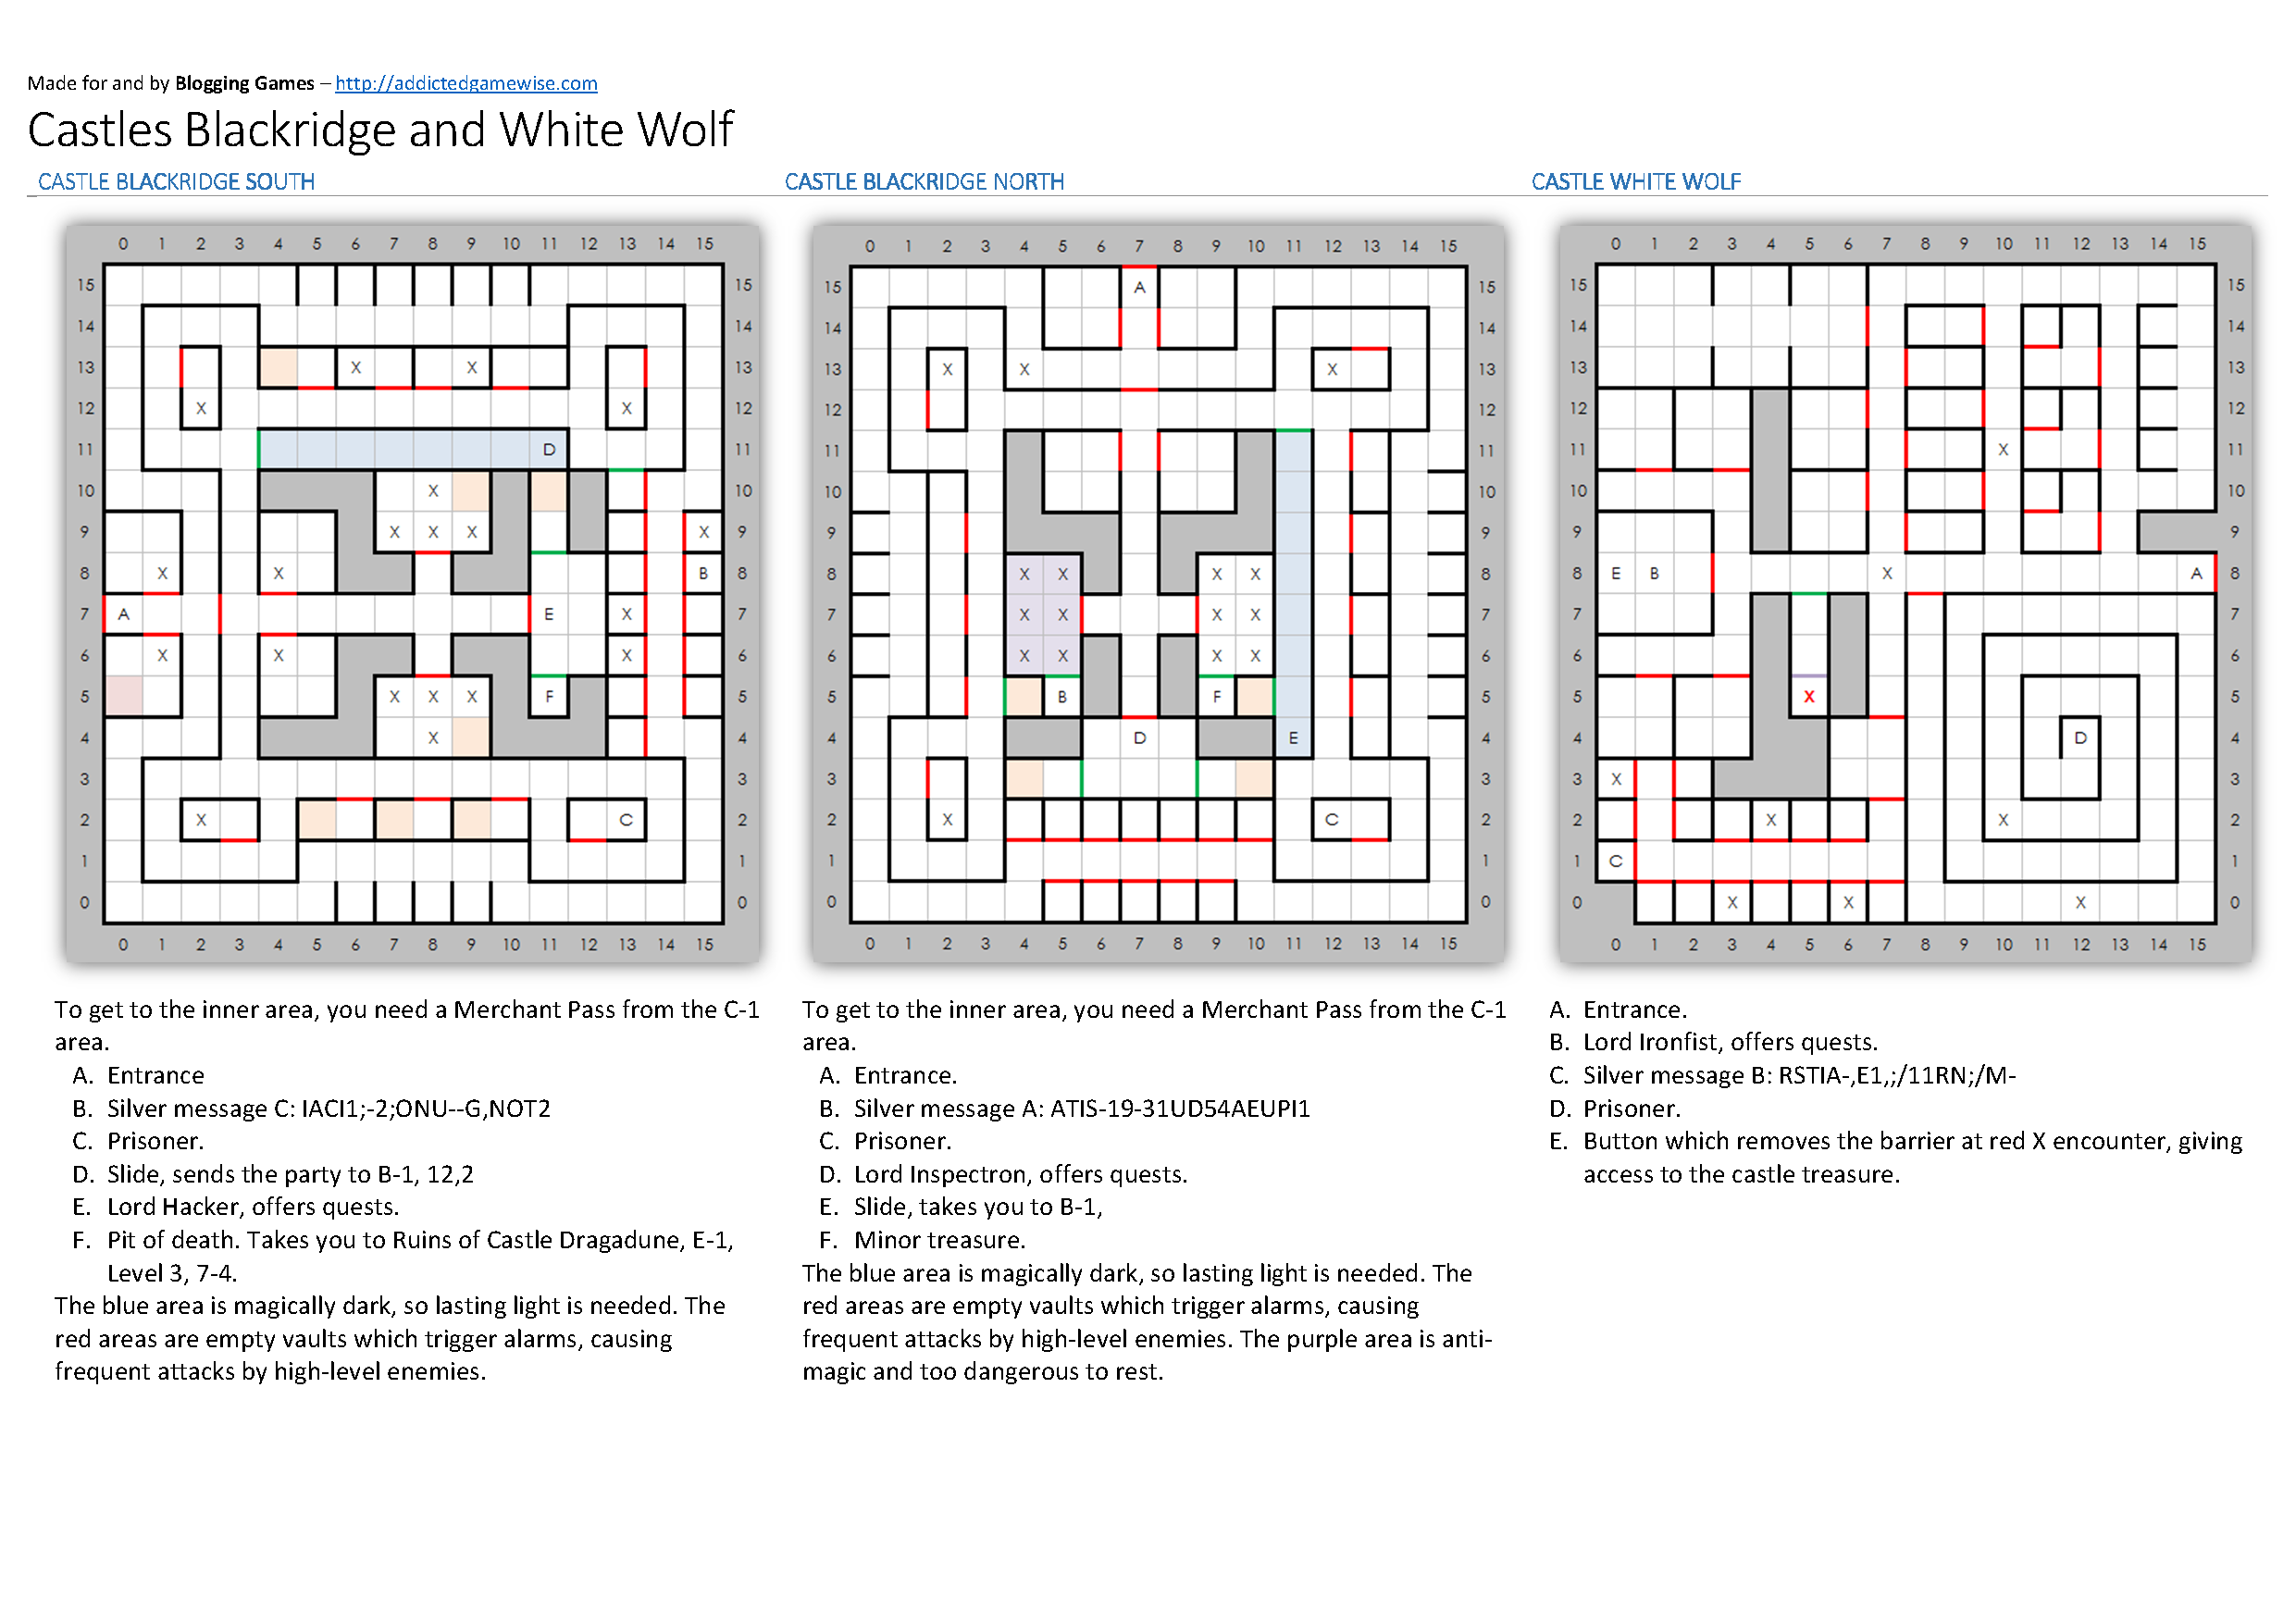
Click to expand.
Castles Alamar and Doom
These two castles are connected via the main quest.

Click to expand.
Ruins of Castle Dragadune
This castle was destroyed, but you should explore it anyway, it’s worth it.
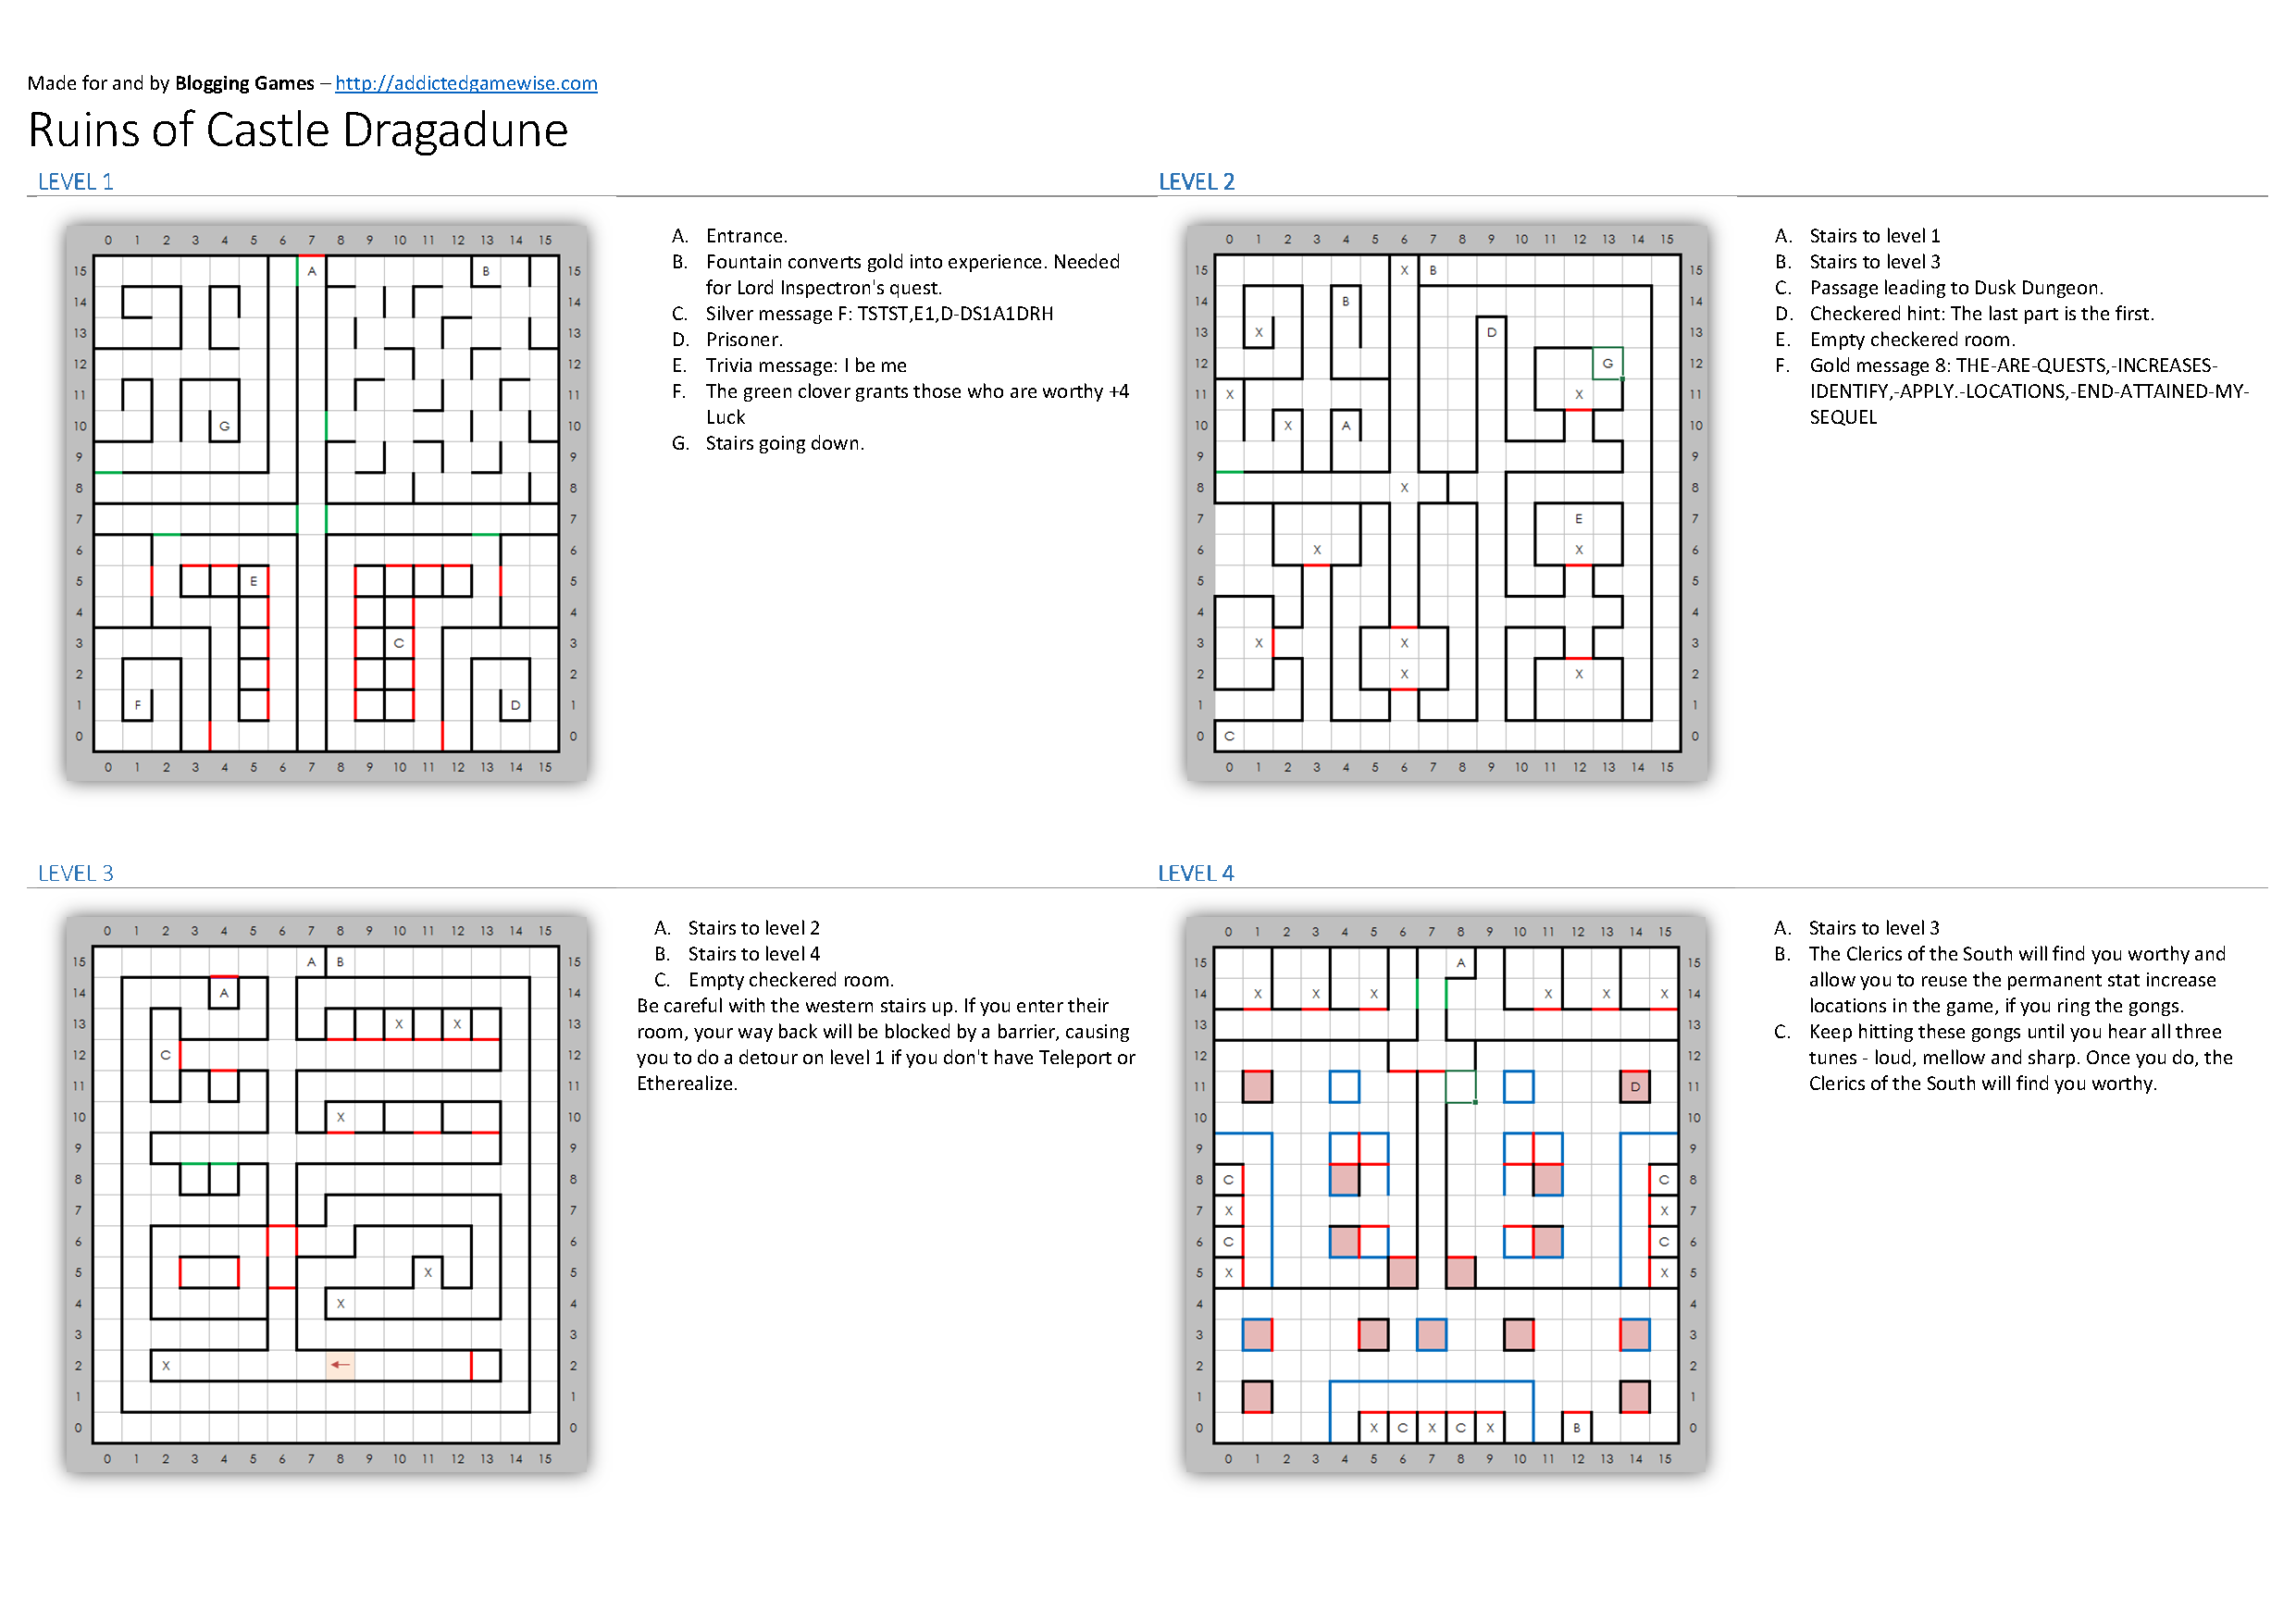
Click to expand.
Warrior’s Stronghold in Raven’s Forest of B-2
A puzzle on level 1 and lots of tough encounters on level 2.

Click to expand.
Ancient Wizard’s Lair in the Quivering Forest of B-1
Go down, conquer the labyrinth and return to parts of level 1 you couldn’t get to, or just use Etherealize.
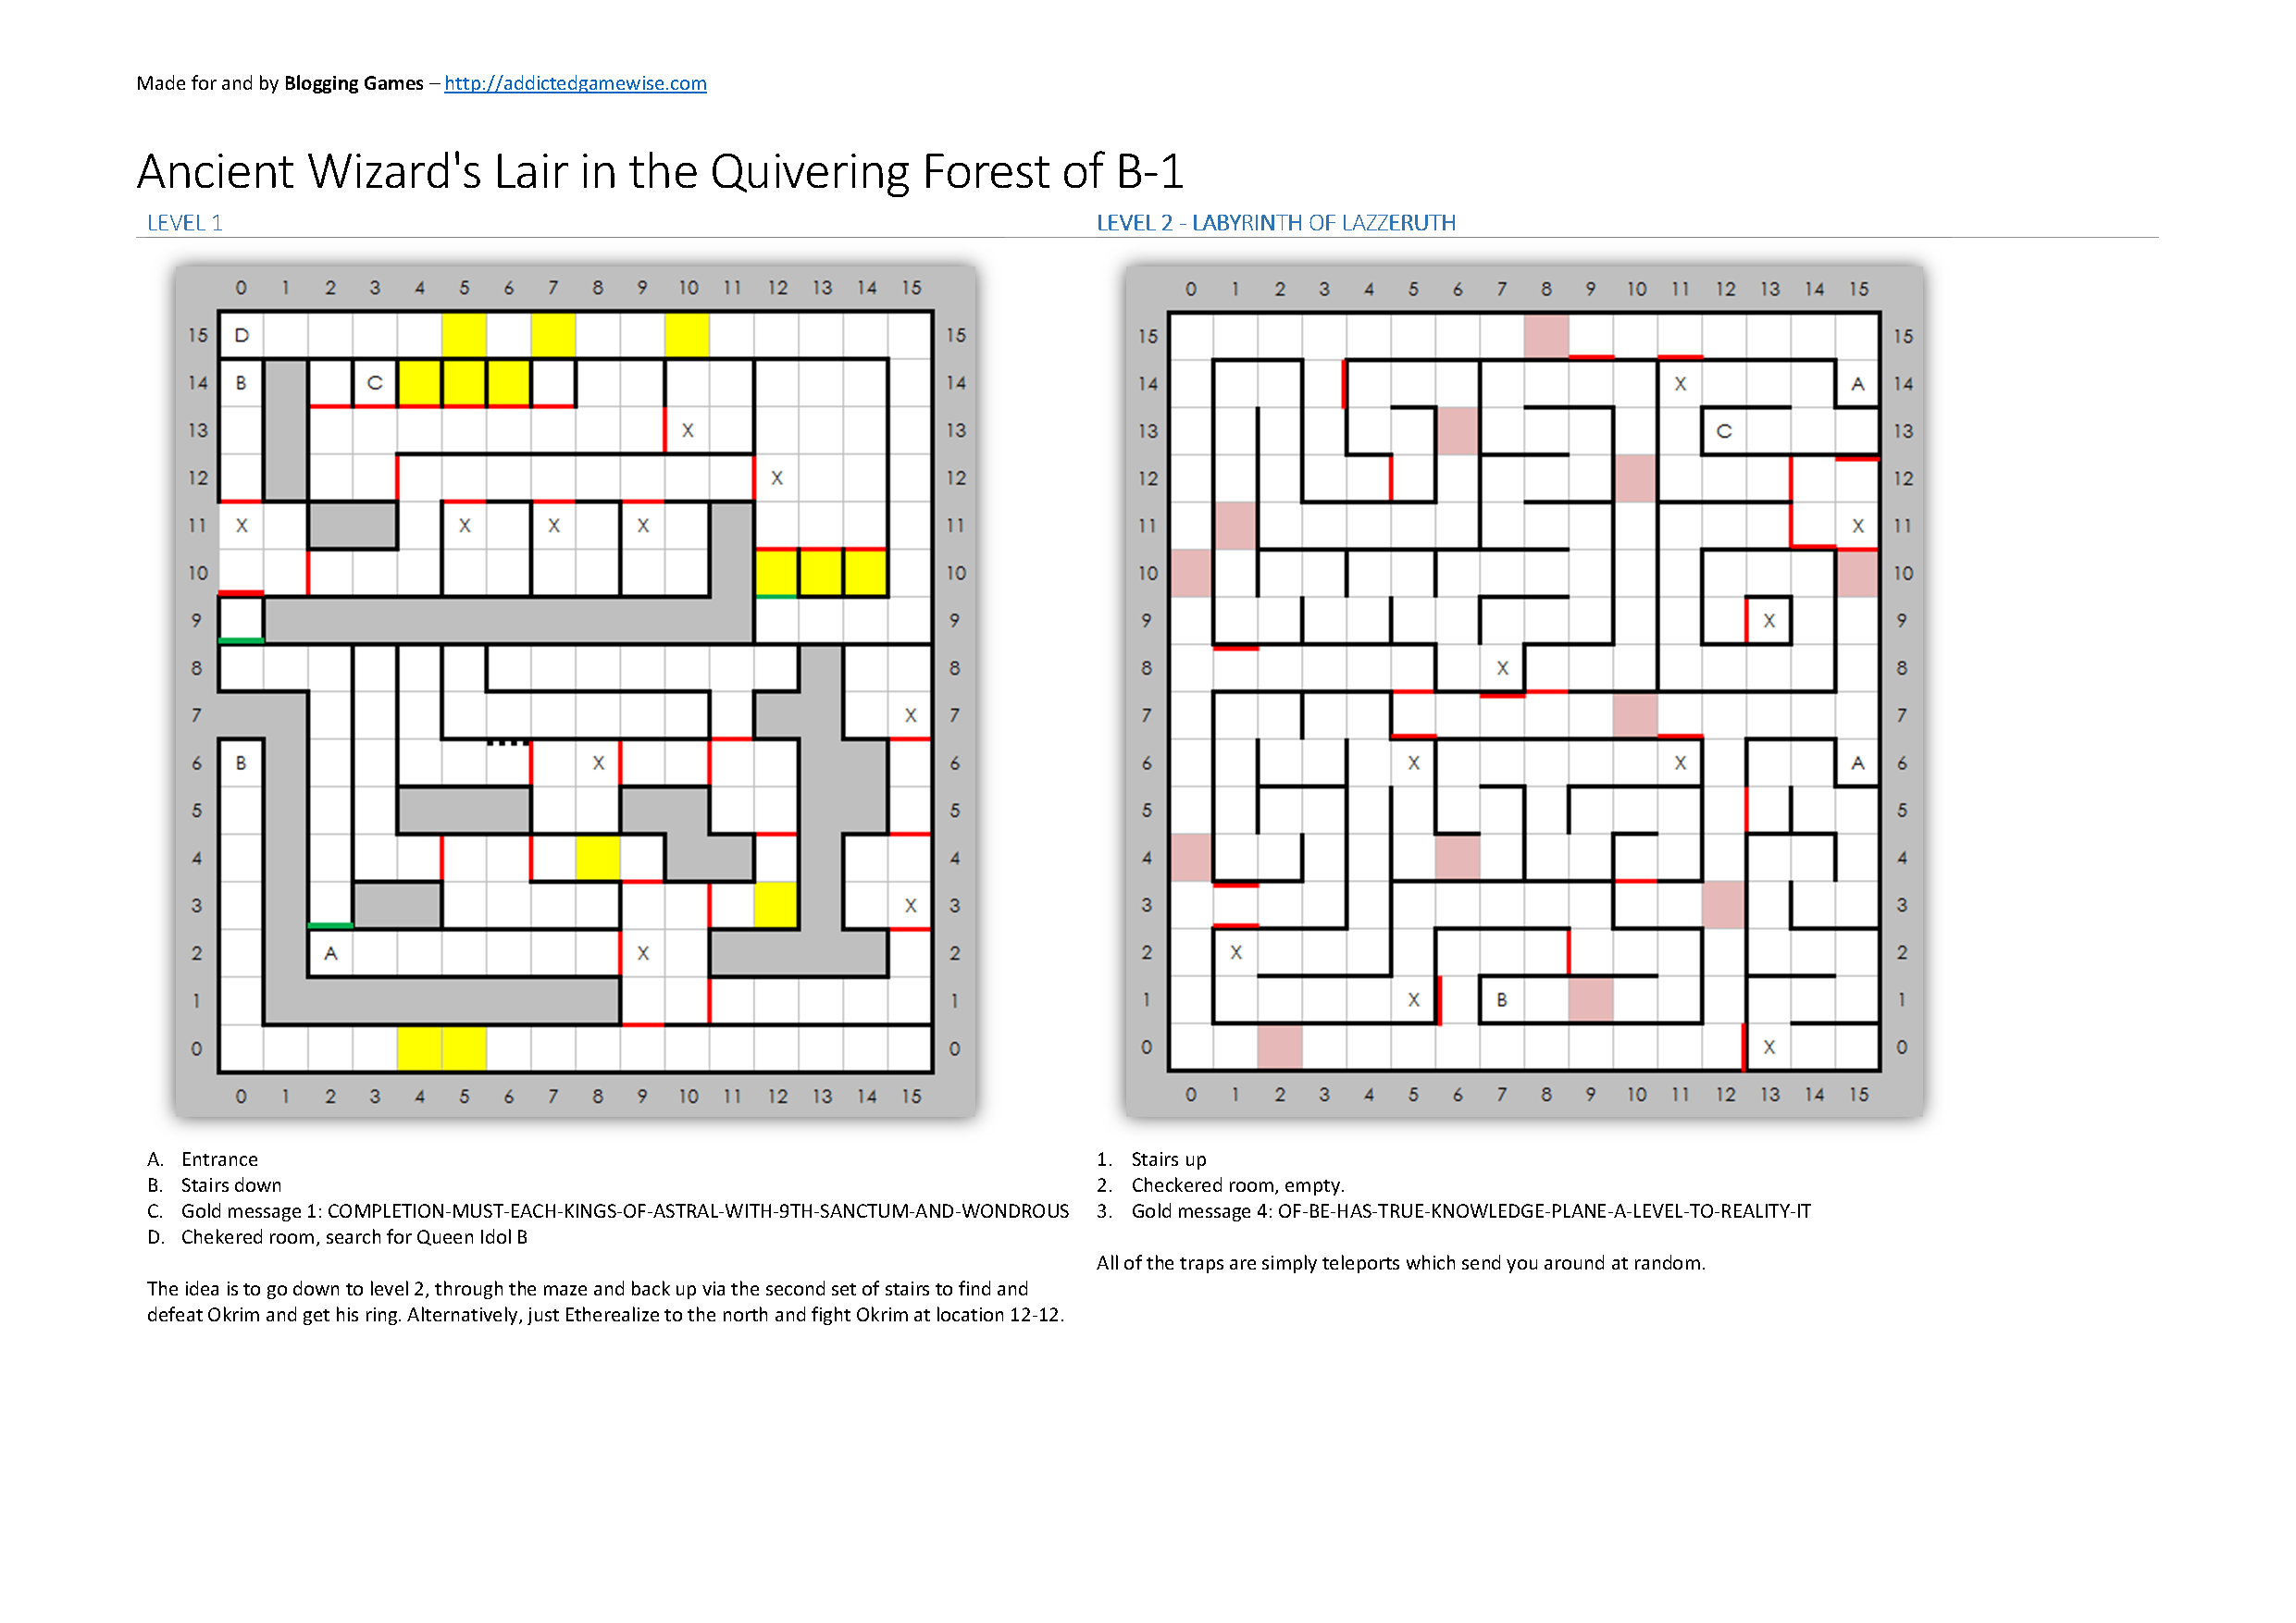
Click to expand.
Sealed Minotaur Stronghold in the Enchanted Forest of B-3
Get the Ruby Whistle to Unseal it and defeat the Minotaur leader.

Click to expand.
Medusa’s Lair in B-2
Take Medusa’s head as a trophy, but be careful about the traps.

Click to expand.
The Magical Square of D-3
Solve the magical square for a brain workout.
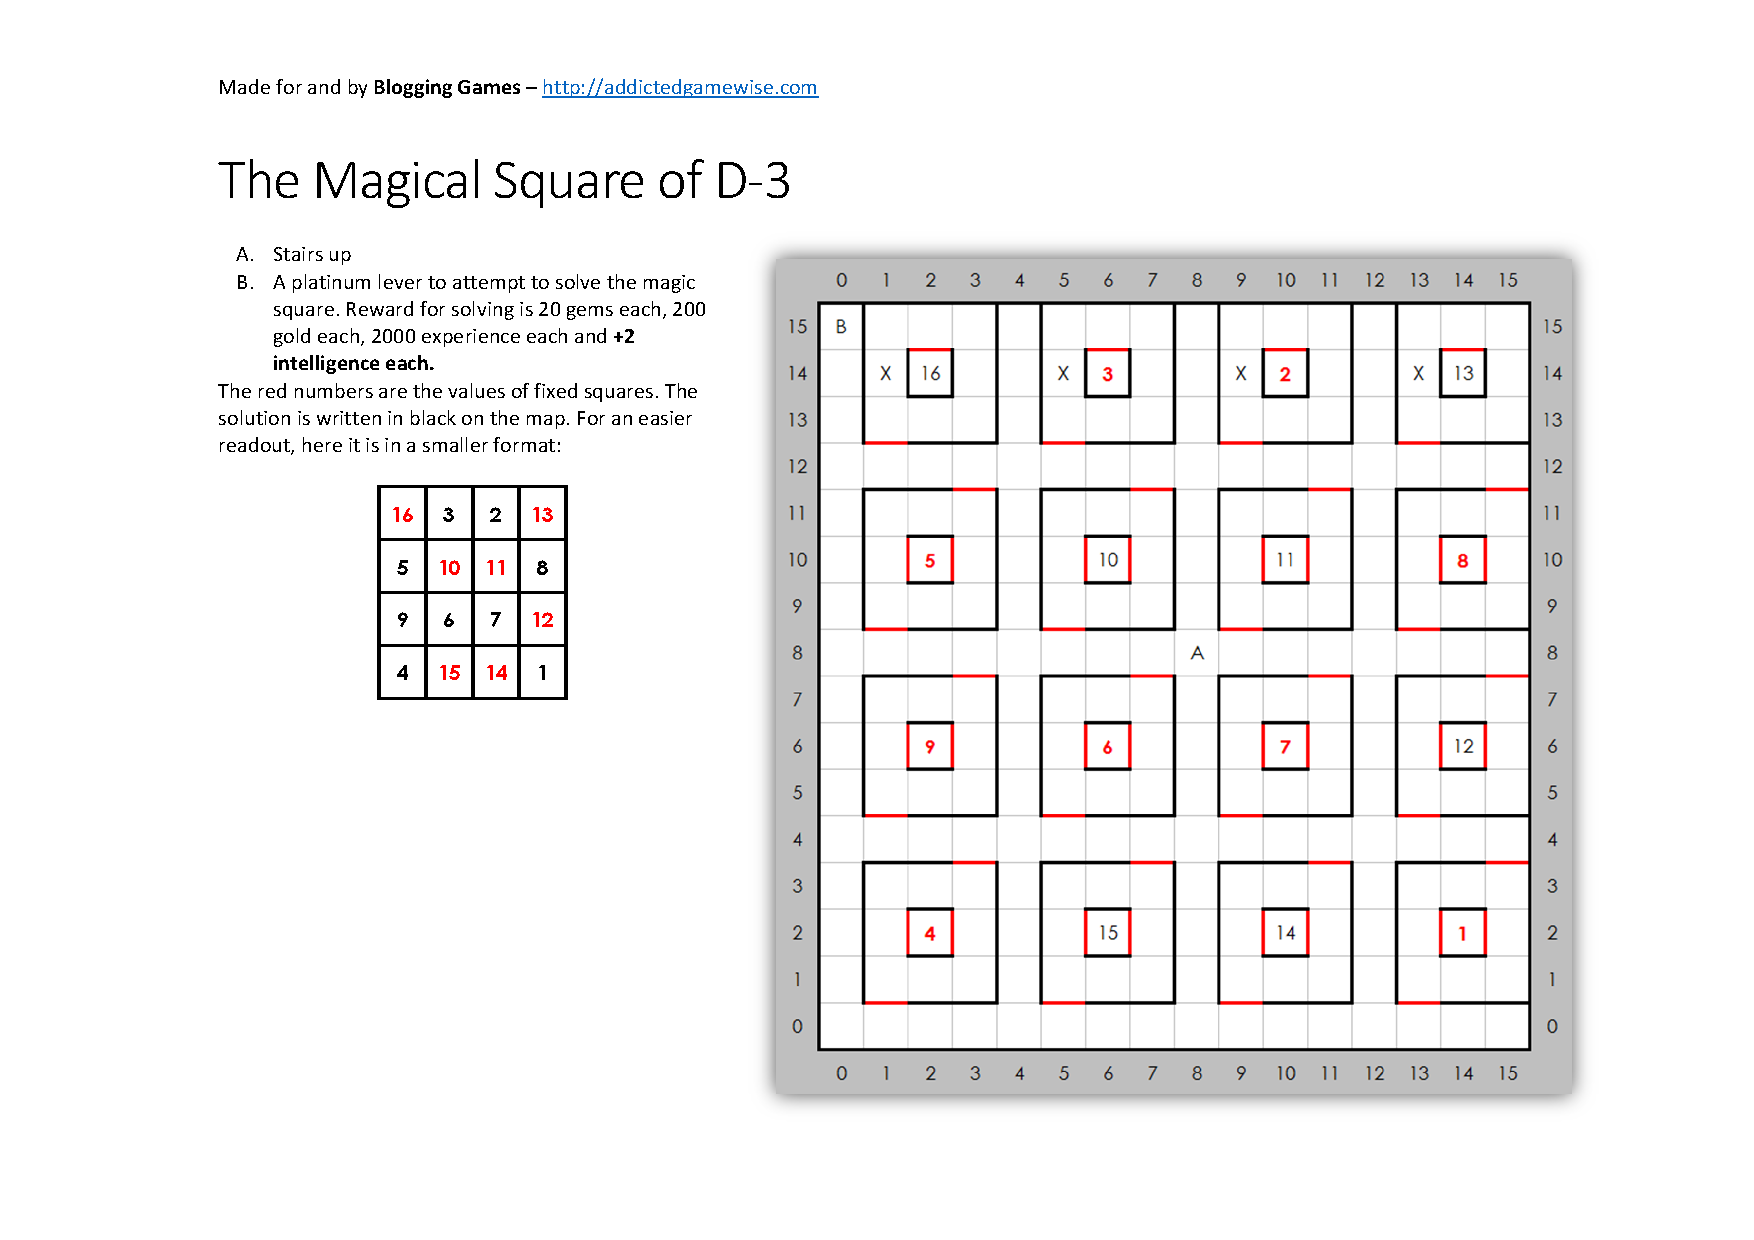
Click to expand.
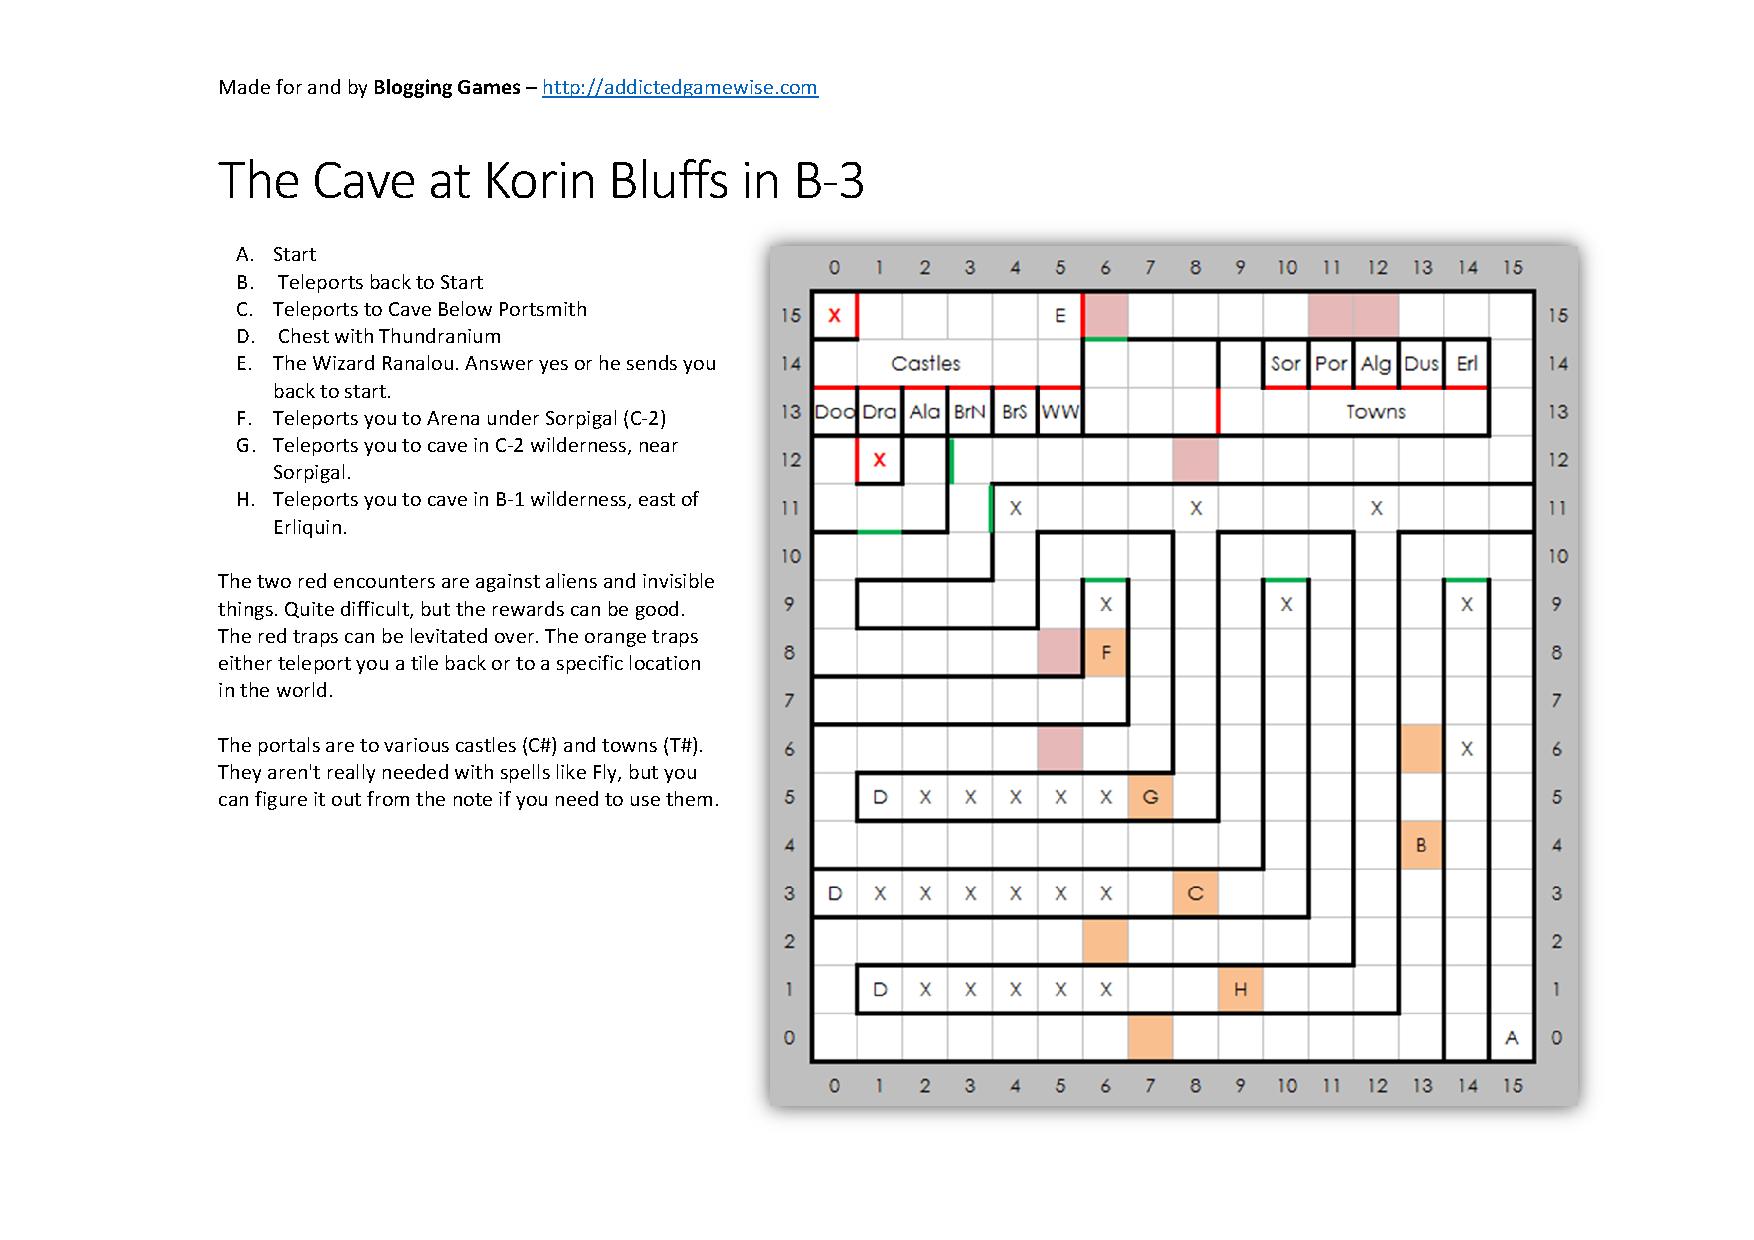
The Cave in the Korin Bluffs of B-3
The wizard Ranalou has portals to all the cities and castles of Varn, but what good are they with the Fly spell at your disposal?
Click to expand.
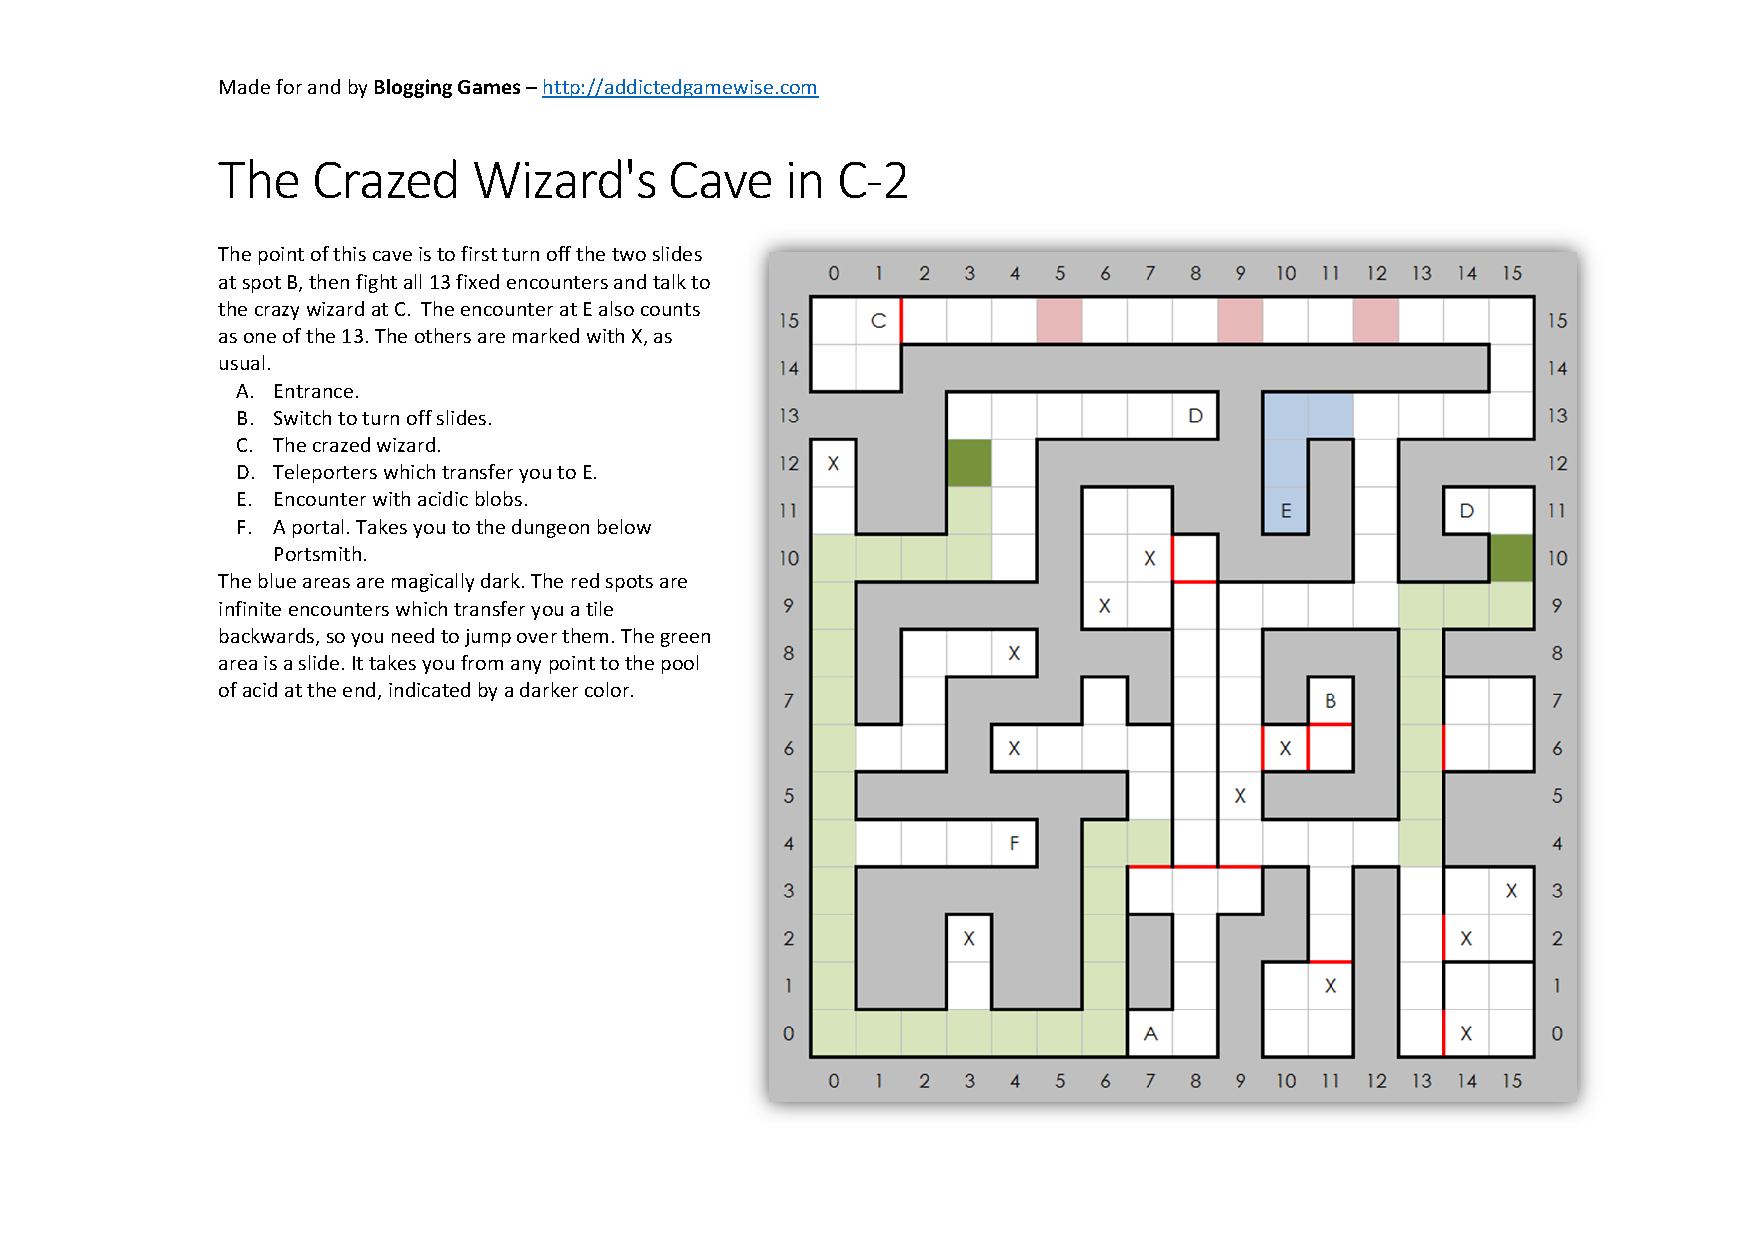
The Crazed Wizard’s Cave of C-2
Encounter the 13 and claim the reward!
Click to expand.
The Fabled Building of Gold
Fight dragons at level 4 to get the golden message.

Click to expand.
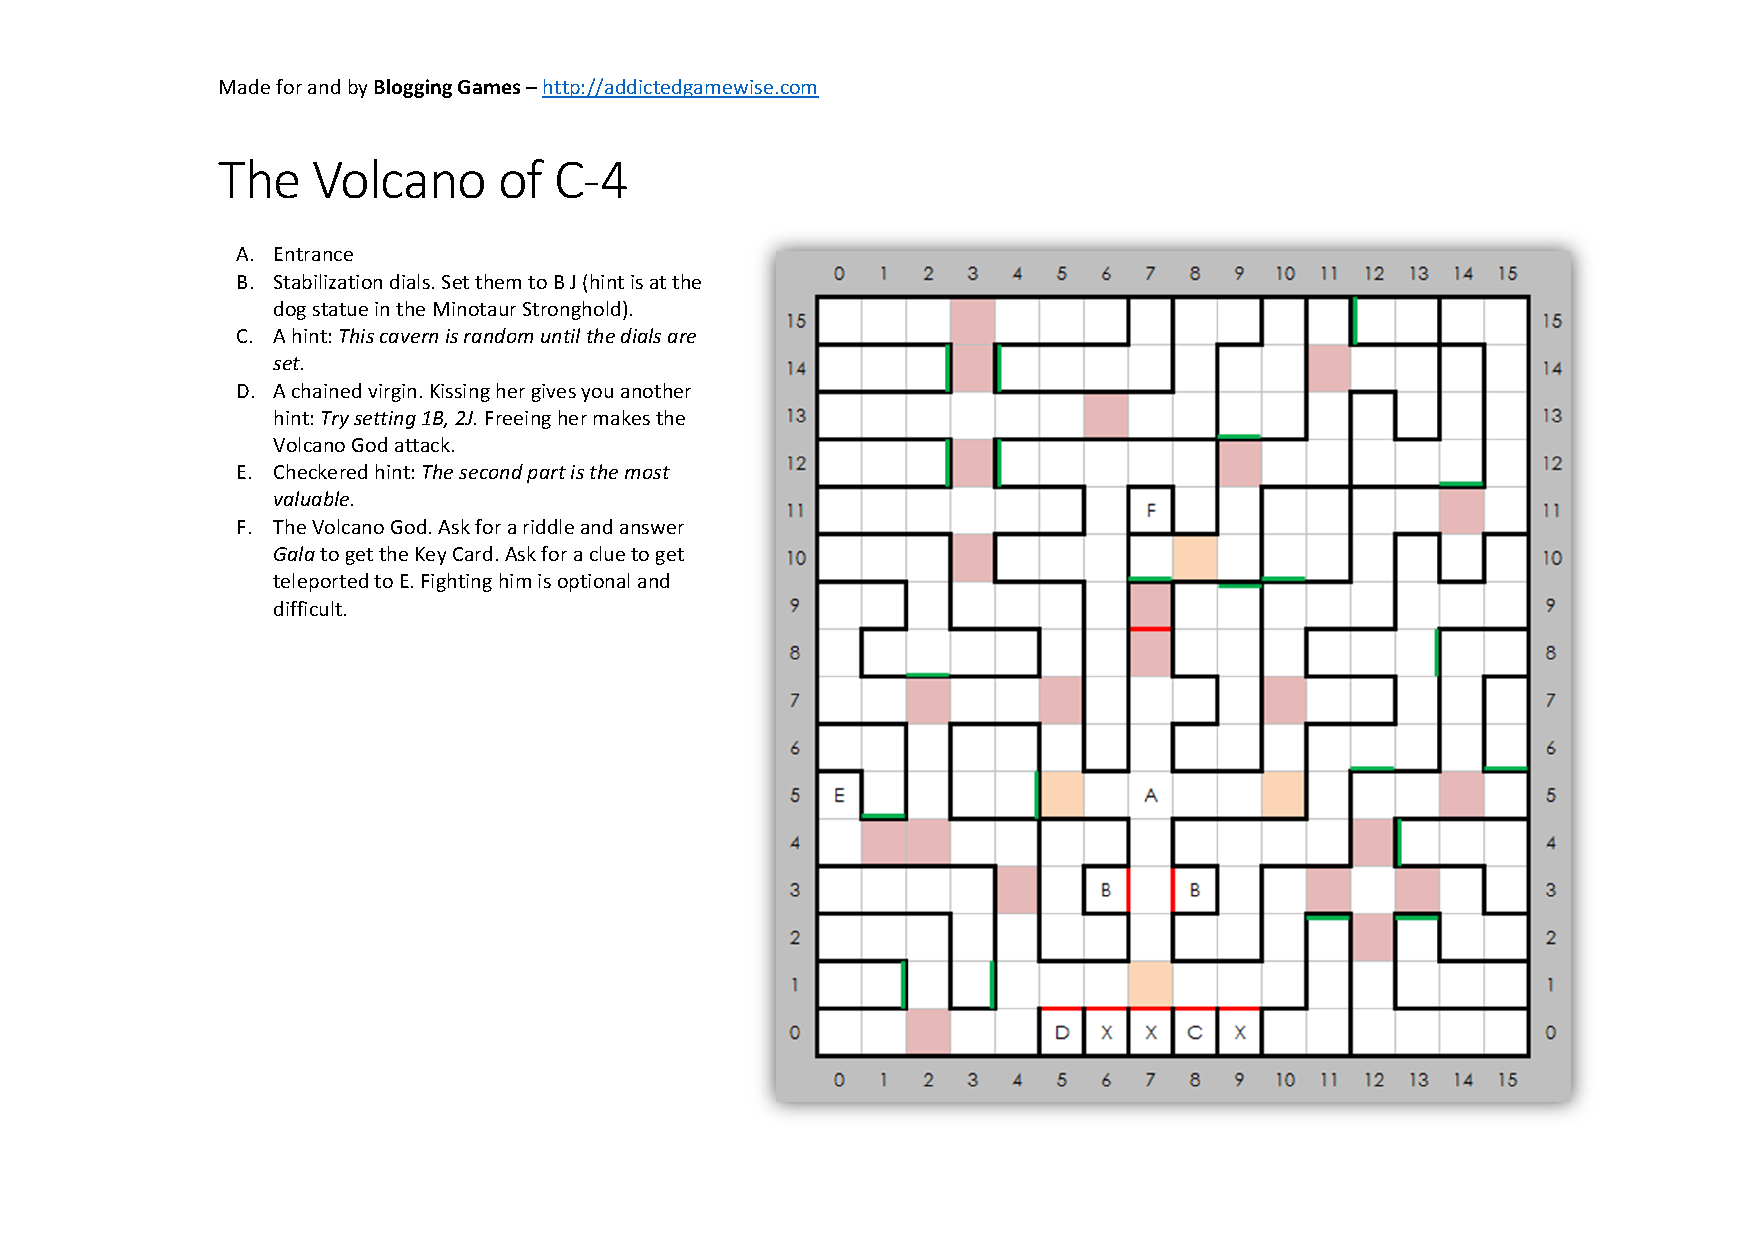
The Volcano
Challenge the Volcano God if you dare, but be sure to get the key card first. Remember B.J.
Click to expand.
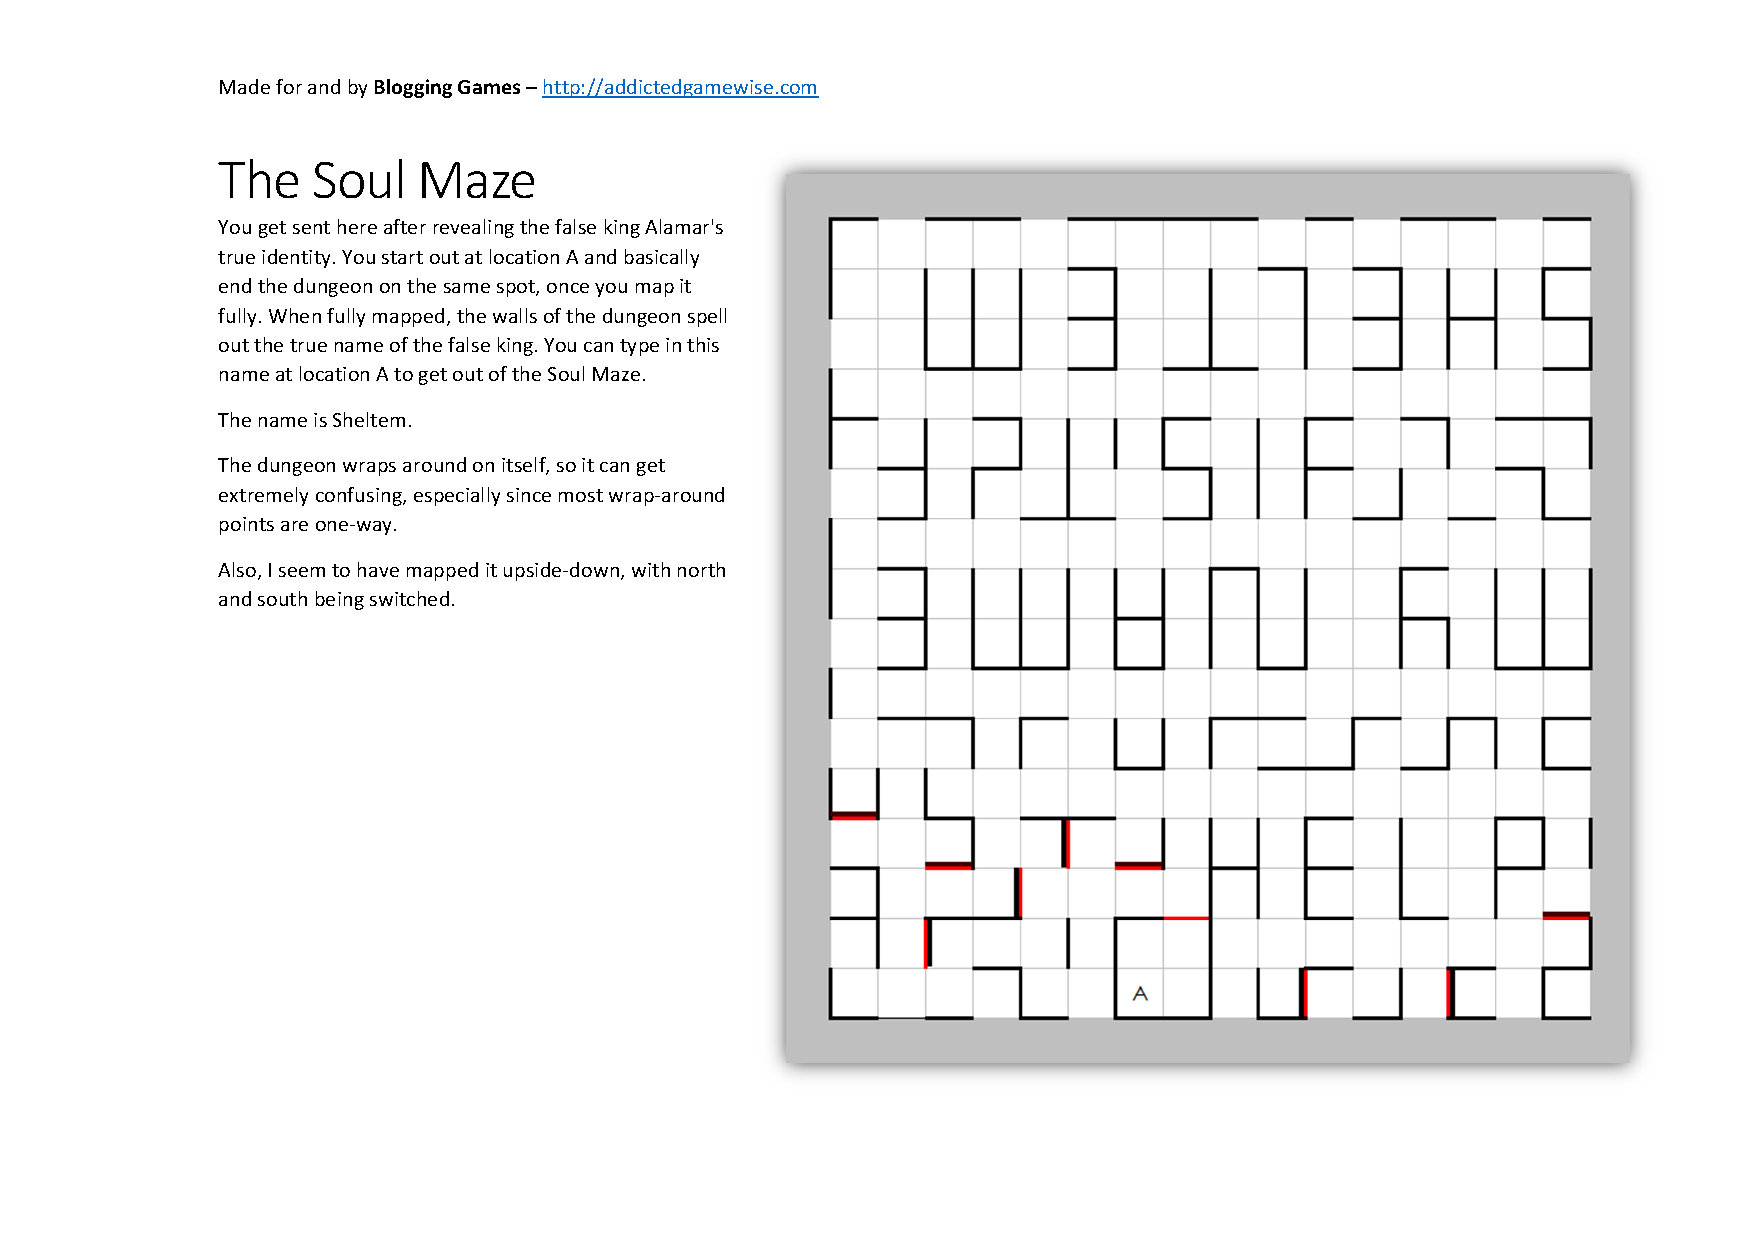
The Soul Maze
Find the name hidden in the walls.
Click to expand.
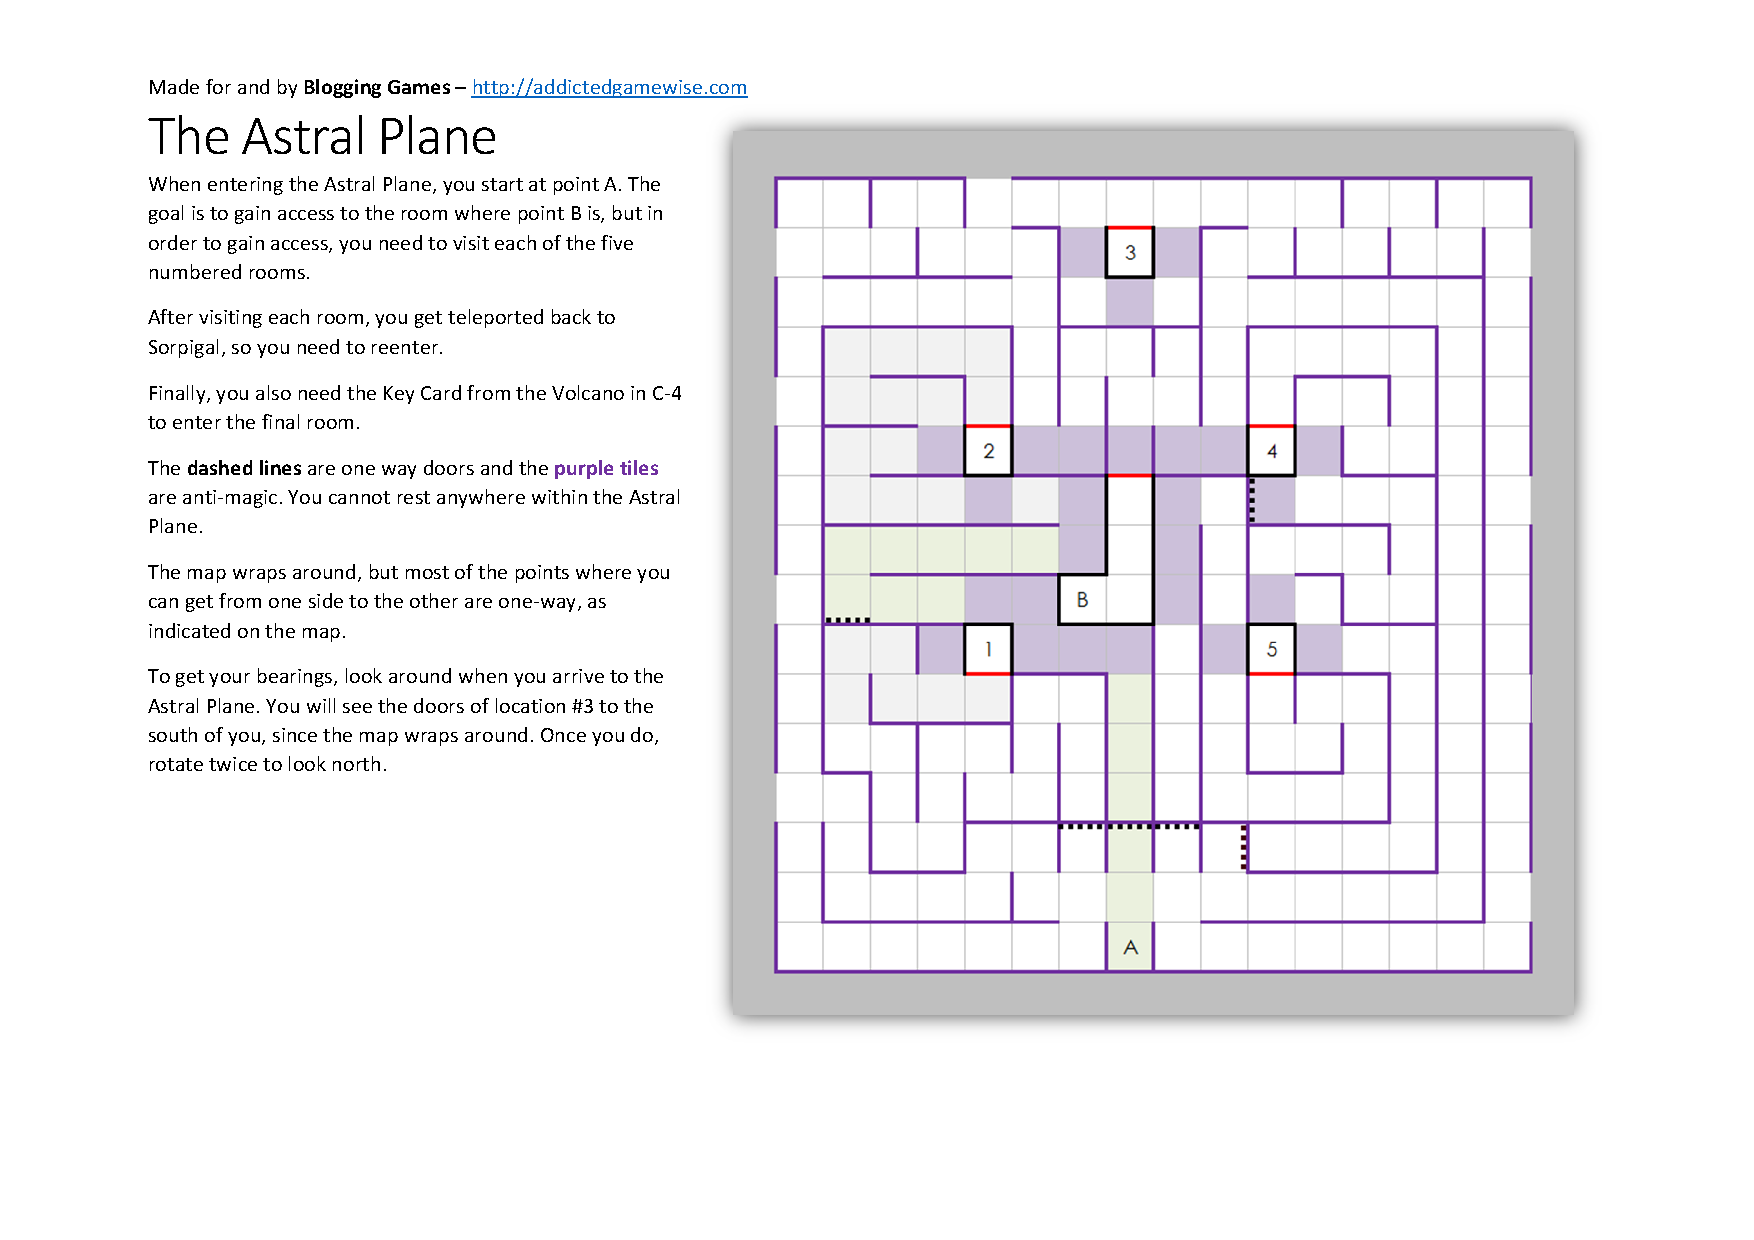
The Astral Plane
Prepare for a headache before the game is over.
Click to expand.
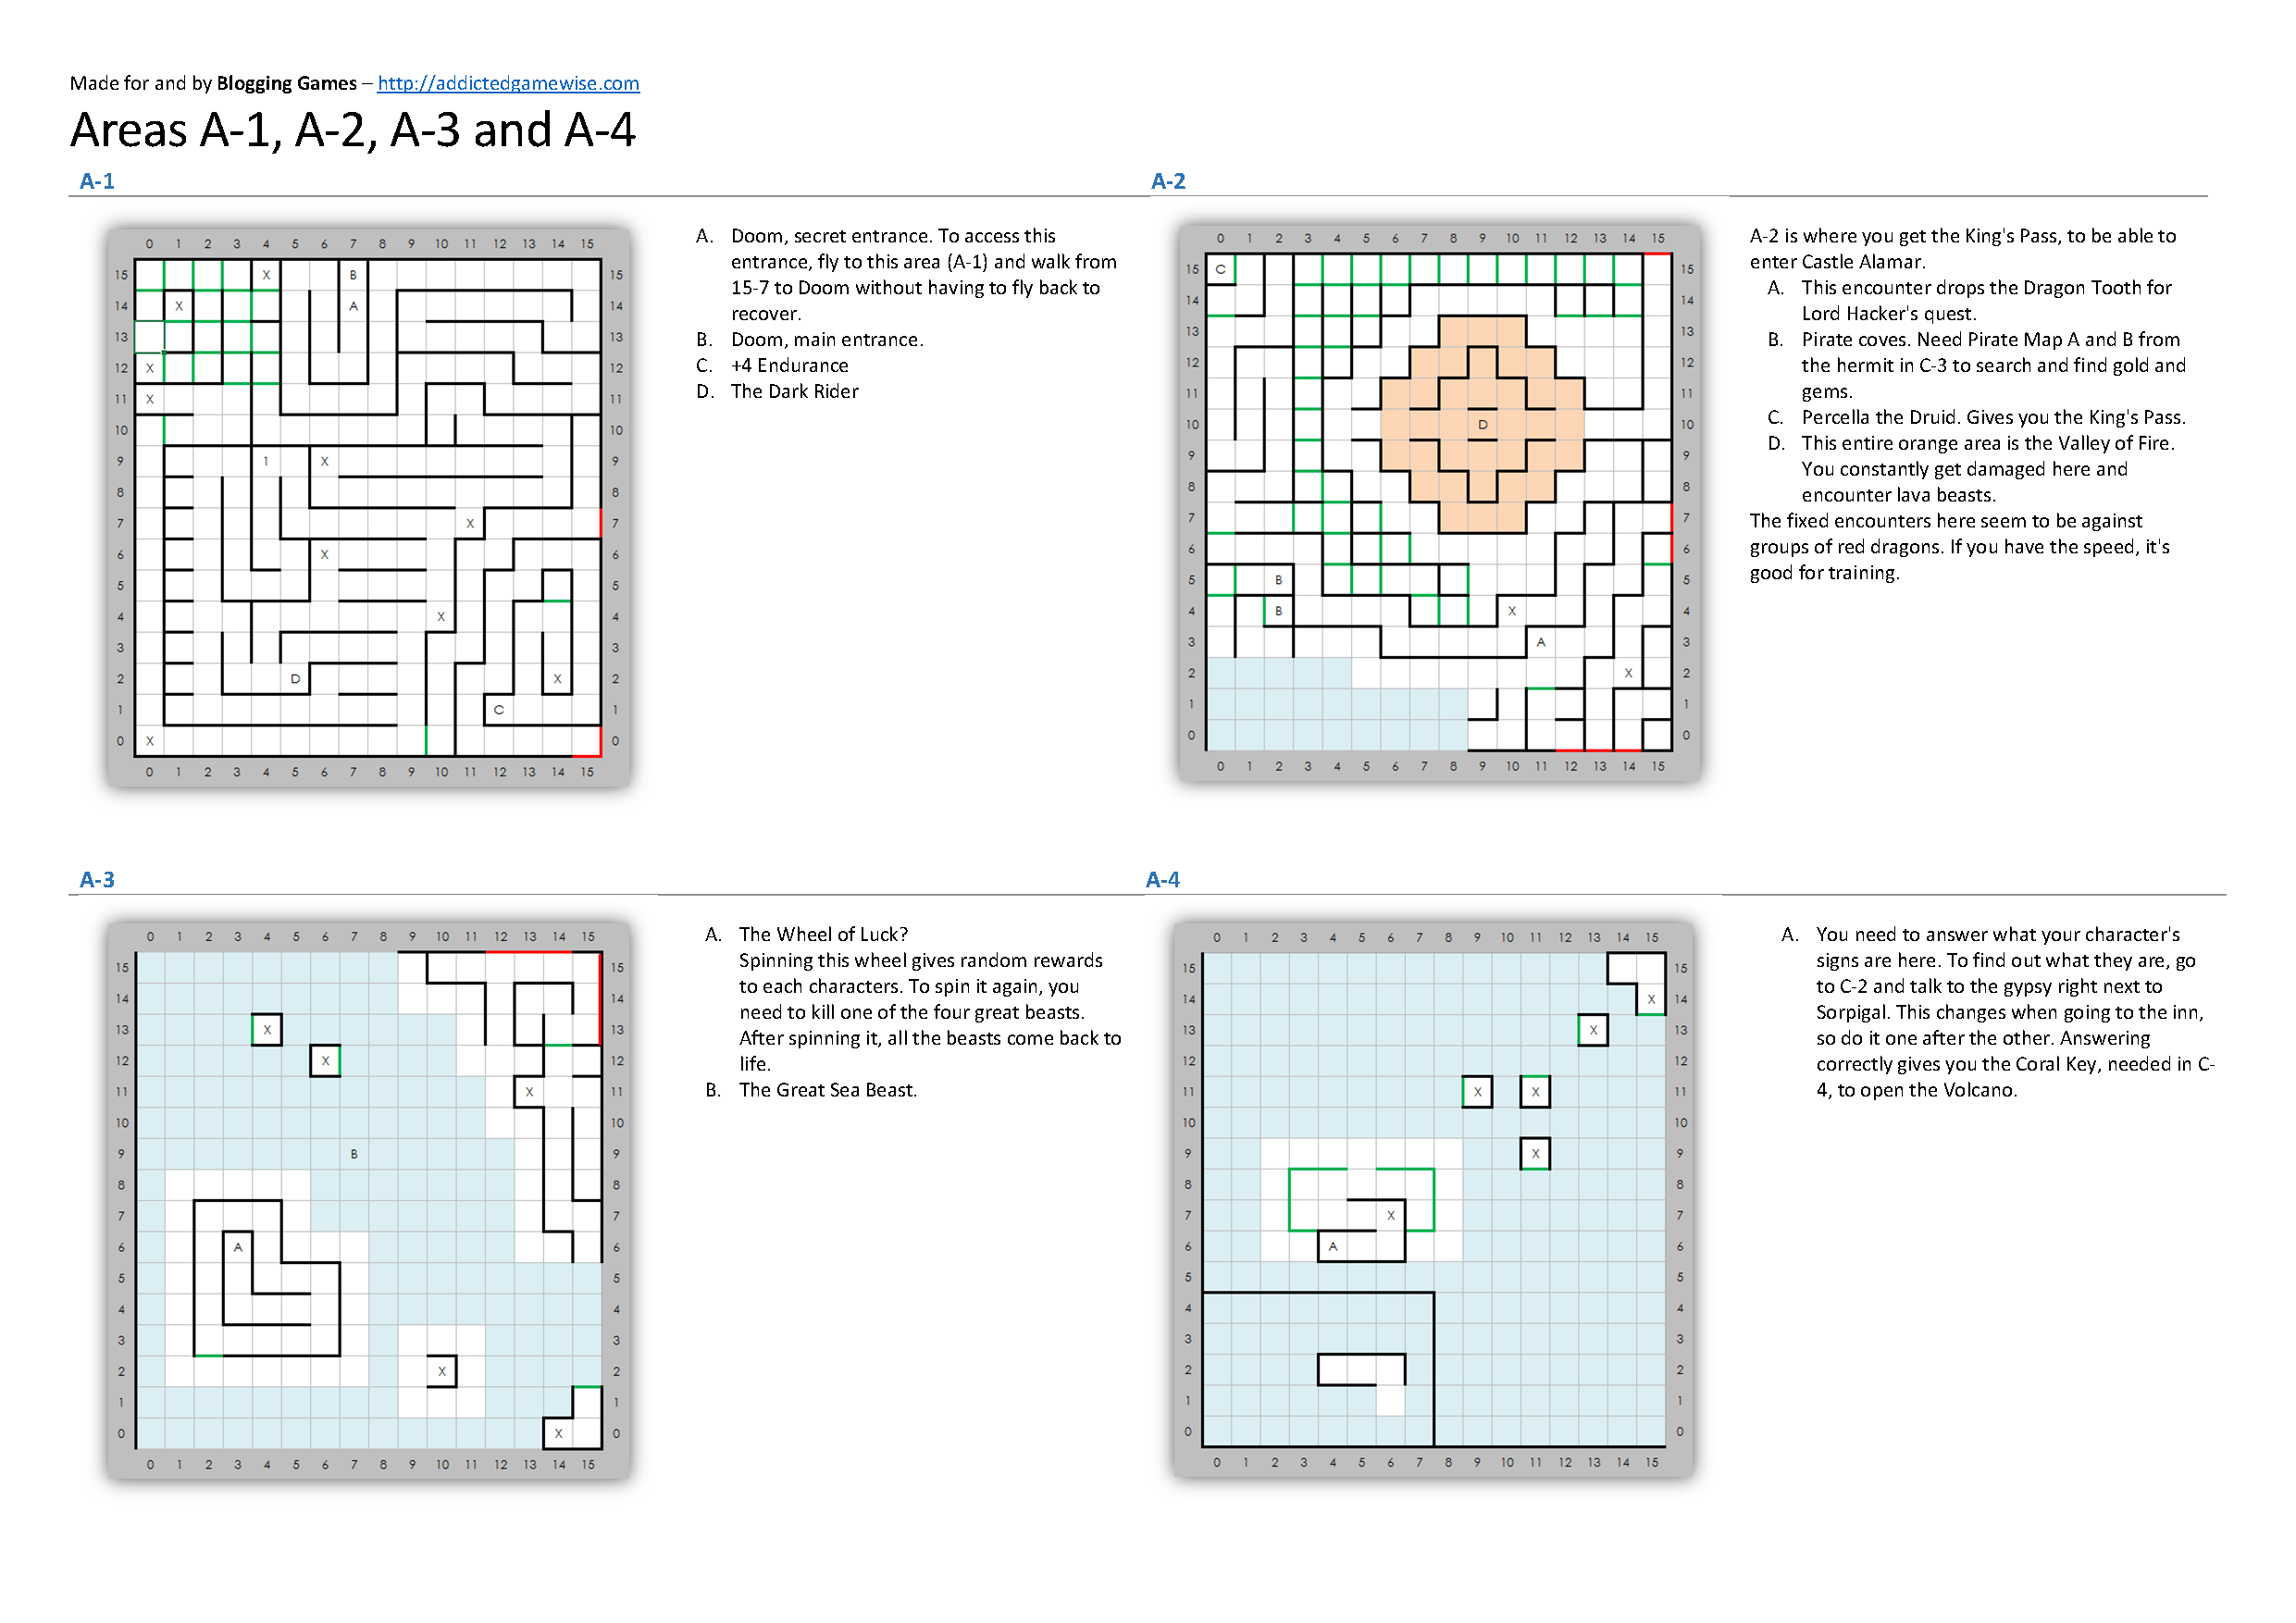
The Areas of A-1 to A-4
Castle Doom, two of the Great Beasts, the Coral Key, King’s Pass and Dragon’s Tooth.
Click to expand.
The Areas of B-1 to B-4
Far to many places to visit.

Click to expand.
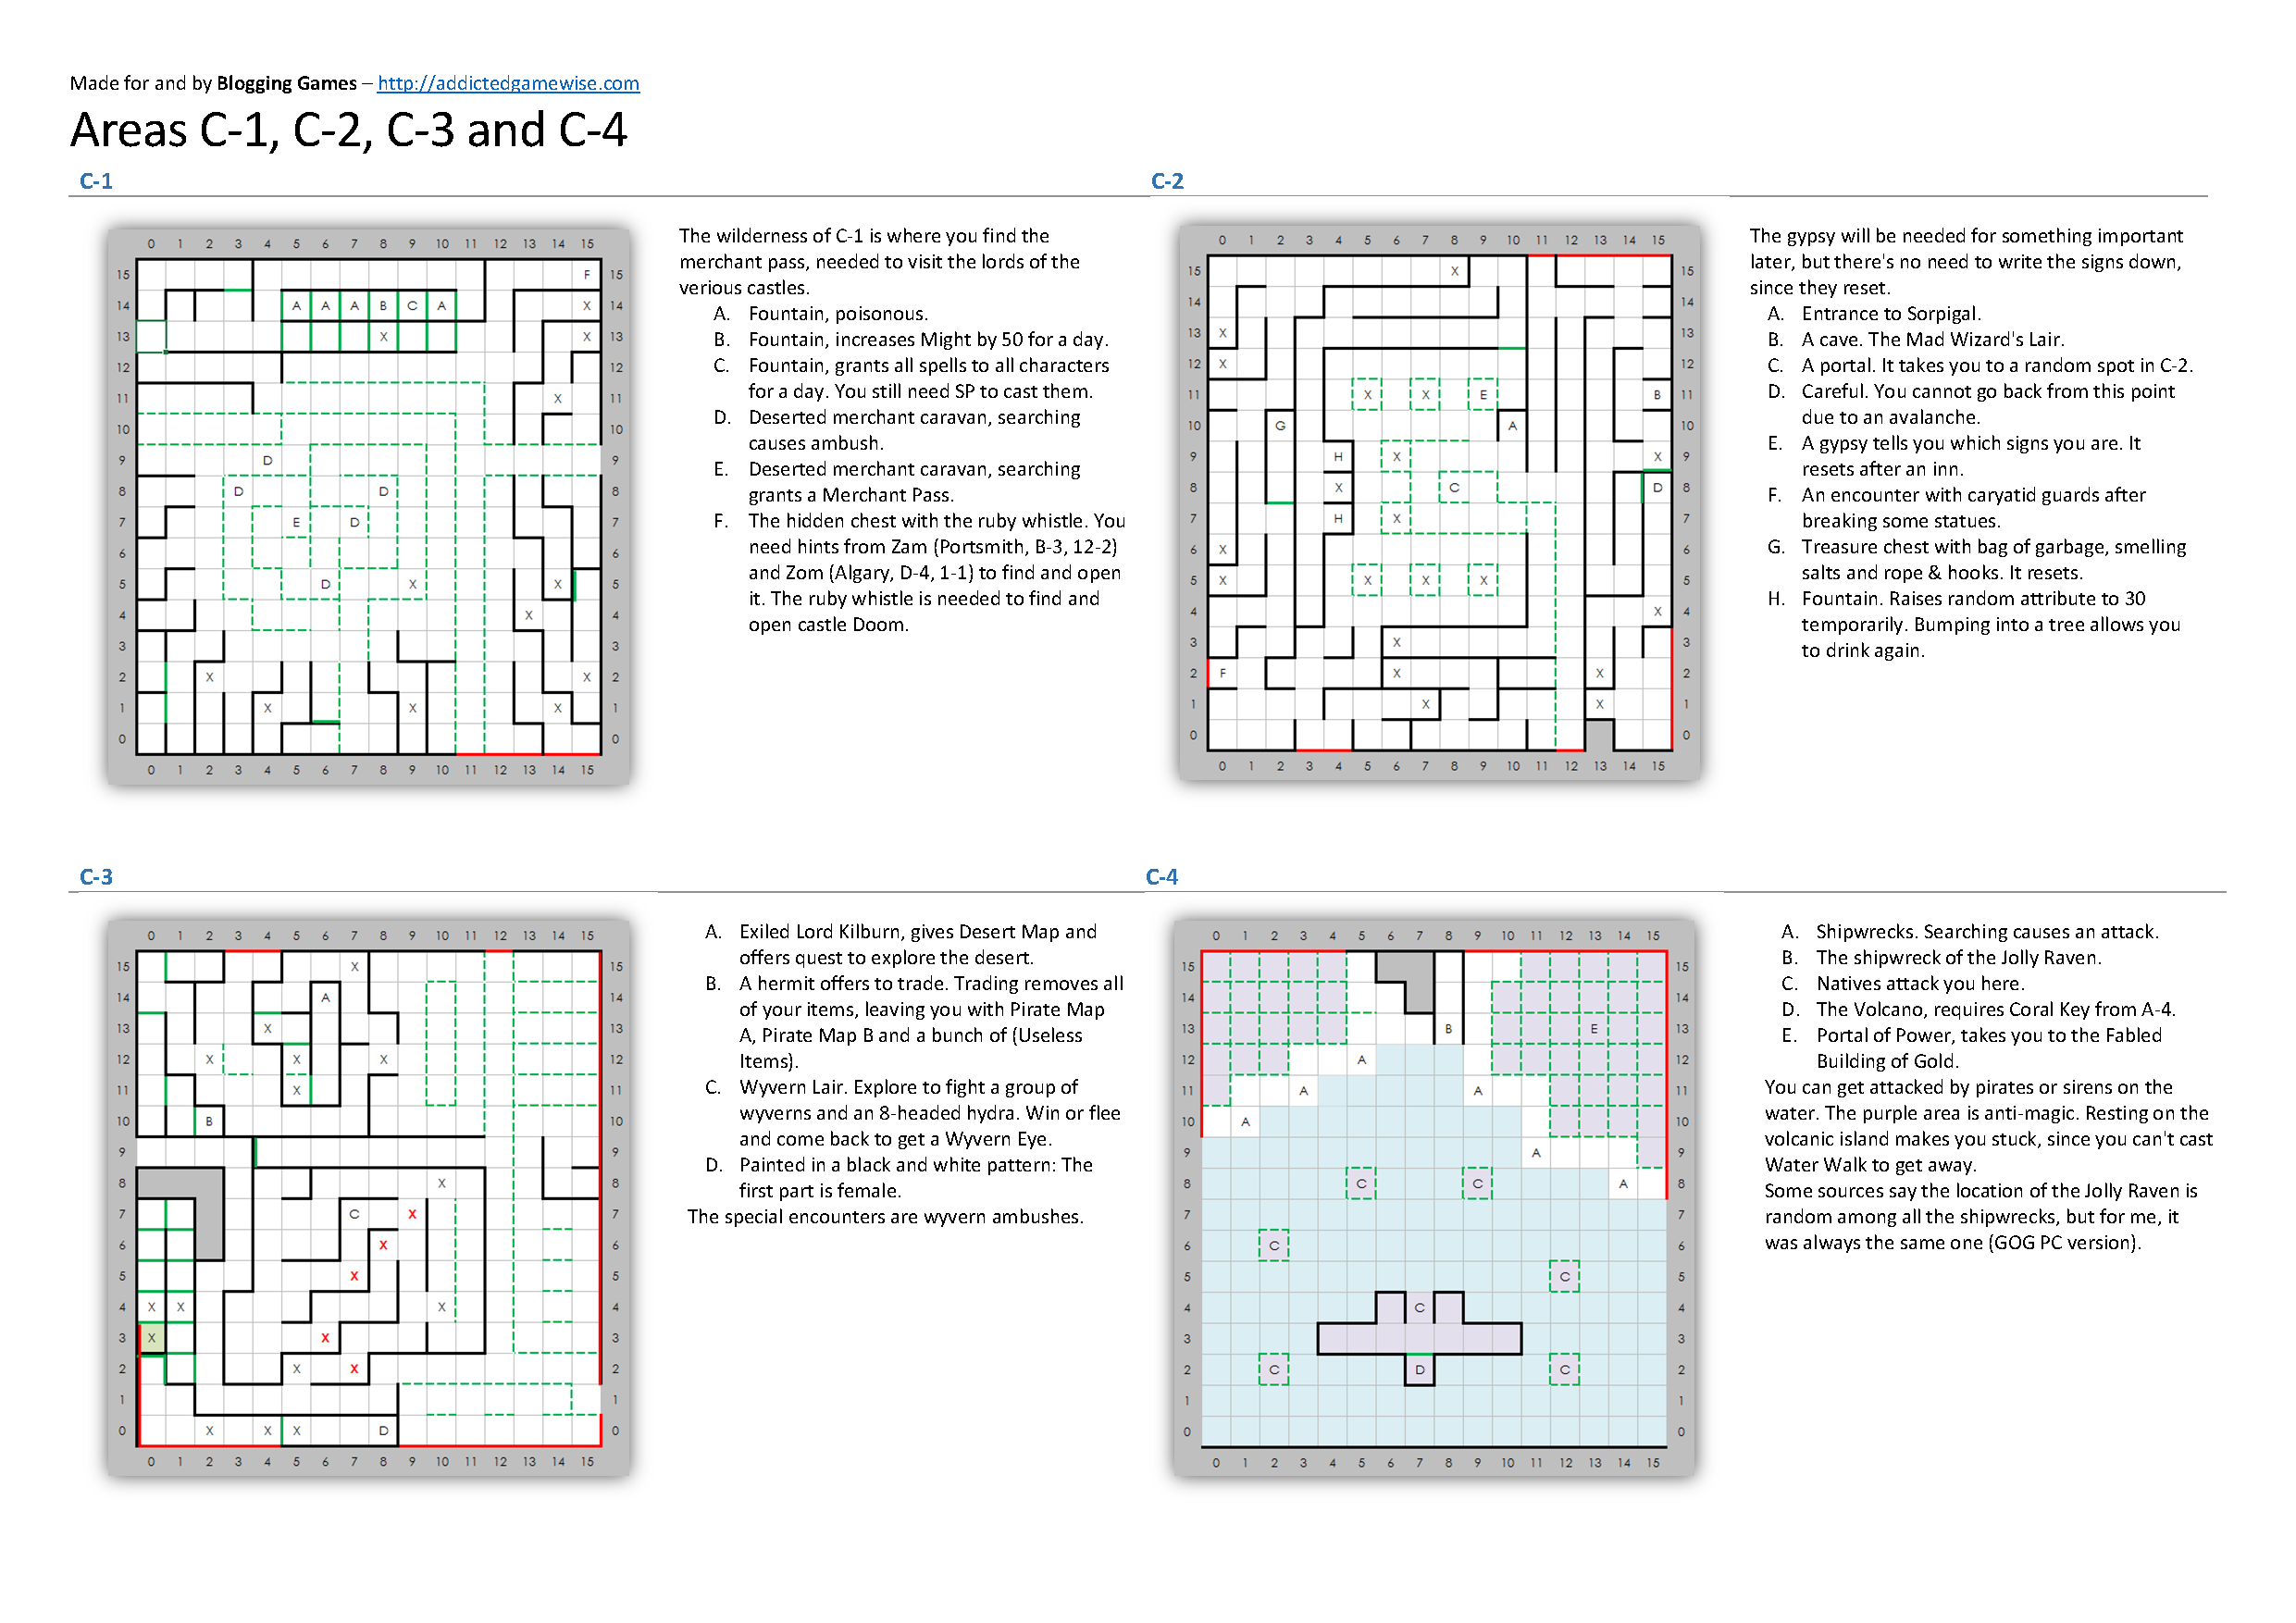
The Areas of C-1 to C-4
Soprigal, Wyvern Peaks, some magical pools and the Volcano.
Click to expand.
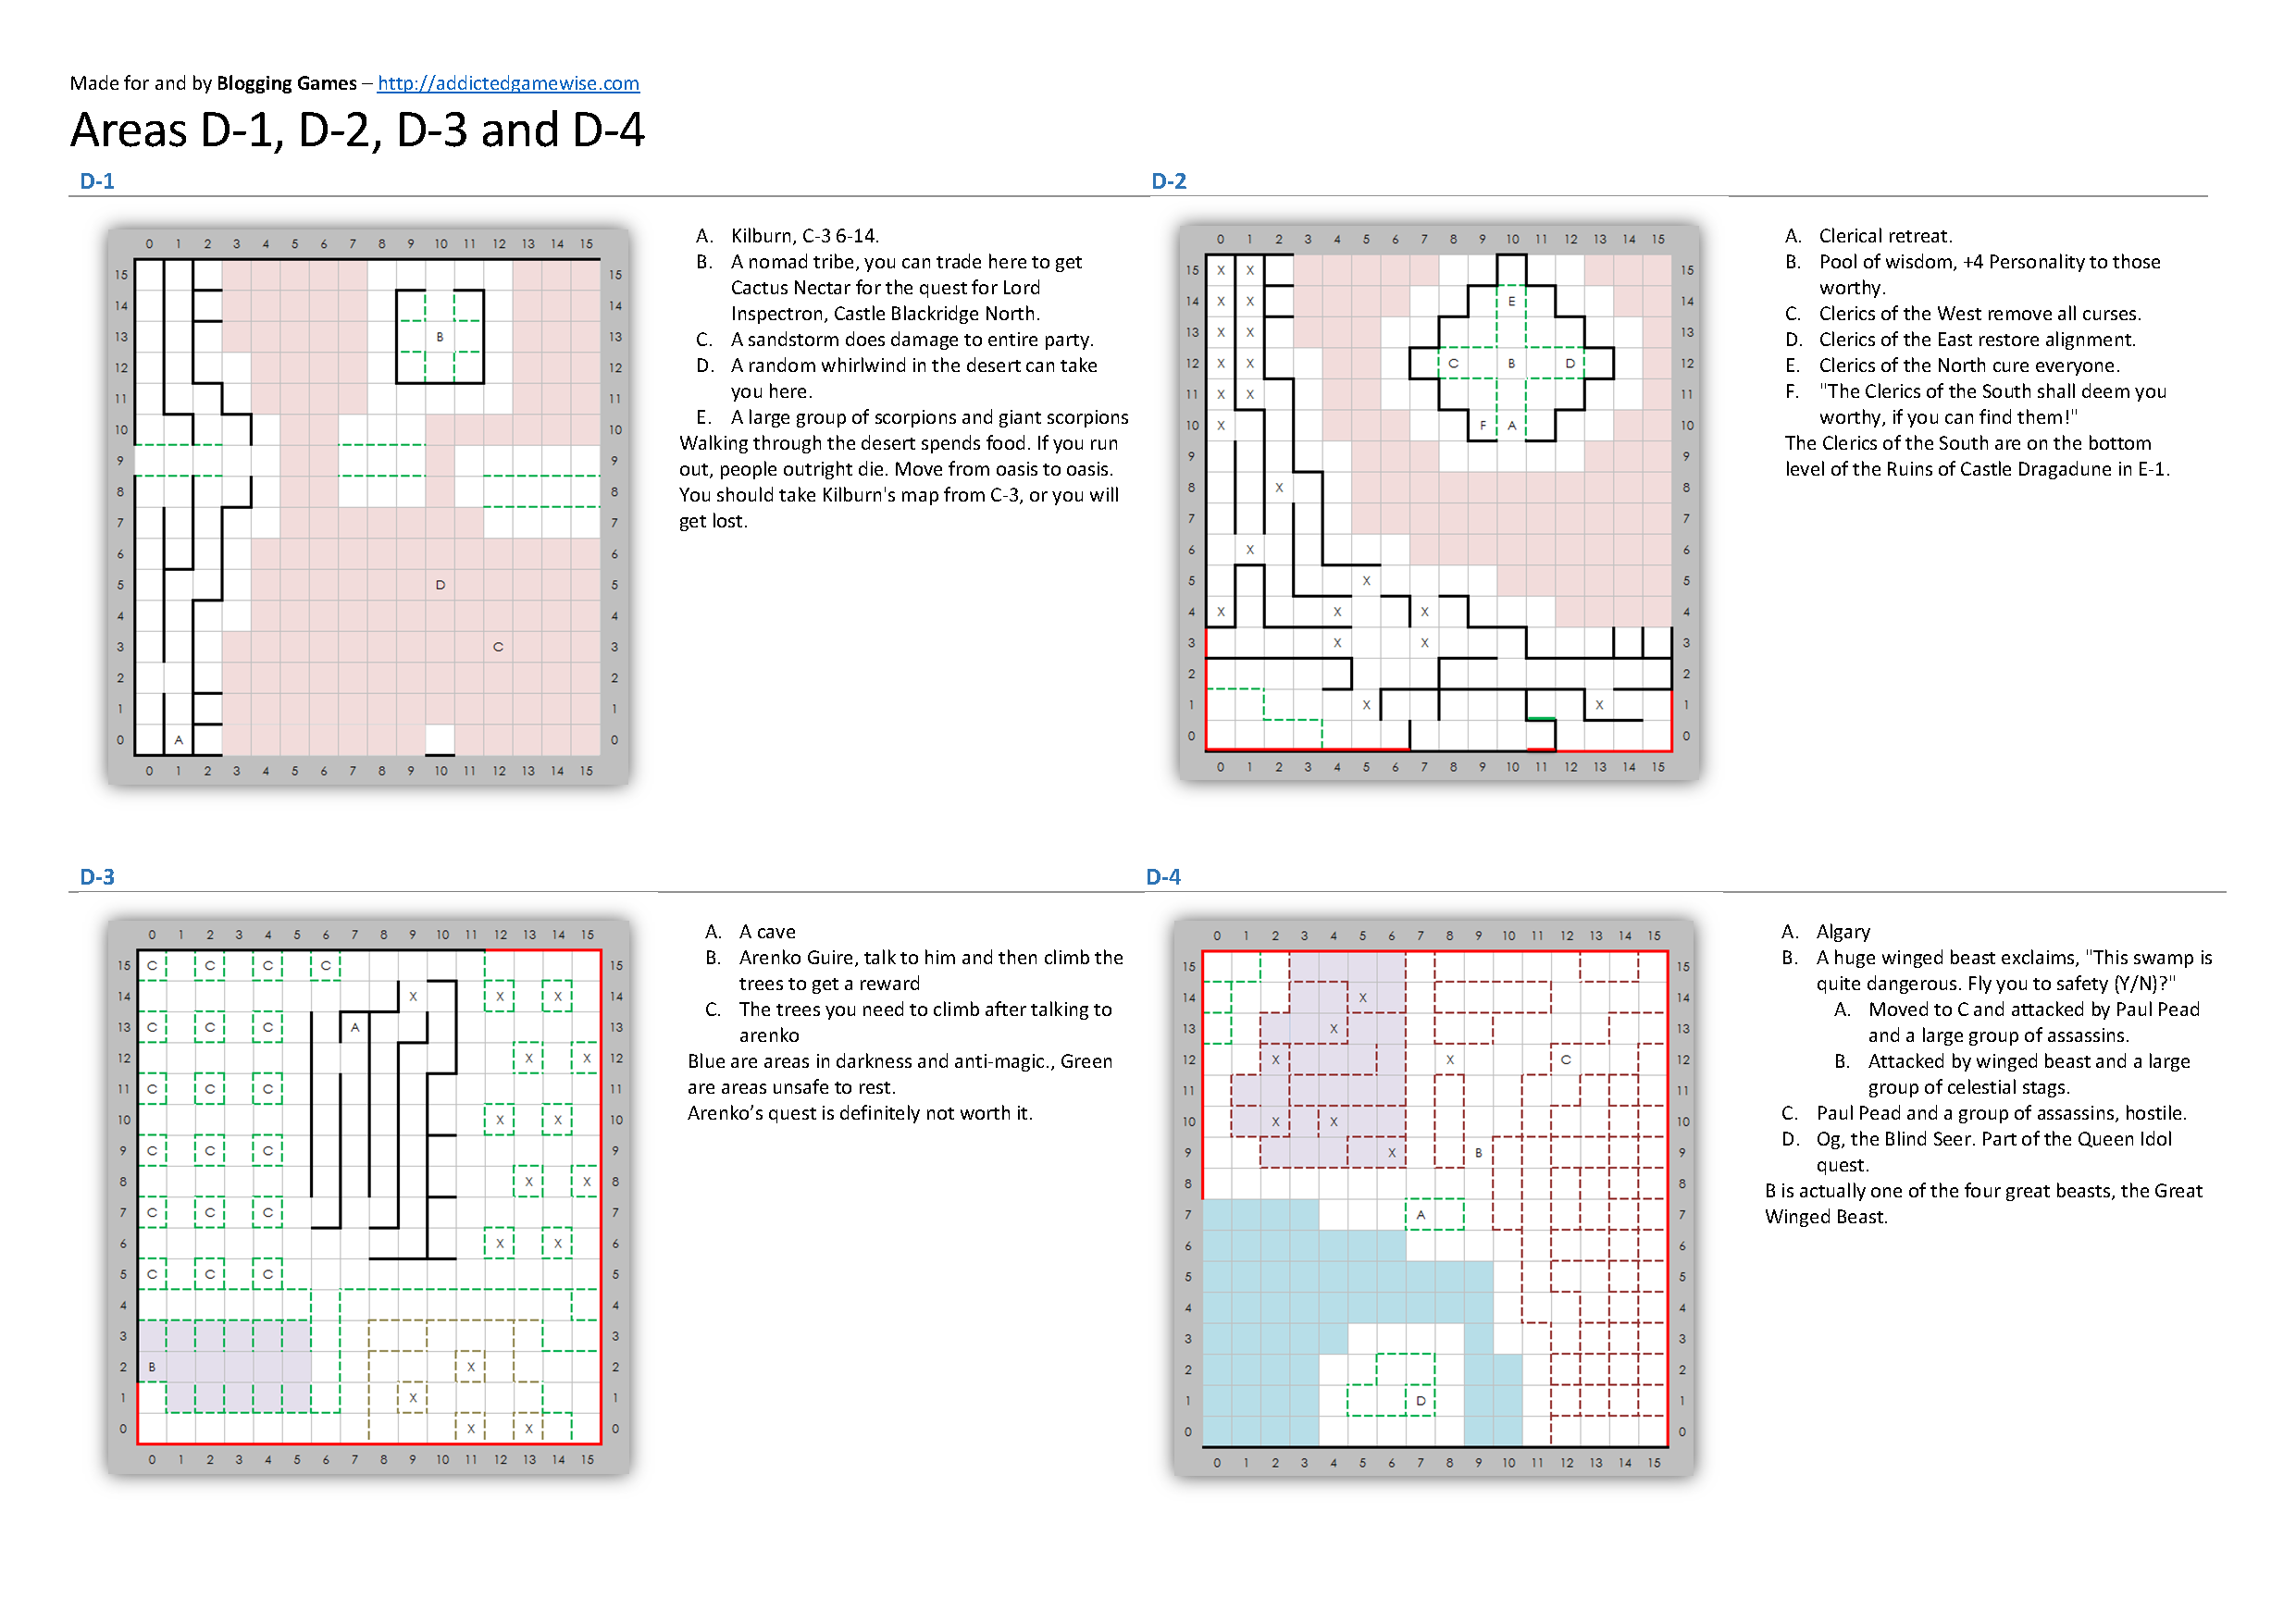
The Areas of D-1 to D-4
Mostly desert and swamp, and Algary.
Click to expand.
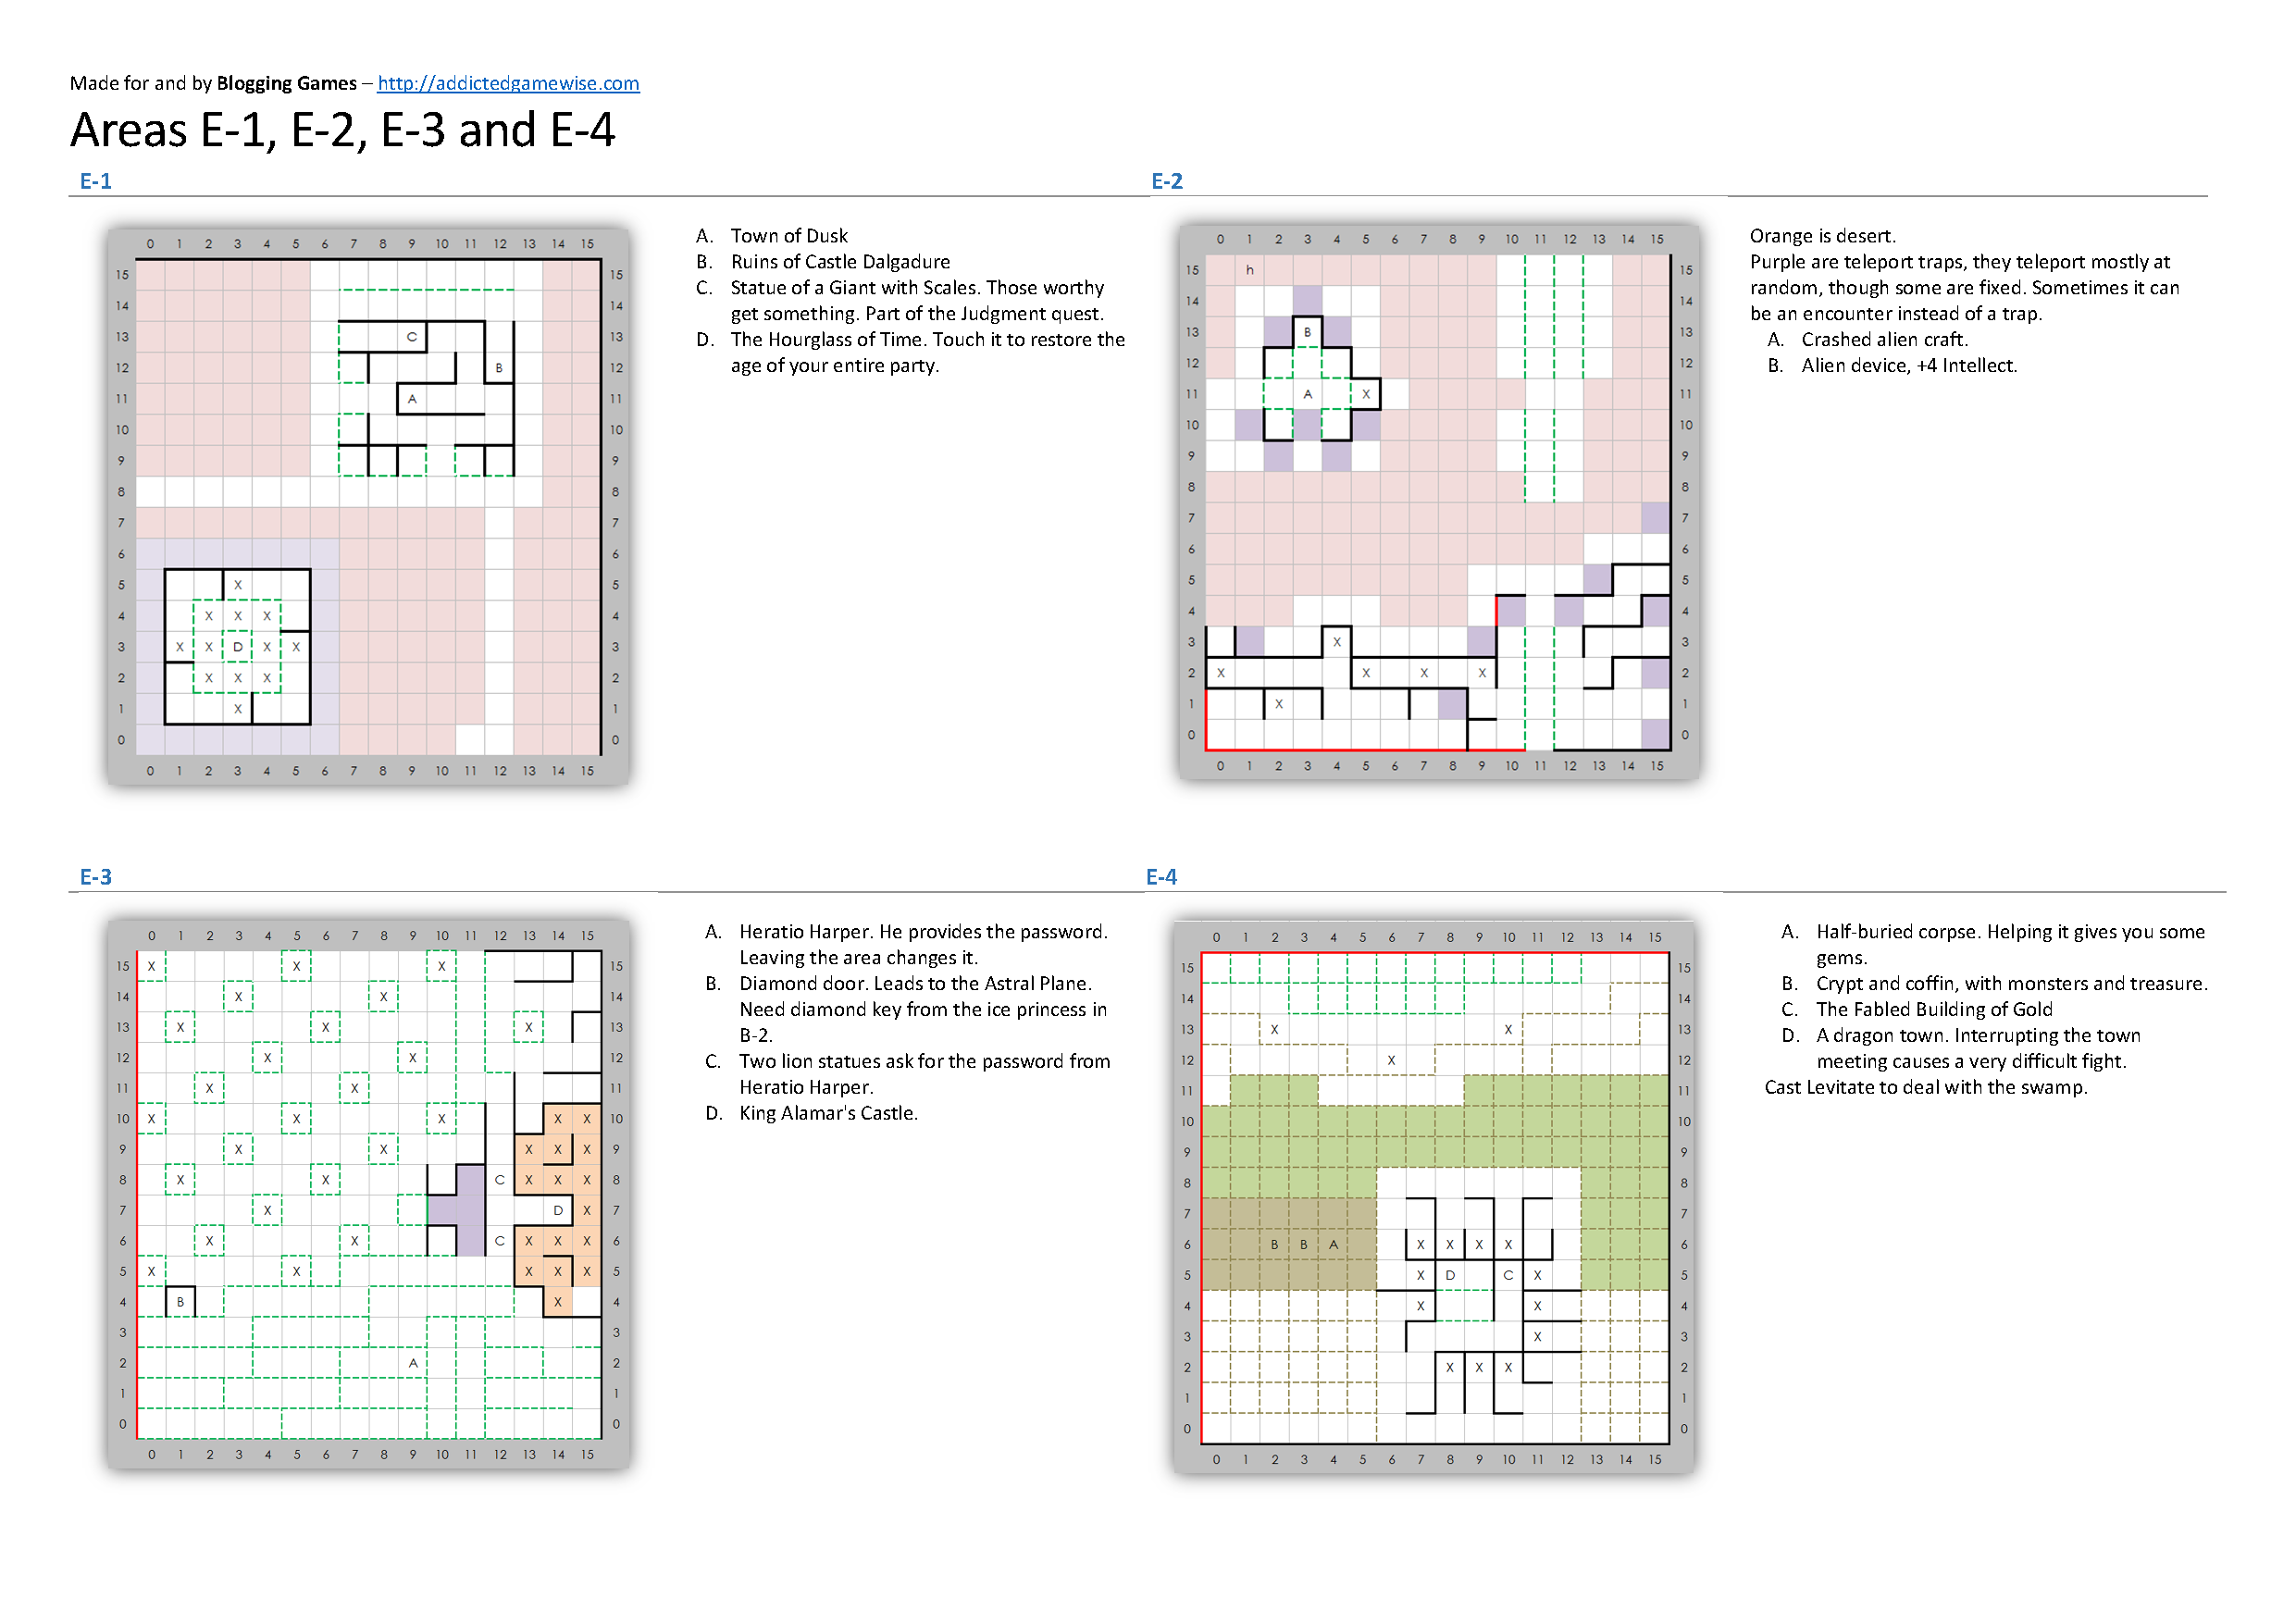
The Areas of E-1 to E-4
More desert and more swamps. Extremely dangerous. Challenge the dragon town if you dare!
Click to expand.
Downloads
For your convenience, I’ve packed these maps into single file archives, one for the DOCX files of the maps with notes and one for the Excel files of the maps themselves.


