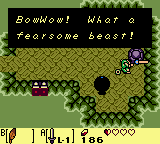
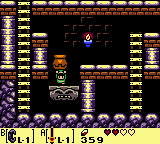
I’ve noticed Link’s Awakening is a bit less formulaic compared to the original Legend of Zelda and A Link to the Past. I got out of the dungeon, with the owl immediately telling me the swamp is my next goal and as I got back to the village, I was told there was a moblin attack. The game pointed me in the direction of madam Meow Meow, where I wound out they took her dog.
Before I forget this, I took a note of something in the Tail Cave
- There’s a bomb-able wall in one of the rooms in the Tail Cave dungeon
Rescuing Madam Meow Meow’s Dog
In any case, again, various hints within the game told me I can find the moblin lair somewhere in the highlands. I made the mistake of going straight for the swamp, though, so I spent some time looking for the place. With my new jumping ability, I found some chests with rupies, so I was getting close to buying the shovel from the village shop, but I couldn’t find the moblin lair anywhere.
Where is the Moblin Dungeon in Link’s Awakening?
I decided to go back to the village and start looking from the start again. This turned out to be a good idea. I found there’s a chasm I can jump over on the screen with the witch’s hut and that was finally the route I needed to take. The moblin cave was a few screen’s after that.
The moblin lair was basically a smaller dungeon, with a couple of rooms where I needed to defeat all the enemies and a mini-boss in the final room. The boss was easy to defeat, but I’m not used to following patterns and playing carefully (to few games these days ask for this), so I managed to lose on my first try. The trick was to just dodge the boss until it crashes the wall and then hit him once. Doing this a couple of times was enough to defeat him.
Exploration
I got madam Meow Meow’s dog and I loved having it with me. It was basically a companion which attacks enemies nearby automatically and can even kill enemies I can’t hurt. This turned out to be the key in entering the next dungeon – Bottle Grotto, but more on that later.
I spent some time exploring and found a few more items. I got another heart container near the area with the witch’s hut, in a very obvious place. I can’t be sure, but I think I also found another one somewhere nearby. I need to take better notes. I also got several chests with rupies, so I got more than enough for the shovel, but I didn’t buy it yet, mostly because I didn’t get around to going back to the village.
Finally, I got to the next dungeon, the Bottle Grotto. I stumbled into it earlier on, but I couldn’t enter it because it was surrounded by plant enemies I couldn’t hurt (but they sure could hurt me). As I said, the key to entering was the dog. It had no problem devouring the plants and clearing a path.
Link’s Awakening Dungeon #2 – The Bottle Grotto
The Bottle Grotto was definitely harder than the Tail Cave. The layout was circular, with two basic paths I could explore. The left path was shorter, required a key and took me to the room with the Owl Beak.
Owl Beak, you ask? I forgot to mention this in my previous posting, but some of the rooms int he dungeons have beakless Owl statues. Finding the beak gives Link the ability to get hints from the statues, which was extremely helpful in the Bottle Grotto.
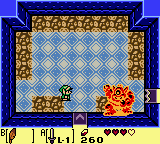
The cyclops was easy to beat. You need to dodge the bombs and hit him when he calms down. That’s it.
The right path was much longer and it lead me to a side scrolling area, which then lead me to the second half of the dungeon and a cyclops mini-boss. Throughout all of this, I was mostly fighting bats and skeletons with a couple of those enemies that mimic Link’s actions. The cyclops was easy to beat. I just had to dodge his bombs and movement, while hitting him when I had the chance.
Next up was an annoying room with bats and a “magnet” which pulled everything towards it. Of course, the room was also full of chasms, so I ended up losing a lot of health in that one.
The Power Bracelet
A few rooms after the cyclops room, I finally found the treasure of the dungeon, the Power Bracelet. A few moments after that, I found one of the game’s annoyances. For some reason, the designers decided that every time I run into a lift-able object without having the power bracelet equipped, I would get a dialogue box slowly telling me “I can’t just lift this object with my bare hands”. In a dungeon where you constantly have to switch between the Power Bracelet and the Roc Feather, this got really annoying, really fast.
After getting the bracelet, I explored the rest of the area and spent a lot of time being lost, trying to figure out where the Nightmare Key was.
The Bottle Grotto Nightmare Key
Thanks to the Compass and it’s new ability to chime every time I enter the room with a hidden key, I found the room where the Nightmare Key was supposed to be. It was the room with a cloaked swordsman enemy, a bat and one of those rabbit enemies. Again, since I’m bad with names, I had to google the name of the bat enemies. The bat enemies are called Keese. As for the other two, the game told me their names. The rabbits are called Pols Voice and the swordsmen are Stalfos.
As I said, an Owl statue was important in the Bottle Grotto. There was a side scrolling area connecting the Nigthmare key room and an Owl statue room. The Owl statue outright told me I need to kill the “Trapped Polls Voice” first and the Stalfos last. Logically, this meant the killing order in the Nightmare key room was
- Pols Voice (the rabbit)
- Keese (the bat)
- Stalfos (the skeleton)
Killing them in this order made a chest appear and I finally had the nightmare key. Two rooms later, I was in the room with the Nightmare door. A few more rooms and another side scrolling area after that and I was in the boss room.
The Genie Boss of the Bottle Grotto
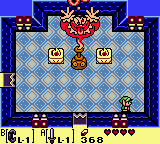
OK. It’s possible Link’s Awakening DX is giving me a few hints to many, because the Genie almost outright told me what I needed to do to kill it. The pattern was easy to figure out. First, the Genie is out of it’s bottle, throwing fireballs at me. After dodging 8 of those, he goes back into the bottle. Picking the bottle up and throwing it does some damage and causes the Genie to come back out and throw fireballs again. Repeating this four time destroys the bottle.
After that, the Genie floats around and throws fireballs. Hitting it causes it to go invincible, split up and move around in a spiral for a while, before being hit-able again. A few more of these hits and the battle is over.
Simple, but again, I’m out of practice. I probably had to repeat the battle ten or so times before I finally got it right. I got annoyed to, because it’s quite a trek to get from the entrance to the boss room, even with the warp shortcut. Even worse, I had to switch between the Bracelet and the Feather a couple of times on the way there, which meant there was a lot of dialogue cancelling.
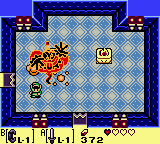
The second phase of the battle is harder, but Link has plenty of health if the first part is done right.
Still, knowing you’re getting better at the game with each try is a great feeling and part of why I decided to do this Legend of Zelda challenge. Eventually, I got to the point where I could go through the bottle phase without getting hit and finally, I beat the Genie with one heart remaining.
I got the second instrument, the Conch Horn and the Bottle Grotto was clear. Next up, the Savannah.

