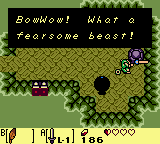
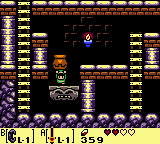
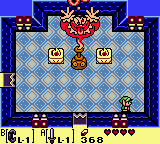
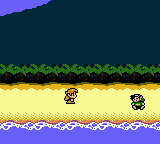
I finally got through Grandia and I’m about to complete Link’s Awakening as well. Since I started Tomba! months ago, I decided to stick with it and complete it, before going to anything else. It’s a fun game and I’m in danger of burning out on RPGs. The problem is, I can’t remember a thing!
Category: Adventure
Link’s Awakening [10] – The Face Shrine
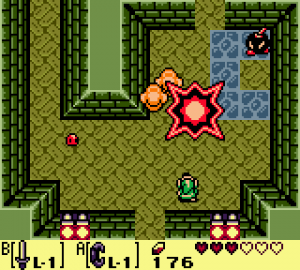
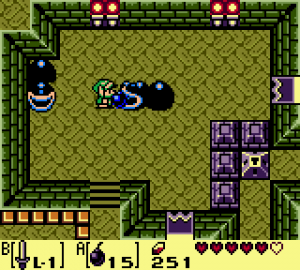
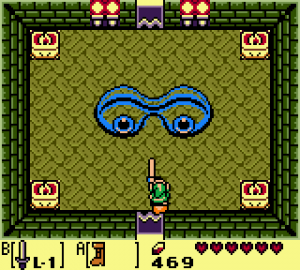
Maybe it’s the game, but I prefer to think it’s me. By this point, I started to get the hang of Link’s Awakening. The game can be difficult, but as long as I’m focused and I avoid carelessness, I can easily get through most of the challenges it throws at me. It requires skill, but it’s fair and forgiving when it needs to be. At no point did I feel tricked out of a victory.Continue reading
Link’s Awakening [9] – Exploring With the Hook Shot
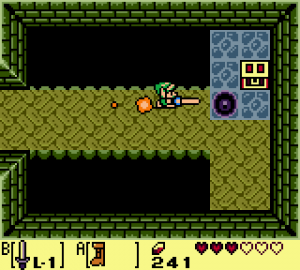
The hook shot is one of those items that usually open up quite a bit in the worlds of the Legend of Zelda games, especially in the shortcut department, so I was looking forward to exploring for a bit. I figured Link’s Awakening can’t be an exception to this.Continue reading
Link’s Awakening [8] – The Catfish’s Maw
Compared to the Angler’s Tunnel, the Catfish’s Maw was hell, in terms of difficulty. Objectively speaking, though, once you figure out the layout and the tricks, it wasn’t too hard. What it was, was again, very unique.Continue reading
Link’s Awakening [7] – Preparing for the Catfish’s Maw
Making the preparations to enter the next dungeon in Link’s Awakening, Catfish’s Maw was a bit of an “on rails” experience, with the game guiding me through most of it.Continue reading
Link’s Awakening [6] – The Angler’s Tunnel
I Entered the Angler’s Tunnel
It seems to me like the difficulty of Link’s Awakening isn’t on a constant increase like you would expect with your typical game. The Angler’s Tunnel, for instance, was an extremely easy dungeon. Don’t get me wrong, I did die once, but that was only because I entered it at low health and then got hit twice. Outside of that, there were no deaths.
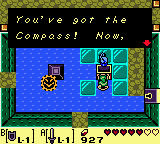
I got the compass within the first few rooms. The stone beak was right after that and the map soon after.
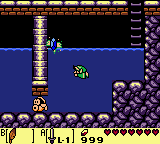
This was a water dungeon, but it was no Water Temple, of which I heard the dreadful stories, but had no first-hand experience. Most of it just consisted of navigating through shallow water, avoiding enemies pushing you into deep water, going back and forth from one side of the dungeon to the other and getting keys.
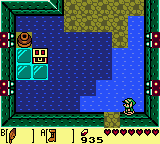
I spent a lot of time trying to make the jump across the deep water here. I don’t think it’s doable.
The enemies were easy. I mostly had to fight Spiked Beetles and Red and Green Zols, with a bunch of Peahats, Sparks and Whisps to avoid for good measure. I also encountered a brand new enemy – the Iron Mask. This guy inspired the zombies in the Binding of Isaac. You have to hit it from behind in order to kill him, but he moves slowly, so it isn’t hard to actually get behind it.
I Fought the Cue Ball
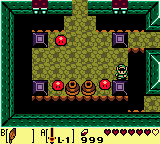
This time, the mini-boss was appropriately placed almost exactly half-way through the dungeon. It was extremely easy to beat. The Cue Ball, as I found out it’s called, just kept charging at me around the central wall. The only thing I had to do was to keep charging away from it until I caught up a full circle and hit it from behind, by dashing into it. I think I was hit once, but that was only because I was being careless.
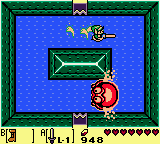
Cue Ball, the mini-boss, was ridiculously easy. I got hit only once. You just charge around the center and hit it in the back.
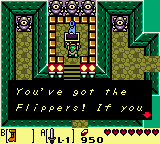
The Cue Ball guarded the item of the dungeon – the Flippers. The Flippers are a passive item and probably one of the most useful items in the game. I can now swim through water, which means no water surface will ever be a danger to me again. I can also press A to swim a bit faster or, even better, press B to dive, which avoids all attacks for a short time. The flippers made the extremely easy Angler’s Tunnel even easier.
How to get the Nightmare Key in the Angler’s Tunnel
After getting these, there was a slight challenge in finding the Nightmare Key. Technically, I knew exactly where it was, but I had trouble figuring out how to get to it. After a few minutes, it dawned to me. There were two rooms in the dungeon, each with five special tiles. In one of the rooms, a glow that shifted from tile to tile indicated on which tile I needed to step on. Stepping on all of them in the correct order opened a door.
In the other room with five tiles, there was no glow, but stepping on them in the same order as in the previous room had the same effect, except this time, it revealed a hidden stairway. Getting through the stairway got me to the platform with the Nightmare Key, just a few rooms away from the boss room.
Also, the room right before the boss room had a nifty shortcut. Instead of going the long way around, the Roc Feather allowed me to just jump over the chasm. It was a bit of a tricky move, but it was doable.
I Fought the Angler Fish
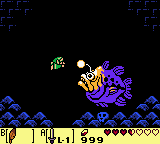
The boss was unique, compared to what I’ve seen up to now. It was easy, but it was unique. I had to fight the Angler Fish in a side-scrolling area below the actual boss room. I first tried being tactical and avoiding its attacks, but then I realized I could just stand in one spot and swing my sword until it was dead. I started out at full health and, even with some mistakes, I had more than half remaining when the Angler Fish died. I’m not sure if I should even count it as an actual boss.
In any case, I got the Surf Harp, which is the fourth instrument, and I got my heart container, so I guess the game did count it as a boss. Next up, I have to go to the bay. It looks like I’m half way through the game now, or if it’s like A Link to the Past, I might be only a quarter way through. We shall see.
Link’s Awakening [5] – Finding the Angler’s Key
Getting the Honey
I got out of the Key Cavern and then circled back around Richard’s house to explore for a bit. I took a wrong turn and stumbled into the area with the beehive, which turned out to be very lucky, because Tarin was there, and he asked for the stick I got from the monkey. He used the stick on the beehive, so the bees chased him away and I was able to get some honey. Here’s a note for a random googler:
- After the Key Cavern, go to the beehive and give Tarin the Monkey Stick for some Honey
The Color Dungeon
I then went back to the village to use dash on the unreachable book in the library. The book contained hints on how to enter the Color dungeon, which is a secret dungeon in the DX version of Link’s Awakening, I’m guessing. There were some numbers with some direction in the book, as well as a mention of the graveyard and finding the correct grave stone. In hindsight, I should have probably written all of this down, so I’ll have to come back later to do just that.
- Color dungeon hint: Use dash to knock down book in the village library
Papahl Lost in the Hills
I decided to go north, past the Mysterious Woods again. I took a look at the egg, to hopefully get a screenshot this time, but it looks like my emulator is somehow overwriting them, so I didn’t get one this time either.
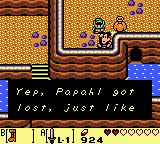
I was able to get a bit further with dash this time, so I got to a screen where I could see Papahl. I guess he finally got lost in the hills as he said he would. I couldn’t reach him, though, or, in hindsight, maybe I could, but I just didn’t realize at the time.
The “Desert”
I went back to the Savannah and with dash, found a way into a desert area filled with (currently) unkillable dragon knights. I thought this was the desert the owl told me to go to after the Key Cavern, but it turned out I was wrong. I died, so I went in a different direction from the last check point and got to the Animal Village.
The Animal Village
At the Animal Village, I was immediately told that Yarna desert was to the south, so the part I died in was not the desert at all, since it was to the north. I started exploring the village, taking notes as I went along.
- The Animal Village and the Mabe Village are “Twin Cities”. Mabe Village is the starting village?
- A bunny loves hearing Marin sing
- There’s a Dream Shrine in Mabe Village. I don’t know what that means.
- There’s a painter who made the mermaid statue by the bay.
- There’s a writer, like the one in the north. She wants a Hibiscus flower before talking to me.
- There’s a cave in the back of the village, but I don’t have any bombs at the moment.
- I traded the Honey for a Pineapple with a bear chef in one of the houses.
- A walrus is blocking the way to the Yarna desert. Marin can wake him up.
It was obvious I need to go back to Mabe Village and get Marin, so that’s exactly what I decided to do. Before that, though, I wanted to figure out what that armor knight place was.
The Armor Knight Area
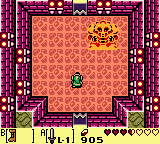
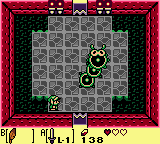
I went back north and carefully navigated through the maze, dodging enemies. I found a seashell in one of the nooks and finally reached a small dungeon. There was just a boss room in there and the boss was difficult, at least at first. The only thing I could hit him with was my dash, but dashing to hard or at the wrong moment meant getting hit myself.
After many attempts, I managed to get through all three phases of the fight and finally beat it. This got me the Face Key, which I have no use for right now, and it opened the way into the back room, where there was a mural.
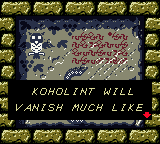
The Mural said the whole island is just a dream, dreamt up by the Wind Fish. If I wake up the dreamer, the dream will go away. I will be able to go to, but the dream will be gone. I actually knew about this plot point from a video before, but now that I played through the game a bit and realized what a charming world it was, this made me kind of sad.
I got out of the dungeon and the owl was there, saying there’s no way to be sure if what I read was true. The only one who really knows is the Wind Fish and the only way to find out was to wake it up. In any case it was time to go get Marin.
Getting Marin
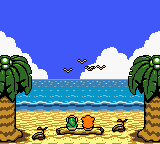
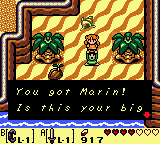
Marin was at the beach, south of Mabe Village. Finding her triggered another cut scene with more charming scenery, making what I just discovered that much stronger. After a talk, Marin joined Link and I took her to the Animal Village via a nearby shortcut. She woke up the walrus and I was able to get to the desert.
The Yarna Desert
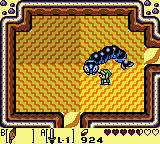
The desert consisted of several screens and it wasn’t to hard too clear. The last screen contained a mini-boss who guarded the Angler’s Key. Even the boss was extremely easy, so I didn’t die at all here. All I had to do was to dodge its slow movement, hit it when I could and avoid falling through the quicksand. I can’t be completely sure, but I think I also got a seashell while I was there.
The Waterfall
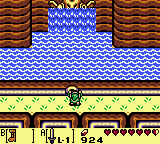
The lock the Angler’s key was meant for was north of the Savannah, next to a huge waterfall. I already walked past the lock several times while exploring, so I knew exactly where to go. It was even near a warp point, so getting there was easy.
Using the key on the lock caused to waterfall to retreat, opening the way to the Angler’s Tunnel, the next dungeon. I could get there from the lock, though. I had to go several screens west, then north, through a cave and finally to the place where I’ve seen Papahl in the hills.
As I said before, I wasn’t sure if I could reach him, but now I definitely could. The water that blocked the way was actually shallow, so I could walk through it. It’s possible that using the key made the water shallow, but it’s also possible it was like that to begin with and I just didn’t notice.
Saving Papahl in the Hills
In any case, I got to Papahl and talked to him. He was hungry, so I gave him the Pineapple, getting a Hibiscus flower in return. I already know who to give that to, but right now, it was time to get into the dungeon. Here’s a note first:
- Give Pineapple to Papahl in the Hills, in exchange for the Hibiscus flower.
To get to the Angler’s Tunnel entrance, I had to go to the screen directly north of it and then jump down. This got me right in front of the dungeon. There were also stairs next to the entrance, which lead to a one-way cave back down to the main area, next to the Angler’s Key lock.
I got into the dungeon and did a “Save & Quit”. That was it for now.
Link’s Awakening [4] – The Key Cavern
Key Cavern, the third dungeon of Link’s Awakening, was definitely a big jump in difficulty compared to the first two. I started dying on a regular basis here, mostly because some of the enemies started doing larger amounts of damage, compared to the half hearts I was losing up to now.
Even so, I somehow managed to get both the map and the compass, though I only got the compass when I already explored most of the dungeon. The focus of the dungeon was getting four keys in order to gain access to the boss area. The boss area was a separate area of the dungeon, connected with the main area by a side scrolling part, hidden behind a total of four lock blocks. Basically, it was all about getting keys. I needed to get one key to enter a room with another key, etc., until I got into a series of rooms where I could get more than key at a time.
Mini-Boss: Dodongo Snakes
The mini-boss was a pair of worms that swallow bombs, so that was the only way to kill them. The difficulty there was that I could only carry ten bombs at a time, and I needed 8 in total to kill both of them. They love to change movement directions, so it was easy to waste a bomb. After several attempts, I managed to do it with one bomb left. This got me one more key and I was finally able to enter the room with the item of the dungeon – the Pegasus Boots.
Item: Pegasus Boots
The Pegasus Boots allow link to dash, which allows him to kill some enemies more easily, break through some objects, such as those green crystal pillars, and when combined with the Rock Feather, jump greater distances. The last ability was the crucial to get the Nightmare Key and eventually, get to the boss room.
Boss: Slime Eyes
The Key Cavern boss was a giant blob with an eye in the middle. It was actually easy, compared to the rest of the dungeon and the Bottle Grotto’s boss. In the first phase, I had to dash into it until I managed to split it in two. On each hit, Link gets knocked back, so the difficult part was staying on top of the boss and dashing into him before he recovered.
Once the first phase was over, I just had to kill each of the two halves. The key here was not to spam-attack both of them, because then both would jump into the air, jump back down, stun Link and then damage him. Focusing on one at a time on my second attempt made the second phase extremely easy and the fight was one.
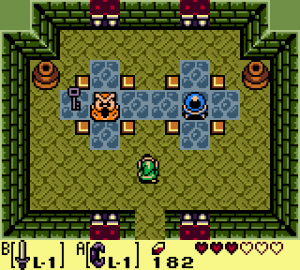
This room is easy to clear, it’s close to some stairs, and it contains a heart or two. Great for healing!
I got another heart container and another instrument – a Bell. Now, it was time to explore the world with my new dashing ability. I already have a couple of locations in mind. The Key Cavern is done for.
Link’s Awakening [2] – The Bottle Grotto
I’ve noticed Link’s Awakening is a bit less formulaic compared to the original Legend of Zelda and A Link to the Past. I got out of the dungeon, with the owl immediately telling me the swamp is my next goal and as I got back to the village, I was told there was a moblin attack. The game pointed me in the direction of madam Meow Meow, where I wound out they took her dog.
Before I forget this, I took a note of something in the Tail Cave
- There’s a bomb-able wall in one of the rooms in the Tail Cave dungeon
Rescuing Madam Meow Meow’s Dog
In any case, again, various hints within the game told me I can find the moblin lair somewhere in the highlands. I made the mistake of going straight for the swamp, though, so I spent some time looking for the place. With my new jumping ability, I found some chests with rupies, so I was getting close to buying the shovel from the village shop, but I couldn’t find the moblin lair anywhere.
Where is the Moblin Dungeon in Link’s Awakening?
I decided to go back to the village and start looking from the start again. This turned out to be a good idea. I found there’s a chasm I can jump over on the screen with the witch’s hut and that was finally the route I needed to take. The moblin cave was a few screen’s after that.
The moblin lair was basically a smaller dungeon, with a couple of rooms where I needed to defeat all the enemies and a mini-boss in the final room. The boss was easy to defeat, but I’m not used to following patterns and playing carefully (to few games these days ask for this), so I managed to lose on my first try. The trick was to just dodge the boss until it crashes the wall and then hit him once. Doing this a couple of times was enough to defeat him.
Exploration
I got madam Meow Meow’s dog and I loved having it with me. It was basically a companion which attacks enemies nearby automatically and can even kill enemies I can’t hurt. This turned out to be the key in entering the next dungeon – Bottle Grotto, but more on that later.
I spent some time exploring and found a few more items. I got another heart container near the area with the witch’s hut, in a very obvious place. I can’t be sure, but I think I also found another one somewhere nearby. I need to take better notes. I also got several chests with rupies, so I got more than enough for the shovel, but I didn’t buy it yet, mostly because I didn’t get around to going back to the village.
Finally, I got to the next dungeon, the Bottle Grotto. I stumbled into it earlier on, but I couldn’t enter it because it was surrounded by plant enemies I couldn’t hurt (but they sure could hurt me). As I said, the key to entering was the dog. It had no problem devouring the plants and clearing a path.
Link’s Awakening Dungeon #2 – The Bottle Grotto
The Bottle Grotto was definitely harder than the Tail Cave. The layout was circular, with two basic paths I could explore. The left path was shorter, required a key and took me to the room with the Owl Beak.
Owl Beak, you ask? I forgot to mention this in my previous posting, but some of the rooms int he dungeons have beakless Owl statues. Finding the beak gives Link the ability to get hints from the statues, which was extremely helpful in the Bottle Grotto.
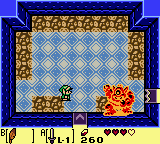
The cyclops was easy to beat. You need to dodge the bombs and hit him when he calms down. That’s it.
The right path was much longer and it lead me to a side scrolling area, which then lead me to the second half of the dungeon and a cyclops mini-boss. Throughout all of this, I was mostly fighting bats and skeletons with a couple of those enemies that mimic Link’s actions. The cyclops was easy to beat. I just had to dodge his bombs and movement, while hitting him when I had the chance.
Next up was an annoying room with bats and a “magnet” which pulled everything towards it. Of course, the room was also full of chasms, so I ended up losing a lot of health in that one.
The Power Bracelet
A few rooms after the cyclops room, I finally found the treasure of the dungeon, the Power Bracelet. A few moments after that, I found one of the game’s annoyances. For some reason, the designers decided that every time I run into a lift-able object without having the power bracelet equipped, I would get a dialogue box slowly telling me “I can’t just lift this object with my bare hands”. In a dungeon where you constantly have to switch between the Power Bracelet and the Roc Feather, this got really annoying, really fast.
After getting the bracelet, I explored the rest of the area and spent a lot of time being lost, trying to figure out where the Nightmare Key was.
The Bottle Grotto Nightmare Key
Thanks to the Compass and it’s new ability to chime every time I enter the room with a hidden key, I found the room where the Nightmare Key was supposed to be. It was the room with a cloaked swordsman enemy, a bat and one of those rabbit enemies. Again, since I’m bad with names, I had to google the name of the bat enemies. The bat enemies are called Keese. As for the other two, the game told me their names. The rabbits are called Pols Voice and the swordsmen are Stalfos.
As I said, an Owl statue was important in the Bottle Grotto. There was a side scrolling area connecting the Nigthmare key room and an Owl statue room. The Owl statue outright told me I need to kill the “Trapped Polls Voice” first and the Stalfos last. Logically, this meant the killing order in the Nightmare key room was
- Pols Voice (the rabbit)
- Keese (the bat)
- Stalfos (the skeleton)
Killing them in this order made a chest appear and I finally had the nightmare key. Two rooms later, I was in the room with the Nightmare door. A few more rooms and another side scrolling area after that and I was in the boss room.
The Genie Boss of the Bottle Grotto
OK. It’s possible Link’s Awakening DX is giving me a few hints to many, because the Genie almost outright told me what I needed to do to kill it. The pattern was easy to figure out. First, the Genie is out of it’s bottle, throwing fireballs at me. After dodging 8 of those, he goes back into the bottle. Picking the bottle up and throwing it does some damage and causes the Genie to come back out and throw fireballs again. Repeating this four time destroys the bottle.
After that, the Genie floats around and throws fireballs. Hitting it causes it to go invincible, split up and move around in a spiral for a while, before being hit-able again. A few more of these hits and the battle is over.
Simple, but again, I’m out of practice. I probably had to repeat the battle ten or so times before I finally got it right. I got annoyed to, because it’s quite a trek to get from the entrance to the boss room, even with the warp shortcut. Even worse, I had to switch between the Bracelet and the Feather a couple of times on the way there, which meant there was a lot of dialogue cancelling.
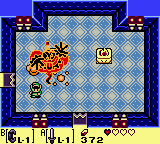
The second phase of the battle is harder, but Link has plenty of health if the first part is done right.
Still, knowing you’re getting better at the game with each try is a great feeling and part of why I decided to do this Legend of Zelda challenge. Eventually, I got to the point where I could go through the bottle phase without getting hit and finally, I beat the Genie with one heart remaining.
I got the second instrument, the Conch Horn and the Bottle Grotto was clear. Next up, the Savannah.
Link’s Awakening [1] – Tail Cave
I’m bad with names. I’m really bad with names. When I meet someone for the first time, I don’t think their name even enters my memory. I have to make a conscious decision to remember and repeat the name in my head just so It doesn’t go away immediately. The same goes with any other name.
Because of that, I couldn’t remember the name of the first dungeon of Link’s Awakening, nor the name of most of the characters in the game, other than Link, of course. Luckily, some quick googling helped with that, so I can now say I cleared the first dungeon – Tail Cave.
Koholint Island
Link’s Awakening is something of an off-shot of the main story arc of the Legend of Zelda series, the way I understand it. According to the story, After the previous games, Link is now a hero. He travels on his ship, ends up in a storm and crashes on the shores of the Koholint Island. To get off the island, he needs to wake up the Wind Fish.
I can’t really understand how they do it, but the Zelda series manages to have a very minimal story in each game, but it all adds up to a complex and extremely interesting overall story arc. What I wrote above is pretty much everything the player needs to know about Link’s Awakening. There’s the backstory and the motivation and that’s it. Of course, stuff is added to it throughout the game, but no more than needed, which is very little.
Getting the Sword and the Shield
Link wakes up at the home of Marin, who he mistakes for Zelda for a moment, and her father Tarin. Taring gives him the shield and points him towards the beach where Marin found him, hinting something important might be there.
Before I went to the beach, I explored the village, checked out the shops and talked to everyone. I decided to do this playthrough completely walkthrough free, so instead, I’ll be taking notes (thank you, OneNote).
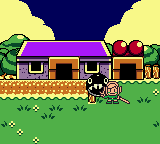
Talking to the NPCs made me realize the game is self-referencing a lot. The kids in the village give me tips about the gameplay and then finish with “I don’t know what that means, I’m just a kid”, there’s a Yoshi doll I can get at a game store, and there’s a lot of tips I can read up on on various signs and in the Village Library. There’s also a building with a phone in it. On the other side of the phone line is a person named Ulrira, who seems to be telling me what my next objective is. Overall, Link’s Awakening is the most approachable Legend of Zelda game yet.
It also seems to control much more easily and fluently. The movement and the actions are less rigid, so I can dodge more easily. I still get hit, but it feels more like my fault when it happens and not that I’m not used to the controls, liked it felt in the past.
Anyway, I talked to everyone, took some notes and finally got to the beach, where I found my sword. I have two items now. Here are the notes I took:
- Papahl’s wife wants the Yoshi doll for their kid.
- Papahl will be lost in the hills later on in the game (this is more self-referencing).
- Sale at the Sale’s House O’ Bananas is interested in any canned food.
- One of madam Meow Meow’s dogs is interested in jewelry and accessories.
- There’s a monkey on a tree near Sale who throws coconuts at me.
- There’s a bomb-able wall on the beach near where the sword was.
- There’s a book on the top shelf in the village library that I can’t reach
- There’s another book in the library that apparently needs a magnifying glass.
After getting the sword, I immediately went back to the village to deal with some of the requests. I got the Yoshi doll and got a ribbon as a reward for that. I gave the ribbon to the dog and got a can of dog food. I then gave the dog food to Sale, who gave me bananas. I tried somehow giving those to the monkey, but they aren’t a select-able item and I don’t know how to talk to it.
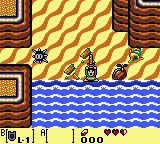
Getting the sword plays the famous Zelda tune. It’s also definitely Link’s sword because his name is written on it.
I also got a heart piece from the well above the library. Getting four heart pieces in a Zelda game gives Link an extra heart container, so those are always great to pick up.
An owl (yes, we finally have the annoying owl) told me to go to the Mysterious Woods next, so that’s exactly what I did.
The Mysterious Woods
The screen went darker when I got to the Mysterious Woods. I don’t this happens on the original GameBoy, so it’s a nice touch on the color version. I had to fight a lot of Moblins while there, and I also find an item or two I wont be able to get until later, so I took some notes, or a note:
- There’s a heart piece in a cave that I can’t get to. I need to be able to lift giant skulls
I found a toadstool and a witch’s hut, so I gave her the mushroom. I got a bag of magical powder. I used this magical powder on a raccoon who turned out to be Tarin, transformed by a toadstool he ate (the circle of life). I’m not sure what the importance of this is, but I did it. The witch told me to bring her more toadstools if I need more powder, so I’ll probably be doing that later. I also tried using the powder on other stuff. It lights up braziers and temporarily stuns that invulnerable enemy that electrifies me when I attack it, but I didn’t discover anything else.
I was supposed to find the key for the first dungeon in the Mysterious Woods, so that’s what I eventually did, but it took me a while to find it. The place is pretty much a maze, so I got lost once or twice.
Link’s Awakening Dungeon #1 – The Tail Cave
The Tail Cave was located to the south of the village, north of the beach. I actually stumbled into it before I ever got to the Mysterious Woods, but I had to get the key to enter it.
The dungeon itself was easy, as I expected, since it’s the first dungeon. I found the compass and the map within the first few rooms and I beat the mini-boss a few rooms after that. The compass got a bit of an upgrade since A Link to the Past, or at least I think it did. It now creates a sound every time I enter a room where I can get a key. This can be useful with rooms where there’s a trick to get it. I don’t think the compass did this in A Link to the Past, but I might be wrong.
The item of the dungeon was the Roc Feather, which allows link to jump. It can even be used in the short side scrolling sections within the dungeons, which turns this part of the game into a full-fledged platformer. While we’re on the subject of the side scrolling sections, there are goomba and piranha plant enemies from the Super Mario series in those, which is a great touch.
Defeating the mini-boss involved jumping over things he sends at me, so I immediately got an opportunity to practice the jumping. The final boss of Tail Cave was more familiar and straight forward, but also far more annoying. It was the snake/worm boss with a vulnerable tail from the previous games. As before, if he hit me the wrong way, he would send me to the floor bellow, though this didn’t take away my health this time, and I had a much easier time getting back to the boss than in A Link to the Past. Still, it’s a very annoying boss.
Killing it got me my first heart container and the first of the 8 instruments needed to awaken the Wind Fish, which by the way, apparently is neither wind or a fish. The first instrument was a cello.
