Compared to the Angler’s Tunnel, the Catfish’s Maw was hell, in terms of difficulty. Objectively speaking, though, once you figure out the layout and the tricks, it wasn’t too hard. What it was, was again, very unique.
I Died in Catfish’s Maw, Several Times
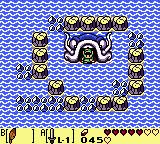
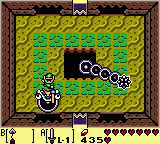
The entrance to Catfish’s Maw looks cool. You have to dive at the bottom left to get to it.
First of all, I got the compass quite early, within the first few rooms. That was the easy part. Next up was the beak, which took me a few rooms, but I got it eventually. As for the map, that took me a while. I’ve probably been to most of the rooms of Catfish’s Maw by the time I finally got it.

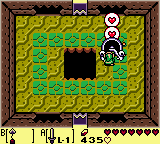
I saw this room several times due to dying. I still think the difficulty was appropriate, though.
I Fought Master Stalfos, Several Times
The first unique element of the dungeon was that the item I was supposed to get wasn’t in the chest. The mini-boss, the Master Stalfos, was just a big version of the regular Stalfos (skeleton) enemies. The trick with him was to charge up the sword and then do a spin-attack when Master Stalfos tries to jump on Link. This stuns him for a few seconds, but doesn’t actually do any damage. What does damage are bombs and he being stunned is the perfect moment to use one.
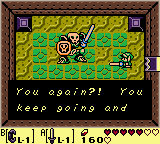
Master Stalfos is easy to defeat, even If I have to do it three times.
This brings us to the uniqueness again. The first time I encounter Master Stalfos, he runs away after three hits. The room after the mini-boss room contains an empty chest and upon opening it, the voice of Master Stalfos says he took the dungeon’s item from the chest. I actually had to fight him two more times before I finally got the item.
I Got the Hook Shot
The general layout of the dungeon made it obvious what the item was – something that allows me to cross great chasms. Obviously, in a Legend of Zelda game, this can only be the something I called the hook (kuka in Croatian) as a kid, but is actually called the Hook Shot. After the third battle, which involved quite a lot of backtracking and walking back and forth to get to, the Master Stalfos finally dropped this awesome item.
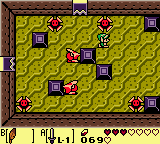
In rooms like this one, the Iron Masks are annoying without the Hook Shot, since they need to be hit in the back.
Having the Hook Shot made the dungeon much, much easier. I could easily avoid traps now, collect chests, use shortcuts and most importantly, kill most of the enemies without danger. The green and orange Stalfos could now easily be killed at range, and the Iron Mask became ridiculously easy now that I can use the Hook Shot to take away its mask.
I Fought Two Gohma Spiders
All I had to do at that point was to open up the remaining chests, find the Nightmare Key and fight the boss. The thing is, Catfish’s Maw was quite the maze. I had to backtrack several times. First, I went in the wrong direction and didn’t have enough keys with me. Then, I ran into one more mini-boss, two Gohma spiders. I had to use my bow to defeat these guys, but they weren’t too hard. Lastly, I had trouble finding the Nightmare Key, mostly because I kept forgetting which stairway leads to which section of the dungeon.
The two Gohma spiders are only marginally harder than Master Stalfos. All you have to do is shoot them in the eye when it’s open.
I Fought the Slime Eel
Finally, I got to the boss room and fought the Slime Eel. I died on the first try, but the warp pad was close to the room and I had a chance to completely fill up on health on my way there, so my second try went much more smoothly.
The Slime Eel’s tail shifts direction with each hit.
The key item of the battle was, of course, the Hook Shot. The boss consisted of two parts. His tail emerged from the central hole and moved in a circle around the room, so I also had to walk in a circle to avoid it. Periodically, his head would emerge from one of the four holes on the wall. At that moment, I had to be in the right position to use the hook shot and pull the head out, so that I could attack a vulnerable part on Slime Eel’s body.
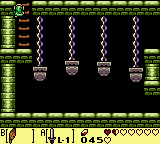
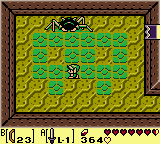
This things are connected in pairs. Standing on one pulls it down while lifting the other one.
For some reason, on my first attempt, once I did enough damage, I was pulling the entire boss out of the hole. This did damage to me, so I died. On my second try, though, this never happened. I just pulled out the head several times, swinging the sword as fast as I could, and that’s all it took to kill the Slime Eel.
The Slime Eel’s weak spot is very obvious, once you pull it out of the wall.
I got my heart container, as well as the Wind Harp, the next instrument, and I was told by the dying Slime Eel that I have no idea what the island actually is. Except, I do have an idea, since I already fought the giant Armos in that mini-dungeon and I’ve seen the mural. Then again, I might be wrong. Next up, I have no idea where I need to go because I accidentally missed the hint I get after a dungeon.
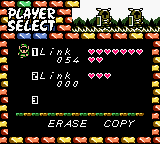
I’m not sure what the number on the save file is. Is it percentage? I know it grows as I advance through the game.
Oh well, next up, Ulrika’s phone booth!


