Avadon 2: The Corruption is the second game in the Avadon series, made by Jeff Vogel, of Spirderweb Software, of Exile, Avadon, Geneforge and Nethergate fame. This guy is solely responsible for some of my favorite games and, although I do not completely agree with some of his design decisions in later games, I’m still a big fan of his work and will probably play through anything he releases.
Avadon 2 is no exception. Heck, I’ve even put Demon Souls on hold to play it, and Demon Souls is great.
In this post, I would like to, in the usual style of this blog, guide the reader through one of the game’s many quests. We will be Hunting the Rebels.
For the sake of completeness, I have returned with my party to the fortress Avadon.
In this game, you are a scout, who stumbled into a war and got recruited as a Hand of Avadon, a fortress who’s ruler’s sole purpose is to keep the Pact, ruled by a council, in check, through any means necessary. To achieve this goal, he is given absolute power, which he enforces through his Hands (military), Eyes (spies) and Hearts (advisers).
The Pact is a loose alliance of nations, surrounded on all sides by barbarians. Primarily, the fear of those barbarians, and of the black fortress itself is what keeps the pact together. It’s a very bleak atmosphere that this game portrays.
Anyway, we’re at the fortress.
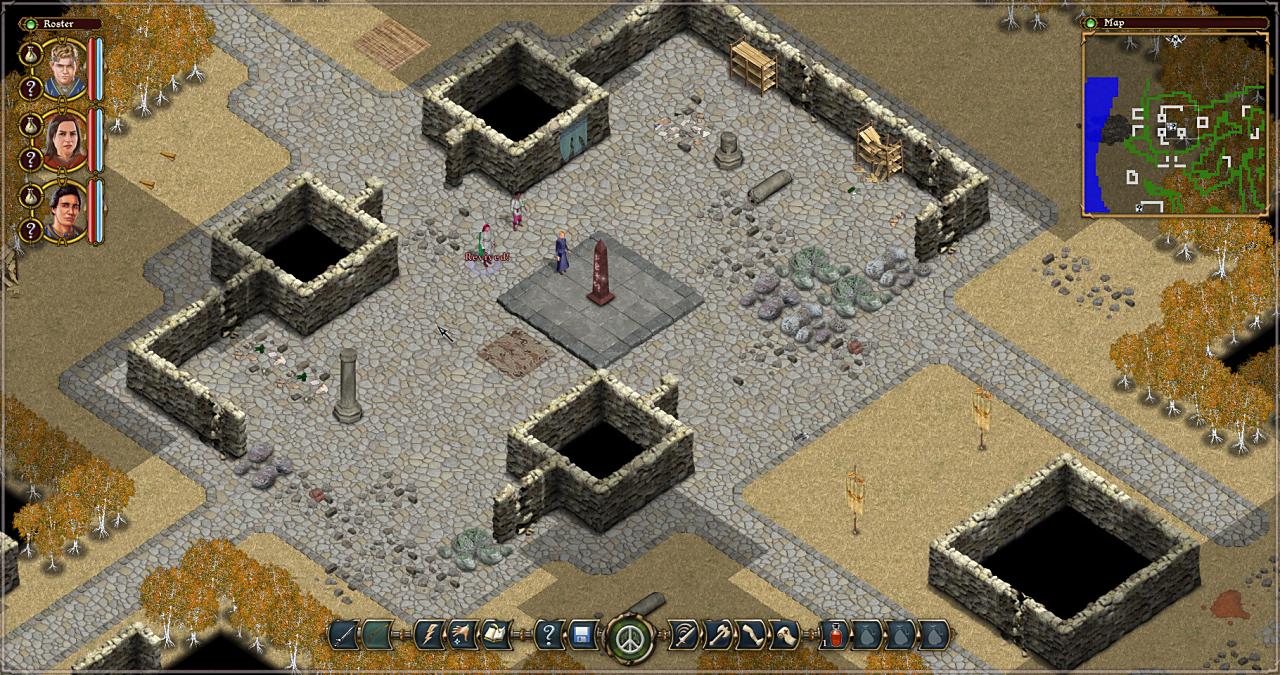
Avadon

Pictured: Contested Lands pylon room in avadon
From the image, we have our roster to the left. We only control the protagonist we’ve created while in the fortress, but when we leave for a mission, we get to pick two more out of a roster of five companions.
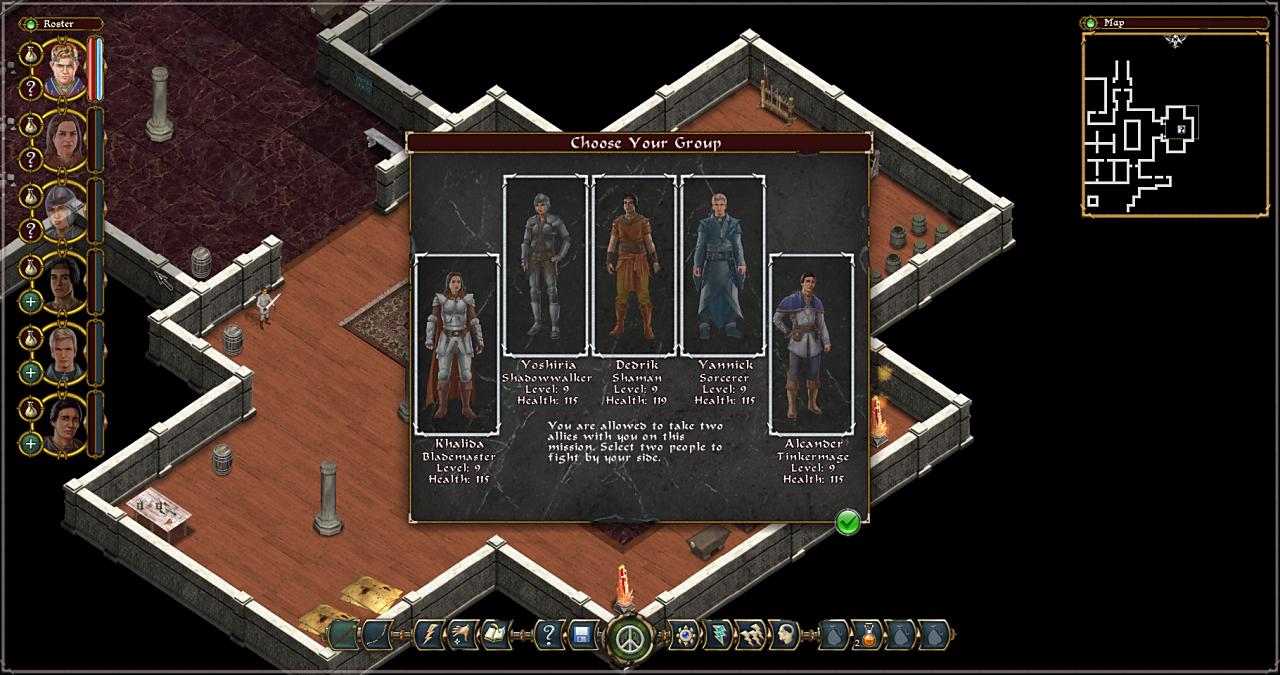
Pictured: The Character select screen
We gain access to these companions quite early into the game and each of them represents a single class available in the game. Formulaicaly, they all have a personality, a backstory and a side quest to get through that backstory as the main quest chugs along.
While we take two of our companions with us, they all share experience, so now that we got back, after killing a bunch of stuff and solving a few quests, the three that were left behind have skill and attribute points to distribute. Let’s do that with our Shaman, Dedrik. He has a scar on his face that he’s ashamed of, so he gets to have the moody personality.

Pictured: The skill screen
What’s seen here is quite similar with all five of the character classes. There are four different attributes, and mostly, it’s advisable to raise the one primary for that character’s class. For shamans and wizards, that’s Intelligence.
Then, below, there are 3 specializations, for which we gain a point every five levels. Putting a point into a specialization raises all skills in that column of the skill three by 1. Basically, you specialize into what you’re already putting points in anyway.
Finally, there’s the skill tree. We get enough points to max out two of the three paths and then maybe have a few leftover, so we do that for most characters. Dedrik is being trained in healing and summoning.
All of this really isn’t hugely terrifying, though. As far as I know, you gain access to retraining later in the game.
Once we distribute all of the skills, it’s time to go visit the fortresses merchants and sell our junk, but not before I equip it on some of our unused characters. Equipment matters, so we don’t wanna be forced to play with an unequipped companion on some future quest.
There’s this cool quality of life feature that Avadon provides – the Junk Bag. It’s a common inventory for all of your characters, separate from their individual inventories. It’s either unlimited or very big, I’m not really sure, and what’s really cool about it is that anything in it can be sold all at once by just clicking a single button. You can quickly put items in there by clicking them while holding Ctrl to. It’s amazing.

Pictured: The inventory screen
Anyway, there isn’t much of note. We put the gear we can on our characters and sell the rest.
While selling, we also by Iron Razordisks four our Tinkermage, Aleander, since he can use them and doesn’t have any. It’s always a good idea to have a ranged weapon, since ammo is unlimited.
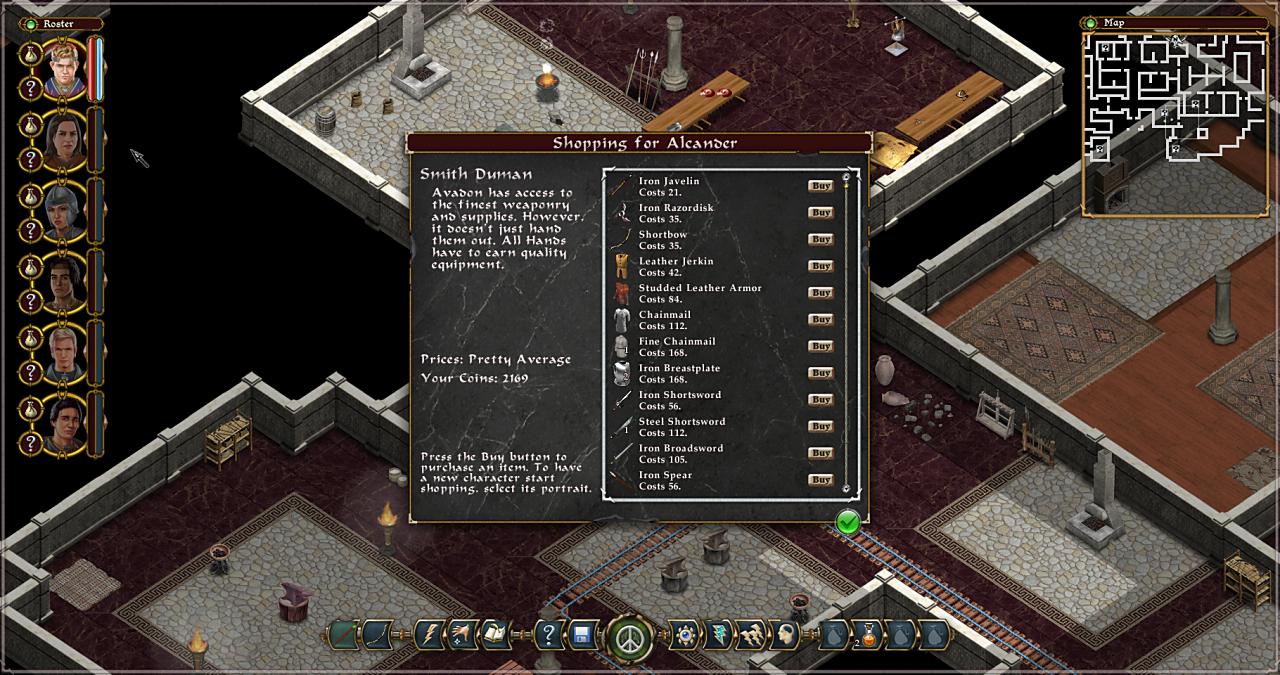
Pictured: The shop screen
While we’re still here, we use the forge and the cheap runestones we found to improve some of our crappy gear in an extremely minor way. I barely used this feature in the first game and it turns out, there really is little point to save up the weaker stuff.
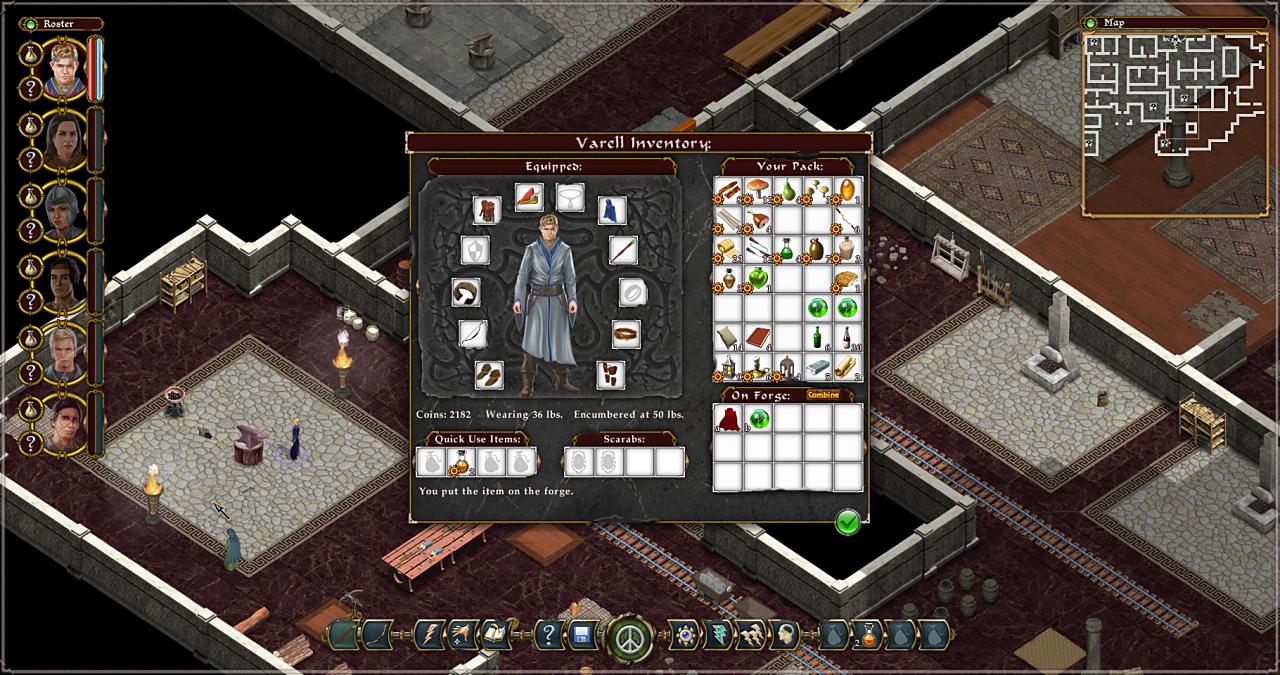
Pictured: Equipping the party
The way it goes is, sometimes we find a runestone, which improves weapon and armor in specific way. Then we find a forge, take a piece of gear and a runestone and put it on the forge to combine them. The runestone disappears and the item is a tad stronger, but it cannot be improved anymore and the process cannot be reversed.
Oke, we’re done in Avadon, so let’s go four our mission. What does the quest log say?
Hunting the Rebels
Redbeard told you that Commander Odil of Rockridge Keep has an idea of where some of the Wyldrylm rebels may have been hiding: A wretch lair west of the keep. You need to travel to that lair to investigate.
Commander Odil has told you where the abandoned rebel fort is, Travel to there, enter and look for clues of the rebel presence.
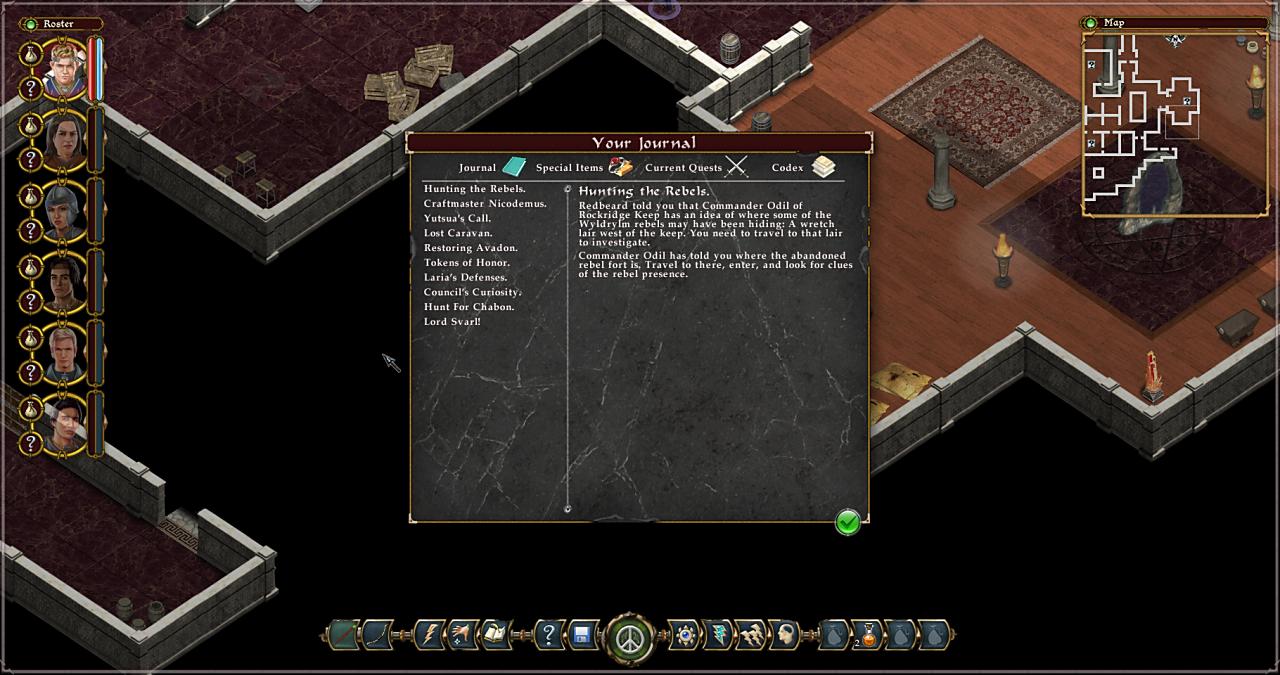
Pictured: The Codex
Readbeard is Avadon’s terrifying and slightly mad leader, The Wyldrylm are one of the two factions who are members of the pact, but are in a sort of tenuous conflict regarding some contested lands, rich in ore, between them. Commander Odil is the leading commander of a fort built in these contested lands to maintain peace. Wretches are small, stupid, high breed rate goblin-like creatures living in one of the barbaric areas outside the pact, but constantly infesting and invading pact lands. This should bring everyone up to speed.
We take the portal, take the Aleander and Khalida with us and were there already.
Pictured: Pylon area in Contested Lands
The area with the portal is not the area where the quest is. Luckily, the area transition zone is nearby so we take it to get to the “world map”.
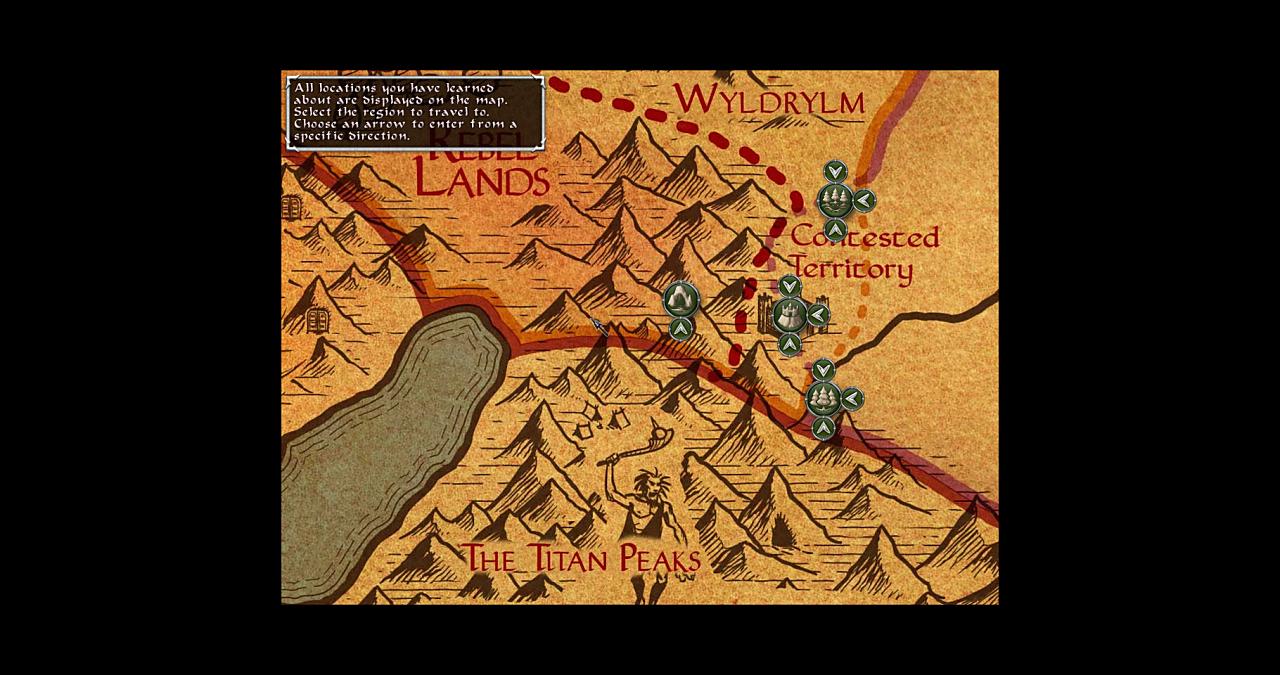
Pictured: “World” map
See those arrows surrounding available areas? Those allow us to pick from which side we want to enter that zone, which is just a nice thing to have. We want to go to the zone with the cave icon and just one arrow. One click and a loading screen, and we’re there.
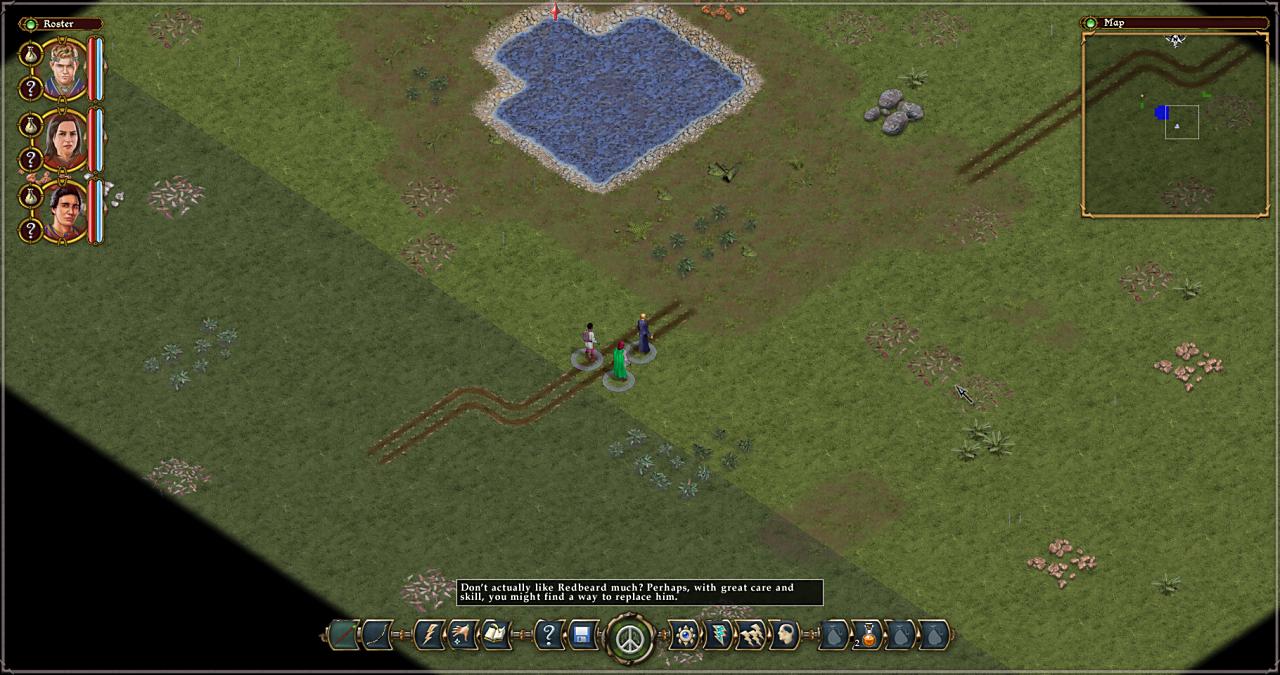
Pictured: Entering the area
Pretty soon we get a text popup with some exposition
You check your map and find that yes, indeed, you have reached the region where the abandoned rebel lair is located. It’s pretty quiet.
You are at the south end of a broad plain, bisected by a river. There is heavy forest to the west, with a large, rocky hill rising above it on the far side.
If there were lots of rebels here, they did a very good job of concealing their presence. The road you are traveling on has not been maintained for years. You see no towers, no fortifications.
There is one sign of occupation, though. A line of woodsmoke, rising from a camp to the north, alongside the river. At least someone is here.
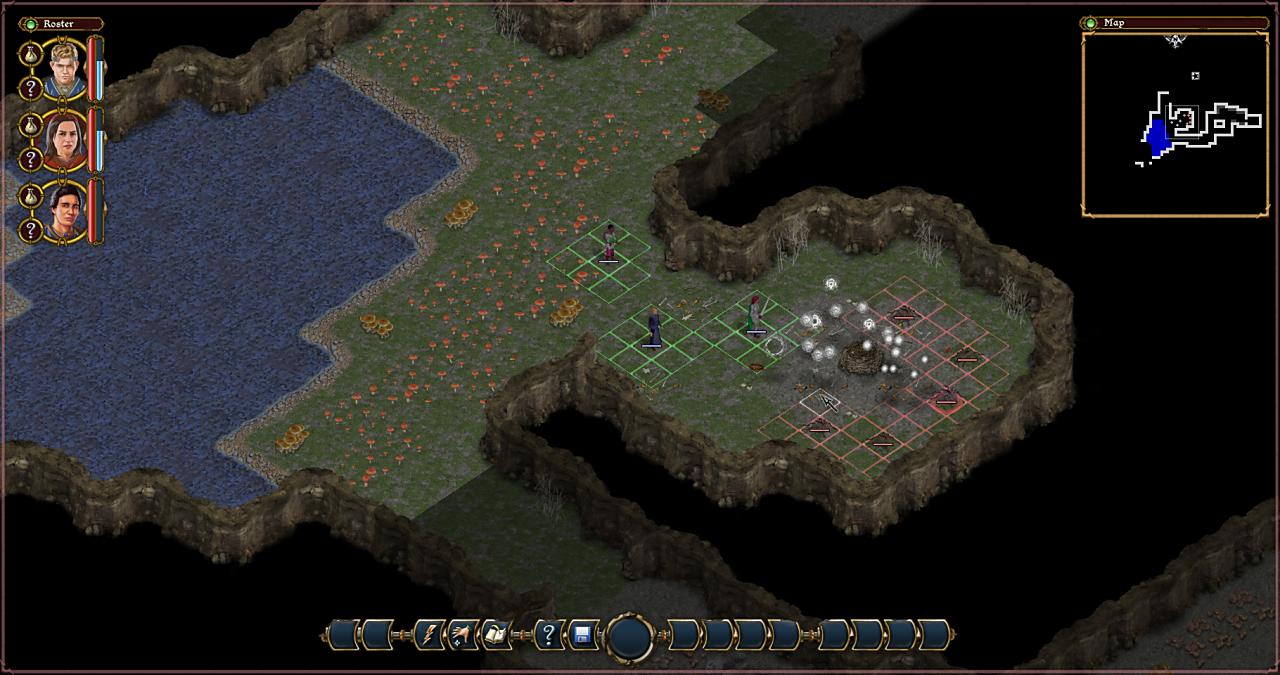
We move around a bit and pretty soon end up in a fight with some dire wolves.

Pictured: Fighting some wolves
So what do we see here.
We see a blood spot to the right, where we’ve already killed a wolf with a single cast of a spell. We see Khalida holding a bow to attack from range while the wolves approach and we see Aleander way too far in the front because I miss-clicked when switching back and forth between my wordpress editing window and the game.
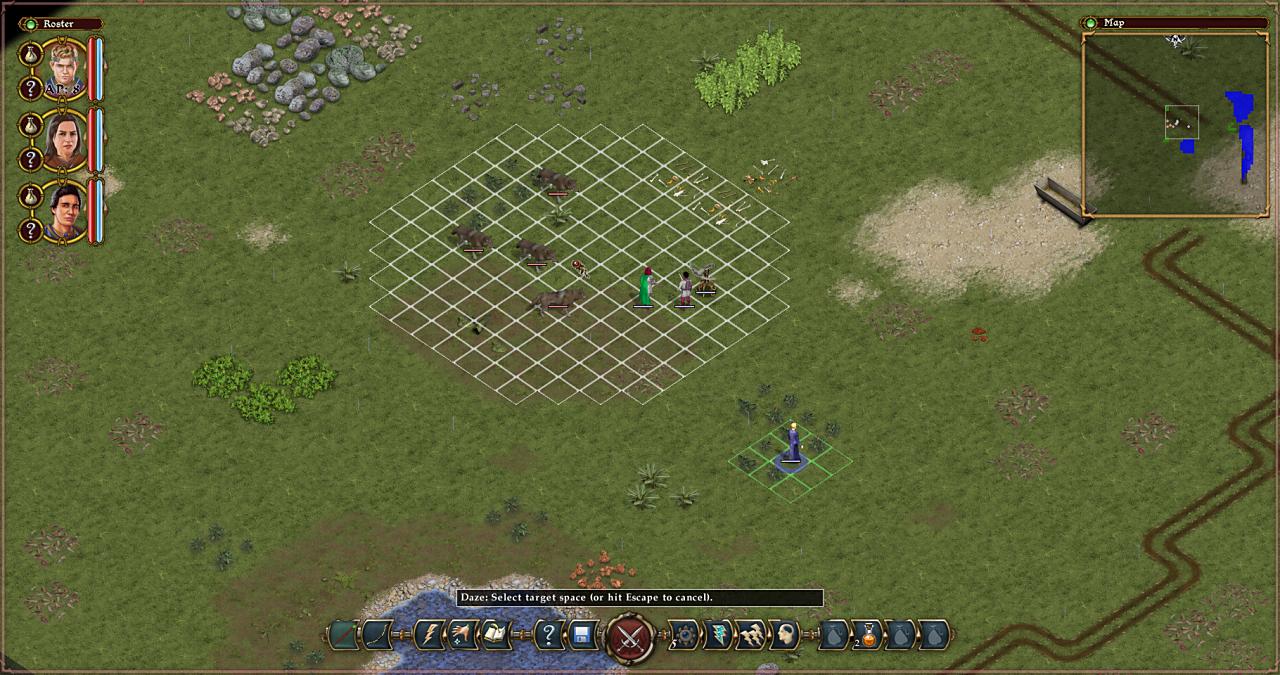
Pictured: A summoned turret and a Daze spell in the process of being cast
It has been a turn and now things have happened. Aleander has constructed a turret next to him, because that’s what tinkermages do. They make turrets to attack enemies and pylons to strengthen the party. Varell, the protagonist, is preparing to cast Daze, which has a good chance of causing most of these wolves to skip a turn. It’s an easy fight, really, so all of this is overkill.
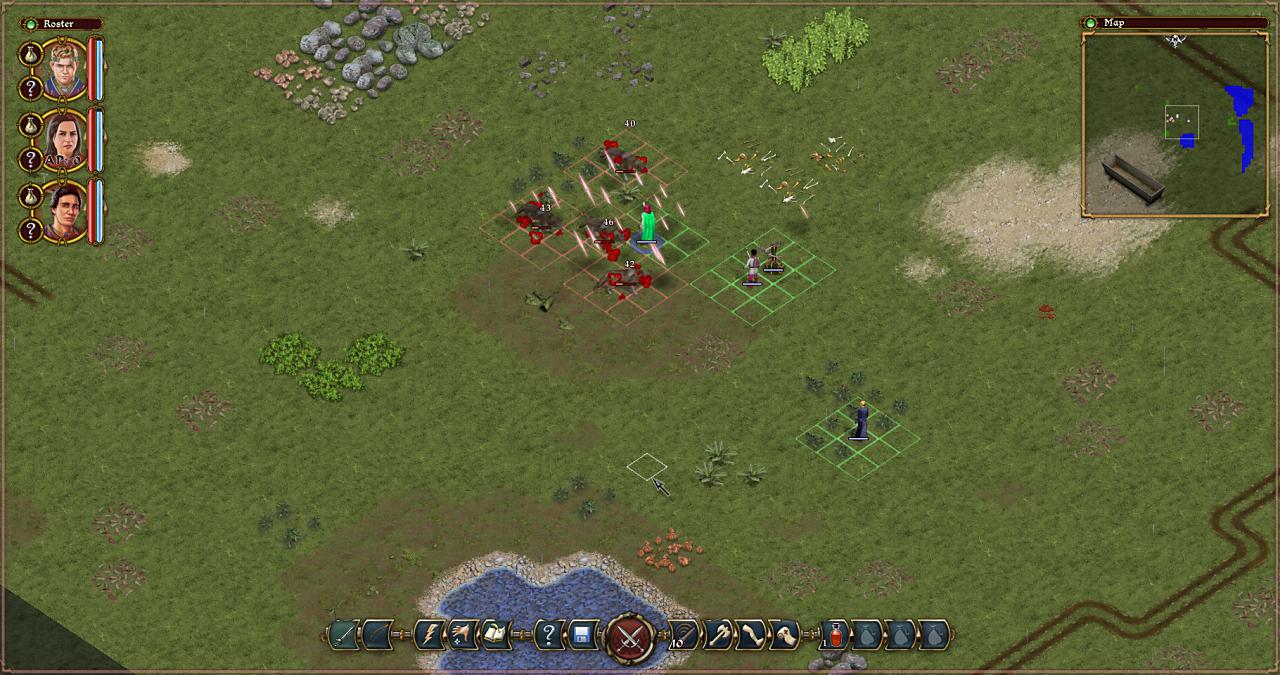
Pictured: Using the Blade Sweep skill
Just to show how easy it really is, we now see that all of the wolves have been dazed, so they wont act. Also, Khalida has moved in between them and used Blade Sweep, which is an area attack that does a decent amount of damage and nearly kills all of them at once. We mop up and move on.
The game continues to give exposition via text, which is something I quite enjoy with spiderweb games. The mechanics may have been simplified, but there’s plenty of flavor still.
There was recently a small battle here. The ground has been scorched by fiery magic, and the rains have not yet entirely washed away the sings of blood.
There was a skirmish when the rebels evacuated the area. You aren’t sure who was fighting, but you find a few large, deep bootprints. Titan-sized, you would say.
Titans are another of the barbarian races threatening the pact.
On the nearby riverbank, we stumble into a group of Pact soldiers.
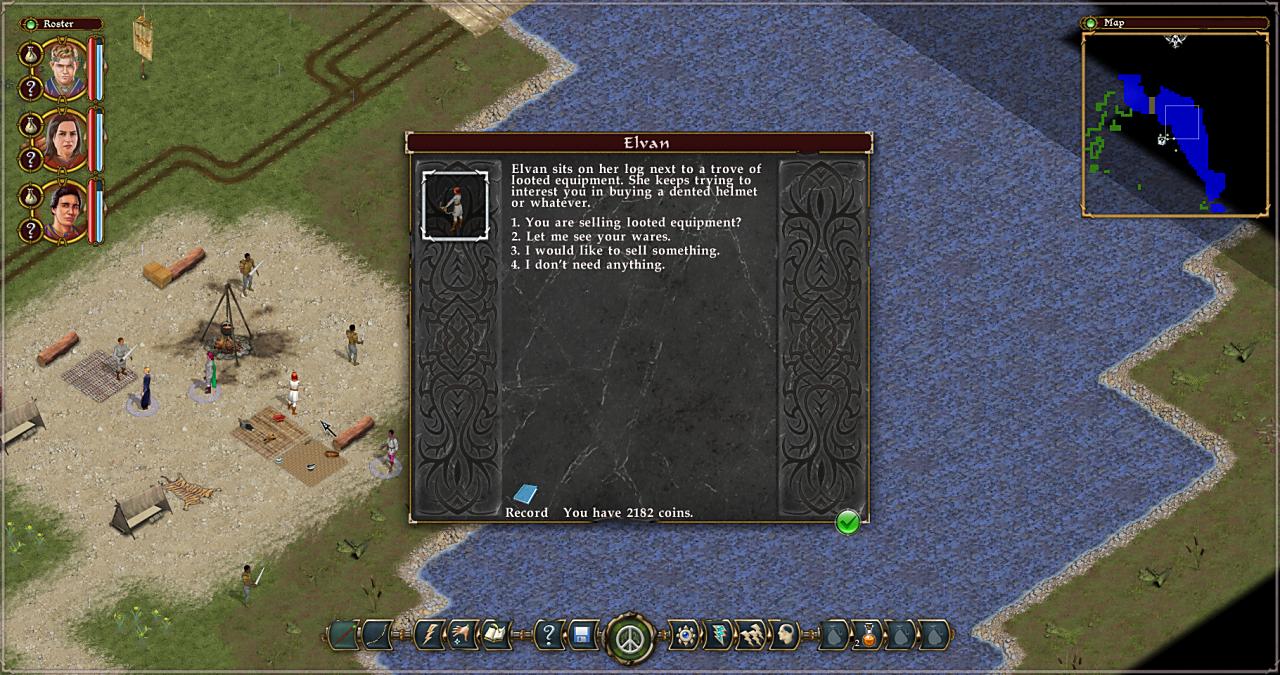
Pictured: A conversation with some pact soldiers
One of the solder offers to sell us looted equipment. In some cases, we would be able to use our authority as Hand of Avadon to scare them into at least giving us something, but there is no such option here, that I could tell.The soldier sells lockpicks. According to rumor, there’s a limited amount of those in the game, so I always make it a point to buy those. I also buy Steel Razordisks, to upgrade Aleander’s Iron, which I just bought in Avadon.
The Watcher in charge of the soldiers gives us information about our quest and how to enter the rebel lair.
The thing is, the way I, and I’m sure many others approach these quests is by first doing everything that isn’t in the quest description. This means that I explore every little bit of the map that isn’t in the direction of the quest marker.
In one corner, I find a pack of giant lizards, led by an ice lizard. This is the first time I encounter these enemies.
Pictured: A combat against some lizards
I’m able to get rid of them before they can act. The reward are a couple of animal skins, some lockpciks, a group heal scroll and the ability to enter an optional dungeon. That is, it looks like an optional dungeon, but it’s just a joke.
You open the trapdoor and find a stairway underneath it. It goes down about five feet and is then blocked by tons of rubble.
Ha! Ha!
Further north, there are ruins of a Kva settlement, with some more flavor text, but there’s no point in transcribing all of those here. Play the game for yourself!
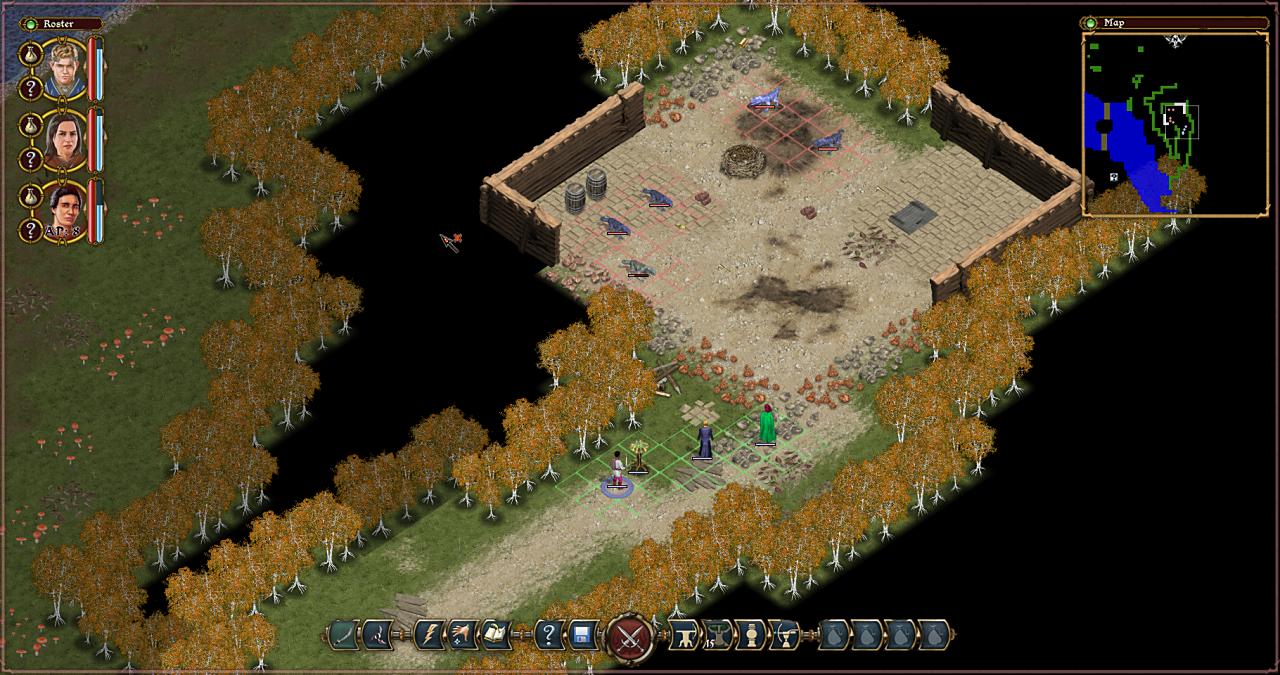
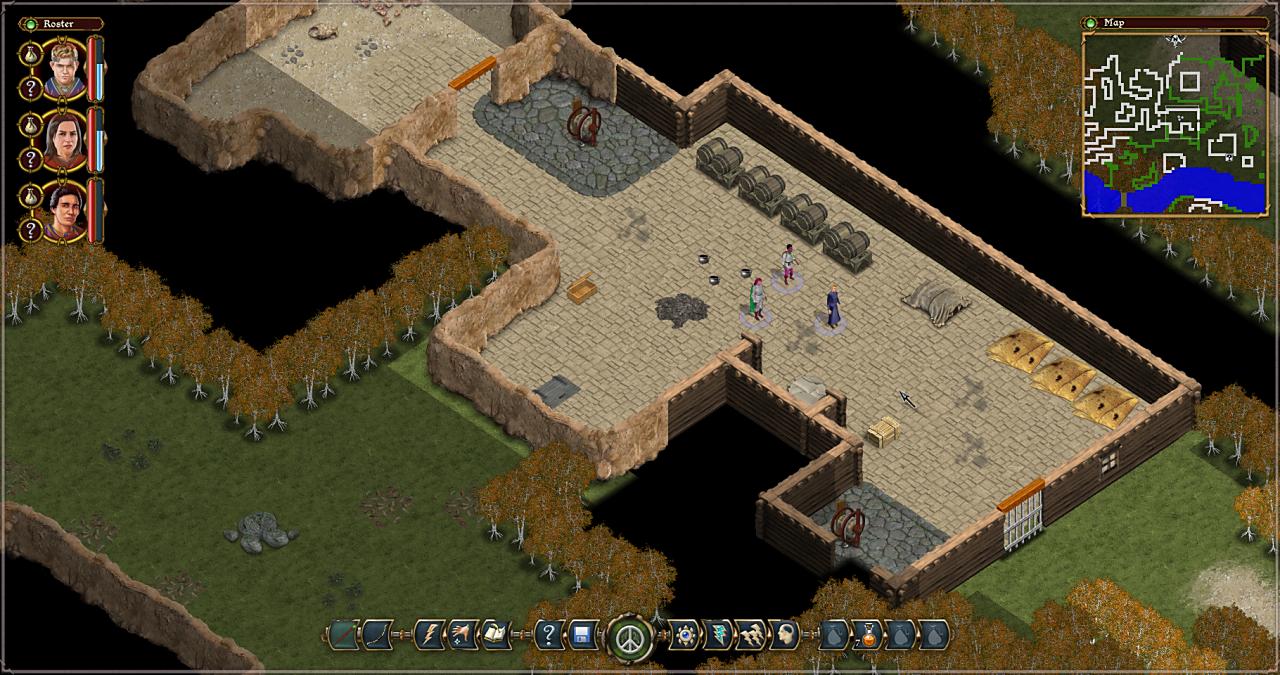
To the nortwhest, there’s a building with no doors. This usually means we will get to find an entrance through a story or quest trigger. Perhaps in the very quest we’re on, or perhaps in some we get to later on.
Pictured: A building with no doors
To the west, there’s a cavern system with some drakes and lightning lizards, It’s clearly a place I will return to later, since there’s a stairway that disappears as I get close, indicating I (in-game) have no idea how to get to it yet. There’s also a locked door I will get to later. Why not now?

Pictured: An encounter with a locked door
Because it will take two lockpicks. Thing is, increasing the lockpicking skill of some classes reduces that amount to 1 or even 0, so I can return with a dedicated lockpicker at a later time.
The Lost Caravan
There is also a side quest I got in Rockridge that takes place on this map. A caravan was attacked and lost. I find traces of it close to the rebel base, but not quite there yet. Tracks indicate it has been taken to a nearby spider-infested cave. All of this is told to me via text, of course.
Pictured: A spider cave
After a brief, but difficult fight with the spiders, a set of stairs takes us back to the surface, into a building closed from the outside. We get to open it now and we can turn in the quest when we get back to Rockridge.
Pictured: The backdoor exit from the spider cave leads to some stolen goods from a robbed caravan.
Moving On with the Rebels
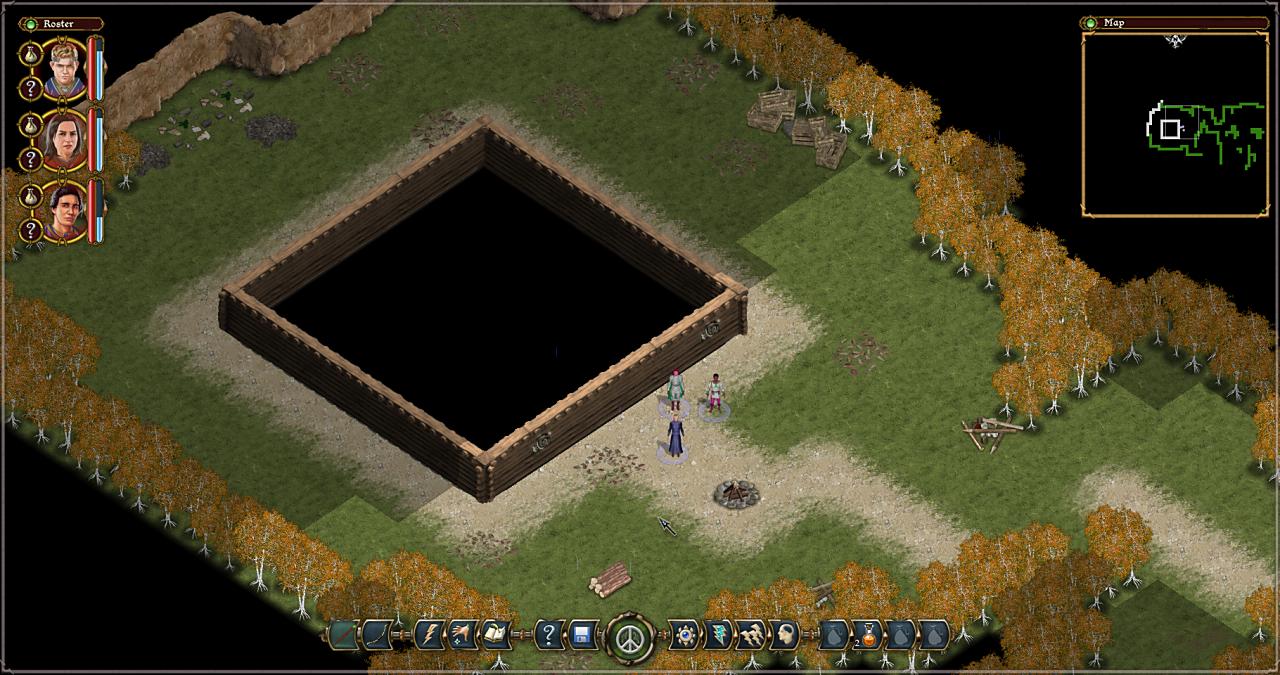
There’s some more unimportant monster slaying and pretty soon, I run out of things to do, so now the party needs to finally enter the rebel lair.
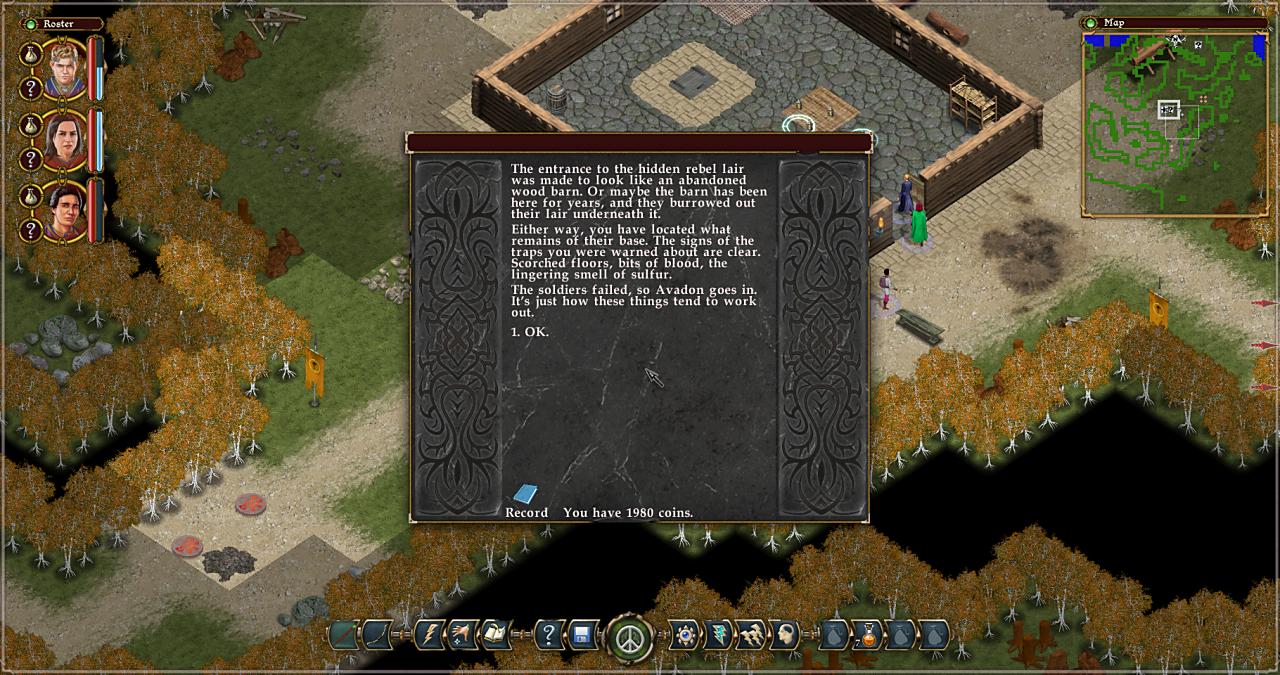
Pictured: The entrance to the quest dungeon.
The entrance to the hidden rebel lair was made to look like an abandoned wood barn. Or maybe the barn has been here for years, and they burrowed out their lair underneath it.
Either way, you have located what remains of their base. The signs of the traps you were warned about are clear. Scorched floors, bits of blood, the lingering smell of sulfur.
The soldiers failed, so Avadon goes in. It’s just how these things tend to work out.
Obviously, it’s time to go underground. I do that, and shortly after, get trapped in there.

Pictured: A scripted trap triggers soon after entering.
The ground lurches under your feet. The air is flooded with dust and smoke. the concussion leaves your head spinning and your ears ringing.
The exploding barrels you passed on the way in weren’t malfunctioning. they were set to go off when you were by. You are trapped inside their lair.
If you don’t find another exit, your career as a Hand of Avadon will be extremely short.
being trapped underground does wonders for Khalida’s sense of purpose. She radiates focused rage. “Only cowards use traps.” She pulls out her sword and looks eager to begin the hunt for those responsible.
I’m thinking there was a theme to this area.
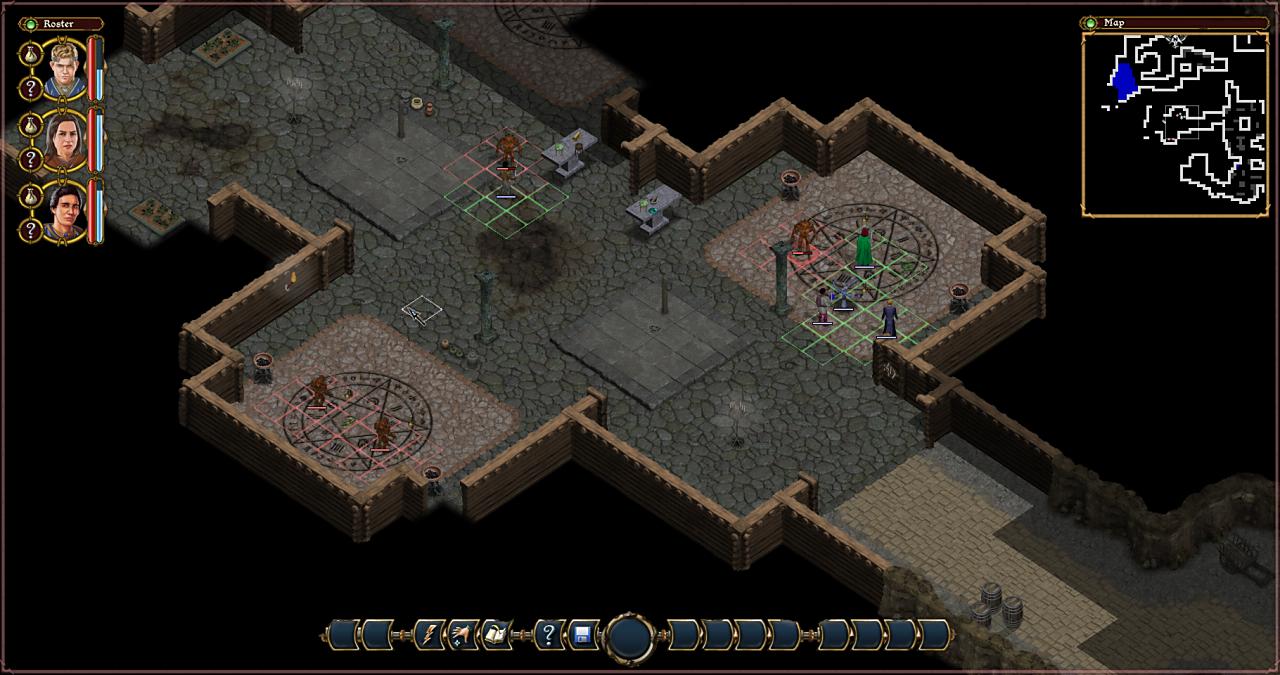
In the north, there’s an abandoned shop with alchemical equipment. The traps in the rebel base are explosive, but also alchemical in nature, if Aleander is to be believed. There are undead in both the shop and the base. Later on, it even turns out the two are connected by a collapsed tunnel.
I’m thinking there’s a background story to the area, loosely told, but still, there’s something. I quite like that!
Anyways, further on, first there’s some plot development from Aleander. He takes some notes about some unset explosive barrels to send to his family. Then, there’s an encounter with Sulla, a Wyldrylm warrior. He tries to warns of of an ambush by summoned Imps, but too late and we are all forced to fight.
Pictured: Encounter with a potential ally?
We dispose of the imps and question Sula. He first claims he’s just a hunter who fell through a pit trap into the lair. Later on, he gets caught in a lie and admits he’s a rebel scout who got trapped by being foolish. Still later on,we trust him too much and he manages to destroy some papers. Turns out, he’s there to clean up evidence. There’s a sort of fight where he casts battle frenzy on himself. It’s really close, but he ends up escaping. I decide to reload and this time don’t let him destroy evidence. A major character from first game is working with the rebels!
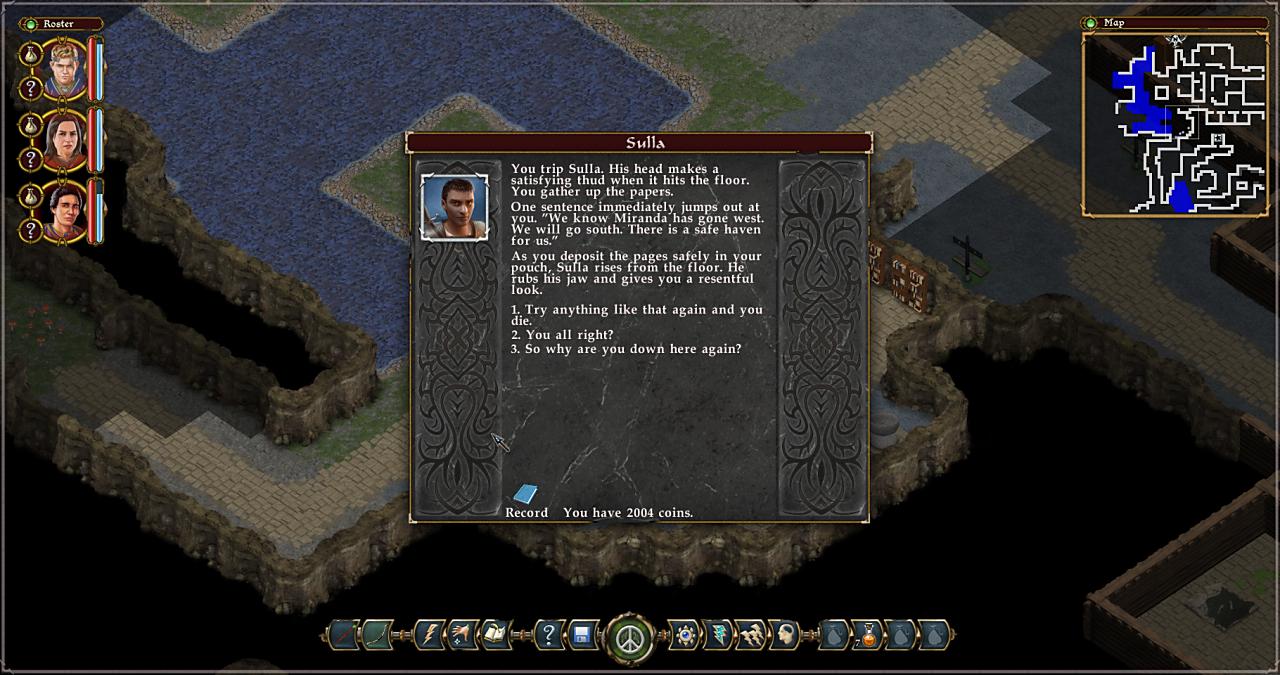
Pictured: The ally shows their true face soon.
We keep him around, so he can open doors, and soon enough, we get to meet face to face with an enemy that’s been chasing us, or has been chasing us from the start of the game.
Ghorus, the Hunter
You are close to an exit. You can smell the fresh air, and there is the barest hint of sunlight visible to the north. You are almost able to escape this pit.
But something stands in your way. A titan with an all too familiar face. Ghorus the Hunter, you heard him called.He clubbed and captured Silke when the rebel attack began. he tried to kill you when you were trying to use the pylon to Avadon. Now he is here, armed and standing in your way.
Sulla freezes, terrified. You’d think he would be happy to find a fellow rebel. He is not.
Ghorus rises slowly to his feet when you enter. he is not the same virile brute you encountered before. He is covered with wounds and burns, treated with filthy bandages. He stares down at you, unsure what he is seeing.
Sulla, what is going on?
Sulla whispers, “There may have been some arguments. Between our side and our servants, I mean.
Greetings, titan.
Ghorus looks closer at you. “Little humans. Little pests. No trusting humans. Pact humans hunt me. Konstina and her rebels cheat me. Nothing but trouble, humans are.
Konstina?
“Big rebel boss. Little cheater. I’ll make her pay.
What did you do with the scout you captured?
Ghorus is confused. “Scout? Captured? Oh, that little one I clubbed in the woods. I dumped it in the cells here. Dead? Not dead? Don’t care.
Where is <major character from the first game>?
The question catches Ghorus by surprise. “She left. left Konstina behind. She always paid us. Now she gone.
What happened to you?
“Tried to hunt Pact humans. You. Konstina told me to hunt you. Avadon helped you get away. Konstina blamed me for that, for everything. She tried to cheat me. I tried to make her pay.”
Make her pay how?
“Tried to eat her. Had my ogres, my wretches. Thought I could beat her and her guards. Was wrong. Most of us died. I got away, hurt bad.”
“Now I just make little people pay!”
Perhaps Avadon can pay for your services.
Ghorus barely hears you. he’s been maddened by the pain of his wounds. A long rope of drool hands from his mouth.
“Pay? Like Konstina pay? Watch as all my helpers die, then whine and not pay? No, I eat you and take all your things. That my pay!” He lumbers forward, club in hand.
The conversation had other options, but there was no way to go back to them, so this is what I got stuck with. I have to fight a weakened titan.
The fight starts by me summoning a couple of turrets and then dwindling Ghorus down a bit. Since it’s a boss fight, there are gimmicks. At about 60% health, which is probably 75%, but the graphics aren’t clear on it, there’s a cutscene, if you can call it that.
You have managed to add a few more wounds to Ghorus’s already impressive collection. With every poke and jab, he grows more incoherently furious.
“Wanted to protect… protect my few pets left, but no more. Come wretches! Swarm these little humans!”
As you look around for additional foes, Ghorus pulls a crystal from his pouch and crushes it in his fingers. Is skin immediately takes on a strange, green luminescence.
Sulla looks at the passage to the north. the situation has gotten a little crazy for him. He makes a run for it.
At this point, I have the option to kill Sulla to, so I do just that, even though he would’ve probably been stopped by the wretches summoned from the north.
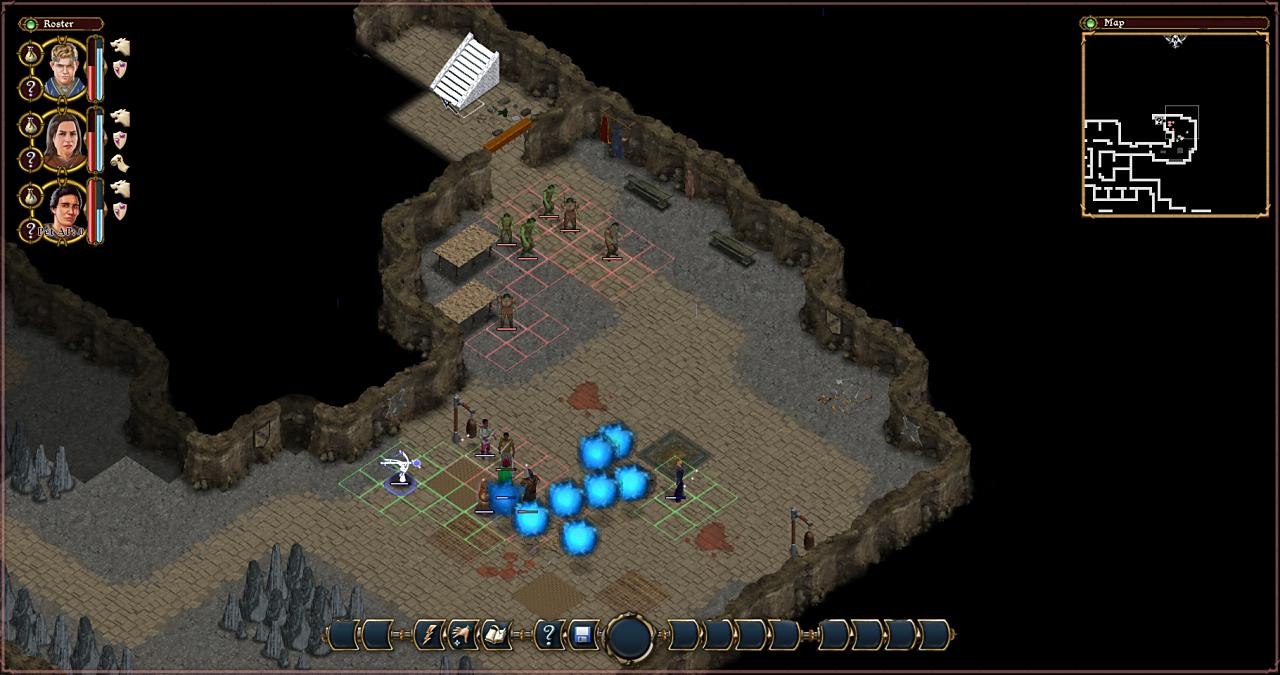
Pictured: A boss battle against a weakened titan.
At about 15% health left, there’s another cutscene.
Ghorus finally lets go and sinks into pure berserker madness. He begins to stomp his feet on the ground. The stone shakes under your feet and rocks fall from the ceiling above.
“Gharrrrraaaaghhh!” he adds.
A few turns after this, Khalida manages to pass out. Character’s don’t really die in Avadon. Even if just one emerges victorious from the battle, the fallen ones revive. Another couple of turns after that unfortunate event, we are victorious and she is back with us. I get the loot and consider leaving, but then try to open a trapped passage Sulla refused to open before. No luck, the tunnel still collapses if I try it. Either Sulla had to do it at some point, or there is another way in, because there’s clearly an area beyond. It’s probably connected to the disappearing passage in the drake caves above ground.
Anyway, the passage past Ghorus takes us to the doorless building I mentioned before. Whodathunkit!
And that’s about it. What comes next is me turning in the Lost Caravan side quest and then going back to Avadon to turn in the Hunting for Rebels main quest. Those would just be spoilers, so let’s not do that.
Instead, I’ll just say that Avadon 2: The Corruption is a pretty cool game I’d recommend any fan of old school RPGs to play, as I would the first one, or any spiderweb game for that matter. Sure, some of the stuff is a bit too simplified, but there are quality of life features that more than make up for it.
Enjoy!


