I knew where to go next, and I knew where the Eagle’s Tower dungeon was, but I also knew it needed a key and I didn’t have it. I decided to get Ulrira’s help. The first phone booth I got in told me about the legendary Flying Rooster of Mabe Village. How it used to fly the villagers everywhere. Now it’s dead and it’s resting under the windcock.
Everything I wrote about below happened on May 4th, 2013.
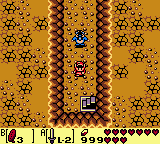
I “Acquired” the Flying Rooster
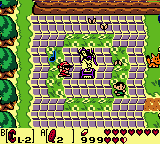
I just had to freakin’ push the windcock: I love that word 😀
I went there, tried using the frog song next to it, tried lifting it, but none of those worked. I spoke to everyone at the village and nothing. I noticed Link is now apparently asking the children of the village when they started living on the island, which “blows their mind”.
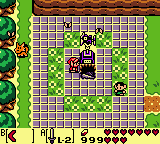
I have no suitable place to put it, so here’s a random photo.
I continued to explore, but I didn’t find much. The flamethrower turret is still blocking me, there’s a cave with a hammer past a huge chasm that I can’t get to and there was a photo opportunity close to the Hen Breeder’s house. All of those things, I’ve actually seen before but I forgot to mention some of them.
As I said, all I had to do was to push it. It took me an hour.
I could honestly say I was actually stuck. I went back to the Animal Village and noticed Marin wasn’t there anymore, but I couldn’t find her anywhere else either. I tried talking to everyone, but I got nothing. I did not expect it, but Link’s Awakening made me completely stuck. Again, this was completely my fault. I’ve tried everything I could think off with the windcock, except just plainly pushing it.
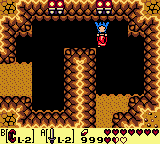
Link is a Necromancer now.
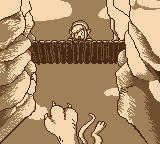
Once I got back to it and did just that, I revealed a staircase to the rooster’s resting place. I used the ocarina and played the frog’s song next to the skeleton to revive it. Now, the game here says that the rooster is “feeling fine” after revival, but it still seems extremely creepy to me, especially considering the color palette used makes it look a bit “undead”.
The rooster even looks like a zombie.
I Got the Bird Key
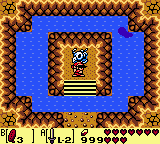
It didn’t take long for me to figure out you can grab the rooster with the Power Gauntlet to have him fly you around, so I made my way towards Tal Tal Heights to get that hammer across the chasm I’ve previously seen. It turns out, that was no hammer – it was the Bird Key, the key to the Eagle’s Tower.
Hammer, here I come!
So now I had access to the key to Eagle’s Tower, I could go there, but I wanted to see that flamethrower cave first, thinking I might be able to fly over the flames, but no dice. I decided to just go to the dungeon.
I’ve Conquered the Eagle’s Tower
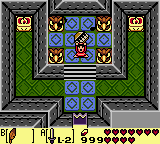
The Eagle’s Nest was laid out in four separate levels, with some of the puzzles spanning across the levels. The first difficulty was navigating through a lot of those blocks that can be raised or lowered via crystal switches. These blocks covered most of the dungeon floor, so hitting a switch basically changed access between one of two large dungeon areas.

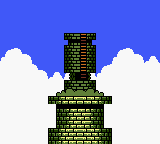
The map is so big, it barely fits the screen.
I explored most of the bottom floor before getting to level 2. This is where the primary puzzle of the game was located. The second floor had four pillars I needed to destroy. I knew that part, but I had no idea how to do it. A couple of notable points:
- In the room with a pull switch that opens one of the doors, there was a circular platform. I assumed this is where an item will appear once I destroy the pillars.
- There was a room with three Three of a Kind (duh!). Killing them properly made a chest appear in an unreachable spot. I had to get to a room behind it and bomb my way in, but I couldn’t figure it out how, without going down a floor and resetting the chest.
- I could get to the next floor and clear most of it, but I couldn’t get any further, so the puzzle was definitely on floor two.
- I got the Mirror Shield early on the first floor. I was hoping I could use it to kill those beam turrets with their own beams, but they’re still untouchable.
- The mini boss, Grim Creeper, gave me some trouble because I thought the Mirror Shield hat something to do with it. I actually just had to kill all of his birds in one go to defeat him.
Finally, I figured the chest out. After getting the Three of a Kind, I had to go left, then up, and up once more, through the one-way door. After clearing the northwestern room (floating floor tiles), I had to go right and then bomb my way down to finally get to the chest. The key here was to get rid of the Three of a Kind first to get the chest to appear, because the final step was to drag myself towards the chest with the hook shot. I opened the chest and…
I Got a Bomb!
That sucked hard!
Obviously, the chest wasn’t the solution, but the difficulty of the puzzle made me sure it had something to do with the dungeon solution.
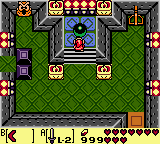
This was NOT a platform. You an pick it up!
I mucked around for a long time before I finally realized it. The circular platform in the pull switch room wasn’t a platform. It was a ball I could pick up. I was supposed to use this ball to destroy the pillars.
The first two pillars were easy, though I lost the ball after the second one, because it dropped to the floor below. I went after it, but I overestimated the game technology here. It actually just reset to its initial platform.
It took me another hour to realize I can pick it up.
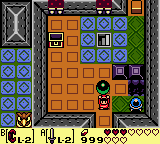
The final two pillars were not so easy. For the third one, I had to take the route I took to get to the chest. The pillar was in the room to the right of the floating tile room. The fourth pillar was even more annoying. It was in a room before the chest room, but in order to get there, I had to get to the chest room first, via the secret entrance, and then go back through the other entrance.

Don’t focus on the shield, just use the sword.
The issue here was, I couldn’t throw the ball across the chasm. It just fell to the floor below. Instead, I had to restart the entire floor. I got the ball, brought it to the Three of a Kind room, killed the Three of a Kind and threw it across to the empty chest. Then I took the long route to get to the chest myself, picked it up, went to the room behind it and finally destroyed the fourth pillar.
This triggered an actual cut scene where the top floor of the tower collapsed to the floor below, which was the third floor. I got back up there and now the third floor was different – larger and more complicated.
First cut scene ever!
I got the medicine from one of the rooms and finally climbed to the top of the tower where the boss was waiting.
I Killed the Evil Eagle
The Evil Eagle was actually being ridden by the Grim Creeper. I really can’t say anything about the mechanics of the fight, because it was extremely short. I hit it with a hook shot once, which caused him to charge me. I tried jumping over that, but I couldn’t jump high enough.
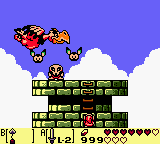
An easy fight, consider what I just went through to get here.
In the next round, I hit him with a sword and climbed down the latter, hoping I could dodge him that way. This was definitely the trick to it, but I executed it poorly, so I got hit anyway. After that, he used his wings to blow me off the tower. I fell down to the screen below and climbed back up, but I don’t think his health was reset, because in two or three more swings, he was dead.
This one was some sort of organ, but I forgot the name.
I got the heart container and the instrument. My next goal was in the mountains to the west, I was sure of it.
So, to recap, The Eagle’s Tower:
- Difficult and complex dungeon
- Easy final boss
- Useless item


