Over the past few days, I’ve been playing Might and Magic Book One intensively, exploring everything that was left to explore, finishing uncompleted quests and getting ready to end the game. That’s exactly what I did! I’ve completed a game that’s as old as I am and I loved every moment. The first thing I did was to explore the left-over areas…
A-3, Water
A-3 is mostly water, with a large island containing a strange wheel, and one of the four great beasts being in the area. I managed to defeat the Great Sea Beast! It actually wasn’t very difficult. It does a lot of damage, but by now, bot Priscilla and Alana were able to heal through most of it, so I just kept focusing on the beast, while casting multi-targeting spells with Aleen. A few turns after the beast was gone, so were the sharks in its cohort. I didn’t even get a lot of experience, but this does bring me to the point about the great beasts.
Might and Magic Book One, the Wheel and the Great Beasts
This great wheel in A-3 can be spun once after you kill one or more Great Beasts. It rewards each character separately, giving them gold, experience, gems, etc. Every time you spin it, all the beasts come to life again, so you can do it as many time as you want, as long as you kill a beast after every spin.
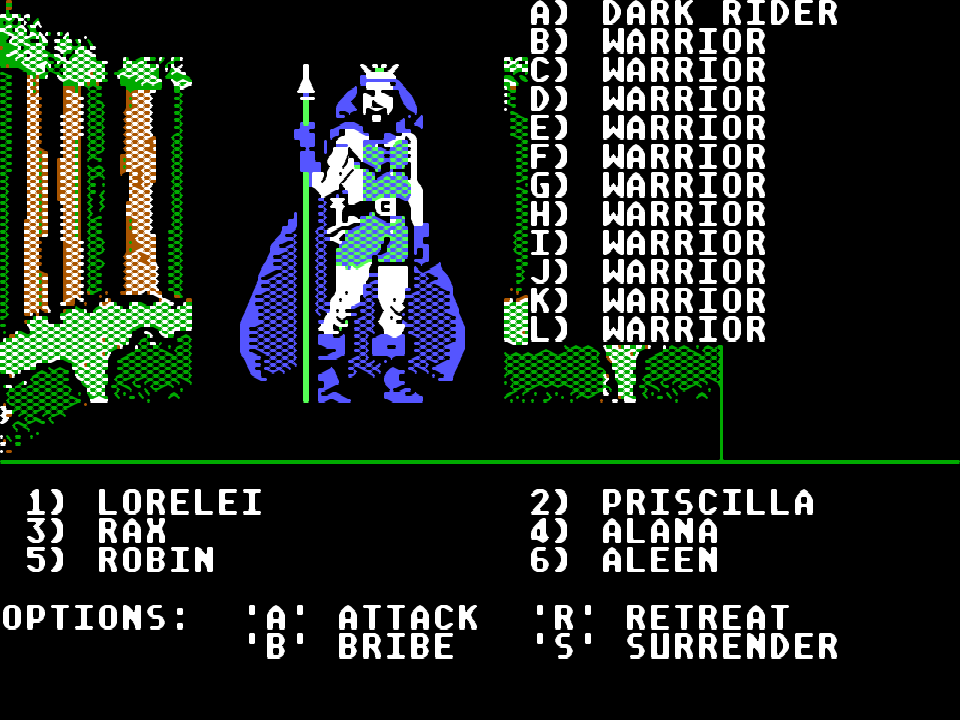
The Dark Rider is actually one of the four great beasts. Who knew!?
It also looks like the reward is greater if I kill more beasts. In any case…
Might and Magic Book One, the Great Beasts Locations
- The Great Sea Beast – A-3, 7-9
- The Dark Rider – A-1, 5-2
- The Gargantuan Scorpion – D-1, 10-5
- The Great Winged Beast – D-4, 9-9
At my level at the time, close to 20, they posed almost no trouble at all, so I’m sure I could’ve handled them a few levers lower. I’m absolutely positive I killed the Dark Rider without even realizing it was one of the great beasts when I first went to the area of A-1, and that was probably around level 15.
A-4, More Water
A-4 had even more water, with the added annoyance of a random tidal wave sweeping you back to 14-14 from any water tile in the area. There was a large island, with a bridge leading to somewhere, and a person asking each character for their sign. I didn’t check what happens if you answer wrongly, going back to C-2 and writing down the correct sings instead. Answering correctly for each character gave me a Coral Key.
B-4, Gah! I hate water!
The only thing B-4 had of note, other than the heap of fixed encounters, was an island in the far south, where you are asked questions about the game. Honestly, I haven’t been paying enough attention for most of them, but the reward for answering correctly are just gems. There was also a spot where you get attacked buy a pirate captain with a bunch of pirates and ghosts. This is related to another quest by one of the lords, but I didn’t even realize it wasn’t a random encounter at the time.
C-4, Water and a Volcano
C-4 has a bunch of shipwrecks scattered along the coast. Searching them usually causes an attack, or you can be lucky enough to find the Jolly Raven. According to many online sources, which one of the wrecks is the Jolly Raven is determined at random, but for me, it was always the same one – the one at 8-13. Finding it is the goal of one of the many quests you are assigned. There’s also a portal of power in the northeastern forest. It leads to the fourth level of the Fabled Building of Gold in E-4, so I have no idea where the power part is coming from. Finally, there are a bunch of islands in the sea, with natives attacking you as soon as you step on them. All of them are covered in anti-magic fields, so resting on any of them strands you, forcing you to restart the game, since you can’t swim, water walk or fly out of there. The biggest island is supposed to be a volcano, and it leads to an important dungeon, but you need the Coral Key to enter it.
The Volcano of C-4
The Volcano is the first dungeon in Might and Magic Book One I can honestly say I hate. It’s clever and you feel clever if you figure it out, but it’s also extremely annoying if you want to stick around to fully map and explore it. The cleverness is actually tied into the annoying part. There’s a huge amount of teleports within the dungeon, and they all teleport you to random spots. The key is to find the two switches just south of the entrance and set them to B and J respectively. Why B and J? Well, there are two reasons. Firstly, in the Minotaur Stronghold in the Enchanted Forest, the dog statue ends its line with
Remember B. J.
Those aren’t initials, obviously. Secondly, there’s a virgin chained in the cell to the south. Kissing her makes this clue even more obvious:
Try setting 1B, 2J.
Because of that, even a dimwit like me managed to figure it out. Setting the two dials properly makes all the teleports stop being random and instead teleporting you to the same spot – to the Volcano God. This guy has a few choices. You can challenge him, which for my party means quick and painful death. You can also ask him for a clue, in which case he transports you to a spot with a checkered message:
The second part is the most valuable.
These clues are definitely related to the two queen idols, of which I’m still missing the first one, so I’ll be saving them in the same note as the checkered room locations. Lastly, asking the Volcano God for a riddle gives you the question:
Who was brave and yet failed.
Sadly, I’ve been following an amazing let’s play on lparchive.org, so I managed to spoil myself with this answer, even though it’s a very fun and fair puzzle, so I would have loved figuring it out legitimately. The answer is Gala and you can find it in Sorpigal, from one of the statues. Answering correctly transports you back to Sorpigal (annoying!) and gives you the Key Card. I don’t know what it’s for, but I’m definitely keeping it.
The thing is, I would like to free that virgin, but that means killing the Volcano God and even with heavy use of Thundranium, I can’t do it. That’s probably the most annoying part to me, because I can’t mark the dungeon as completed. Also, with C-4 done, I’ve explored every area of the world.
Wrapping Up
Over the next several days, I’ve been going through each and every area of the game, using Etherealize and Teleport to map out everything I haven’t previously and making sure my maps are (mostly) correct. I realized there is definitely persistence after you free the true King Alamar. I was able to acquire other quests and the King remained on his throne, without the game resetting. I’ve turned in all the other lord’s quests, found the trivia island, gave Om his sight back using the two Queen Idols and answering a riddle, and basically did everything there was to be done. I even managed to defeat the encounter at the dragon town in E-4.
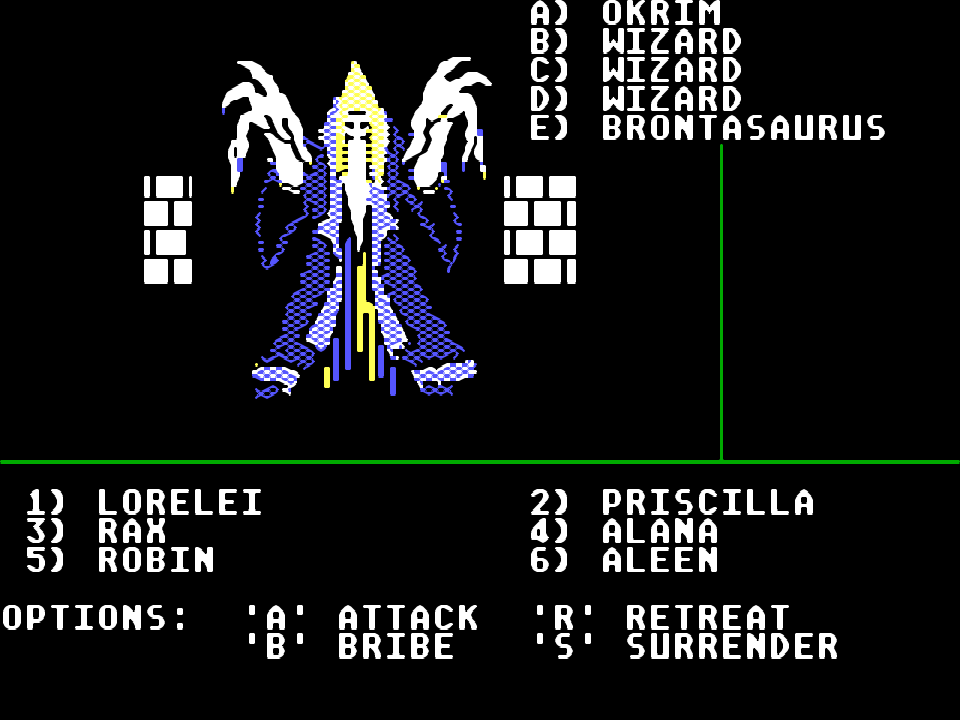
Okrim went down with a single shot from Robin’s Giant´s Bow.
Eventually, I went to Fander Treespook’s Grove of Might and Magic to see the maps Fander made and compare them to my own. I found a few mistakes on my own, as well as his side and corrected them in my files. I gathered all the Silver and Gold messages and managed to decipher them…
Silver and Gold Messages
I’ve figured it out! The messages are actually quite easy, once you put them on paper. Let’s see how this works. These are the silver messages:
- ATIS-19-31UD54AEUPI1
- RSTIA-,E1,;/11RN;/M-
- IACI1;-2;ONU–G,NOT2
- //SV/21;-22R,;DU1RS0
- OEI/:1-33-1EK5;D-ET,
- TSTST,E1,D-DS15A1DRH
A hint from the Fabled Castle Doom said the silver message interleave is “FEDBAC”. Here’s what happens if we put them in that order:
- TSTST,E1,D-DS15A1DRH
- OEI/:1-33-1EK5;D-ET,
- //SV/21;-22R,;DU1RS0
- RSTIA-,E1,;/11RN;/M-
- ATIS-19-31UD54AEUPI1
- IACI1;-2;ONU–G,NOT2
Now, all you need to do is read them from top to bottom. The solution becomes clear: To raise statistics, visit: A-1, 12-1; E-1, 9-13; E-2, 3-13; D-2, 10-12; under Dusk, 15-15; 14-5; Dragadune, 1-1; under Portsmith, 0-12. So the silver message solution wasn’t very useful to me, sadly. I already have the all the stat-increasing locations from my exploration. A peculiarity is that the location of the giant scale in E-1 is also considered to increase statistics, though all it ever gave me was experience. How about the gold message solution? Here are the gold messages, in order:
- COMPLETION-MUST-EACH-KINGS-OF-ASTRAL-WITH-9TH-SANCTUM-AND-WONDROUS
- ONE, -RIDDLES-VALUE-YOU-YOU-5-CARD-MUST-CLAIMED.-DREAMS,-…
- FOR-TASKS-AND-RATING.-BE-FROM-6TH-FRUSTRATIONS!-THE-TO-IN
- OF-BE-HAS-TRUE-KNOWLEDGE-PLANE-A-LEVEL-TO-REALITY-IT
- SCOOP:-THE- DICOVERIES-YOUR- TO-RETURN- THE-YOUR-FOR- DREAMS-IS
- BOOK-DONE.-A-SELF-THAT-FROM-KEY-YOU-BE-TO-SEEMS.
- THESE-AND-THAT-MUST-CAN-DIFFERENT-SHALL-HAVE-FROM-A-JVC
- THE-ARE-QUESTS,-INCREASES-IDENTIFY,-APPLY.-LOCATIONS,-END-ATTAINED-MY-SEQUEL
- SUCCESSFUL-THAT-TRAINING,-THE-WORTHY-THE-VISIT-YET-INNER-REALITY,-ORDER,
Another hint in Castle Doom tells me the gold interleave is “8, 5, 3, 9, 1, 4, 6, 2, 7”. Putting the messages in that order gives me:
- THE-ARE-QUESTS,-INCREASES-IDENTIFY,-APPLY.-LOCATIONS,-END-ATTAINED-MY-SEQUEL
- SCOOP:-THE- DICOVERIES-YOUR- TO-RETURN- THE-YOUR-FOR- DREAMS-IS
- FOR-TASKS-AND-RATING.-BE-FROM-6TH-FRUSTRATIONS!-THE-TO-IN
- SUCCESSFUL-THAT-TRAINING,-THE-WORTHY-THE-VISIT-YET-INNER-REALITY,-ORDER,
- COMPLETION-MUST-EACH-KINGS-OF-ASTRAL-WITH-9TH-SANCTUM-AND-WONDROUS
- OF-BE-HAS-TRUE-KNOWLEDGE-PLANE-A-LEVEL-TO-REALITY-IT
- BOOK-DONE.-A-SELF-THAT-FROM-KEY-YOU-BE-TO-SEEMS.
- ONE, -RIDDLES-VALUE-YOU-YOU-5-CARD-MUST-CLAIMED.-DREAMS,-…
- THESE-AND-THAT-MUST-CAN-DIFFERENT-SHALL-HAVE-FROM-A-JVC
It’s a bit harder to read it from top to bottom this time, but if you put it on paper or in a table, it becomes easier:
The scoop: For successful completion of Book One, these are the tasks that must be done. Riddles and quests, discoveries and training, each as a value that increases your rating. The kings true self you must identify, to be worth of knowledge that you can apply. Return from the Astral Plane from 5 different locations. The 6th visit with a key card shall end your frustrations! Yet 9th level you must have attained for the Inner Sanctum to be claimed. From my dreams to reality, and reality to dreams, a sequel is in order, wondrous it seems. …JVC
So the gold message is more of a message from the developer, Jon van Caneghem, to the player, though it should help me with where to go to finish the game – I have to go to the Astral Plane, and I’ll need the Key Card which I got at the Volcano.
The Astral Plane
No resting, no Location spell, regular darkness and walls mostly consisting of magical barriers – this is what the Astral Plane is. The Soul Maze was a piece of cake compared to mapping out this place. After a lot of stumbling around, I got a revelation – teleportation works by keeping your orientation the same as before casting the spell. With that, I found my bearings and determined what the north in the Astral Plane is. I mapped out everything before I even tried to use Etherealize, because I would have definitely gotten lost otherwise. Eventually, I figured out the layout is quite constricted, with long hallways leading you to your goals. The goals? Five rooms, each teleporting you back to Sorpigal after entering it. Once all these rooms were triggered, I was able to back to the large, sixth, L-shaped room, where the boss was. I needed the key card:
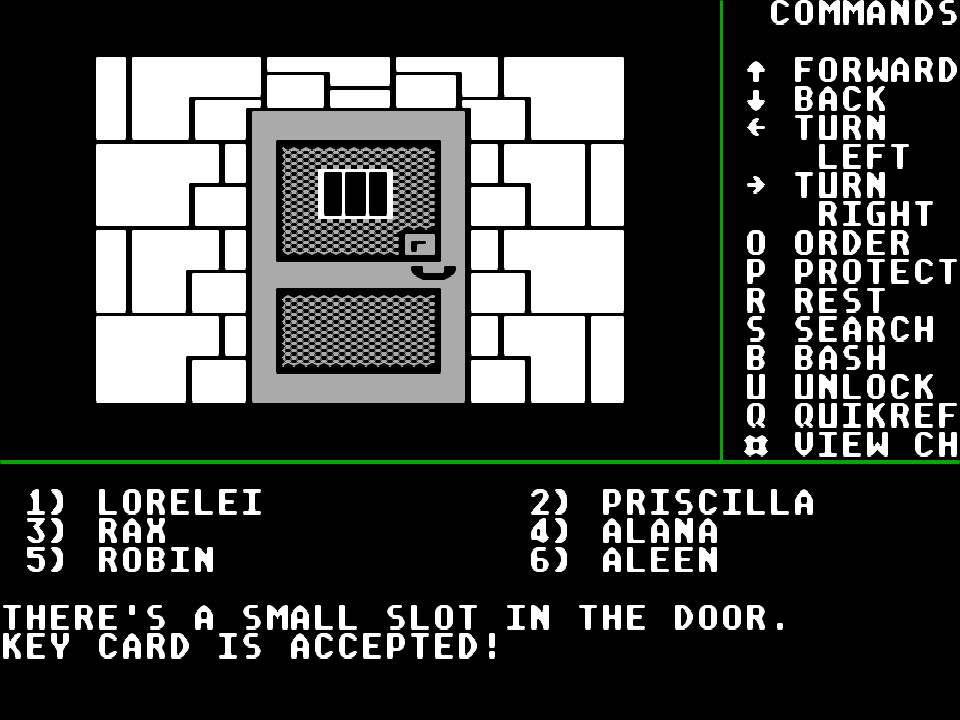
Finally, after hours of mapping the floor.
There’s a small slot in the door. Key card is accepted!
The next step…
The metallic room is dimly lit by a pulsating white glow!
And finally…
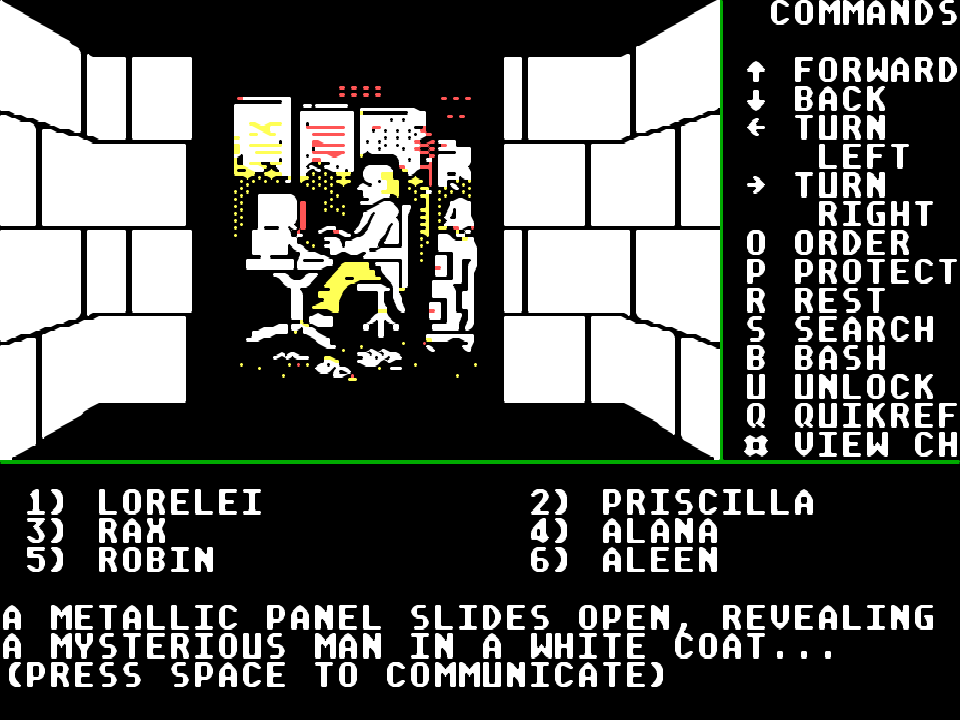
The final “boss” as it were.
A metallic panel slides open, revealing a mysterious man in a white coat… (Press space to communicate)
Upon pressing space, you get the game ending screen…
In a serene voice, the data keeper says: “Welcome to your Inner Sanctum, Varnlings! I am very pleased that you’ve made it this far. You are to be commended. I’ve been monitoring your progress.” Turning to the strange mechanical device, he inserts a flat object into a slot. Your party’s current performance total = 427131. Excellent rating! This is a rare occasion, for only a privileged few are given the opportunity for transfer to another V.A.R.N. (Vehicular Astropod Research Nacelle). Return now to the Inn of Sorpigal for rest and celebration. Then continue on to your new assignment at the gates to another world.
Apparently, the game gives you a final score, which the messages throughout the game hinted at. I’m not sure what it means, but I can send it by mail to the New World Computing offices in California, provided those still exist.
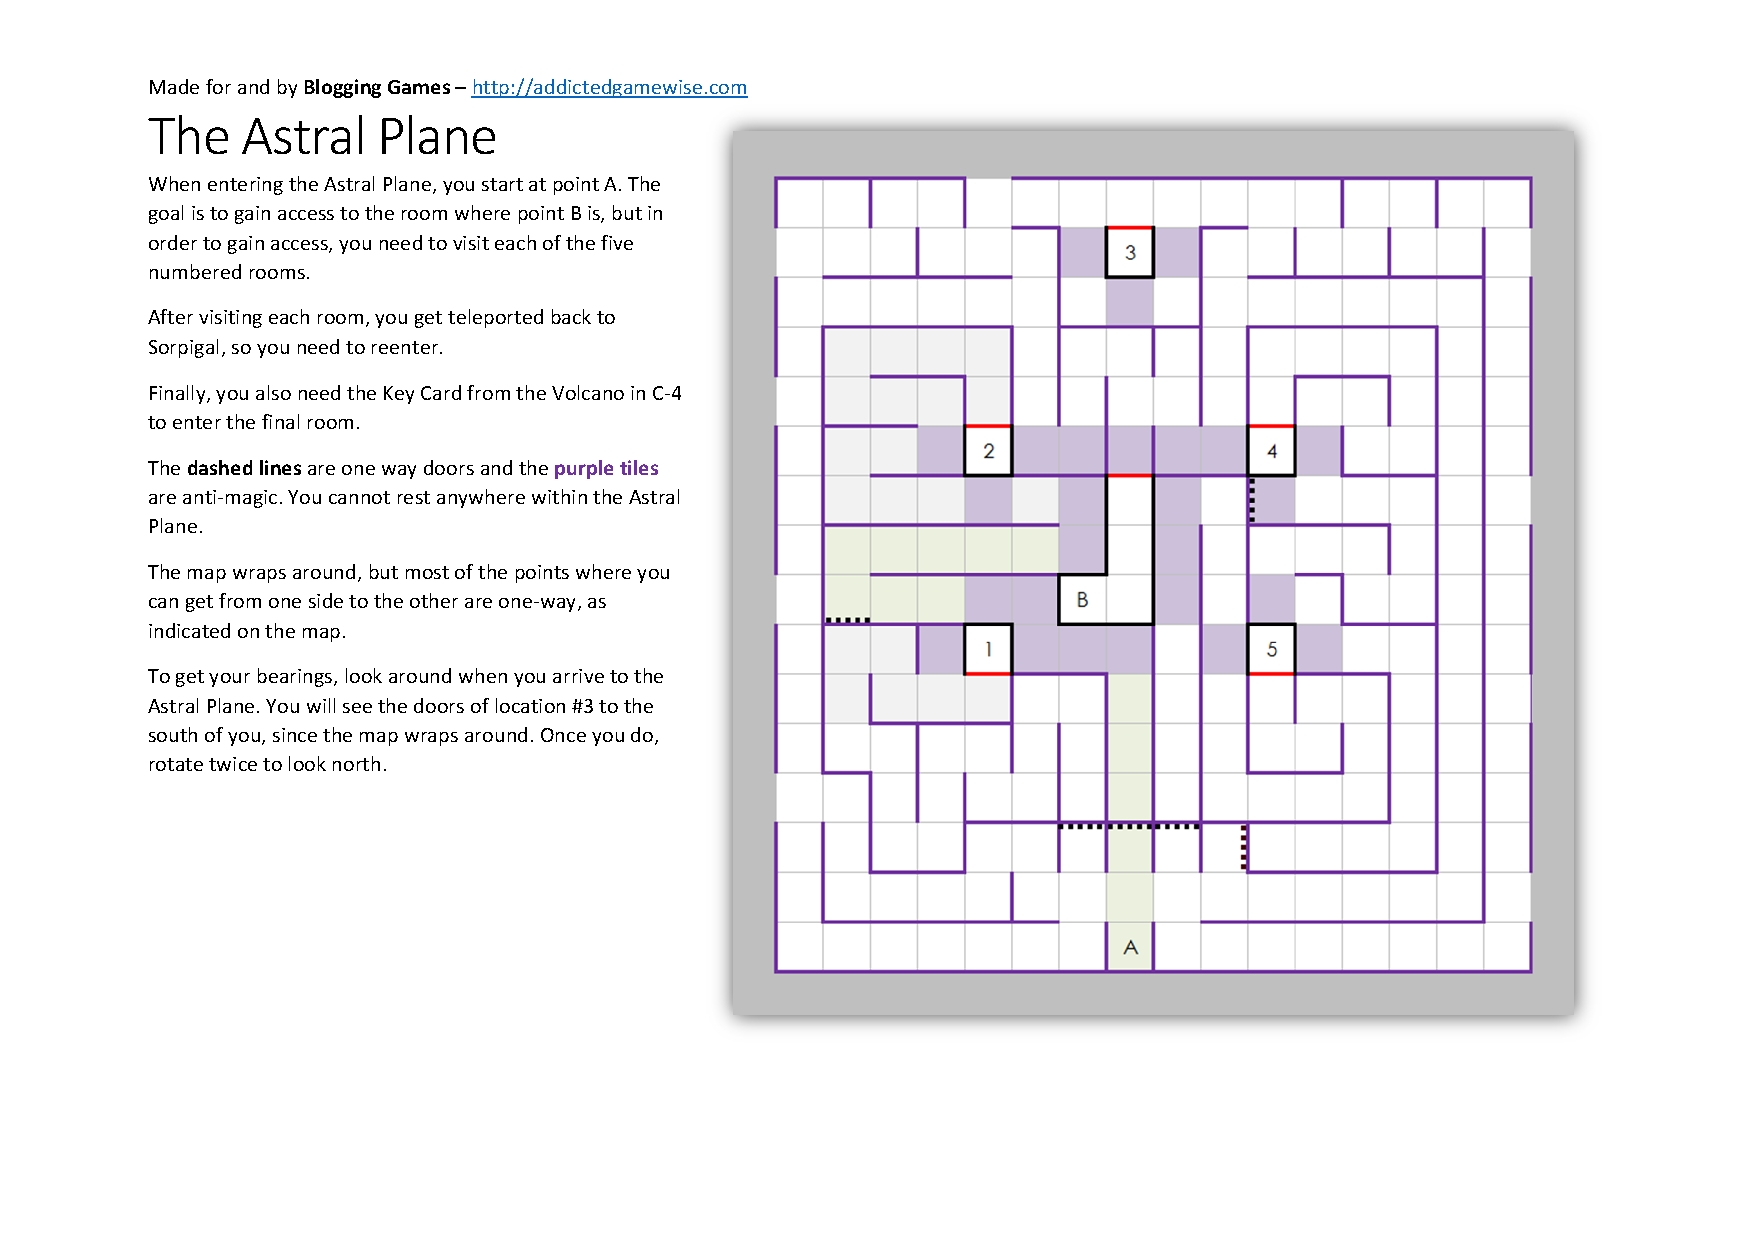
Everything you need to know about the Astral Plane.
I got transferred back to the Inn of Sorpigal and was rewarded with 500, 000 experience points for my troubles, which gave each of my characters another 3-4 levels. The game is now completed, but there was one more thing I wanted to check out…
The Gates to Another World
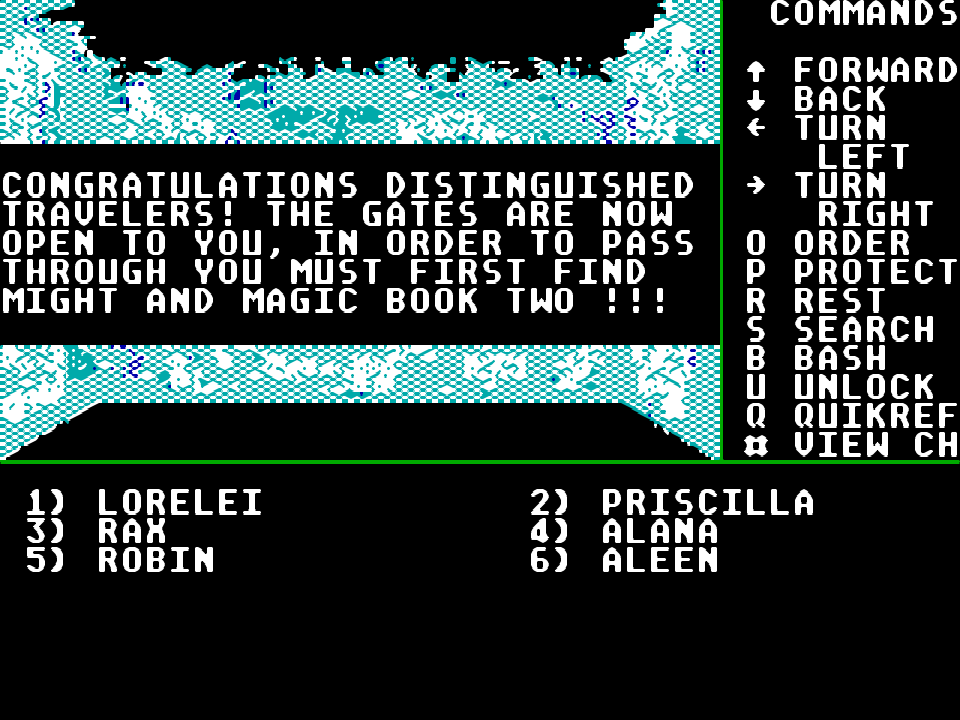
I wanted to see how the transfer process to Might and Magic II: Gates to Another World works. I’m not sure I’ll want to transfer, since I hear that the second game has some pretty intense level scaling, but I at least wanted to check it out. In order to transfer your party to Gates to Another World, you need to go to the Gates to Another World, logically. These are located in B-1, in the northern part of the area, at 4-14. Now that the game is over, going to the portal gives you a message:
Maybe it’s just a flag, maybe it’s an unimplemented feature. In any case, it doesn’t seem to do anything.
Congratulations, distinguished travelers! The gates are now open to you. In order to pass through, you must first find Might and Magic Book Two!!!
So I guess that’s it. I get this message and all I can really do is to step off the tile. To my knowledge, there is no way for this transfer to work. Thinking about it, stepping into the portal might trigger some sort of flag to mark the party as game completers, so I did go back to the inn to save after stepping into the portal, just in case. What you can do, based on what Google tells me, is to start up Might and Magic II and then opt to transfer characters from Might and Magic Book One by typing in the path to the roster.dta file from the first game. I’ll touch on that when I start up the second game, eventually. For now, I’m in the mood for something lighter on my time and my brain. Maybe I’ll play a more modern Steam game. For this one, I’ll make image and document files for all my maps, write up on a few tips and maybe a guide. There’s far too much time invested here for me to just abandon all those maps and notes. I might even try to start the game again, to see how fast I could get through it with all the knowledge I have now. I had one more thing to do. There was a virgin I had to free…
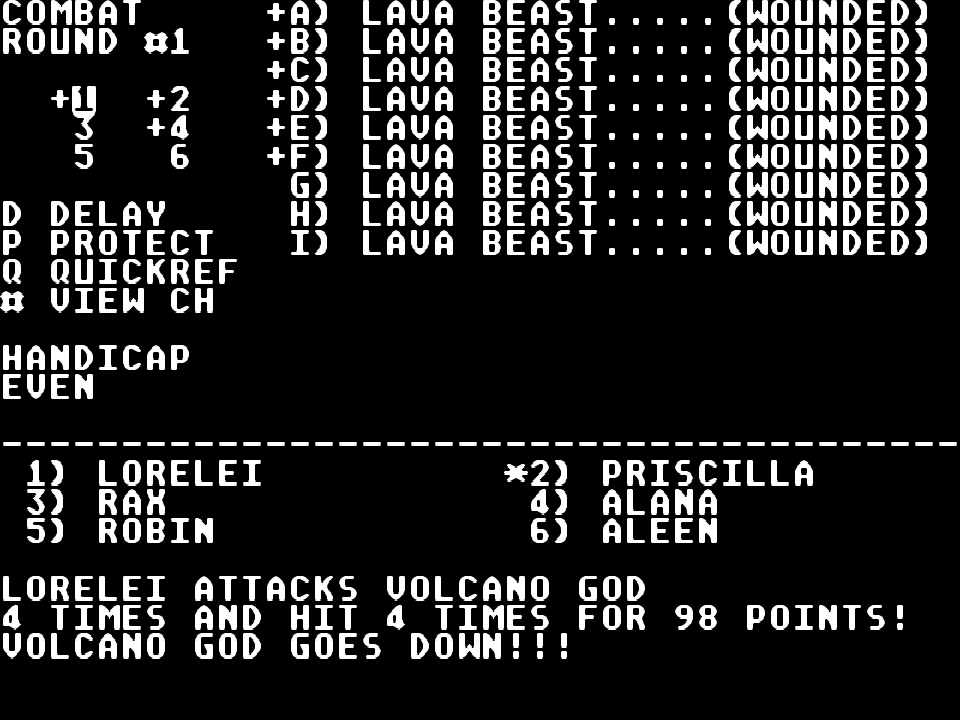
The Volcano God died like the wuss he was. Priscilla is dead because I was doing it for the second time here, to take a screen.
Character Advancement
Lorelei the Knight
Lorelei gained six levels, 60 hit points in total and ended the game at level 24. She finally got a Flamberge +3, to replace her Flamberge +2, from a battle in the Astral Plane. The game completion bonus gave her another 4 levels and 55 hit points, taking her to level 28.
Priscilla the Paladin
Priscilla gained four levels, 39 hit points in total and ended the game at level 19. She got a Plate Mail + 3, to replace her Plate Mail + 1, providing a straight upgrade. The armor dropped in a random fight in the area of A-3. The game completion bonus gave her another 3 levels and 38 hit points, taking her to level 22.
Rax the Robber
Rax gained seven levels, 78 hit points in total and ended the game at level 24. He is now wearing the Ring of Okrim, replacing the Robber’s Tools. The ring is a drop from Okrim, the boss of the Ancient Wizard’s Lair in B-1. It increases Luck by 10 points. The game completion bonus gave her another 3 levels and 34 hit points, taking her to level 27. While going back to the Volcano God, he got a Crossbow Luck, to replace his Crossbow + 2.
Alana the Cleric
Alana gained eight levels, 85 hit points in total and ended the game at level 25. The game completion bonus gave her another 3 levels and 35 hit points, taking her to level 28.
Robin the Archer
Robin gained four levels, 43 hit points in total and ended the game at level 19. She got the Giant’s Bow, which is absolutely awesome and, to my knowledge, the best bow in the game. She also got a Ring Mail + 3, replacing her Ring Mail + 1. These items dropped while exploring the area of A-1, to see if I missed anything. Okrim, the boss of Wizard’s Lair, was killed with a single shot by Robin, after she got the Giants Bow. The game completion bonus gave her another 3 levels and 34 hit points, taking her to level 22.
Aleen the Sorceress
Aleen gained five levels, 49 hit points in total and ended the game at level 21. She got a Shiny Amulet, which increases sleep resistance. The only reason she’s wearing it is because of the free slot she used to have. It was going to be replaced soon, but with bad luck, nothing ever dropped. The game completion bonus gave her another 3 levels and 34 hit points, taking her to level 24.
Accumulated Links
I’ve played Might and Magic Book One for well over a hundred hours. Through the course of this, I tried not to spoil the game for myself, so I avoided walkthroughs and maps. I didn’t avoid reading about the game in every other way, though. Because of that and, after completing the game, because I wanted to make my maps as accurate as possible, I accumulated a bunch of links and resources. Here they are:
Ashtarat’s Gaming Blog
Ashtarat made a blog similar to this one, except his blog serves only to document two games – Might and Magic Book One: Secret of the Inner Sanctum and Might and Magic II: Gates to Another World. What I love about it is that he’s a pretty good writer and instead of just reporting on his progress, he invented and wrote a story about his characters, briefly interrupting it every now and then to explain the mechanics.
Let’s Play Archive: Might and Magic by Thuryl
I love this let’s play or, to call it the more correct term, after action report, for the exact same reason I love the blog I listed above. The author tells a story, provides his own take on it and adds some nice humor. I actually haven’t finished reading either of the two, primarily because I wanted to complete the game first. Now that I have, it’s time for some relaxation.
Fander Treespok’s Grove of Might and Magic
Fander made his site for a single purpose – to gather up all the information about the Might and Magic Series in one spot. His site does that very well, perhaps even too well, so I wouldn’t recommend going to it if you want an authentic experience. By authentic, I mean “I have no idea what I’m doing”, of course. If you don’t mind spoilers, or if you’re like me – you finished the game and you want to make sure you haven’t missed anything, this will be an excellent place to go to.
My Google Drive – Might and Magic Guides
Now that the game is over, my Google Drive will receive a boost in activity. I will be cleaning up the files, finalizing and sorting them and making everything ready for the guide I intend to write. For now, you can find all of my notes and maps there.


