I pretty much explored most of the cave near Sorpigal, with only the tough encounter rooms remaining. Instead of bashing my head against the wall, I decided to do some easier encounters in the jail of Sorpigal, to earn some money and recover from all the deaths.
Encounters in the Jail of Sorpigal
This decision turned out to be pure genius. The toughest encounter in the jail was the one in the back room, which is lit up. Usually, you can encounter clerics, wild boars or some other second-tier (this is my own category) monster which provides some challenge, but is mostly easily beatable.
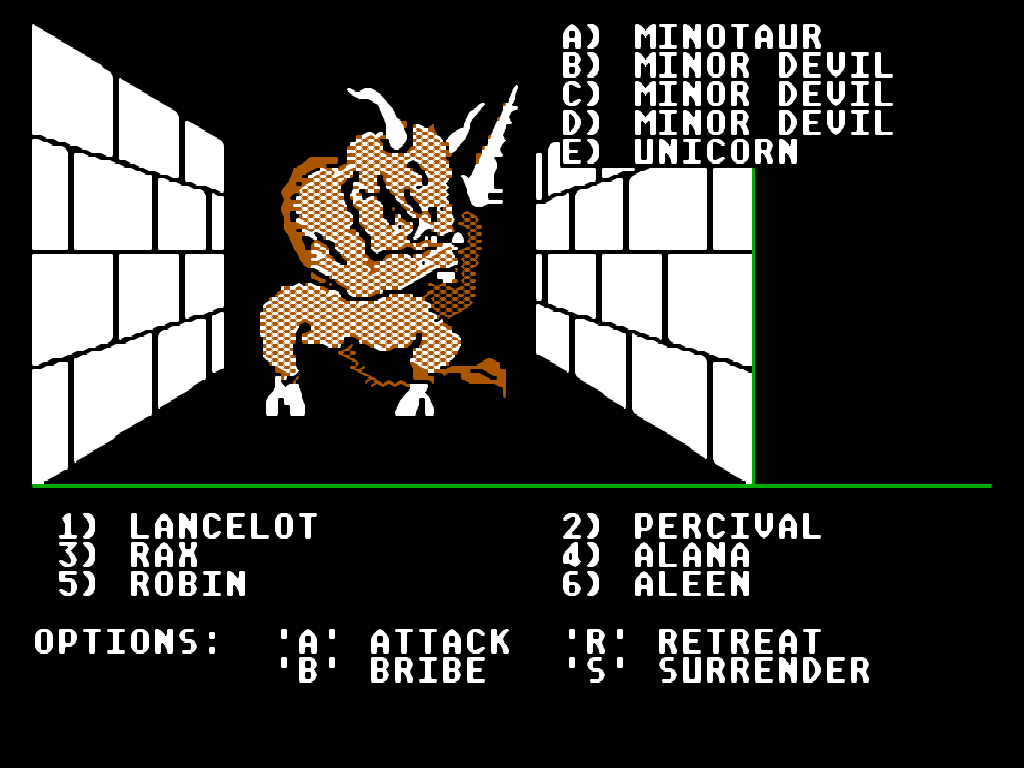
The encounters might scale with levels slightly, because I found this minotaur within Sorpigal.
More often than not, these enemies drop a nice amount of gold, but more importantly, they drop chests with some very good loot. After about half an hour to an hour of fighting, I made a list of all the loot that dropped.
- Long Bow +1
- Large Shield +1
- Large Shield +2
- Leather +2
- Staff +1
- Short Bow +2
- Mace +1
- Silver Shield x2
- Robber’s Tools
- Various Herbs
- Scimitar
I gave the Scimitar and the Robber’s Tools to Rax. I also gave him Robin’s Crossbow +1 and gave Robin the Long Bow +1, since robbers can’t use Bows. I also gave Alana the Mace +1 and Aleen the Staff +1, so now my entire party has enchanted weapons, meaning they can all hit monsters that are immune to regular weapons. I also evenly distributed the defensive equipment, which raised the party’s overall armor class, making them harder to hit.
Beware of Cursed Items
Sadly, I wasn’t careful, so I also equipped some cursed items on my party. I had to waste a total of 1500 gold pieces to uncurse this gear. Since uncursing an item actually completely destroys it, instead of just making it “normal”, I also lost some gear in this process, meaning I had to fight some more encounters to find some decent replacements.
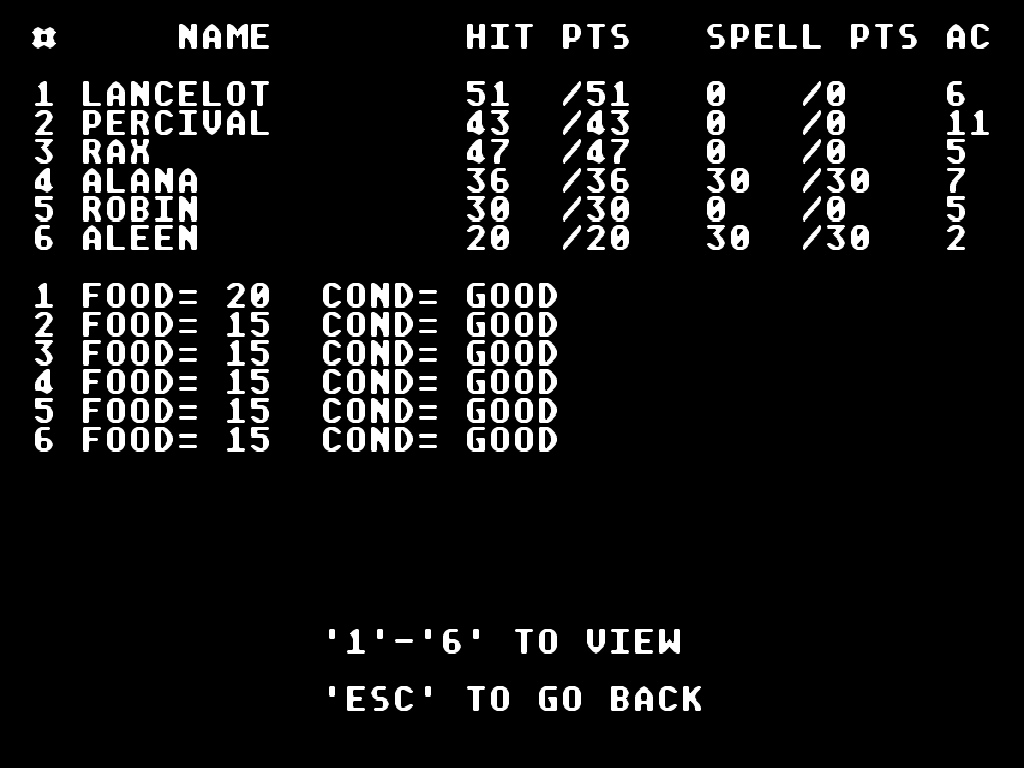
The final state of the party after all the jail fighting.
Eventually, I was done with all of this, leveled everyone to level 5 and even raised some of my characters to level 6, before I decided to take a break.
Useful Spells
I realized I’ve accumulated a large amount of gems, so I started giving spell that use them their chance to shine. Fireball and Lightning are extremely useful against large group of enemies. The Energy Ball is nowhere near as useful, but it can be a lifesaver when I need to quickly kill of a single enemy, albeit a very costly one, with a 1SP per level cost.
As for my Cleric, she now casts Protection from Poison after every rest and Protection from Fire when I find a group of fire enemies. She also needs to remove afflictions from my party members on a regular basis, provided she has a turn free from needing to heal, which is rare. Hopefully, it’ll be less rare now that my armor class is much higher.
Ready to Clear the Cave
Since I fought a few groups of centaur, I was now also reasonably sure I can clear a few of the encounters in the cave now, so I felt it was time to try and fully map it. I was right!
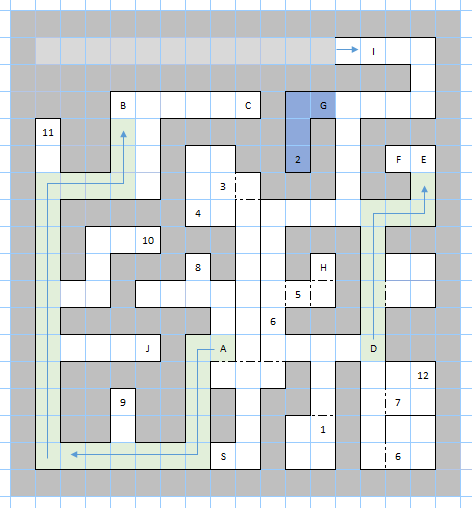
The full map of the cave, without notes.
I cleared the centaur and militiamen rooms easily, though I have noticed that fighting centaurs causes my alignment to switch, so I’ll have to avoid them in the future. The room with the militiamen had another encounter against a group of druids, which I barely won, but won all the same.
I tried clearing the ogres, the cyclops and the barbarians, but I wasn’t able to defeat them because all three of the groups ended up being huge. I did, however, manage to retreat from all three battles, making the encounters go away and allowing me to explore the rooms, which ended up being empty.
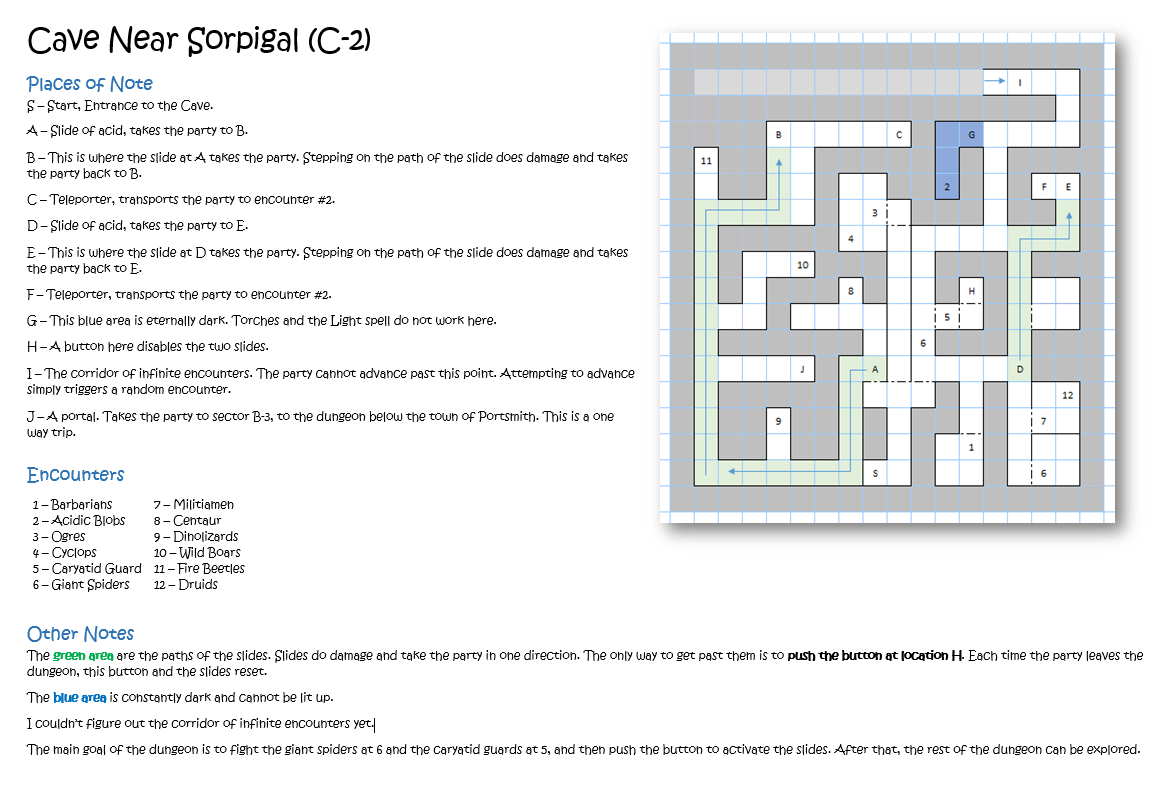
The full map of the cave, with all the notes I took.
To the west, I tried clearing the fire beetle encounter, hoping there would be a secret passage, to behind the corridor of infinite encounters, but I found nothing. There’s the area past the corridor to explore yet, but I have no idea how to figure that one out. In the meantime, I consider the cave near Sorpigal to be fully explored and mapped, as possible as that is. All that’s left was to test the portal in the cave, which is what I did. It took me to sector B-3, next to some stairs leading up – to Portsmith.
Portsmith
So the portal from the cave near Sorpigal leads me to the cave/dungeon below Portsmith. I’m starting to think there’s a route throughout several caves which avoids going up to the surface, but I’m not really sure.
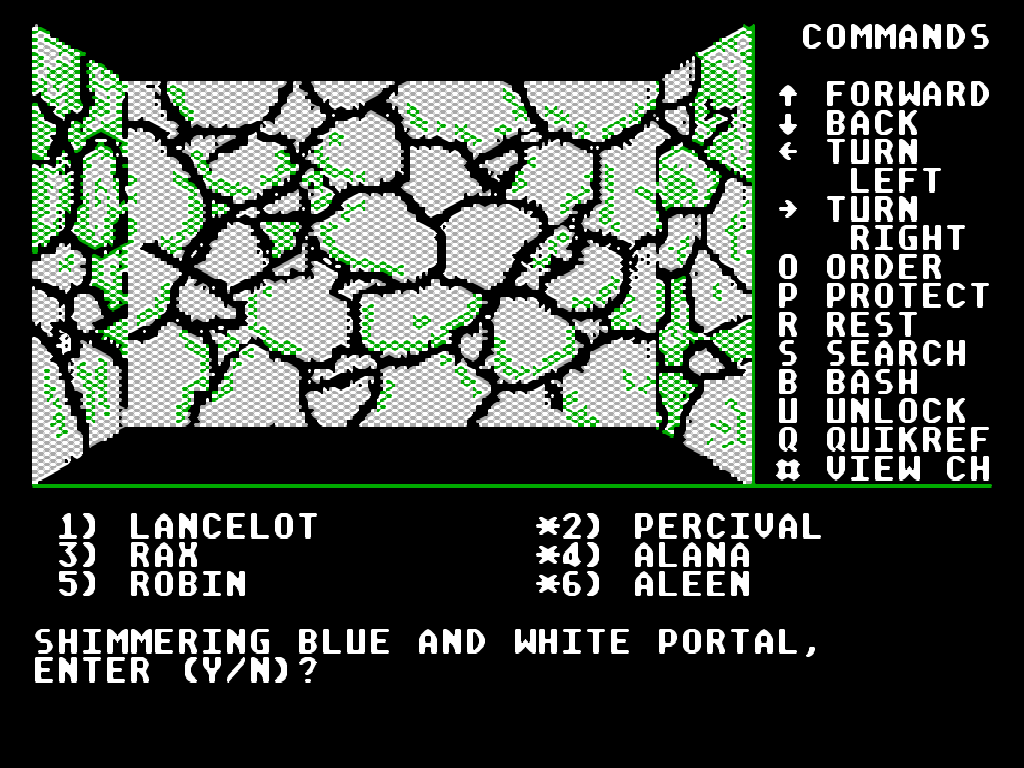
It’s a one way trip, so saving beforehand is always a good idea.
Since Portsmith is hostile to male characters, I decided to reload the game, but before that, I wanted to enter the inn to write down any rumors I might find…
Experienced Might and Magic players will know what happened here. Everyone else will find out in the next article. Cliffhanger!
Goodies
As usual, I made the maps, so you get download links.
- Might and Magic I – Cave Near Sorpigal, Map and Notes, A4 .docx
- Might and Magic I – Cave Near Sorpigal, Map and Notes, A4 .pdf
- Might and Magic I – Cave Near Sorpigal, Map and Notes. A3 .docx


