Pokemon Yellow - Hall of Fame

In my final two sessions of Pokemon Yellow, I beat the Elite Four and my rival and then spent a couple of hours wrapping things up.

Pokemon Yellow - Training Kingler

Training was very creative. I figured it was faster to get less experience directly than constantly switching in battle.

I made some “creative” choices with training. I got bored constantly switching Pokemon in and out at the Victory road, so instead, I did a couple of suicide runs against the Elite Four. Lorelai was easy to beat with Pikachu and Charizard easily destroyed Bruno’s team. I even managed to beat Agatha relatively consistently. It was only Lance that gave me trouble, really. At one point, Squirtle got strong enough to beat Bruno’s rock types, so I started training him a lot faster to.

Pokemon Yellow - Squirtle Saves the Day

Surprisingly, Squirtle took the victory.

Kingler and the rest of my team gave me trouble, though. I actually started wandering around the world, looking for trainer rematches to get some money and train the weaker Pokemon in my team. I had to grind for a long time to finally beat Lance with most of my team intact, but once I did,  Gary was easy in comparison. He did almost kill me, but that was only because I ran out of PP on Pikachu and almost ran out of PP on Charizard. In the end, Squirtle took the victory with critical health and none of my other Pokemon remaining conscious.

Pokemon Yellow - Team

The state of my team before the victory.

The game was technically beat, and the session was over, but I wasn’t done yet. Today, I loaded up the game again and went straight for the Unknown dungeon, to catch Mewtwo. The place was a maze with tough enemies, but Pikachu and Charizard made it easy for me to get to the bottom of it and reach Mewtwo. I decided not to beat my head against a wall and just used the Master Ball on it, so the fight was won instantly and Mewtwo was mine.


Pokemon Yellow - Mewtwo

Remember when Mewtwo used to be “the strongest Pokemon ever”?

Next up, thanks to some reminders on reddit, I went to route 4 and caught a Mankey. Technically, Ash encountered a Mankey in the early episodes, but only caught it after it evolved into Primeape, but I don’t think that’s an option in Yellow, at least not that early, so instead, I did what I did with Pidgey and just rush-trained it to level 28 instead.

Pokemon Yellow - Primeape

I kind off forgot about Primeape. Thanks, reddit!

After that, all I had to do was to catch 29 more Tauros. This took me a good hour of playing, even with generous use of the fast-forward feature, but eventually, even that was over. I wish I could prove it , but sadly, the Box interface of the first generation games is horrible and there’s no way for me to show how many I had. I’ll transfer them from game to game until I’m able to display them in the GBA games.

Pokemon Yellow - Tauros

No, I don’t want to give a nickname, for the 19th time!

Also, it was pointed out to me that I didn’t catch a Muk. I actually did, I just didn’t write about it. I caught one at the Electrical Plant but haven’t used it at all. If i remember correctly, Ash’s Muk evolves at one point, but I don’t think it’s in the first season, so there’s plenty of time for that.

In any case, I believe I did everything I could and needed to do in the first game.  I also did something extra – I got a Lapras. Ash saves one at the beginning of the Orange league season, but I’m not sure if I’ll be able to catch one then, so instead, I got it now, for free, as a reward at some point in the story.

I’ve added a new challenge to my list which again involved playing through a series of games. I know I still have the Zelda challenge to beat, but I think this one might be a bit more interesting.


I want to play through the generations in order, so I picked Yellow as my first game, since it follows the anime most faithfully of the three.  At first I thought I might have an issue with the graphics, since the old GameBoy really hasn’t aged well on that department, but I quickly got used to it. What I can’t get used to is that the sound on the emulator get’s truly horrible now and then. Lucky for me, I’m mostly playing through the game on fast-forward, so I don’t get the chance to notice it to often.

Pokemon Yellow - Name

I decided to name myself Nikola, because I’m an idiot and I forgot I’m playing as Ash

Pokemon Yellow starts a bit differently than usual. The professor isn’t at the lab. Instead, he stops me from going into the tall grass and catches a Pikachu there. Once my rival, Gary, takes the Pokemon Oak meant to give me, I get Pikachu instead and he gets to walk around behind me through the entire game.

Catching a Pidgey and leveling it was faster than waiting for a Pidgeotto.

Catching a Pidgey and leveling it was faster than waiting for a Pidgeotto. This one was Taubsy in the German dub of the anime.

I went through the usual notions of going to the next town, going back to deliver something and then finally moving on from town to town, learning the game. Since Ash sucks as a trainer, I didn’t even try to catch anything until Viridian forest, where I caught a Caterpie and a Pidgey. I know I was supposed to get a Pidgeotto, but I didn’t feel like waiting around until I encounter one, so I did the next best thing – I grind-leveled Pidgey until it evolved. I also evolved Caterpie into Metapod, but decided to wait for a bit before I leveled him into a Butterfree.

Pokemon Yellow - Brock

Brock might be a bit dumb, but Ash is pure stupidity.

After a lot of walking (on fast-forward) I finally got to the Pewter Gym, where I decided Ash was a cheater. There was no way he beat Brock with a Pikachu with so little grinding. I actually had to level Pikachu all the way to 17 at which point I still won due to pure luck of a critical hit. I have no idea how that kid got any badges, but it sure wasn’t skill or strategy. Still, he did it with a Pikachu, so I had to do it to.

Pokemon Yellow - Team Rocket

I don’t know about Red and Blue, but in Yellow, you actually keep encountering the terrible duo.

I got the badge and I moved on through Mt. Moon, where I got the Dome fossil. I intend to use it and put the Pokemon in the PC as soon as I get it, simply so I can transfer these rare Pokemon between games later. It’s not following the story, but since I’m playing through all the games, I might as well create a collection. I also fought Team Rocket along the way.

Pokemon Yellow - Bulbasaur

I remember this one as Bisasam from the German anime dub. I don’t really like grass types.

Next up, I got to Cerulean city, where I beat Misty easily, mostly because I couldn’t remember which Pokemon Ash used against her. Based on his track record, he probably decided Pikachu wasn’t the best choice. It was for me, though, so I had no trouble whatsoever. I also got Bulbasaur from a person in the city. Ash catches it in a hidden village in the anime, but there’s no hidden village in the game. Sadly, since there’s no Everstone in Pokemon Yellow, I have to keep remembering to cancel his evolution at each level up.

At this point, I was playing for well over an hour, or about 15 hours if you could believe the game save. Gotta love that fast-forward feature. This was the end of the session.


That’s right. After all these years, I’ve finally managed to complete this amazing classic god game. Populous: The Beginning has always been one of my favorites, but it has also been a thorn in my side, since I never even finished half of it as a kid. Thanks to the magic of Good Old Games, I could finally do it and it was worth every single one of the many hours I’ve spent doing it.

Journey’s End

Journey’s End was technically the last level I needed to complete before my shaman could finally realize her plan and become a god. It was definitely not an easy one.

I started out on a small piece of land on a peninsula surrounded by the three enemy tribes. While I only had a few huts, all of them already had pretty much fully built settlements. Even worse, those that didn’t have a nice route towards me were just a Land Bridge away, which the Matak nicely demonstrated just a minute or two into the level.

I started immediately charging my own Land Bridge so I could create some extra room for my buildings. At first, I used my shaman and her spells to repel the early attacks, but I rushed to get a fire warriors training hut as well as a balloon hut as soon as I could. This was a huge gamble since I was low on room already, but it paid of. Once I had a few airborne fire warriors, I could repel the enemy attacks more easily and now actually had time to charge up the crucial spells I needed, such as Swamp.

Populous - Journey's End

The starting location was NOT a good place to be in.

Pretty soon, the Chumara started attacking with balloons of their own, but lucky for me, I already had a small force of fire warriors and, since they used a mixed force of attackers, I could easily take care of their shaman and then pick off the ground forces without any difficulty.

This got me a huge fleet of stolen balloons, so I trained up even more fire warriors and decided to go after the Matak, since they seemed the weakest and their lands seemed to have plenty of trees which I lacked. This turned out to be the correct strategy, so the Matak were destroyed pretty soon.

Now I could finally build up my village properly on the Matak terrain, so that was exactly what I did, using my shaman in the meantime to do some harassment. Once I had an even bigger flying army I could use, I started focusing on the Dakini and the Chumara in order. They managed to repel a couple of attacks and even started a few counter attacks, but eventually, I worn both of the tribes down and managed to defeat them. The Chumara were definitely the hardest, since they had access to balloons of their own and also loved creating fire warriors.


Populous - The Beginning

Time to get my godhood…

In any case, the level and technically the game, were both won. I wasn’t done yet, though.

The Beginning

I got myself a bonus level to play with. The beginning is a level where every tribe, including my own, has a fully built up village. The catch was, I was in the middle of all of them. The fun part of it was that my shaman was now a god.  What this meant was that I could cast any of my spells on any point of the map, as long as I had the mana for it. Fun times!

To be completely honest, I wasn’t ready for this kind of power. My first two tries failed miserably, because I though I could just focus on my spells and ignore my village. I guess I wouldn’t be a very good god, because I missed the part where I needed villagers to get mana for my spells.

Eventually, I figured this out, so I started focusing on building up my population and defending until I could increase my mana income enough to go on the offensive. I focused on sinking the routes towards my village, being careful to keep the trees growing on those routes on my side of the sea. Once I got rid of one tribe’s route of attack, I could more easily defend against the other two. Once all of them were gone, I was finally able to go on the offensive.

And what a glorious offensive it was!

No sinking this time. I cast a charge of swamp on the three places where the enemy shamans loved to hang out and then used the huge amount of mana I was getting to obliterate everything. Volcano, Angel of Death, Firestorm, Tornado, Earthquake… Everything was used and no one was spared.

The Dakini went down first, followed by the Matak, keeping the Chumara for last. They were a bit stubborn, hiding the last few of their villagers on various parts of the map, but eventually, I exterminated every single last one of them. The universe was mine.


As I promised, today, after about 15 years, I can finally say I’ve accomplished all the goals in Crash Bandicoot 2: Cortex Strikes Back. It took me  a few days of persistence and it probably did some damage to my nerves, but I did it.

The most difficult level? I’m surprised to say it was Un-Bearable. It contained the last clear gem I got and I found what I needed to do by pure accident. I kept missing about 20 boxes at the end of the level and I was sure I didn’t miss any forking paths or anything of the sort. On one of my many attempts, it just so happened that, on the point where the big bear falls through the wooden planks,very few of the planks got broken. At that point, I was sure I had to now jump over the gap and go back to find some hidden passage.

Crash Bandicoot 2: 100% Save

That save slot looks so nice I’d like to frame it and put it on my wall.

I failed to jump over, but I managed to fall in. THAT was the secret passage. You actually have to jump into the hole. About ten lives later, I managed to get through it to, and even found the two sneakily hidden extra life crates at the only checkpoint in the area. Finally, I got the last gem.

My reward? An extra ending scene where Coco, Crash and Nitrus Brio use a cannon powered by all the gems to destroy the Cortex Vortex. Well, I got that, a nice “100 %” on my save slot image, and the satisfaction of completely clearing one of my most fondly remembered games.

Crash Bandicoot 2 : 100% Ending

I’ve 100% cleared Crash Bandicoot 2 and all I got was this scene.

What now? I’ll move on to another one. I also might write up a short guide on all the gems,or at least on how to get those I personally found the most difficult to find or get.

As expected, Chapter V of the Witcher felt far more linear and shorter than the earlier chapters. It was followed by a relatively quick epilogue and that was it.

I started out at the Dike, having to fight my way to the Old Town, where I met king Foltest and was taken to his palace. Once there, I was told I needed to free his daughter from the curse again and find some way of ending the conflict between the Scoia’tael and the Order of the Flaming Rose, which turned Vizima into a war zone.

While I was there, I managed to miss the last gambling quest. The gambler was the king, but when he offered me a match, I declined, hoping I could save my game first. Sadly, after the conversation, he wouldn’t talk to me any more. I guess I deserved it for trying to “cheat”.

I went back to the Old Town, where I cleared the area and met Shani and Kalkstein again. After that, I had to go out to the swamp graveyard. This was the large area of the chapter, with several smaller locations to explore and outlying areas to visit. I spent about an hour there, solving various quests, including the one which involved saving the princess again.

That one was a bit confusing. I got locked in the crypt with her, so I had to either kill her or somehow free her from her curse. I didn’t want to kill her, so I opted for the other choice, but I couldn’t figure out what I needed to do. I though I need to somehow hide from her so I could leave combat and then meditate at one of the two campfires there, but this didn’t work. Eventually, I let her chase me around her sarcophagus for a bit and then the game finally revealed what I needed to do.

The Witcher - Strigga

Why couldn’t I have just blown the candles out with Aard?

After leading her around long enough, one of the candles on her sarcophagus went out. After four more candles, it was finally over. I have to say, I did not like this mechanic. It wasn’t very obvious and it felt very clunky. Still, I did what I needed to do, so the mayor let me and the princess out of the crypt.

The second major quest I did in the swamp revolved around me gathering all the pieces I needed to craft the legendary witcher’s armor I found out about in the previous chapter. I had to bring all the pieces to the blacksmith at the Old Town, which got me what I’m guessing is the best armor in the game. It reduced all damage I received by a fifth and had three potion slots.

The Witcher - Raven's Armor

Raven’s Armor doesn’t just look awesome, it IS awesome!

Eventually, I cleared everything I could and went to the old manor, where the king sent me. This is where I found out the Salamandra laboratory was, with Azar Javed hiding inside. I met Yaevinn there, so he followed me in. After along trek through the catacombs bellow, I finally reached Javed and was able to fight him. He fell really fast, so it was a bit of a letdown. The monsters he threw at me before I could reach him didn’t fall nearly as fast, though, so there was definitely plenty of challenge.

Once all of that was over, I found out the leader of the Order of the Flaming Rose was behind everything. I got back to the city, which ended Chapter V and started the Epilogue. I fought through the streets, met some old friends along the way and finally got to the Order’s castle, where Jacques de Aldesberg was waiting.  Before I could fight him, the teleported both of us to some icy area in the future.

Apparently, some sort of major cataclysm, called the White Frost was coming, so Jacques’ intentions were to create a new breed of human which could survive it. Of course, his intended results weren’t exactly what most people would agree with, so he definitely didn’t turn out to be a good guy, just a misguided crazy guy.

The Witcher - Frost Area

The icy area actually looks cool. I wish there was an actual chapter there.

What followed was the game and Jacques prolonging the inevitable. Instead of me just having the final showdown, I had to fight random battles on the long way to Jacques for about half an hour. It wasn’t hard or challenging, it was just tedious, so it kind off took away from the ending and the game. Eventually I got to him, beat him, and the game was won.

Oh, and it’s possible Jacques might be Alvin all grown up. The same amulet I gave Alvin was on Jacques body, except it looked aged, and Triss already said it’s possible Alvin could actually teleport through time. The game didn’t confirm it, but it’s a definite possibility.

In any case, the game is won.

Also, the final movie looks awesome. I wish there was more of that. In fact, I wish there was a full-length movie.

Well, it’s the last day of the year and I managed to squeeze in one more game before it’s over. Crash Bandicoot 2: Cortex Strikes Back is completed.

I’m not done with the game, though. Even though I beat the last boss and gathered all the crystals, I still have loads of gems to collect. Luckily, the game gives a convenient “percentage completed” statistic, which now tells me I’m at 73% overall. I was in the higher sixties when I beat the last boss, so I did make some progress towards 100% completion, but it will still take a while. As a kid, I never managed to reach 100%, partially because I was a kid and partially because I didn’t have Internet access so I couldn’t “cheat” my way through by reading guides. I’ll try not to cheat my way through this time as well, but I make no promises. If it gets too dull, or I get stuck, I’ll find a guide.

73% completion, Save Slot Image

As I said, I’m at 73%

I love the look and feel of the game. It aged really, really well and the graphics don’t look outdated at all, thanks to a great, timeless style. Most of the levels, I’ve enjoyed, but some of the last few got a bit annoying. The levels which contained bees got a bit tedious towards the end, but by the two most annoying levels were definitely the two where you used a jetpack to fly through a space station – “Rock It” and “Pack Attack“. These two were simply too different compared to the rest of the game. It was disorienting and annoying to play through them. I do get why they exist, though. The last boss uses the same control scheme, so the game had to get me used to it. I’d prefer if Cortex just didn’t use this mechanic, though.

In any case, Neo Cortex was defeated and everything was well and dandy, but as I said, I still have a whole bunch of gems to collect, which I’m guessing will allow me to destroy the Cortex Vortex and beat the third mad scientist, whose name I forgot. As of now, I got close to half of the grey gems, I think; as well as one of the several colored gems. I also managed to find two of the five secret levels.

Crash Bandicoot 2, Ending

And what about the Cortex Vortex? It’s still up there.

I’ll make use of the plethora of spare moments on train rides I have to complete the collection. The PSP is a great gadget for stuff like that, and Crash Bandicoot is an excellent series for short sessions. Well, the first three games of the series are.

I did it! I finally did it! I beat the strongest enemy in Final Fantasy IX – Ozma. It wasn’t easy, though, and there’s definitely a story to it, so here goes…

Last time, I beat the final area of the game and saw the ending. This was the easy part and I’ve done it with three of my characters being in the high 40s/low 50s. Final Fantasy IX at no point makes you grind, at all. In fact, with the proper items, which were easily obtainable, I could have probably done it in the 30s.

EDIT: Ok, Johnny got me in the comments. As with any JRPG, if you want to do the optional stuff, you’ll grind. To beat the story, though, you can just go through it the regular way. No grinding required.

In any case, while the game was beaten, some of  the goals I’ve set for the game haven’t been accomplished.  I’ve done all the side quests I wanted, but I haven’t gotten all the ultimate equipment, I haven’t learned all the abilities, nor have I beaten the optional boss.  As I previously wrote, I decided to skip the optional boss of Final Fantasy VIII, simply because he seemed not at all interesting, and I haven’t even tried beating the optional bosses of Final Fantasy VII because I’ve actually done it as a kid, so didn’t feel the need to do it again this time.

For this one, I decided to go for it, since it just seemed like a hard battle, not an especially long one, or one that requires a lot of preparation. In fact, I was convinced it was doable right after I beat the game, so I decided to go for it immediately.

Well, not immediately. First, I wanted to learn all the abilities on all of my characters. For that, I needed to do several things. First, I needed to go back to Hades’ synthesis shop and synthesize a Pumice from  the two Pumice Pieces I had. This was costly, but didn’t involve any challenge, since Hades was already beaten. Second, I had to learn the two remaining blue magics for Quina, both of which could be obtained from the “fake” guardians in the final, crystal area of Memoria. This didn’t take to long either.

Final Fantasy IX, Crystal Kraken

The crystal guardians are ugly, to put it bluntly.

Lastly, I had to grind for a bit to learn all the remaining abilities. Luckily, the fake guardians were worth 7 AP each, which adds up to 14 points per battle, when combined with Ability Up. I didn’t time myself, but it probably took me about an hour to learn most of the remaining abilities that way. I got impatient, though, so I decided to go back outside, gathering all the remaining weapons I missed on my way in and make an attempt at Ozma now, thinking 60 000 health can’t be that hard to take away.

Boy was I wrong. On my first attempt, Ozma outright killed my party with one move – Meteor. On my second attempt, I tried the Auto-Life ability, but all that got me was that after his Meteor, Ozma used Curse to kill my recently revived characters all over again. I tried it another few times, but I didn’t have a chance. Sure, with some luck, I might have been able to do it, but that wouldn’t have felt like an accomplishment then.

I didn’t feel like going back to Memoria, so I trained on Grand Dragons for a bit, until everyone but Dagger learned all of their abilities. This got my main party, now consisting of Zidane, Dagger, Steiner and Freya to their mid 50s. It also maxed out Freya’s Dragon’s Crest ability, so this was now my second character able to reliably do 9999 HP of damage. In case I haven’t mentioned it, the first one was Steiner, with his Shock! ability and he was able to do it ages ago.

By the time Zidane got to the low 70s, leveling on Grand Dragons was really started to get slow, so I decided to take my chances with Yans on Vile Island. These guys are tough, really tough. They are fast as hell and counter every action directed at them with either Float or Snort, regardless of the action hitting or doing damage.  Snort removes the targeted character from battle and if everyone gets snorted out, this means Game Over. In addition to that, their most common attack is Comet, which can do all the way up to 9999 points of damage, determined randomly. Luckily, Comet misses often, but when it hits, it hurts badly. Lastly, they also use an attack which causes the Virus status effect, though that isn’t completely bad, since the experience is never wasted, as long as at least one character is able to receive it.

They have close to 20000 health and they give over 40000 experience each, shared among the party members. Since they attack in groups up to three at a time, this is definitely the best enemy to train on, once you’re able to do it.

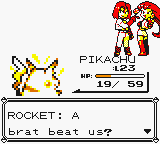
Final Fantasy IX – Yan Strategy

The problem was, I didn’t feel I was able to do it. I persisted, though, in spite of the Game Over screens, so I eventually figured out the proper strategy. I put Auto-Regen and Auto-Potion on all of my characters. Chemist wasn’t needed here, because it doesn’t matter how much the used potion heals for. What matters is that there’s an animation during which no one is attacking, but Auto-Regen is doing its thing. Next up, I added Auto-Life on top of that, just to make things a bit easier when a Yan  manages to get an instant kill with Comet. Lastly, I added HP +10/20% and Gamble Defense to cut the chance of an instant kill, Restore HP to add a buffer on top of that and Distraction/Awareness to further nudge things into my favor.

Once I got inside the battle, it all depended on how many Yans I was fighting. With one or two, Zidane had to act first. Soul Blade with a Masamune equipped meant I was able to cast Doom on one of the Yans. This meant that Zidane was out of the battle after this, because the Yan usually retailiates with Float, meaning the next retailation would Snort Zidane out of the battle. After Doom, Steiner and Freya do their thing with Shock! and Dragon’s Crest, killing the second Yan. Throughout all of this, both Yans usually get to act at least once, so there’s a good chance someone will die. If that happens, either they get revived after the fight, or during it, by Dagger or Zidane. Of course, this is only the cause if Auto-Life already got depleted, which rarely happens.

Final Fantasy IX, Ozma Party Setup

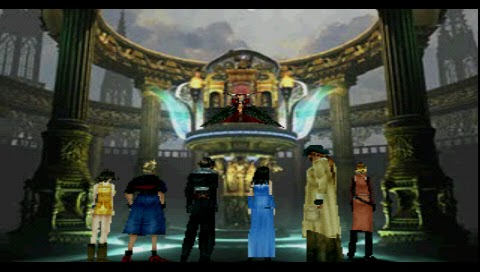
The heroic party that got me this achievement.

If the battle is against three Yans, then Dagger acts first, with Odin. Odin is an eidolon with a Death attack. The chance of it directly depends on the number of Ores the party has in their inventory and maxes out at 50% with 99 Ores. This means that with 3 Yans, one or two are usually dead immediately. With that out of the way, the three other characters could do their usual routine with Soul Blade, Shock! and Dragon’s Crest.
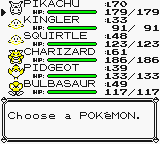
The Application

I used this strategy for about 30 minutes, which got Zidane to level 78 and the rest of the group to somewhere around 65. I got confident, so I decided to try my luck with Ozma again and this time, it worked. Ozma started out with Meteor, but the party survived and, thanks to Auto-Potion and Auto-Regen, almost completely recovered before anyone could make another move. After that, Freya and Steiner did their 9999 damage moves, with Dagger throwing a 7000 Ark on top of it. That was 27000 out of 55000 HP gone right there. Ozma then tried using Mini, which got reflected back at him, meaning he wasted a turn. I got a chance to do another Shock!, but Freya didn’t get a chance to act before Ozma’s next move. This one killed both Stiener and Freya, but Auto-Life brought them back and Zidane and Dagger’s Auto-Potion gave them a chance to recover with Auto-Regen.
Finally, Ozma used Curse, which killed Zidane, causing him to come back with Auto-Life, while causing various status effects on the rest of the party. Freya managed to Squeeze in another Dragon’s Crest, with another Ark from Dagger, bringing me to a total of about 53-54000 damage. Then Ozma threw another Curse, casting Stop on anyone but Zidane. That was all I needed, though, because one last pysical hit from Zidane was the final killing blow.

Summoning Ark Against Ozma

Ark wan’t the biggest damage dealer, but it tipped the scales.

Final Fantasy IX – 100% Completed

With the optional boss defeated, all the interesting side quests solved, and all the abilities learned, I can now put this game on the 100% completed list. It took a surprisingly small amount of grinding to get to this point, but the game was no less fun because of it. In fact, I’d consider this a strength. Don’t get me wrong, I love a good JRPG grind, but I love it even more when there’s a point to it, without any boring filler.

Now I have to decide what to play next. I’m thinking one of my other JRPGs from the era, perhaps Grandia.  I also have Koudelka, which I never properly played. Heck, I even have Final Fantasy VI, which is another game people consider a classic. Maybe Vagrant Story? Or I might just buy another one from the PSN. Who knows…

The Final Boss, Necron

Since the last time I wrote about Final Fantasy IX, I’ve spent a good hour or two fixing up Mognet Central. This side quest involved a lot of trecking back and forth, delivering letters to various moogles in order to figure out which item I need to fix the Mognet Central mail sorting machine. I had to go to Alexandria first, then to Burmecia, Ipsen’s Castle, Daguerreo and the Qu’s Marsh among other places. Each letter I delivered rewarded me with a kupo nut I promptly delivered to the moogle family at Gizamaluke’s Groto. It wasn’t really worth it, though. Past the first nut I delivered, which got me an Aloha T-Shirt, all I got was a couple of Ether’s and a Phoenix Pinion or two.

Final Mognet Central Letter

The item needed was Superslick, which is some hair gel that Ruby had.

The side quest itself, though, was well worth it, getting me a Protect Ring which, apart from teaching me a bunch of useful abilities, also halves damage from all the elements.

Eventually, I learned all or most of the abilities I could, so I decided to go to Memoria, the final area, just so I could get all the rest of the abilities and items. Killing the Nova Dragon was easy enough and the first part of Memoria wasn’t much of a challenge either.

Once I killed the first two Chaos Guardians, I got to an area where the random encounters involved fighting Behemots and enemies who look like the Materia Keeper from Final Fantasy VII. At this point, I also decided to switch my party up, so the less trained guys could advance a bit to. This was a huge mistake. Both of these enemies did a load of physical damage so several times, my whole party was nearly wiped. Somehow, I managed to survive and, once I gained a few levels and switched to stronger items, the place became easy again.

I kept pushing further, fighting fresh enemies, killing guardians and missing on items which were the only reason I entered the place (sigh) and eventually got to the final area. This is why I like this game! The very final save, which is located right next to the final room, with the final three bosses, has a “teleport back to the entrance” option. Basically, there is no “point of no return” in this game. Even better, once you kill the first of the three final bosses, you still get to exit the room, go to the save and teleport to the outside. Only the final two bosses are tied battles.

In any case, I saved my game and decided to just go for it. Killing Deathguise was easy, while Kuja might have been even easier. The final boss, Necron, provided a bit of a challenge, but I don’t think I was ever in real danger. It just took me a while because he kept killing my characters, so I had to play defensively.

The Final Boss, Necron

Necron is introduced a bit out of the blue, but I didn’t mind.

Eventually, he fell and Final Fantasy IX is now the last Final Fantasy game of the PlayStation era to be completed by me. Did I like it? Yes, absolutely. Is it my favorite? It might actually be. I have to think about it. For now, all I can say is that I’m not done yet. I’ll reload on my final save, learn the Blue Magic from enemies in Memoria I can eat, gather up the rest of the items and then go back outside to max out my characters and kill Ozma.

I forgot to mention, I also killed Hades, which is an optional boss in Memoria. Killing him got me access to his hidden synthesis shop, where I made a Pumice accessory. This one allows Garnet to learn Ark, her final Eidolon. I also made a full stack of Phoenix Pinions, so Eiko’s Phoenix does more damage now.

In any case, it’s time to do some final grinding, before tackling Ozma. Lot’s of “finals” in this article. 😀

I got past the bridge and saved my game. The final boss battle was waiting.

Ultimecia had the same sense of fashion as Edea, it seems, which makes sense since she was the one possessing Edea.  Right at the start of the battle, she did the most evil thing of any boss in any of the Final Fantasy games – she picked the initial party to fight against at random.

Final Fantasy VIII, Ultimecia

The villain needs to have her speech.

That wasn’t the end, though. After I defeated her, she decided to summon her GF as a last resort. Griever had a flying lion style going for it and some truly annoying abilities. The GF could completely destroy an entire stock of magic from any of my characters. Soon after the fight against him started, he decided to do just that and destroy Zell’s whole supply of Life. I took the opportunity to bring in another of my junctioned party members by letting Selphie get killed. A few turns after she died, Squall replaced her spot and I could start doing some serious damage. I used an Aura Stone on Squall and dished out Renzokuken with Lionheart, which pretty much killed Griever in one swoop.Luckily, Zell was one of the first three, and Zell was geared up, so it wasn’t to much of an issue. Additionally, even though Selphie and Rinoa weren’t properly junctioned, thanks to my planned leveling, they still did a decent amount of damage so overall, Ultimecia went down relatively fast.

Final Fantasy VIII, Ultimecia Junctioning Herself

At least she’s thinking outside the box.

Again, it wasn’t over yet. Ultimecia decided to now junction herself to Griever, creating a monster that was a fusion of both of them. This meant the enemy was using Ultimecia’s magic, while still being able to destroy my magic stocks. I took the opportunity to bring in Irvine and continued with Renzokuken on Squall. Eventually, this one fell to and the final form of Ultimecia appeared.

Final Fantasy VIII, Ultimecia New Form

She looked better in her first form.

The final form had a nasty attack called Hell’s Judgement, which would reduce everyone in the group to 1HP. Luckily, I had a supply of about 10 Megaelixirs, so this wasn’t hard to deal with. Again, I continued Renzokuken with Squall, but also brought in Irvine with his Shot. Zell was assigned to Megaelixir usage, so there was never any real danger. Eventually, Ultimecia’s final form was brought down and it was all over.

Everyone tried hard to focus on which moment in time to return to, but Squall had to do something first. He got back to the point where Edea took on Ultimecia’s powers and reassured her it was all going to be OK. Then he tried to return, but it seemed to fail. Luckily, Rinoa upheld her part of the promise to meet each other at the meadow behind Edea’s house and pulled Squall into the right timeline.

Final Fantasy VIII is now completed!

Once I approached the equivalent of Hera’s Tower in the dark world, the crystals broke the seal and opened the entrance. This was a huge dungeon, with several bosses of the previous dungeon reappearing to fight again. This is another way of the game showing me how strong I got since I started. Thanks to my sword and armor upgrades, most of these bosses died in just a couple of hits, without even touching me.

A Link to the Past, Red Mail

The game’s strongest armor!

Even though it’s the last dungeon, this one also had a special item – The Red Mail. It’s another armor upgrade, just as the blue mail was. I actually got the boss key and the armor quite early in the dungeon, even before the compass, which was very helpful and basically required to advance far enough before dying.

Eventually, I got to the wizard. The strategy to fighting him was still the same, except he now made three copies of himself to add extra attacks. I still only had to beat the real wizard, though, so it didn’t take long. After about five of his shots deflected back at him, he was down. Then, Ganon rose up from his dead body, turned into a bat and disappeared. Link followed him all the way to the Pyramid of Power, where the bat crashed through the roof.

A Link to the Past, Ganon

Ganon! Who knew!?

In the first phase, Ganon was just throwing his trident around, which was easy to avoid. After a few hits, he added a spinning fire circle and fire bats to his arsenal, which was much, much harder to get away from. I used the staff for some protection and kept hitting him until he started jumping around. I still had some magic, so I continued with the staff and the sword swings until he went invisible.Before I entered, I used my mirror to go to the light world and then my ocarina to get to the potion shop. I already had two bottled fairies, so I bought two blue potions to stock up completely. Then I entered the dark world and used the “Save and Quit” shortcut to get to the pyramid for the final battle.

At that point, I used one blue potion to refill my magic and hearts and then started using the Fire Rod to light up two torches, which made him visible for a few seconds. I kept hitting him with a sword, but it didn’t seem to go anywhere.

A Link to the Past, Ganon Defeated

I’m guessing it becomes less and less surprising in later games.

Then I remembered what I had to do in the original Legend of Zelda. I hit him with a sword, which got him stunned and then fired a silver arrow at him. This seemed to hurt him, so I kept repeating it for another three or four times and then it was over.

I won!