It’s been long since I’ve devoted so much time to a single game and got so much enjoyment out of it. I’m not completely sure, but slowly, it seems like I’m approaching the finale of Might and Magic Book One.
Teleport
I realized I now had access to the Teleport spell (Sorceror, 5-5) so I decided to go explore old maps for a bit, since there was plenty of places I couldn’t access before. Here’s a rundown of what I found:
- The secret of Portsmith is a Succubus Queen with a cohort of Greater Demons. I’m guessing that, in order to reveal the secret, I have to defeat her, which is pretty much impossible right now.
- While you can teleport into most inaccessible areas, most of them are also completely empty, so I’ll be keeping those greyed out on my maps, just to save people’s time.
- Castle White Wolf seems to be blocking teleportation somehow. In fact, most if not all castles seem to do this. They don’t, however, block Etherealize (Sorceror, 6-3). This spells moves you just one space forward, but most of the time, that’s all you need.
- With the Teleport spell, I can now pretty much abuse the game and access areas I’m not really strong enough for. With that, I managed to get to the medusa in her lair in B-2. It was actually a special group of regular medusas, meaning there was nothing out of the ordinary about them other than the head they drop. Funnily enough, the basilisks would still obliterate me at this point, even though I could handle the medusas easily. Hacker’s next quest was to get the Wyverns Eye so I got that one as well. Now I need a Dragons Tooth.
- Erliquin is full of treasure. All of the inaccessible areas, including those behind walls as well as those behind barriers have treasure chests I can steal from. It’s not worth it, though. I get 600 gold and 60 gems per chest, and then I start getting attacked by Diamond Golem guards.
Wyvern Grinding
- Plate Mail +2
- Boots of Speed x2 (+5 Speed to the wearer – Aleen and Lorelei)
- Flail +1/+2, several of them.
- Large Shields +1/+2
- Elec Shield (better than large shield +2 by 1 AC and it provides electrical resistance )
- Club of Noise (always cursed item, just garbage)
- Belt of Power (I got it back, baby!)
- Bracers AC4 (replacement for Padded +1 on Aleen)
Wyvern grinding can be very lucrative, but I’m starting to think there might be some mechanism in place to prevent abuse. It makes no sense that there is, since you can abuse most other things in Might and Magic book one, but it sure feels that the quality of loot drops as you repeat certain encounters.
So Brave!
With new gear, spells and levels, I tried my luck with some of the two encounters in B-2, first against a lich and a group of mummies and second against a black knight and a group of assassins completely suck. I managed to beat both of them on my first try, but searching the area for treasure caused the exact same group to attack me again. On my later try, I managed to defeat the black knight group twice in a row and was allowed to loot then, but I didn’t get any good treasure.
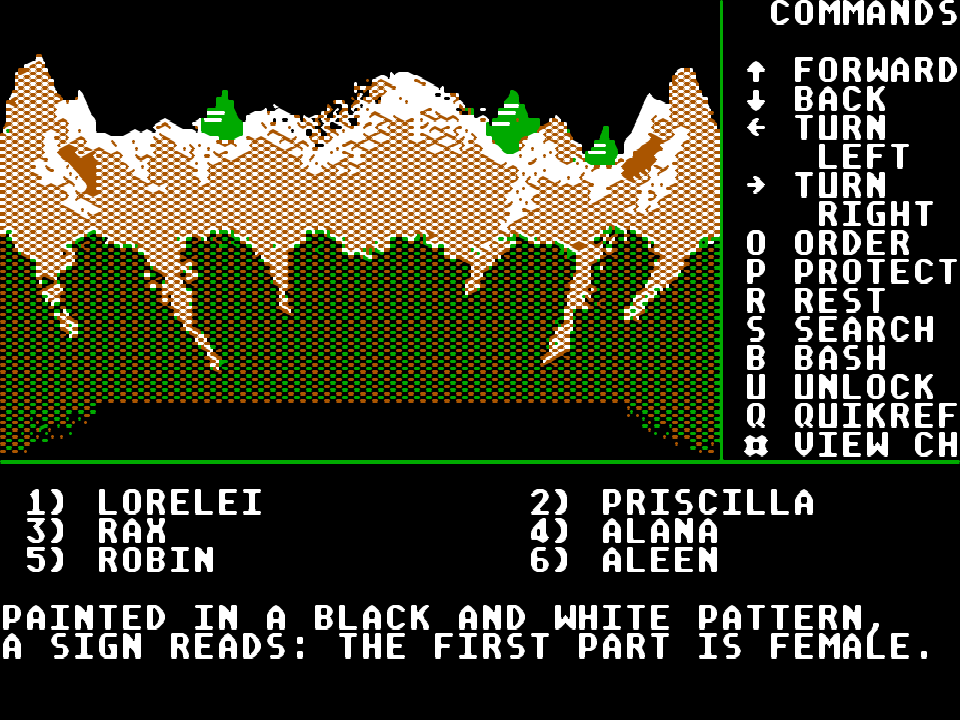
I’m guessing this is a hint for the chest piece puzzle (queen idols and checkered rooms).
Aleen was able to cast level 6 spells, so I also went to castle White Wolf, to get past that one barrier close to the throne room. Surprise! It contained an encounter with a pack of white volves. White wolves use frost breath to hit the entire party for some pretty high damage (around 40 sometimes), so a pack of them obliterated me.
Wizard’s Lair, B-1
The initial area of the Wizard’s lair was easy to clear now. However, the fact that I have am now aware of teleportation means I’m really messing with the flow of the dungeon. You’re supposed to get through the initial area, go down to level 2 and then go back up via a second set of stairs to the second area of level 1. Instead, I just used teleport to get there and soon got attacked by dinobeetles and dinosaurs. I’m not sure how strong these enemies are, but they do have a huge amount of health, so fighting them is extremely annoying. Some of the rooms even contained pyro- and 12-headed hydras. B-1 of Wizard’s Lair will not be fully mapped for the time being.
On the plus side, I got gold message #1 while in there, as well as another checkered room. Thanks to the quest in the minotaur stronghold, I had an epiphany and (s)earched the checkered room. I found a bag with the Queen Idol B, so now I have to visit all the other checkered rooms and search them. I’m guessing B means Black, since the motive is definitely chess.
Going Back
I revisited a lot of the old areas, now that I had Teleport and Etherealize, just to make sure I’ve fully mapped them. Since many of the encounters in Sorpigal contained high level monsters, I suspected there was some sort of level scaling involved, but when I tried saving and reloading at the inn, to fight a bit more, they suddenly reset back to low level fights. I’m guessing there’s some weird mechanic with the party, places you have visited within the session or something like that. One of these encounters granted me my first Black Box. I thought a Gold Box is the best treasure chest you can loot after an encounter, but apparently not. It contained a Devil’s Glaive, which is a weapon only evil characters can use, so I won’t be able to. It can be sold for 5000 gold, so I assume it’s very powerful.
These guys drop a piece of Thundranium upon defeat.
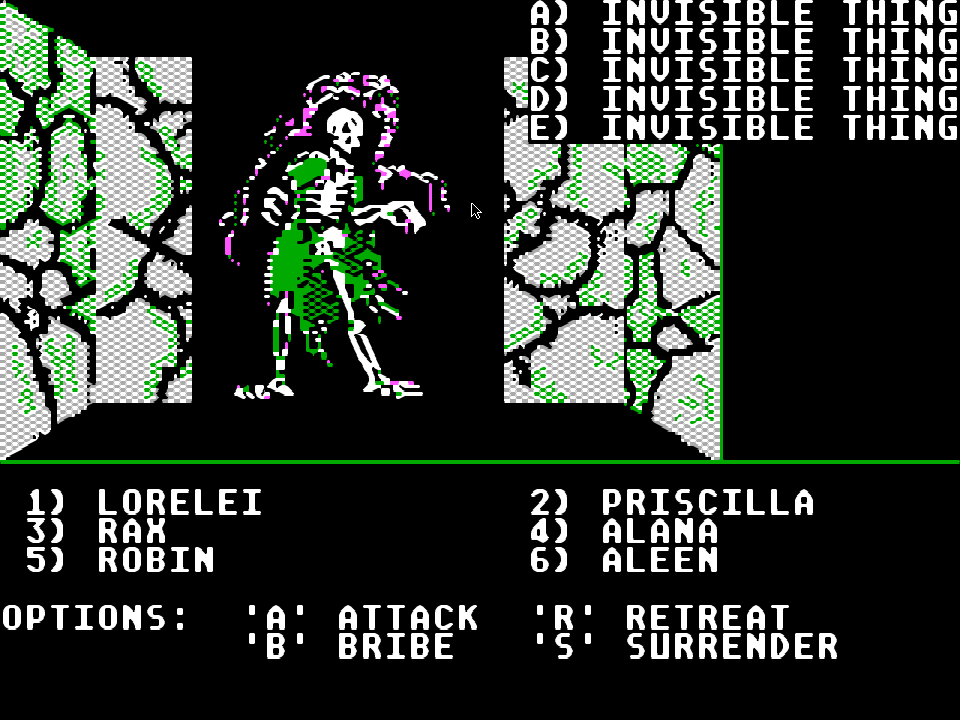
I also went back to the Korin Bluffs Cave, to try and fight the Aliens in one of the secret room. I used my Thundranium on my fighters, several times, had Lorelei drink a Skill Potion twice, as well as a speed potion, and charged. It was tight, but I won and got an item called Laser Blaster. For a moment, I was hoping it would be an awesome ranged weapon, but it wasn’t. Robin still uses her Great Bow +2 to attack, but she now also has the Laser Blaster equipped, for a bonus of +5 Accuracy, and the ability to use it to cast Disintegration, though this probably has limited charges. In any case, since the encounters reset, I’ll be able to get more when I need them. The other special encounter in the cave, against the invisible things, gets me more Thundranium if I ever need any.
What Does Thundranium Do?
I actually forgot to mention this, but Thundranium increases the Strength of the user, by a lot, and you can use it several times over. If there’s a limit to how many times you can use it, I haven’t reached it yet, and I’ve used it several times already. As I said, Might and Magic Book One is very easily abused. Considering how long I’ve been playing it and how far I’ve got, I’m starting to think it’s time to fully use this to my advantage.
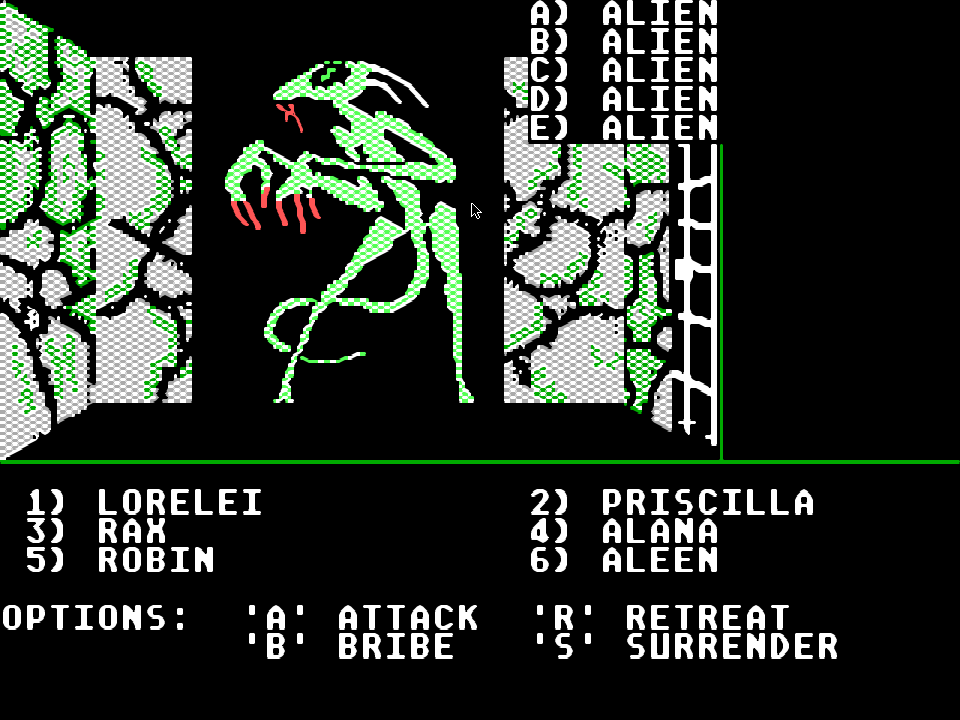
Defeating the Aliens gives you a Laser Blaster.
Raven’s Lair, the Warrior’s Stronghold
Aleen finally has access to her seventh level spells now, so I felt strong enough to tackle the second level or the Warrior’s Stronghold in B-2. It was easy enough to clear most of it, though some of the encounters did end up being tough.
According to a note I found, there are five tests within the second level of the stronghold. However, even though I used Etherealize to scout everything, I could only count four. Each of these four tests is relatively easy battle, especially compared to the other fixed encounters in the area. I managed to clear all of them without much issue, found gold message number 2 and finally found Lord Raven, the Archer. I had the choice to either submit to him, or fight him. I don’t stand a chance in a fight, so I submitted. What this does is that, if you have gold, you lose all of it and end up in Sorpigal. If you don’t have any gold, you get 5000 gold per character or 30000 in total, and also end up in Sorpigal. I submitted twice, just so I could regain some of the lost gold.
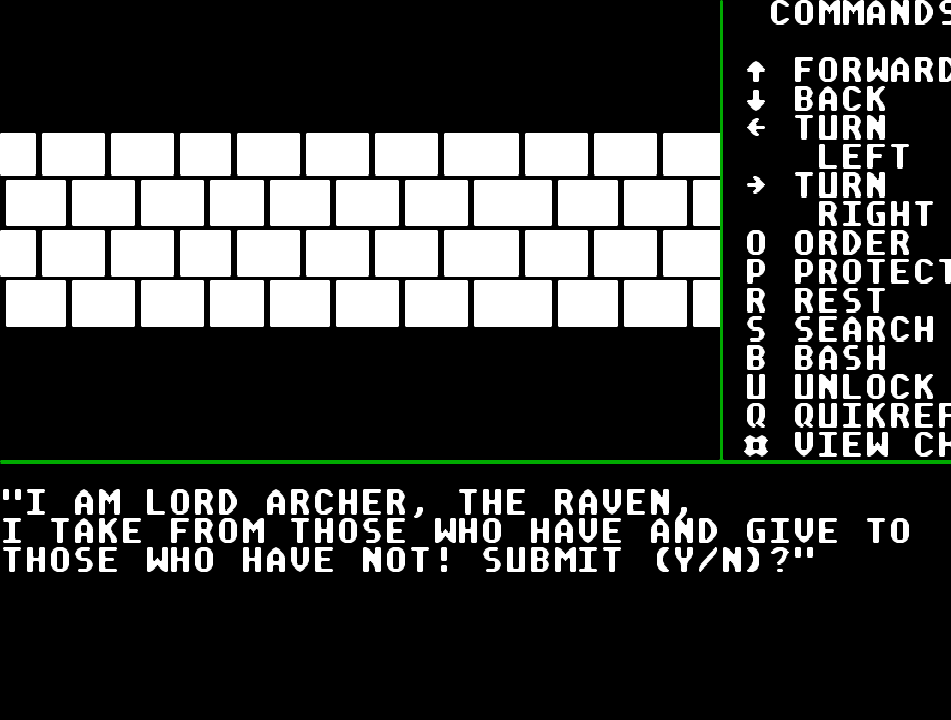
Fighting Lord Archer is way beyond my abilities. His companions hit for 100 damage each, easily.
On a side note, Raven’s Lair might be a good place to train. It provides nice experience and good items, and the encounters, while high-level, aren’t that tough.
Mapping Progress
With all of that running back and forth, I can now be pretty certain hat I’ve fully mapped five overworld areas, including all of the locations they contain. B-2, B-3, C-1, C-2 and C-3 are now fully mapped and explored. I still have quests in B-3 remaining, but there’s nothing in there that I haven’t seen.
A-1 and Castle Doom
It was time to explore column A of the world map, so I started from the top. As luck would have it, this was the area that contained the fabled Castle Doom. To get to it, though, I had to walk for a long time, starting at 15-7, where I flew in, in a circle around the map until I eventually got to the castle, first to the secret entrance, then to the real one.
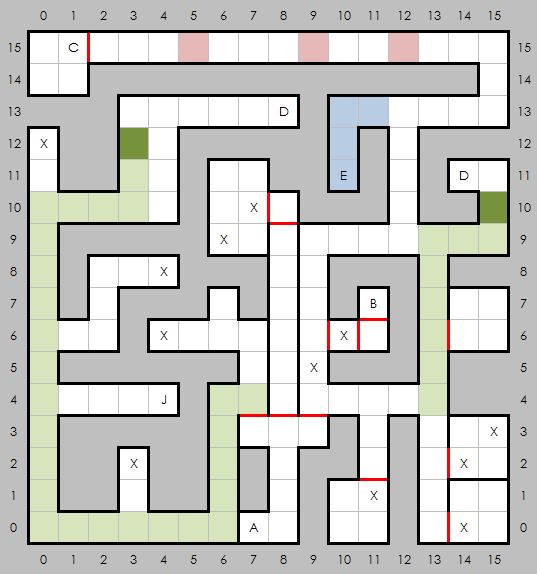
The final map of the dungeon below Sorpigal.
A-1 contains some high level encounters, which actually include dragons, but I seem to be able to handle them now, so I’ve been getting some excellent experience. Eventually, I explored all I could, but I was left with a huge area in the middle completely inaccessible. Since teleportation was disabled in A-1, I decided not to abuse Etherealize and instead just enter the castle. Later on, I discovered there actually is an open route to the central part of the map. It contained a huge forest maze and an encounter with the Dark Rider and his men. I could fight the rider, but I didn’t get anything other than experience and the usual loot. I also eventually used Etherealize to enter the southeast part of the map, and it was worth it. There was the last stat increasing fountain there – Endurance.
In Castle Doom, I soon found the prisoner and a silver message, this one labeled D. I also found some hints as to what I have to do here. First of all, I need the golden key:
The canine has the key.
Search after the canine rewards you.
These are obviously a reference to the dog statue where the Two Brothers quest line ended. It’s also a hint that I should look for a key there, but I already had the foresight to do that – I got spoiled. Then I also need to use the secret entrance to Castle Doom:
A gruesome statue says: “Start at 15-7 and walk to Doom!”
As it turns out, I already discovered the secret entrance by complete accident. Flying made me end up at 15-7 and I managed to survive all the way to Doom. Sadly, I used the secret entrance and then also used the real one for some thorough mapping, so I needed to get out, start back at 15-7 and then go back in. For now, though, I flew back to Sorpigal to save all that experience I got and decided to go back and fully explore the main area of the Castle first. There was some machinery I also found, so I’m expecting more to do than just that one thing with the golden key (whatever that thing actually is).
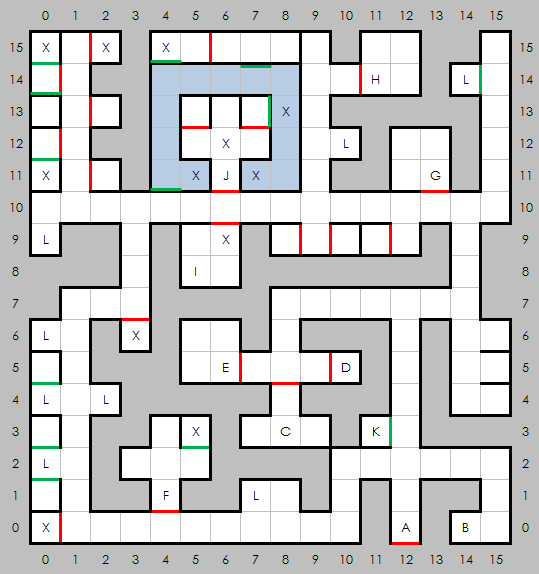
The final map of the cave near Sorpigal, in C-2, hopefully.
After a few hours spent in Doom, fighting against a huge amount of encounters, I lost patience and started using Etherealize. In the corridor to the east, at 15-0, I found a silver message saying:
Message interleave ‘FEDBAC’
As well as a gold message saying:
Message interleave ‘8,5,3,9,1,4,6,2,7’
It’s pretty obvious these are hints on how to decipher the gold and silver messages – the order they go in. Even with these hints, though, I still have no idea how to do it. Maybe it will become clearer when I get all of them.
I used the legitimate way to get through the secret entrance and found the imprisoned king Alamar there. He asked me to uncover his impersonator and save him that way and gave me an item to do so.
A-2, Pirate Treasures, the King’s Pass and the Valley of Fire
I found the Dragon’s Tooth I needed for a quest pretty much as soon as I got to A-2, in an encounter with a red dragon and some other enemies.. I also found a Flamberge +3 from the same encounter. A few moments later, I died in an encounter against 5 red dragons. They can target my entire party for as high as 70 damage per character, so it’s safe to say I’m unable to beat them as of yet. Unfortunately, I wasn’t as lucky with the loot the second and third time around (I died twice).
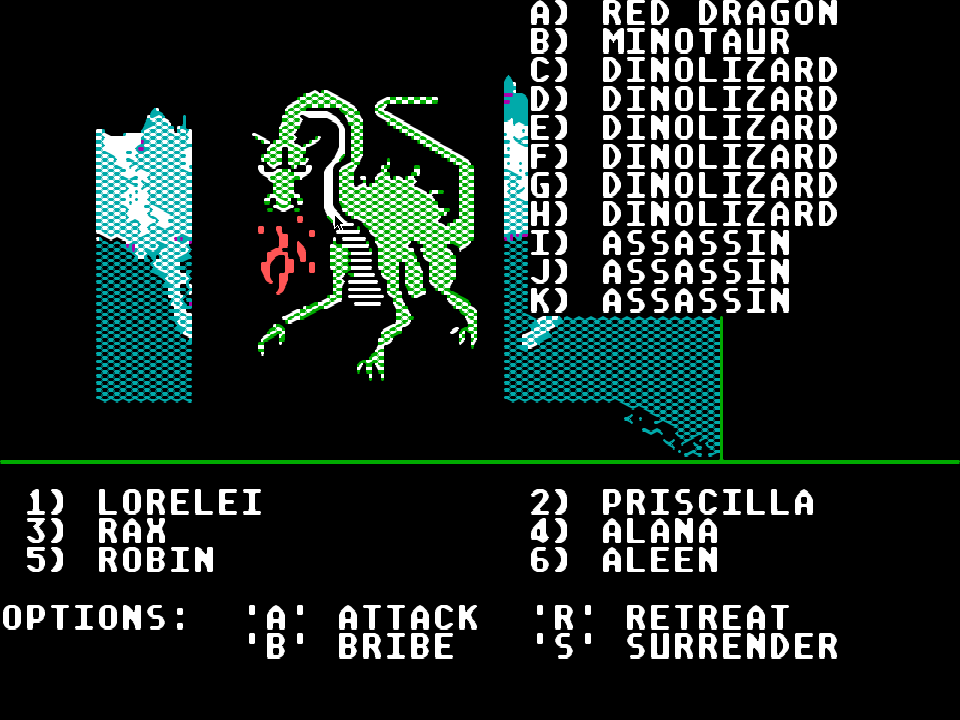
This encounter rewards you with a dragon tooth, though other encounters in A-2 contain way more red dragons.
After the Dragon’s Tooth, Lord Hacker wanted the Ring of Okrim, which thanks to some “in order” after action reports I’ve been reading, compared to my own which is severely out of order, I know the location of, or at least I think I do. I’m pretty sure it’s on the bottom floor of the Wizard’s Lair in B-1. In any case, I decided to explore A-2 first.
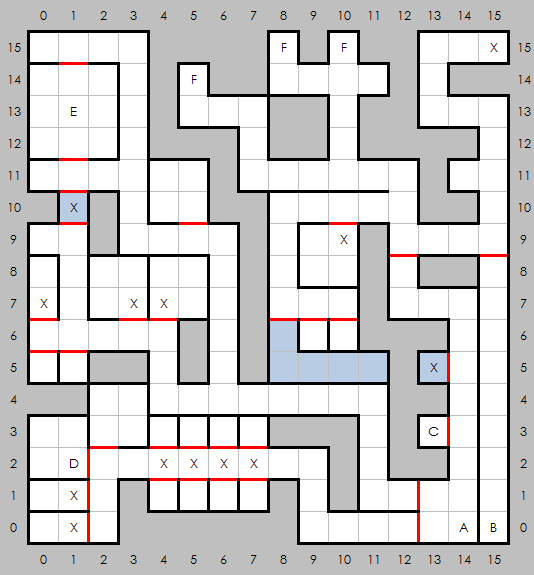
The final map of the city of Sorpigal. The first city in the game, and I only mapped it now.
There wasn’t much in A-2, but what was there, seemed important. In the center, there was the Valley of Fire. Walking through it did huge amounts of damage to my entire party, so I wasn’t able to entirely explore it. I’m guessing I need to find some sort of protection and return.
In the northwest, there was a druid who gave me a King’s Pass, as long as I promise not to help that demonic menace. I’m not sure what it’s for yet, but I took it.
In the west, there were two pirate coves, but searching through them revealed nothing. My assumption is that I need the two pirate maps from the hermit in C-3, so I went back to Sorpigal, cleared Aleen’s inventory and then used her to go talk to the hermit by herself. Teleport really helped there and I soon had my maps with no item loss. It was easy, really. All I had to do was to fly to C-3, walk one tile west and then teleport one tile north. I was right, but the treasure I found was just gems and gold. I was getting low on gems, so that was OK, but I was hoping for something more substantial.
Since I was unable to get through the Valley of Fire, I decided to go to E-3 next. I knew the southern areas of A, B and C contained water, so I didn’t feel like going there yet.
E-3 and King Alamar’s Castle
As luck would have it… OK, I’m serious here, this was luck, I wasn’t spoiled or anything. As luck would have it, King Alamar’s Castle was in E-3. Flying there put me in front of a lion statue, asking for a password. I didn’t have it, so I ended up teleported into a magical darkness anti-magic field.
Throughout the area, there was a bunch of groves – those individual tiles surrounded by spare trees, with encounters in them. I tried to clear them all, hoping to find one that would give me something special, but there wasn’t anything there.
What I did find was Horatio Harper, who gave me the password for the statues. The way this works is that the password changes every time you revisit the area, so you have to go to Horatio again.
Later on, I also used Etherealize to explore the mountains around the castle. These contained encounters on each tile and were too dangerous to rest except for one tile, so the goal there is to find it, rest and Etherealize the hell out of there. You actually get thrown out here from the castle via a chute similar to the one in castles Blackridge.
Castle Alamar
This is definitely the toughest castle in the game; with random encounters every few steps. As all the castles, this one also had the prisoner, though this one was at the end of a medium-length spiraling hallway with an encounter at every tile. I managed to get to him and free him, so as soon as I did that, I used the Surface spell to get out and Fly to Sorpigal to save. I actually try to do this more often now, because it was far too often that I got a nice amount of experience and items, only to lose it all to a stupid death. I still forget myself, though, as proven by the Flamberge +3 I lost in A-2.
Side Note
I can kill dragons now. They also run away from me sometimes. I used to have a hard time killing goblins.
As usual, I have my Google Drive shared for viewing, so you can look at my map progress there:


