Vagrant Story - Rosencrantz

I got lost after Snowfly Forest. My assumption was that I needed to use the bronze key to go further, but I couldn’t find any bronze doors. From Snowfly Forest, I got through the City Walls South back into Lea Monde’s Town Centre West, but I couldn’t find anything beyond that. I had to resort to a walkthrough.

Where to go after Snowfly Forest?

The thing is, I didn’t really need the walkthrough. I just needed to look more closely. From the City Walls South, there was another door, leading to the keep. The one leading to Town Centre West was just there so I could visit the workshop if I had to. Just in case someone else gets lost, after Snowfly Forest, you need to go through City Walls South and into the Keep, or optionally, into the Iron Maiden B1.

Iron Maiden B-1

This! This is the furthest I ever got to in Vagrant Story. I thought it was Snowfly Forest, but I guess I did get through it at some point, because I now distinctly remember getting to Iron Maiden. I also remember getting stuck here and completely giving up.

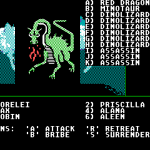
Well, these were my thoughts when I found Iron Maiden B1. However, when I entered it, the second room was completely unfamiliar to me. It was probably just a glitch in the Matrix, I guess.

Some googling told me that Iron Maiden is a bonus, optional dungeon, made to be more challenging than the rest of the game. As a kid, I didn’t know that, so I thought the game was made to be that way. This is probably one of the main reasons I gave up.

The second room of Iron Maiden B1 contained a Wraith and two Gargoyles. This fight is designed to be annoying. The wraith is a ghost-type enemy, so its pattern is to teleport around and cast spells. One of the spells it casts silences Ashley, so his ranged damage gets disabled, unless I use a crossbow, which I don’t. The gargoyles, on the other hand, inflict the Numbness status effect, slowing Ashley’s movement, so it’s even harder to get to the wraith. The gargoyles, other than casting numbness didn’t do much, except that they loved just running away from Ashley, making his slowed movement even more annoying.

Even so, I focused on the wraith first and it went down in two hits, thanks to my Exorcist being a dagger with piercing damage. Killing it gave me a Mandrake Sigil, which apparently unlocks a door in City Centre South, as well as Grimoire Exsorcer, which casts the Exorcism spell, exorcising undead foes. Using Soil Fusion made damage against the gargoyles skyrocket, so they were easy to dispose.

Other than this first room the rest of Iron Maiden B1 was locked for now, so I went back to and through the first few rooms of the Keep, which were empty of enemies, but contained a lot of locked, colored rooms. I ended up at Warrior’s Rest, where I fought Rosencrantz

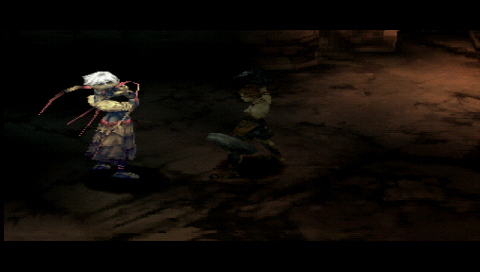
Boss Fight: Rosencrantz

Rosencrantz was easy. He kept using his break art, Cherry Ronde, which did about 60 damage to Ashley. Once he got low on health, he started using cure bulbs, so he prolonged the fight a bit, because his dodge rate was high. Still, eventually, I dwindled him down.

Vagrant Story - Rosencrantz

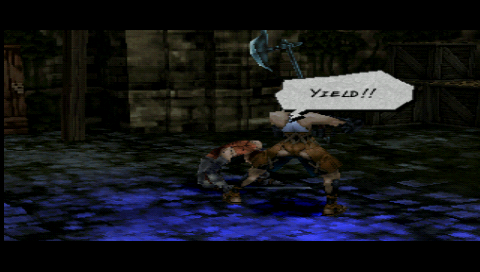
Rosencrantz was an easy fight, but it probably won’t be the last.

After the fight with Rosencrantz, I was at Town Centre South

Town Centre South

This was another large hub-like area infested with Crimson Blade soldiers. It connected directly to City Walls South, which opened up a shortcut for me. It also connected to Abandoned Mines B2, where I had to go next. The hint? The gate to it required the bronze key.

Abandoned Mines B2

Orcs! Lots of orcs.

Orcs are humanoid enemies, like goblins, so I used my executioner. There were also some slimes, but they died in two hits with the Hunter most of the time. The first boss I fought was an Air Elemental

Boss Fight: Air Elemental

I put two air affinity gems in my rounded shield to reduce the incoming damage. I then used Soil Fusion to boost my weapon, but it’s getting apparent I should switch to an axe or some other edged weapon against phantoms. The air elemental had a large amount of piercing resistance, so I did 15-20 damage per hit with my Exorcist dagger. Since it’s silver, I couldn’t combine it yet, so for now, I’m stuck with it.

Vagrant Story - Air Elemental

I’m pretty sure the elementals get stronger versions later on.

At this point, I also realized you can’t use a weapon fusion and armor fusion spell at the same time. Somehow, I didn’t notice this before, but one obviously overwrites the other. In this case, the choice was easy. I had two air affinity gems, but no earth affinity gems, so I used gems to boost my defense and magic to boost my offense. In the future, it might not be as simple, though I can’t imagine it being much more complex than that. Either I’ll go all offense, all defense or try to keep a balance.

More Abandonded Mines B2

Next up was a challenging area, though in part because I was careless. Ashley starts in a large room with a save point. Exiting this room to the next area starts a two minute timer. Within those two minutes, you need to get through about a dozen rooms, each with enemies, get all the items you want to collect, defeat an Earth Elemental boss and finally get through the room after that to end the timer.

To make it even worse, the first room after the timer is over does contain a save point, but in order to get to it safely, you need to defeat a dragon-type enemies (one of those lizard people) as well as two gargoyles, one of them earth-type and the other water.

Basically, I first ran out of time a couple of times. Then I managed to defeat the boss only to die at the above room. Then I did all this one more time before I finally managed to clear it and save my game. I decided to skip one of the two optional chests within this timed section, because I tried looting it in one of my failed attempts, but it didn’t contain anything useful. The other one, however, had some nice items, so I looted that one.

Boss Fight: Earth Elemental

The earth elemental wasn’t exactly difficult, but my Exorcist wasn’t as effective against it as I wanted, so it took a while. There was no danger, though, so I wasn’t worried about beating it. The thing about the timer is that it does not count down when you’re in a menu or executing an attack – only when you’re moving, so it isn’t really an issue to get through it all in time, unless you get lost and have to backtrack too much.

Vagrant Story - Earth Elemental

The earth elemental is in the last room of the timed section.

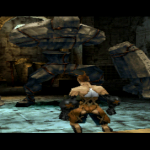
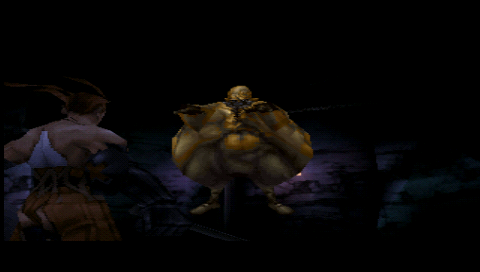
Boss Fight: Sky Dragon

Right after the room with the second save point, the Sky Dragon was waiting for Ashley. This one was an issue. For some reason, my Dragonslayer spear is not a piercing weapon. It makes absolutely no sense, because it absolutely does look like a piercing weapon. Instead, its type is blunt.

Because of that, even with Soil Fusion or Prostasio (I tried both), I did zero damage with my regular attacks. Luckily, I have learned a Spear Break Art which does piercing damage, so I used that to damage the dragon.

Still, it only did a maximum of 60 points of damage per hit, it damaged Ashley as well, so he had to heal, and it had only a 50-60% hit chance, to it took a while to take out an almost 700 HP dragon. The dragon also does about 120 of damage with his tail strike, which it loved to use, so this meant even more time spent on healing.

Vagrant Story - Sky Dragon

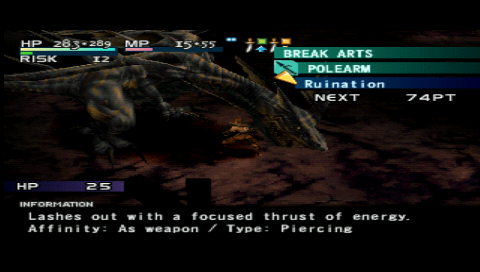
The sky dragon has a lot of defense, and a lot of dodge, so he takes a while to beat.

Basically, the battle was long. It wasn’t especially hard, but it was long. I need to create a piercing Dragonslayer as soon as I can.

The Story

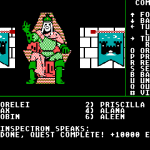
It’s getting weirder, but also far more interesting. As expected, Rosencrantz had a lot to hide. That’s probably not a big reveal, but it is a big plot point. The major plot point, however, is that the entire city of Lea Monde is actually the Grand Grimoire.

Vagrant Story - Gran Grimoire

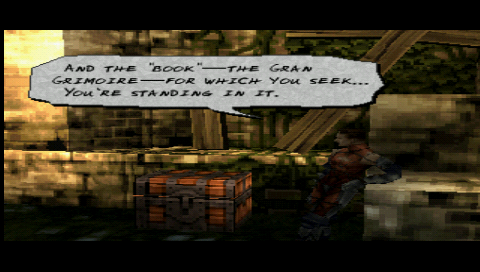
This sounds like a big reveal, but the game doesn’t make it look that way.

Also, Rosencrantz and Guildenstern know each other, Rosencrantz was expelled from the riskbreakers and Samantha can actually do the whole clairvoyance thing with Ashley in the opposite direction, which is how she was able to realize Ashley was listening in on their conversation.

Finally, Rosencrantz and Ashley did use to work together and both killed the picnicking family, so I guess that part wasn’t a lie told by Sidney. Or is it?

Vagrant Story - Cal Merlose

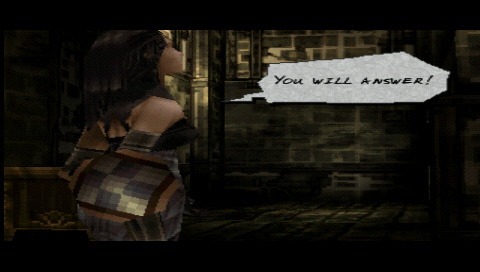
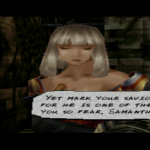
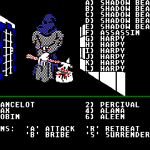
Callo has powers of her own…

Meanwhile, Ashley is fine tuning his clairvoyance abilities and can now communicate with Callo Merlose even more effectively. Callo, on the other hand, turns out to be a Heart-seer, meaning she can extract information out of people’s minds, somehow. It didn’t look like mind reading in the game, so it’s hard to describe.

Vagrant Story - Callo's Powers

…she can “read” minds.

Also, the duke Barbossa is something called a Key Holder – he holds the key over Lea Monde, having some control of the city’s powers. If he dies without a successor, then the powers are lost.  Sidney is also… something and has an interest in the city, but it isn’t yet revealed what he is or what he wants.

Character Development

I finally found a workshop that can handle hagane equipment. It was at the Keep, in Warrior’s Rest, right before the battle with Rosencrantz.

A footman’s mace dropped, which has much higher base damage than my wizard’s staff, so I decided to disassemble the staff and assemble the mace into my new Paladin undead weapon. Its undead staff is negative right now, but I’m hoping it will turn into a good long-term mace. Once I get to a workshop that can handle silver, I’ll be able to combine it with the wizard’s staff to transfer the points over.

A tower shield also dropped, so I combined it with my circle shield to get a spiked shield. This was a no-brainer straight upgrade. I further combined it with a circle shield to get an even better round shield. This one has two gem slots, so I fitted it with a White Queen (20% change to evade numbness) and a Nightkiller (20% chance to evade a non-magical attack).

I combined my hagane Dragonslayer spear with a bronze scorpion and got a hagane scorpion, which was also a straight upgrade. I also did this with my armor, several times. Basically, I have a higher material class, but lower tier item. I combine it with an item of a higher tier and lower material class to get a higher material class, higher tier item.

My hagane spatha Hunter became a bronze norse sword. The material class is lower, but the item there is much higher, so it does more damage. However, I’m now having trouble upgrading the material class back to hagane. It should work with an iron blade, but it refuses to upgrade. I might have to find an iron norse sword to do it. Sadly, what I didn’t realize at the time was that the norse sword is a two-handed weapon. I’ve saved the game after, so now I’m stuck with it. Hopefully, it won’t take too long for me to turn it back into a one-handed sword.

Completion Progress

I’m about 13—14 hours in and at 45% of map completion. I keep guessing how long it will take, but I’m going to stop doing that now. It’s obvious that map coverage doesn’t really correlate well with battles and story.

Might and Magic Book One - True Identity

At this point, I’m practically tasting the end game of Might and Magic Book One. Well, I think I’m tasting it. The reality is, I could be anywhere in the game right now and not know how far I got, since these ancient games really take an alien approach to design and storytelling.

King Alamar’s Castle

As I already said in my previous posting, the southwestern part of King Alamar’s Castle contained the prisoner. One thing I didn’t say was that I managed to botch up the quest line. I accidentally sold the item King Alamar gave me at Castle Doom. Basically, this means I had to go back to Sorpigal and redo the whole quest line all over again.

Might and Magic Book One - Fake Alamar

The fake king gives you a fake quest.

Luckily, not having the quest didn’t stop me from exploring the castle. The room on the opposite side, to the northwest, had the same layout as the prisoner room, except there wasn’t anything good at the end of this encounter series. Instead, I got a catapult which ejected me into the wilderness. What’s worse, after so many encounters, the catapult threw me straight into an encounter, where I then accidentally pushed S on my keyboard, which causes my party to surrender. This almost never works, but when it does, you go to a safe spot in the area and lose all of your money. Basically, I had to reload. I got the exploration, but I lost all the experience and loot.

Might and Magic Book One - Imprisoned King Alamar

I can’t free him, but he can give me an item from within the forcefield.

Similarly, there’s a chute like the one in Castles Blackridge which also takes you outside, but at least I didn’t lose any experience with that one.

Outside of that and the fake King Alamar, there wasn’t anything else in the castle. As I said, I had to redo the entire quest line to get the golden key, so that’s exactly what I did. By trying to rush through it with Teleport and Etherealize, I discovered a few things. Apparently, through the use of anti-magic fields and similar special tiles, there are some measures put in place so you can’t just straight rush through some parts.

Might and Magic Book One - E-3 Castle Alamar, Map Only

All the traps are there for no reason, apparently, other than the one in the silver message room.

For instance, there are anti-magic fields in castle Doom which force you to do two things:

  1. You need to enter the castle through the secret entrance to reach the prison area.
  2. You need to have the Gold Key if you want to get to the imprisoned King Alamar.

So I guess you simply must do the main quest line to advance in the game and there’s no way past that.

Might and Magic Book One - True Identity

The impostor is revealed!

Anyway, confronting the fake king revealed his true identity and I was thrown into the Soul Maze.

The Soul Maze

The goal of the Soul Maze is to find my captors name hidden within the walls. The problem was, using the location spell simply returned ”Unknown” instead of any coordinates. I decided to take the bait and map it anyway. For a while, it was extremely confusing, but then I figured out the level simply wraps around on itself. Leaving it from the top tile in the first column puts you in the bottom tile of the first column, and so on. With that realization, I kept mapping, hoping to find a note of some sort. I didn’t.

Eventually, I mapped it all and then two things became obvious:

  1. I was mapping it upside down, switching north for south.
  2. The name was Sheltem.

How did I realize that? Well, when the map was drawn, some of the walls spelled Help directly on the map. Help doesn’t really work as a name, so I abandoned my excel graph paper sheet and redrew it on a piece of actual paper. Rotating it upside down spelled out a pretty obvious hint:

My name is Sheltem.

I used this name and I got the following:

Agent Orango Seventeen Reporting: Imposter XX21A7-3 Voided! Starphase 5281.6 at 120-Varn-161 Pod #41, you are now rank 1 and eligible for transfer. Find inner sanctum for new assignment. The walls begin to fade…

I was back in Sorpigal.

Might and Magic Book One - X-X Soul Maze, Map Only

I ended up mapping the Soul Maze upside down, but if you twist your head, you can read the name.

Back in King Alamar’s Castle, the real king was sitting on the throne and he told me I should go to the Inner Sanctum. I’m not sure if this is just an item in my inventory doing it or something else, but if it isn’t, this might be the first persistence in Might and Magic Book One. I left the game and got back in and the true Alamar was still on the throne.

Everything you can get to in E-3 is right here.

Everything you can get to in E-3 is right here.

Clerics of the South

The clerics of the south are at the lowest level of castle Dragadune. Their finding you worthy means that you get to reuse all of the permanent stat increase locations within the game. I’m not sure how far you can increase your stats this way, but the action of gaining worth definitely is repeatable and I already got a few stats above 30 this way.

It can be a bit confusing, but to make them find you worthy, you don’t need to ring all the gongs, or you might need to ring them several times. The key is to keep hitting gongs until you hear all three of the tones – sharp, mellow and loud. You can’t ring the same gong twice in a row, but you can keep alternating between two gongs until you hear all three sounds.

Might and Magic Book One - Clerics of the South

They found me worthy several times over.

Just for future reference for myself and everyone else, here’s a little something…

Might and Magic Book One, Permanent Stat Increase Locations

  • Might – The dungeon below Portsmith, B-3, 0-12
  • Intellect – E-2, 3-13
  • Wisdom – D-2, 12-12
  • Luck – Ruins of Castle Dragadune, E-1, 1-1
  • Accuracy – The cave below Dusk, E-1, 15-15
  • Speed – The cave below Dusk, E-1, 14-5
  • Endurance – A-1, 12-1

I actually completely forgot about endurance, so now it’s lagging behind the rest of my stats a bit.

The Six Prisoners

The Clerics of the South task (not exactly a quest) is awesome and provides an awesome reward. The six prisoners task, on the other hand, does almost nothing. You need to treat the six prisoners in the six castles according to your alignment and then you go to the scale statue in E-1. Based on how well you did, you get more or less experience. The amount is pretty high, but nothing you can’t get otherwise. Honestly, it’s not worth the trouble.

Might and Magic Book One, Character Age, Rejuvenation

First of all, I had very little issues with character age in Might and Magic Book One. None of my characters got even close to dying of old age up to now and the oldest one didn’t even reach 50. That being said, you have options for reversing old age, natural or magical.

Firstly, there’s a crater in the southeast of E-1, which you can only access with Etherealize, since it blocks teleportation. In there, you are forced to fight at least two difficult encounters against dinosaurs before reaching the center.

At the center, there’s a device which reverses everyone’s age by a certain number, though I’m not sure how much. Why am I not sure? Because casting Rejuvenate (Cleric, 6-4) is an order of magnitude faster and easier. Sure, there’s a chance you’ll end up aging your character instead, but then you can just cast it a few more times.

By the time you can reach the center of the crater, you’ll easily have access to Rejuvenate, so there really is no point not to use it.

I’ll repeat, the easiest way to reverse old age in Might and Magic Book One is to cast the clerical spell Rejuvenate.

E-4 and the Fabled Building of Gold

With a total of 5 overworld areas left to visit, I decided to start from the east and flew to E-4.  The E-4 wilderness is a pretty OK area to train in. Most of it is empty, but there’s an island in the swamp to the south, with a lot of fixed encounters, most of them being against dragons. Dragons provide a lot of experience in Might and Magic Book One, so now that my level is high enough, they seem like a good way to quickly gain levels. However, there’s a downside – I’m hemorrhaging gems like crazy. I’ll probably have to find a place to collect some in the near future.

Might and Magic Book One - E-4 Wilderness

E-4 is a pretty good area to train, in my opinion. Of course, you need to be able to kill dragons.


On the same island, there’s the Fabled Building of Gold and there was a dragon town, which I could decide to attack. Doing this meant taking on one of each dragon type, as well as two high-level demons, able to cast Eradicate. Even with all of my protection spells, I wasn’t able to clear this battle. I might be able to with a few extra items, but for now, I’m not even going to try.

Might and Magic Book One - Dragon Town

This is what you get for attacking the dragon town.

The Fabled Building of Gold

The Fabled Building of Gold is the first dungeon that I’m aware of with non-linear level progression. From the first level, you can get to either level 2, 3 or 4 via one of the three stairways.

Going straight to level 4 takes you to „dungeon under construction“. This level has a lot of walls which aren’t really walls from the opposite direction, or doors which end up being walls from the other direction, etc. The level also contains three rooms with very difficult encounters behind some barrier walls. Two out of these three encounters rewarded me with a black box, but I didn’t get any upgrades, because all of the item drops required evil alignment.

Getting to level 3 directly from level 1 takes you to an isolated area with nothing of importance in there. Level 2 simply contains a lot of rooms with weird encounters against a lot of different, unrelated monsters. It also contains a large maze, which is pretty much completely empty, other than the stairs to the „real“ part of level 3 at one of the dead ends.

Might and Magic Book One - E-4 Fabled Building of Gold, Level 3, Map Only

Level 3 seems completely pointless. There is literally nothing of note in there.

Level 3 is just a bunch of teleport traps, all leading to the same spot with an encounter. Either I missed something, or there’s nothing of importance in there. You’d expect there to be something, since there’s to ways to get to the level, but I didn’t find anything.


Might and Magic Book One - E-4 Fabled Building of Gold

Four levels of the Fabled Building of Gold, but only two seem important.

Overall, I got a huge amount of experience in the Fabled Building of Gold, and I found two checkered rooms, one of them containing the White Queen Idol. Sadly, it turns out I managed to sell or somehow lose the Black Queen Idol, so I’ll have to find it again. Good thing I’m taking notes, so I know where it is. It’s in level 1 of the Wizard’s Lair in the B-1 area.


Character Advancement

Lorelei the Knight

Lorelei gained four levels, 51 hit points in total and is now level 18.

Priscilla the Paladin

Priscilla gained two levels, 24 hit points in total and is now level 15.

She got a Belt of Power from the Soul Maze, so she gave her Undead Amulet to Alana.

Rax the Robber

Rax gained three levels, 27 hit points in total and is now level 17.

She got a Blue Ring Mail. This excellent item dropped from a Black Box in one of the trap rooms of castle Alamar. This time, I did the smart thing and immediately teleported outside and to Sorpigal. It increases AC by 9 and probably adds resistance, I’m guessing to either frost or electricity. The Blue Ring Mail replaced her Ring Mail + 1. This was an amazing upgrade.

She also got a brand new pair of Boots of Speed, giving his old Defense Cloak to Robin.

She got an Elec Shield, which replaced her Large Shield + 2, adding one more point of AC and increasing her electrical resistance.

Alana the Cleric

Alana gained three levels, 28 hit points in total and is now level 17. I’ve seen her destroy mummies with Turn Undead now.

She got an Undead Amulet from Priscilla.

Robin the Archer

Robin gained three levels, 26 hit points in total and is now level 15. She gained access to her fourth level sorcerer spells.

Robin got Rax’s Defense Cloak, which was a nice AC bonus.

Aleen the Sorceress

Aleen gained two levels, 14 hit points in total and is now level 16.

Maps

I believe I can now safely assume E-4 and E-3, including the Soul Maze, are fully and properly mapped, so I finalized the files related to these two areas. As usual, you can find all of my other files in my Google Drive folder, including the word document files you can edit.