The Final Boss, Necron

Since the last time I wrote about Final Fantasy IX, I’ve spent a good hour or two fixing up Mognet Central. This side quest involved a lot of trecking back and forth, delivering letters to various moogles in order to figure out which item I need to fix the Mognet Central mail sorting machine. I had to go to Alexandria first, then to Burmecia, Ipsen’s Castle, Daguerreo and the Qu’s Marsh among other places. Each letter I delivered rewarded me with a kupo nut I promptly delivered to the moogle family at Gizamaluke’s Groto. It wasn’t really worth it, though. Past the first nut I delivered, which got me an Aloha T-Shirt, all I got was a couple of Ether’s and a Phoenix Pinion or two.

Final Mognet Central Letter

The item needed was Superslick, which is some hair gel that Ruby had.

The side quest itself, though, was well worth it, getting me a Protect Ring which, apart from teaching me a bunch of useful abilities, also halves damage from all the elements.

Eventually, I learned all or most of the abilities I could, so I decided to go to Memoria, the final area, just so I could get all the rest of the abilities and items. Killing the Nova Dragon was easy enough and the first part of Memoria wasn’t much of a challenge either.

Once I killed the first two Chaos Guardians, I got to an area where the random encounters involved fighting Behemots and enemies who look like the Materia Keeper from Final Fantasy VII. At this point, I also decided to switch my party up, so the less trained guys could advance a bit to. This was a huge mistake. Both of these enemies did a load of physical damage so several times, my whole party was nearly wiped. Somehow, I managed to survive and, once I gained a few levels and switched to stronger items, the place became easy again.

I kept pushing further, fighting fresh enemies, killing guardians and missing on items which were the only reason I entered the place (sigh) and eventually got to the final area. This is why I like this game! The very final save, which is located right next to the final room, with the final three bosses, has a “teleport back to the entrance” option. Basically, there is no “point of no return” in this game. Even better, once you kill the first of the three final bosses, you still get to exit the room, go to the save and teleport to the outside. Only the final two bosses are tied battles.

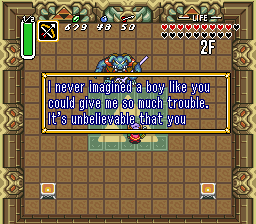
In any case, I saved my game and decided to just go for it. Killing Deathguise was easy, while Kuja might have been even easier. The final boss, Necron, provided a bit of a challenge, but I don’t think I was ever in real danger. It just took me a while because he kept killing my characters, so I had to play defensively.

The Final Boss, Necron

Necron is introduced a bit out of the blue, but I didn’t mind.

Eventually, he fell and Final Fantasy IX is now the last Final Fantasy game of the PlayStation era to be completed by me. Did I like it? Yes, absolutely. Is it my favorite? It might actually be. I have to think about it. For now, all I can say is that I’m not done yet. I’ll reload on my final save, learn the Blue Magic from enemies in Memoria I can eat, gather up the rest of the items and then go back outside to max out my characters and kill Ozma.

I forgot to mention, I also killed Hades, which is an optional boss in Memoria. Killing him got me access to his hidden synthesis shop, where I made a Pumice accessory. This one allows Garnet to learn Ark, her final Eidolon. I also made a full stack of Phoenix Pinions, so Eiko’s Phoenix does more damage now.

In any case, it’s time to do some final grinding, before tackling Ozma. Lot’s of “finals” in this article. 😀

I got past the bridge and saved my game. The final boss battle was waiting.

Ultimecia had the same sense of fashion as Edea, it seems, which makes sense since she was the one possessing Edea.  Right at the start of the battle, she did the most evil thing of any boss in any of the Final Fantasy games – she picked the initial party to fight against at random.

Final Fantasy VIII, Ultimecia

The villain needs to have her speech.

That wasn’t the end, though. After I defeated her, she decided to summon her GF as a last resort. Griever had a flying lion style going for it and some truly annoying abilities. The GF could completely destroy an entire stock of magic from any of my characters. Soon after the fight against him started, he decided to do just that and destroy Zell’s whole supply of Life. I took the opportunity to bring in another of my junctioned party members by letting Selphie get killed. A few turns after she died, Squall replaced her spot and I could start doing some serious damage. I used an Aura Stone on Squall and dished out Renzokuken with Lionheart, which pretty much killed Griever in one swoop.Luckily, Zell was one of the first three, and Zell was geared up, so it wasn’t to much of an issue. Additionally, even though Selphie and Rinoa weren’t properly junctioned, thanks to my planned leveling, they still did a decent amount of damage so overall, Ultimecia went down relatively fast.

Final Fantasy VIII, Ultimecia Junctioning Herself

At least she’s thinking outside the box.

Again, it wasn’t over yet. Ultimecia decided to now junction herself to Griever, creating a monster that was a fusion of both of them. This meant the enemy was using Ultimecia’s magic, while still being able to destroy my magic stocks. I took the opportunity to bring in Irvine and continued with Renzokuken on Squall. Eventually, this one fell to and the final form of Ultimecia appeared.

Final Fantasy VIII, Ultimecia New Form

She looked better in her first form.

The final form had a nasty attack called Hell’s Judgement, which would reduce everyone in the group to 1HP. Luckily, I had a supply of about 10 Megaelixirs, so this wasn’t hard to deal with. Again, I continued Renzokuken with Squall, but also brought in Irvine with his Shot. Zell was assigned to Megaelixir usage, so there was never any real danger. Eventually, Ultimecia’s final form was brought down and it was all over.

Everyone tried hard to focus on which moment in time to return to, but Squall had to do something first. He got back to the point where Edea took on Ultimecia’s powers and reassured her it was all going to be OK. Then he tried to return, but it seemed to fail. Luckily, Rinoa upheld her part of the promise to meet each other at the meadow behind Edea’s house and pulled Squall into the right timeline.

Final Fantasy VIII is now completed!

Once I approached the equivalent of Hera’s Tower in the dark world, the crystals broke the seal and opened the entrance. This was a huge dungeon, with several bosses of the previous dungeon reappearing to fight again. This is another way of the game showing me how strong I got since I started. Thanks to my sword and armor upgrades, most of these bosses died in just a couple of hits, without even touching me.

A Link to the Past, Red Mail

The game’s strongest armor!

Even though it’s the last dungeon, this one also had a special item – The Red Mail. It’s another armor upgrade, just as the blue mail was. I actually got the boss key and the armor quite early in the dungeon, even before the compass, which was very helpful and basically required to advance far enough before dying.

Eventually, I got to the wizard. The strategy to fighting him was still the same, except he now made three copies of himself to add extra attacks. I still only had to beat the real wizard, though, so it didn’t take long. After about five of his shots deflected back at him, he was down. Then, Ganon rose up from his dead body, turned into a bat and disappeared. Link followed him all the way to the Pyramid of Power, where the bat crashed through the roof.

A Link to the Past, Ganon

Ganon! Who knew!?

In the first phase, Ganon was just throwing his trident around, which was easy to avoid. After a few hits, he added a spinning fire circle and fire bats to his arsenal, which was much, much harder to get away from. I used the staff for some protection and kept hitting him until he started jumping around. I still had some magic, so I continued with the staff and the sword swings until he went invisible.Before I entered, I used my mirror to go to the light world and then my ocarina to get to the potion shop. I already had two bottled fairies, so I bought two blue potions to stock up completely. Then I entered the dark world and used the “Save and Quit” shortcut to get to the pyramid for the final battle.

At that point, I used one blue potion to refill my magic and hearts and then started using the Fire Rod to light up two torches, which made him visible for a few seconds. I kept hitting him with a sword, but it didn’t seem to go anywhere.

A Link to the Past, Ganon Defeated

I’m guessing it becomes less and less surprising in later games.

Then I remembered what I had to do in the original Legend of Zelda. I hit him with a sword, which got him stunned and then fired a silver arrow at him. This seemed to hurt him, so I kept repeating it for another three or four times and then it was over.

I won!

Though they were not ready for the final showdown, after several days of training and preparation, the team decided to go ahead and scout the area of the northern cave, in order to be better prepared for the final push. The area was filled with dangerous enemies, but with some difficulty, they managed to push forward, all the way to a fork in the path.

At this place, Cloud decided to take a smaller group in one direction, while the rest of the team went in the other. It was an uneasy separation, as everyone feared they would not see each other again. Luckily, there was no reason to fear. The two paths met up again soon enough and the group was back together.

Final Fantasy VII, Northern Crater Cave, Top View

The crater is deep, very deep.

The path closed behind them and there was no other way to go, but forward. A brief moment of desperation and fear hit them, as they were realizing the battle would be now, not later. Having no choice, though, they summoned up all the courage they had and continued forward.After an extremely long way down, the group finally reached the core, where their final foe was waiting. The area was fully explored and mapped, so there would be nothing to surprise them when they are finally ready. Little did they know, they were forced to be ready now.

I’m trying my hardest to describe what happened “in role”, but I’m not sure I’m doing it well. To put it more directly, I completed the game by pure accident. I wanted to enter the cave and get to the point of no return, so I could create a save point there and train, since the area gave good experience and AP. What happened was that I triggered the “do you wish to continue” part and accidentally answered yes without creating the save point first, or saving the game.

Since it took me quite a while to get there, I decided “to hell with it” and went for the kill. Luckily, I did some training over the last two days, so my party wasn’t that weak. I just wasn’t ready to go yet and wanted to get all the side quests first. Apparently, I did good anyway.

The core was surrounded by floating debris, forcing them to jump from platform to platform, fighting dangerous monsters nearly every step of the way. Finally, they reached the core, where Sephiroth was waiting. The first to attack was another form of Jenova – Rebirth. This one was relatively simple to dispose of, mostly in thanks to some of the new skills the party learned by observing various creatures of the world.

With Jenova finally dead, it was time to deal with Sephiroth. His first form was a twisted mass of mutated parts, barely reminding of the original in appearance. The various parts of it acted separately, healing and reinforcing each other constantly, making for a very difficult battle. Eventually, Cloud managed to recognize the critical parts and focused the group’s attacks to those spots, finally destroying the creature. It wasn’t over, though.

Sephiroth transformed into his second form, a twisted parody of an angel. This one acted as one, but it was stronger than all the parts of the previous form combined. Most of its attacks were manageable, but before the end, it used something that nearly killed every single member of the group. Luckily, Cloud was ready to react, using a megaelixir to completely negate the damage done and refresh the group for the final push. A few moments later, Sephiroth was down.

Final Fantasy VII, Safer (Seraph) Sephiroth

Sephiroth’s most dangerous form.

It was just Sephiroth. No twisted form, nothing special, just flesh and blood. Cloud was done. His determination was absolute. He started swinging, cutting, without pause, but with complete control and his sight constantly on target. When he was done, it was finally over. Sephiroth gasped lone last time and then fell.The group did all they could. It was now up to the planet and Holy. They started climbing back to the surface, with Cloud being the last one. He paused for a second and listened. It wasn’t over. He could still hear him, screaming, mocking them, and refusing to die. Something pulled him down, towards the lifestream, towards the center of the planet. There, in the darkness, Sephiroth was waiting.

Tifa was calling for him, with everything collapsing around them and for a moment, it seemed too late. She fell down towards him, he snapped out of his trance, grabbed her and used his other arm to grab the edge of a cliff. They climbed up and rejoined the group.

The party was hurrying upwards with the cave-in in full effect. Something crashed above them and the Highwind came rushing down. Luckily, the backup plane stored on the airship managed to deploy in time to provide an escape route for the group.

In the meantime, Meteor was rapidly approaching. Holy activated, but it seemed it wasn’t in time. Then, the planet itself provided help, using the lifestream to reinforce Holy and destroy Meteor. It was over.

Well, not really the Balkans. The first two battles involved liberating the Balkans, thus the name of the chapter. The rest of it, though, took place in Berlin. With Tommy dying in the last chapter, DeeDee was forced to go back to the British general she hated so much – McIntyre.

Berlin, though ruined, was not as grim as the previous chapter, probably because suddenly, there was a feeling of victory. Most of the missions were straightforward, with basically just destroying enemies as fast as possible or before time runs out. One of the missions involved captain Edwards, the young intelligence officer DeeDee met during the Neretva missions.

Air Conflicts: Secret Wars, Egypt Flashback

The last flashback mission took place in Egypt.

With this knowledge, I’ve completed the final mission and was then provided with a choice. McIntyre was under attack by a couple of Nazi fighters. I could run away, kill him or destroy the two fighters. I decided to help him, because I really can’t see any other option as the morally right one.The flashback gave us the big reveal – the allies considered using chemical warfare during world war one. Even worse, they would use it against civilians. During one such mission, DeeDee’s father decided he would not allow it and attacked his own squadron to try and stop them. Because of this, McIntyre shot him down.

With this, the game was completed.

As expected, I was done with Rochard today.

We got through the temple, realized it’s all somehow connected and got all we needed to get to and deal with Maximilian. He was at the casino and he managed to snatch Skylar during all this so I also had to rescue her. Once that was done, there was a final battle, and that was it.

What an amazingly fun game!

It just does things right. The mechanics are fun to play with, it doesn’t get dull or repetitive and it’s constantly expanding on what you can do with the toys you have. The story is shallow, but interested enough to keep your attention, the style is pleasant and everything just works well together.

Rochard Game Won

YES! I DID IT!

It took me close to six hours to complete the game and I’m nowhere near being done with achievements, sadly, but this will need to wait, since my backlog is still huge.The only slight downside is that you get the funnest toy right before the game ends. In the final area, you get to upgrade your gravity gun so it’s able to grab living enemies. Of course, there’s a good reason you get this late in the game, since it’s extremely powerful, but it’s just so fun I wish I  had more time with it.

I lied yesterday. I didn’t complete the extra, “DLC” worlds. After clearing Vanishing City and seeing the ending, I was already a bit tired of the mechanics and the same old, so I decided to call it there. I cleared one more level after that, but it’s just more of the same.

Overall, I’ve completed all of the levels of the first four worlds, including the time attack levels, got all the upgrades and basically saw the campaign in its entirety. For me, that’s enough of Xotic for now. Don’t get me wrong, it’s a fun enough game, but it has its bad sides.

Xotic Victory Screen

I won! Yay me!

Firstly, there are clipping issues in many of the levels. I get that a low budget game is hard to test properly, but I was getting stuck far too often for comfort. Secondly, while the old school mechanics are fine, I don’t like the fact that you have to start from scratch if you die. A single save per level, or even a checkpoint system would have been preferable. In the end, I’ve completed most of the worth world on the Easy difficulty, simply because I was getting to annoyed with constantly restarting. And lastly, the weapons really aren’t as imaginative or interesting as you would expect from an FPS.

Still, overall, it’s fun and good enough to go through. I just don’t think it’s good enough to go for all of the achievements. Right now, I’m at 26/46 and I’ll probably stay there.

Ben There, Dan That is the first of a series of two adventure games made in Adventure Game Studio. They follow a comical duo of British guys on their journey through time in space.

I’m sorry to say this, but the game was barely playable for me. It has humor. It also has style. Nothing can take away from that. Sadly, it also has bad animations, painfully slow gameplay and an annoying set of controls and interface. These things made the game a pain to get through, so I’m glad it didn’t last long for me complete it.

Ben There, Dan That

It may have been worth the money, but certainly not the trouble.

That being said, there’s still the sequel to get through and, from what I hear, it’s longer than Ben There, Dan That. This means I won’t be playing it any time soon. I just don’t have the willpower to get through it, even with a guide.It took me 20 minutes of painful walking back and forth before I decided I’m done and used a guide to complete the rest of it. As I said, it’s a funny story, the style is OK, but the way it’s made just makes it an annoyance.

EDIT: I was told this is a horrible review, so let me do a short attempt to “fix” it.

In short, the game is great in almost every way, but for me, it’s ruined by bad and sluggish control. The humor is great, the story is silly as it should be and the puzzles are cool, but I can’t get past how badly and slowly it controls. Someone else might be able to, but I can’t.

If I keep up at this pace, I might run out of games in a couple of years.

And Yet It Moves is a puzzle platformer, I’d say. It’s another game I got in an ancient bundle. Unlike the few others I’ve played recently, I actually already had some experience with this one. You see, one of the holiday sale achievements from a year ago, I think, required me to complete the first world of this game.

There’s three worlds total in the game, meaning I was already one third of the way there when I started today. The remaining two worlds were completed quickly enough, taking me around two hours total to complete the entire game.

And Yet It Moves Credits

You rarely get to play through the credits of the game.

It’s entertaining enough, but it’s obviously short. I can’t really hold that against the game, though, because I think the mechanics and the gameplay would have gotten old soon enough. This way, the game kept me entertained long enough for me to finish it, and no longer.

The mechanics are simple. Your character can walk and jump like in a regular platform game, but you can also rotate the entire world around him, allowing you to reach areas you couldn’t otherwise. The mechanic takes a bit of getting used to, but it’s not too complex and it doesn’t require too much mastery to get through the game. Every once in a while a new element is added to the game, such as parts of the level which respond differently to rotation, enemies, puzzles, etc., which keeps things going and stops the game from getting stale.

In short, And Yet It Moves is somewhat fun and definitely innovative, but it’s not something I’ll be returning to. It has a certain charm, but it’s not extremely memorable. I won’t be getting the achievements of this one any time soon. They aren’t to annoying to get, but do require repeating levels and getting through other game modes that I’m not interested in.

Critical Mass is another bundle game I got ages ago. I’m a bit tired of adventure games, so I decided to give puzzles a chance and this was the one I picked to play through next.

I’m happy with my decision. Critical Mass is a very fun puzzle game. The goal is to combine cubes in 3D space in groups of four or more. The higher the amount you manage to combine, the more points you get. Cubes are dropped on a central shape with a certain amount of cubes already there. This central shape has a constantly increasing mass, which makes it grow and approach the screen as you progress. The destruction that happens after you combine cubes causes it to recede and gives you more time to destroy them all. If you’re too slow, the mass reaches critical levels and you lose, forced to start back at the beginning.

Critical Mass - Meditation Mode

Meditation is a no-pressure, strategic play mode.

This means there’s a decision you’re constantly making – just combine as fast as possible to push the blocks back a bit, or hold out to get bigger combos, which pushes the blocks back more and fills up your bonus abilities. I have to admit, it was a bit disorienting at first, hard to determine where exactly I’ll be dropping the block and what colour I’m currently dropping, but once you get used to the interface, you realize the game tries very hard to help you see everything clearly and then it becomes much easier. The bonus abilities are also there to help. There are three of those and they unlock progressively, as you accumulate more and more points. The next one is always the more powerful one, so that’s another decision you have to make – use the currently available ability, or take the risk and wait for the one that’s more powerful and more helpful.

There are four modes in the game. I’ve played through all of them, but the classical mode is where the level progression is at. As far as I can remember, there are nine or ten total levels, which I completed in much less than an hour. You earn points and based on the total amount you get, you are ranked, globally. There’s also Survival, where you have to stay afloat for as long as possible. For every group of blocks you destroy, more random blocks are added to the field, so you are eventually forced to create longer combos just as fast as you would usually create basic combos, just to stay alive. Every minute, the critical mass resets, which helps a bit, but eventually isn’t enough to keep you alive by itself.

The last two modes are Rush and Meditation. In Rush, you just have to clear a single level as fast as possible. You lose points for ever second spent, so the amount left is your final score. Mediation has not time pressure of any kind. You get a limited amount of blocks which you need to place around the central grey cube. You have to use these limited blocks to get as many points as you can by arranging them into the longest possible combos.

As I said, I’ve played through all of the modes and enjoyed all of them as well. The thing I like the most is the global ranking system, which is based on the skill points you accumulate. The thing is, the skill points aren’t something you just get more and more off. If you do worse in one of the modes, compared to how you did previously, you actually lose these points, meaning that, apart from playing against the world, you’re also sort of playing against yourself.

In short, Critical Mass is a pretty good puzzle game, with a system in place that makes you go back to it every once in a while. I’ve completed the Classic mode, which has levels, so I’m counting it as completed on my list. I’ve also completed all the other modes at least once, but as far as achievements go, they’re designed in a way that discourages a rush to get them, so I won’t aim for 100% completion any time soon. I’ll keep the game on my hard drive, though, just so I can return to it every now and then, and perhaps get an achievement or two that way.