The Review: Is Final Fantasy VIII Really Bad?

Some people might crucify me for saying this, but I believe Final Fantasy VIII is definitely one of the better Final Fantasy games overall. Sure, it isn’t the best one out there, and you might argue it’s the worst one on the PS1, but it’s definitely an extremely good game.

The junction mechanics of Final Fantasy VIII are complex and interesting. The way the various items synergize with the junction system makes the whole thing even deeper and more interesting. The GFs add to it even more, so overall, it’s an amazing package for everyone who loves playing JRPGs for the ability to make overpowered characters if you’re smart and persistent about it.

Final Fantasy VIII - Laguna

There’s a lot of melancholy as the game nears the end, but it lands well.

The story of Final Fantasy VIII is… different. That really is all you can say about it. The story is very different compared to the rest of the series around that time and before it. I’m guessing this is the main reason so many were turned off by it, but if you give the game a chance and keep an open mind, it really is a very enjoyable story. The ending leaves a lot of things open to interpretation, but it does so in a good way, unlike, for instance, the recent Mass Effect 3 ending fiasco.

Final Fantasy VIII - Credits

Emotions are quite well portrayed for the time the game was released in.

The music is memorable and on par with any other in the series. At this point, I’d still say that Final Fantasy IX has the best music overall, while Final Fantasy VII has the most memorable song (One-Winged Angel), but the music of Final Fantasy VIII is definitely very, very good.

The only beef I have with Final Fantasy VIII, really, is the whole idea of monsters leveling as you level. No game should encourage you to run away from fights and avoid leveling at all costs. Sure, the game is beatable even if you don’t take care of not leveling to early, but for anyone who wants to feel powerful later, it just isn’t going to happen on the first play through without some serious grinding in the late game.

The leveling thing is a major flaw, in my opinion, but as I said, it’s still an amazing game overall. It breaks some molds, does a lot of things differently and provides a great experience in spite of its flaws. In addition to this, the technological advancement it brings compared to Final Fantasy VII is alone enough to give it a chance.

Final Fantasy VIII - The End

I didn’t realize the year was 1999. I thought it was earlier.

The Verdict

Any fan of JRPGs should absolutely play this game.

I got past the bridge and saved my game. The final boss battle was waiting.

Ultimecia had the same sense of fashion as Edea, it seems, which makes sense since she was the one possessing Edea.  Right at the start of the battle, she did the most evil thing of any boss in any of the Final Fantasy games – she picked the initial party to fight against at random.

Final Fantasy VIII, Ultimecia

The villain needs to have her speech.

That wasn’t the end, though. After I defeated her, she decided to summon her GF as a last resort. Griever had a flying lion style going for it and some truly annoying abilities. The GF could completely destroy an entire stock of magic from any of my characters. Soon after the fight against him started, he decided to do just that and destroy Zell’s whole supply of Life. I took the opportunity to bring in another of my junctioned party members by letting Selphie get killed. A few turns after she died, Squall replaced her spot and I could start doing some serious damage. I used an Aura Stone on Squall and dished out Renzokuken with Lionheart, which pretty much killed Griever in one swoop.Luckily, Zell was one of the first three, and Zell was geared up, so it wasn’t to much of an issue. Additionally, even though Selphie and Rinoa weren’t properly junctioned, thanks to my planned leveling, they still did a decent amount of damage so overall, Ultimecia went down relatively fast.

Final Fantasy VIII, Ultimecia Junctioning Herself

At least she’s thinking outside the box.

Again, it wasn’t over yet. Ultimecia decided to now junction herself to Griever, creating a monster that was a fusion of both of them. This meant the enemy was using Ultimecia’s magic, while still being able to destroy my magic stocks. I took the opportunity to bring in Irvine and continued with Renzokuken on Squall. Eventually, this one fell to and the final form of Ultimecia appeared.

Final Fantasy VIII, Ultimecia New Form

She looked better in her first form.

The final form had a nasty attack called Hell’s Judgement, which would reduce everyone in the group to 1HP. Luckily, I had a supply of about 10 Megaelixirs, so this wasn’t hard to deal with. Again, I continued Renzokuken with Squall, but also brought in Irvine with his Shot. Zell was assigned to Megaelixir usage, so there was never any real danger. Eventually, Ultimecia’s final form was brought down and it was all over.

Everyone tried hard to focus on which moment in time to return to, but Squall had to do something first. He got back to the point where Edea took on Ultimecia’s powers and reassured her it was all going to be OK. Then he tried to return, but it seemed to fail. Luckily, Rinoa upheld her part of the promise to meet each other at the meadow behind Edea’s house and pulled Squall into the right timeline.

Final Fantasy VIII is now completed!

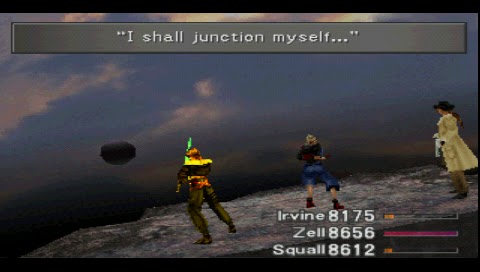
The time compression event was immediately followed by a series of battles against sorceresses. Luckily, I had death junctioned on my attack for all of my characters and they weren’t immune, so they were dying extremely fast.

Once all of that was over, the group appeared at Edea’s house. I got to the beach and that’s when all of the timelines merged, causing Ultimecia’s castle to appear in the sky above the sea. I started walking along one of the huge chains attached to it and soon got to the entrance, where I could save my game.

As soon as I entered the castle, it was obvious what I’m going to be doing here. The castle blocked all of my abilities apart from Attack, making me fight guardians to unlock them. The first boss was at the top of the stairs in the first room and it was easy to deal with, even if I only had the Attack command available. Once the Spinx was dealt with, I was able to pick which command to unlock next. I decided to go with Draw, thinking the bosses might have important spells on them.

Final Fantasy VIII, Spinx

Spinx was easy.

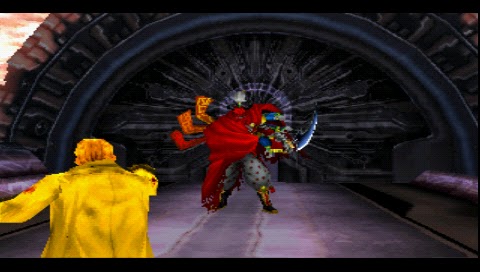
 The second boss was a bit further, past a falling chandelier and in the basement below the room it fell into. It was called Tri-Point and it sort of looked like a giant, flying robot. This one hit for a lot more, so I actually lost one of the characters there. Still, I managed to beat it and decided to unlock the item command next. What I didn’t realize was that Resurrection is a wholly separate ability, meaning I couldn’t revive anyone, even if I had access to the items. Luckily, the second mechanic of the castle came into play now, so I didn’t need to revive anyone yet.

At the start, I had to split my party into two groups. It seems the idea was to use one group to clear the way to the second group and vice-versa. Killing Tri-Point meant I needed to switch to the other group now and move past the chandelier which didn’t fall this time. Past it was a balcony where I fought the third boss – Krysta. This one was quite harder, causing me to actually use items for healing. Sadly, it was extremely resistant to physical attacks, so I’m thinking I should have probably unlocked Magic or GF to make this fight a lot easier.

Final Fantasy VIII, Krysta

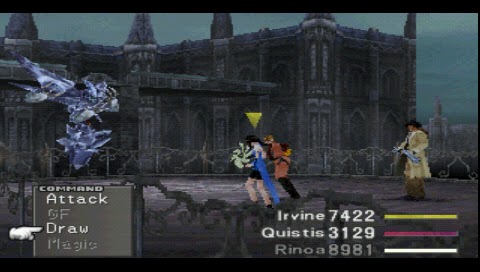
Krysta was the first to offer any real challenge.

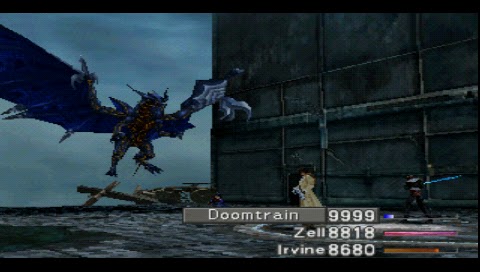
With this one, I decided to unlock GF, since I already had healing via items and was foolish with not realizing I also needed resurrection. Luckily, the next fight was again with me controlling the second group, so I didn’t need resurrection yet. The fight was against a robot named Trauma and in order to get to it, I had to solve a puzzle involving some paintings. Doomtrain’s Meltdown was key to make this fight extremely easy, so I ended it without losses and finally unlocked resurrection.

I switched back to the first group and got further through the door and past a courtyard, to a bridge where I saw an item drop from a bridge to the area bellow. I got back to the courtyard with a fountain and switched to the second group. With this one, I got through a prison area to my next boss, the Red Giant. This one was, again, extremely easy due to Doomtrain and the Blindness it inflicts with its attack. I unlocked magic and moved on, finding the Armory Key in the water nearby. I’m guessing the key is the one that fell from the bridge with the first group. I unlocked the armory and fought the next boss, Gargantua.

The battle started out like a random encounter against the Vissage enemy and its hands. Once I defeated those, the whole thing actually rose from the ground and turned into the boss. This one, again, wasn’t extremely difficult, so I had no trouble beating it. I finally unlocked the Save ability and switched back to the first group.

Final Fantasy VIII, Gargantua

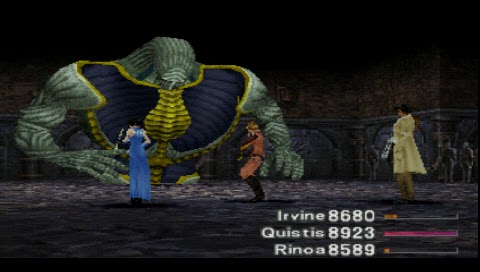
Gargantua was, again, easy.

Past the bridge the key fell off from, there was a room with a save point, so I saved my game. I returned to the fountain and stumbled into another key, this one to the Treasure Room. I switched to my second party and went to the only area where I haven’t really been to yet – the room to the left of the stairs in the main room. It took me a while to figure it out, but the treasure room was on the left side of a hallway there. It involved a “turn off all the lights” style puzzle which, once I solved it, started the battle with the next boss.

Catoblepas was again, relatively easy due to Doomtrain. It used lightning attacks mostly, so they were mostly absorbed, thanks to Flare being bound to my defense. I unlocked limit breaks with the death of this one and moved on.

Past the room with Catoblepas, there was a green party switching circle on top of some sort of elevator. This took me ages to figure out, but I finally realized that the two parties need to meet up here, so that the heavier one can lift the lighter one to the room above, where I got the Flood Gate Key. I used this key at the prison, which allowed me to pull a lever there. The lever caused the water in the canal bellow to retreat, but I had no idea how to get to it. All I know is that it must be through the only door I didn’t get through yet.

There was a barred door to the left of the fountain courtyard. I decided to revisit it and noticed that some of the bars blocking the door were gone. After some messing around, I figured out the organ at the tower actually caused various bars to go away, so eventually, I realized I probably have to push all the keys on the organ to completely open the passage. The thing is, this isn’t easy to do on the PSP, so I wasn’t sure if I was doing the right thing. Eventually, after some walking back and forth, the passage did open and I found a Rosetta Stone there. This thing teaches any GF the Abilityx4 ability, so it was definitely worth it.

Final Fantasy VIII, Tiamat

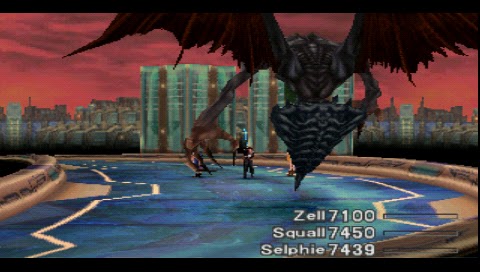
I always get nostalgic when I fight a recurring enemy, such as Tiamat

I got back to the tower and started climbing it. Near the top, there was a swinging pendulum which I used to get to a door and fought the last guardian – Tiamat. This one, again, was pretty easy and didn’t even get the chance to properly attack. With him gone, I unlocked the final ability – Command.

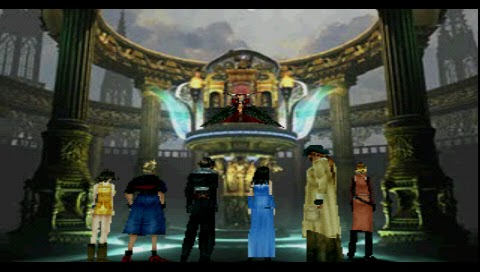
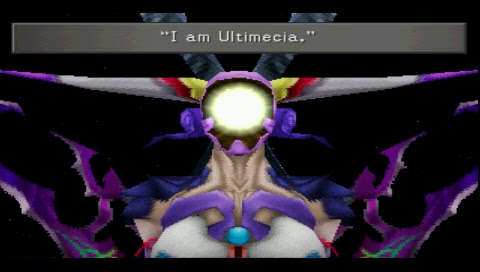
I was ready to face Ultimecia.

To enter Lunatic Pandora, I was “forced” to watch another awesome FMV sequence where Ragnarok blows a hole through its shields and outer shell and then pushes its way through. I feel I have to emphasize on this, but I really do think Ragnarok is the best looking airship of all the Final Fantasy games. I’m not sure about the second place, but Ragnarok definitely takes the first one in my opinion.

Final Fantasy VIII, Ragnarok Scene

The combination of CGI and real time graphics was already used in Final Fantasy VII, but it was greatly improved here.

Once that fight was done, I continued inwards and stumbled into Biggs and Wedge having a realization. They hate their job, so they decide to quit right there, removing one potential fight from my list. Further in, I finally got to the point where that robot threw me out in Esthar. This time, it was a boss battle. Since I knew it was going to be a robot, I junctioned Thundaga on my Elemental Attack, making this another easy fight. I was actually doing 9999 damage per hit without Meltdown or anything like that.As soon as I entered, the last battle against Raijin and Fujin started. It was extremely easy, due to me now being insanely overpowered, so it was done in about two minutes. There was also nothing to draw, and there won’t be anything to draw from now on, so I will be able to just focus on damage instead. I’m still going to keep my Draw command, though, since a lot of the enemies and bosses have spells I can use on them directly, by Draw Casting.

After that, I could continue further in, where I finally met up with Seifer. Raijin and Fuijin give him an ultimatum, asking for “the old Seifer” to come back, but he doesn’t listen, so I end up fighting and beating him. Since I had Odin, I was also treated with a nice sequence at this point. Odin charges at the start of the fight, but ends up being destroyed by Seifer. Odin’s sword flies to the skies and gets caught by someone’s or something’s hand. At the end of the battle, it’s revealed whose hand it was – Gilgamesh. Gilgamesh is another GF like Odin, and he will be helping me from now on. He started helping right there, by finishing off Seifer and thanking me for returning him the “fourth sword”.

Final Fantasy VIII, Seifer and Gilgamesh

Gilgamesh looks cooler, but Odin still feels cooler.

Laguna and Ellone got there; Rinoa accepted Adel’s powers and Ellone did her thing. Everything went wibbly-wobbly and the time compression started.Anyway, Seifer was defeated, but managed to grab Rinoa on his way out and take her to Adel, following the time compression plan perfectly. I followed immediately and another boss battle, this time against Adel, started. This one was a bit trickier, since Adel was “fused” with Rinoa and drained her health every now and then. Luckily, a single Regen cast on Rinoa was enough to offset the health drain and keep her alive. Soon enough, Adel was done and it was time to begin the time compression.

The final step of my preparation for the finale is completed!

Getting all the spells I needed was easier than I thought, for the most part. Due to my training at the Island Closest to Hell, I was already stocked with various extremely powerful items. I used the refining abilities I had to stock up on Meteor, Flare, as well as some other minor spells, such as Bio, Death, Pain, etc.

Next up was Meltdown, which I knew gives nice boosts. I won’t need it for battles directly, since I have Doomtrain to cover that status effect, but magic in Final Fantasy VIII really isn’t made for casting anyway. Mystery Fluid was the item of choice here, since it refines into 10 Meltdowns each. I found out it was dropped by the manta enemies on the snow fields around Trabia, so that’s where I went. In no time, my entire party was fully stocked on meltdowns. The thing that helped here the most was mugging by Squall and the fact that I junctioned Pain to everyone’s Status Attack.

Final Fantasy VIII, Elnoyle

I’ve been fighting this guy a lot.

The last spell I wanted to have was Ultima and for that one, I resorted to google. It turns out, there’s an enemy you can repeatedly fight inside Esthar, the Elnoyle. It drops up to four Energy Crystals per battle, though mostly only two. Each of those can then be refined into two Ultimas. It wasn’t extremely fast, but it was the fastest way to get this spell in the game. For this one, I decided to only get three full stocks, since I can easily switch them around when needed.Full-Life was extremely easy to get. The catlike enemies around Esthar can be mugged for around five Regen Rings. These can then be refined into 20 Full-Life each. Suffice to say, this was another spell that everyone had a full stock of in minutes. The same area contained a bunch of other enemies with useful items and spells, so my arsenal was getting richer and richer extremely fast.

The happy side effect of repeatedly fighting Elnoyle is that it can also be mugged for Moon Stones, which can be refined into 20 Holy each. Since this was a spell I didn’t get much of yet, it was very welcome here. Also, Elnoyle wasn’t immune to Death, so having it junctioned to my Status Attack meant the battles were easy to win in spite it having 140 000 HP and a lot of nasty attacks.

With my arsenal of spells fully stocked, I had to figure out how to optimally distribute them among the attributes. After some crunching, I opted for a single priority system. Full-Life went to HP. It provides by far the best bonus for it, other than Ultima, which I needed for Strength. Strength is my top priority attribute, which is why my strongest spell went here. Thanks to this, all of my characters had 255 strength without any extra abilities needed.

Final Fantasy VIII, Elnoyle

As I said, I fought Elnoyle A LOT!

Next up was Meltdown on Vitality. Out of my remaining spells, nothing else increased it as much. In my opinion, Vitality is more important than Spirit, since most magics can either be resisted with Elemental junction, can’t be resisted at all, or don’t do much damage to begin with.

To Magic, I junctioned Meteor. Again, out of my remaining spells, It provided the best overall bonus. I won’t be casting spells much, but on the occasions I will, It’s good to have them with a properly strong effect. To Spirit, I junctioned Curaga. With any luck, I won’t have to use it in battle and if it happens, I can easily replenish my stores with item refining.

Triple was junctioned to Speed. Speed is a good stat to have plenty of and Triple gives by far the biggest bonus to it. Evasion was junctioned with Tornado. It wasn’t very important, but neither was Tornado, and they work together well. Most of my characters didn’t need Hit, but I junctioned Double to it anyway.

For elemental defense, I used Protect, Shell and Life for some extremely nice overall reduction in all elements. For the last slot, I used Flare, so I could absorb the three basic elements. As for elemental attack, I left it empty. If I need an element for a boss, I can always junction it before the battle, but outside of that, I’d rather potentially do less damage overall, than no damage at all when I encounter an enemy that’s immune.

For status, again, I used Esuna and Reflect for some nice overall resistance and then some of the basic stat spells for defense against the most dangerous afflictions. For status attack, I used death to make random encounters quick and painless. Once I switch to Enc-None, I might replace Death with Pain, but it probably won’t matter, since I’ll only be fighting bosses.

In any case, my party was now ready. It was time to go to Lunatic Pandora and complete this game.

The next step of my preparation for the finale is completed.

Surprisingly, I already had most of the items needed for most of the weapon upgrades. As expected, the item that took the longest to get was the Adamantine. I believe I needed a total of three for it. One to upgrade Squall’s gunblade to Lionhearth, one for Selphie’s ultimate weapon and one for someone else, Irvine, I believe. Rinoa had her weapon upgraded for a long time now, Zell had all the items needed as soon as leveling was done and Quisits was only missing a common item I could get from the huge claw enemies at the Centra continent.

Final Fantasy VIII, Iron Giant

Sadly, a lot of the enemies I needed items from are rare encounters, meaning I had to fight others to.

What I needed to do now was to properly distribute my GFs so all of the characters would have the ability to junction most or even all of their attributes. After some playing around I wound up with Shiva, Diabolos, Pandemona, Bahamut and Doomtrain on Squall. He would be my mugger, while still having plenty of physical damage and speed.With all the stat level bonuses and the final weapon upgrades, all of my characters had their strength above 150 without any junctions, with some even far exceeding those values. As for the other stats, their HP was slightly above 6000 unjunctioned, and the rest of their primary stats were somewhere in the 100-150 range.

For my fighter, which can be Zell, Irvine or Quistis for now, I went with Quezacotl, Ifrit, Cerberus, Alexander and Cactuar. This gave him plenty of strength while still being able to junction everything on needed. The reason the three above characters are more suitable for physical damage is due to their limit breaks. Zell and Irvine use physical damage in their desperation moves, and I also believe Quistis has some blue magic based on physical strength.

As for my healer/mage, I went with the rest of the GFs – Siren, Brothers, Carbuncle, Leviathan, Tonberry and Eden. The spell casting character needs plenty of magic bonus abilities. Again, the junction abilities available to him or her still cover most of the attributes. Again, due to the limit breaks, I think Selphie and Rinoa are more suitable to be healers.

Of course, this role assignment only makes sense now, when I don’t have a full supply of high level spells yet.  Once I stock up on everything, the roles will become meaningless and everyone will excel at everything. This is my next goal.

It took some TV watching and mindless button pushing, but I finally got the last character, Selphie, to level 100. It took longer than necessary to. At one point, I became careless so I didn’t save for a while. A lucky Marlboro managed to kill my entire party, so I was set back about 20 levels.

Final Fantasy VIII, All Characters Level 100

No more leveling!

While we’re at it, I should also mention that all of my GFs other than Eden have reached level 100 as well. She’s only at 84 for some reason, but she has all the abilities I need, so I’m fine with that, since I’m not really using them to do damage anyway.In any case, the grinding was done, so the first thing I did was to use a tent and save my game. The second thing I did was to buy a whole bunch of amnesia greens and delete all the GF abilities I won’t need any more. The stat bonus abilities were the first to go, of course. After that, I went through each GF that was at 9999 health and saved my game before trying to delete the lowest GF HP bonus ability and check if the HP went bellow 9999. This cleared some more room in the GF ability department, allowing me to move on with my plan.

Final Fantasy VIII, Most GF Level 100

Some leveling, but nothing to focus on.

Finally, once all of that is done, I will be going to the Lunatic Pandora to complete the game for the first time ever!My next goal is to upgrade all of the party’s weapons to their maximum levels. To do that, I need to roam around the world for a bit, to gather up some items. Once that’s done, I will be stocking up on high level spells for junction and finally refine some ability items so all of my characters have good ability coverage with their GF.

Over the last few days, I’ve just been spending a minor amount of time leveling my characters on the Island closest to Hell. It’s a tedious job, but I really want to get everyone too level 100 before moving on to the game’s finale. Sadly, the only way to do this effectively is to level one character at a time, with Bahamut and Cactuar junctioned to him or her, so I can also bind the four primary stat bonus abilities to them.

My plan is to first get everyone to 100, then stock up on spells and get everyone’s weapons upgraded and only then go to Lunatic Pandora and further. For now, I’m getting close to being done with leveling. Four of my six characters are at 100, one is at 50 and the last one, Selphie, hasn’t been touched.

FInal Fantasy VIII, GF Screen

The GF are getting there to.

I really can’t stress how important Quistis is for this strategy. Her Degenerator blue magic makes every fight a fast victory, apart from the few where a Marlboro attacks me from behind and I’m forced to run away. I’m also stocking up on some very nice and useful materials, which allow me to refine a nice supply of strong spells as well as medicinal items.

Leveling doesn’t take a lot of my attention, so I’m able to do it while watching TV, or doing something similar. I’ll probably be done some time tomorrow and move on to weapon upgrades.

Now that I only had the final bosses remaining, there really wasn’t any reason left to further postpone leveling up. My intention was to do it strategically, though.

First of all, I needed Cactuar and Bahamut. Cactuar has the Str, Vit, Mag and Spr Bonus abilities. These abilities increase their respective attribute by one on each level increase, as long as they are bound to the character. Bahamut has the Ability x 4 ability, which allows me to bind up to four abilities to a character, meaning I could bind all four bonus abilities.

There is a fifth bonus ability, though – HP Bonus. I decided to skip that one, simply because I could easily junction health and even use other methods of increasing it, such as the Devour command ability.

Now, since I could only attach all four abilities to a single character, I decided to level one character at a time, by killing the other two and leaving them dead. The obvious first choice was Quistis, for one amazing reason. Her desperation move is Blue Magic and one of the spells she can learn is Degenerator. Degenerator outright kills a single enemy, with no exceptions. This ability makes Quistis the perfect character to level first.

Final Fantasy VIII, Quistis using Degenerator

MPV, right here!

I got her to yellow health, bound all the GFs to her and killed of the other two party members. Then I landed Ragnarok and the Island closest to Heaven and started doing random battles, making sure my strongest spell is bound to her Speed stat. This way, I could easily kill any enemy I encounter with a single hit, before it could even act. Since the enemies on this island are all level 100, this meant getting up to three or even four levels per battle. Suffice to say, Quistis was level 100 in no time.

Of course, I had some trouble and needed to save my game often in order to be able to reload, but all in all, this was by far the fastest available method of leveling. Once Quistis was at 100, it was time to level another character. I junctioned Cactuar and Bahamut to Squall, but kept Quistis alive and at critical health. This time, I could go with an even safer tactic. I could now bind Iniative to Quistis, meaning she would always attack first, so there was almost no danger anymore. I think the average level of my party affects the amount of XP the party gets, though, so Squall took a bit longer to get to 100, but still insanely fast.

After Squall, it was time for Rinoa, but it seemed it all went even slower, due to Squall being level 100 and me not being able to replace him with a lover level dead character. Sadly, it seems I made a mistake by leveling Squall second. Luckily, it’s still quite fast, so it’s not a huge mistake.

Anyway, I didn’t get Rinoa to 100 yet. She’s at about 50 now and I expect her to reach her max level some time tomorrow. If I get the chance, I intend to max out another character to. From what I understand, I will be forced to use all of my characters for the final battles, so they all need to be maxed out anyway.

The Shumi Village is an optional area with an optional line of two quests. The first quest could’ve been done as soon as I was able to travel around with the Garden, but I forgot about it then, so I decided to do both quests now. The Shumi are Norg’s people. They aren’t human and their biology is very different to that of humans. They start out as regular Shumi and, after a while, evolve either to Elder’s such as Norg, or to Moombas, the little lion guys that I’ve met throughout the game.

Final Fantasy VIII, Shumi Village Elevator

The elevator ride is long, annoying and has to be repeated several times.

Next up, I used the elevator to go down and start up on the first quest. The Shumi took care of Laguna, Ward and Kiros after their cliff drop years ago. They have a tremendous amount of respect for Laguna, so they want to make a statue of him. For that, they need special rocks which I had to gather. I was the one to do this because the village elder wanted to give me a gift, but couldn’t unless I do something for them.The first thing I did was to pay 5000 gold at the village entrance to access the draw point which contains Ultima. Ultima is by far the strongest spell I can junction to anything, so 5000 gold per draw is definitely worth it.

In any case, all the rocks could be found around the village, one by one, so I’ve spent some time gathering them. None of it really gave me any trouble, since I remembered the locations from my first play through. The reward for gathering all the rocks was to see the Elder’s hand. Lucky for me, I also got a souvenir as I was leaving – a Phoenix Pinion. This one, if I remember correctly, summons the hidden GF Phoenix, which resurrects all of my fallen party members.

Final Fantasy VIII, Shumi Village

There was a lot of running back and forth, but it was worth the final prize.

The next quest involved the statue again. The Sculptor lost interest in completing it, so I had to first convince him, and after that the Artisan as well as the Attendant to help him. The Attendant was simple enough, but in order to convince the Artisan, I had to go all the way to Fisherman’s Horizon to get a special item. The reward for this quest was a Status Guard, which teaches any GF the ability Status Defense x4. Definitely worth it!