My two choices were to either take a look at what’s outside the city of Sorpigal, or to give the leprechaun a gem and teleport to some other random city. Technically, I could also use the portal in the dungeon, but the cave it leads to was still too dangerous.
All of this happened on May 25th of 2013.
I should use a Graphite Pen
I didn’t use a graphite pen when drawing the map of the wilderness, so I couldn’t erase any potential mistakes. It very soon became obvious what a mistake this was. I had to restart the drawing several times, before I finally got it right.
Why? Because the wilderness map of the area around Sorpigal (area C-2, in game terms) introduces a new concept – the forest. The forest looks like a wall and pretty much serves like a wall, except it isn’t. You can almost always pass through it. I didn’t immediately realize this. Instead, when I randomly squeezed through a forest wall by accident, I thought I discovered a secret passage, so I drew secret passages and regular walls next to each other, when it was all basically one huge not so secret passage.
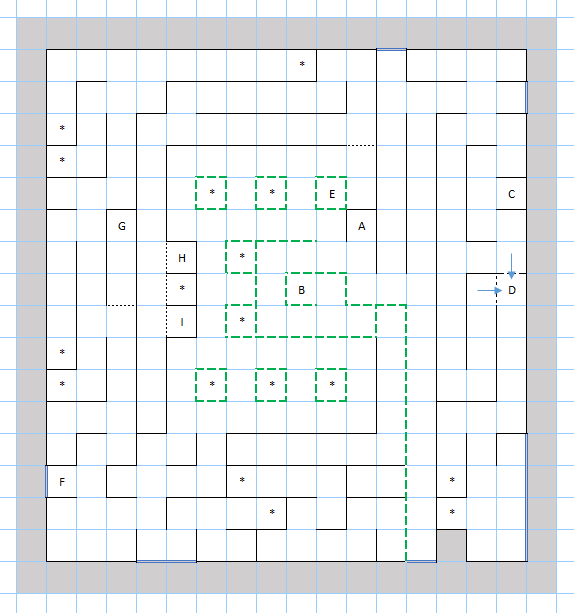
Here’s just the map, in case anyone wants their own notes.
In addition to that, there have been actual secret passages, one-way streets and passages to different areas of the world map which I didn’t immediately understand, so I made mistakes there as well. Eventually, I managed to somehow get through it.
A Portal to the South
Near the entrance to the town of Sorpigal, there was a monolith, or a monument or a pillar. I can’t exactly remember how the game describes it, but touching it teleports the party to somewhere in the same area (again, C-2). At first, I thought it was a fixed transport, so that’s the note I took, but I remembered to actually check before I finalized the map and my hunch was correct – the target location seems to be random, though within the area.
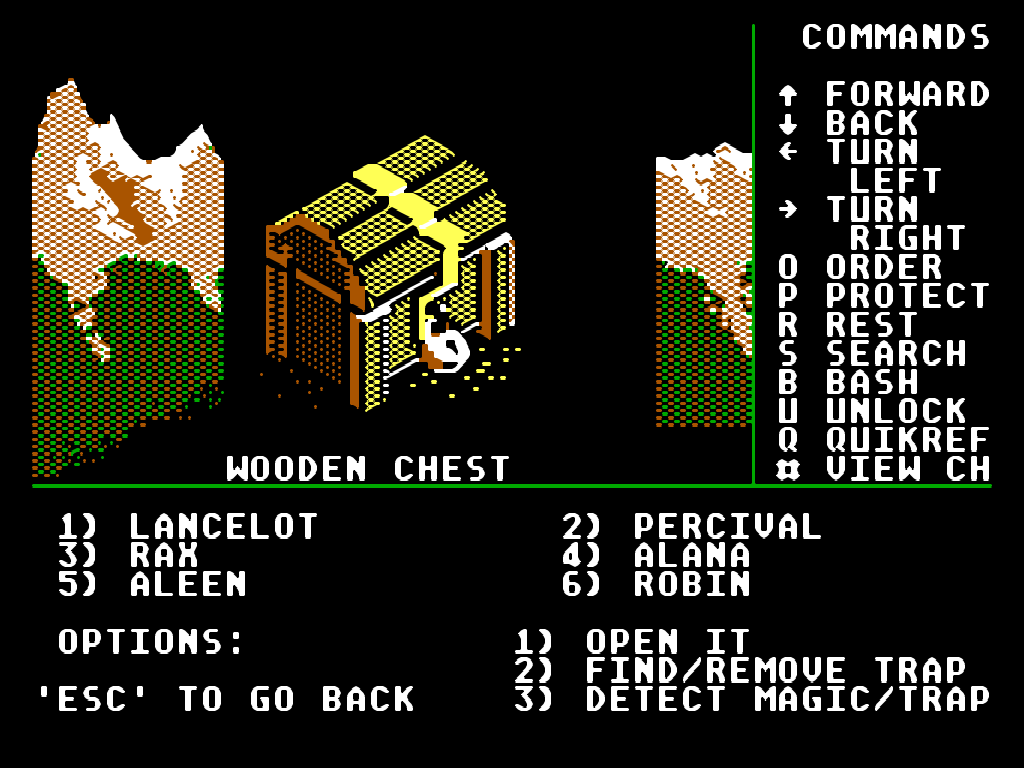
I love getting chests, even if they are trapped, the damage and the rest is usually worth it.
On my first try, it took me south, to a series of passages with nothing of importance in them. Since I didn’t understand the concept of forest walls yet, I thought I was stuck there. Eventually, I managed to find a “secret passage” and got out, but then I got myself killed by a monster ambush, so it didn’t really mater. Still, I at least explored that area.
Next up, I went northeast to explore that part. There was a passage to the next region up north there, as well as a passage to the region east. There was also an entrance to a cave. I tried getting in, but I then immediately got out because I was scared. Still, I immediately got a hunch that this was the cave that the portal from the dungeon below Sorpigal leads to, so I took a mental note to check later, when I get stronger. All I had to really do was to compare coordinates with the Location spell.
Avalanche!
To the south of that, there was a tile that triggers an avalanche. What this means is that basically, a wall appears behind me, completely stopping me from going back. After that, I was stuck in a sealed off area with the only way to advance being to go to the region east of C-2 and then possible circling around to the northwest. I never tried this, but I did try circling to the southwest and this took me to a high level area, so it wasn’t the correct choice.
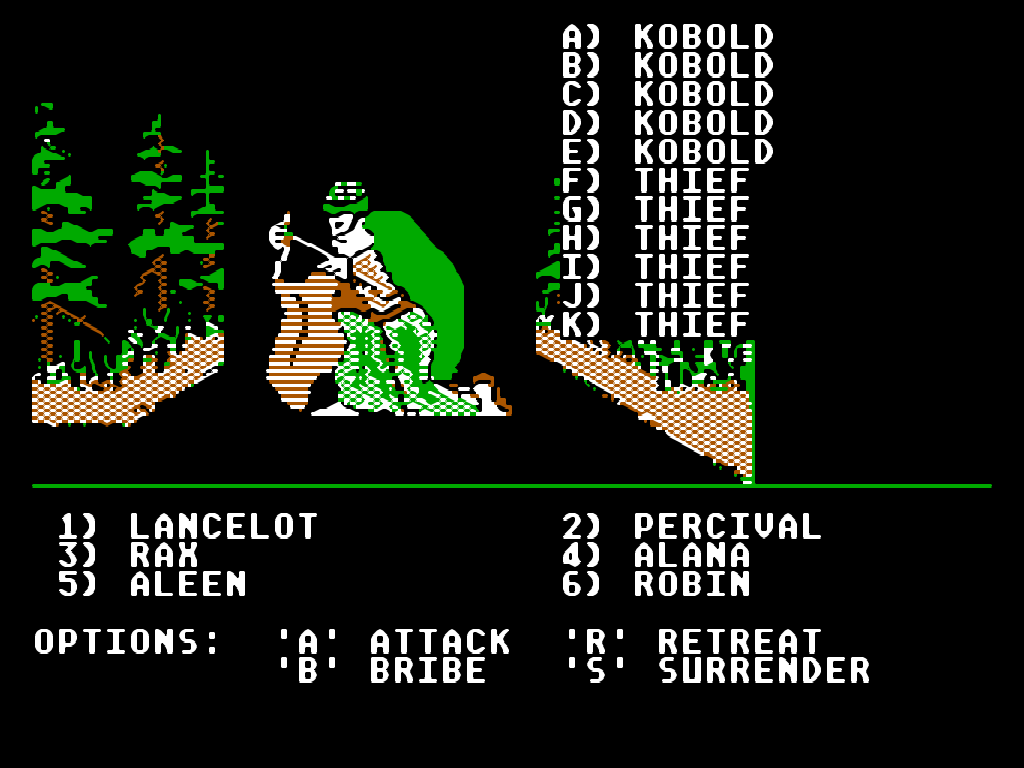
Apparently, this is supposed to be a thief. OK.
It took me several deaths to fully explore this sealed of section, and it all ended up being for nothing. Other than two fixed encounters and the passage east, nothing else was there.
The Western Forest
After all of that, I finally went west, where there was a large forest. It was surrounded by dense trees, which serve as an actual wall and it was full with single tiles, surrounded by passable forest walls. Within each tile, there was a fixed encounter and most of them were too tough for me to handle.
Unlike the passable forest, this is an actuall wall.
The single tile closest to the town entrance didn’t have an encounter. Instead, there was a gypsy there, who was able to tell me my character’s “signs”. At first, I wrote them down, but when I died and came back, I realized the signs change after a reload.
Hindsight is 20-20, they say, right? Well, now that I think about this, it’s possible the signs are determined at random for the first time, but stay fixed later. I think I actually never returned to the inn after talking to the gypsy, so it’s possible it was again my “first” time visiting her when I reloaded. I’ll have to check this later.
The Western Passages
Once I got through these clearings, I went to the south again and got to a series of tunnels with more random encounters and secret passages. I found an item cache there, but I didn’t find anything huge in it.
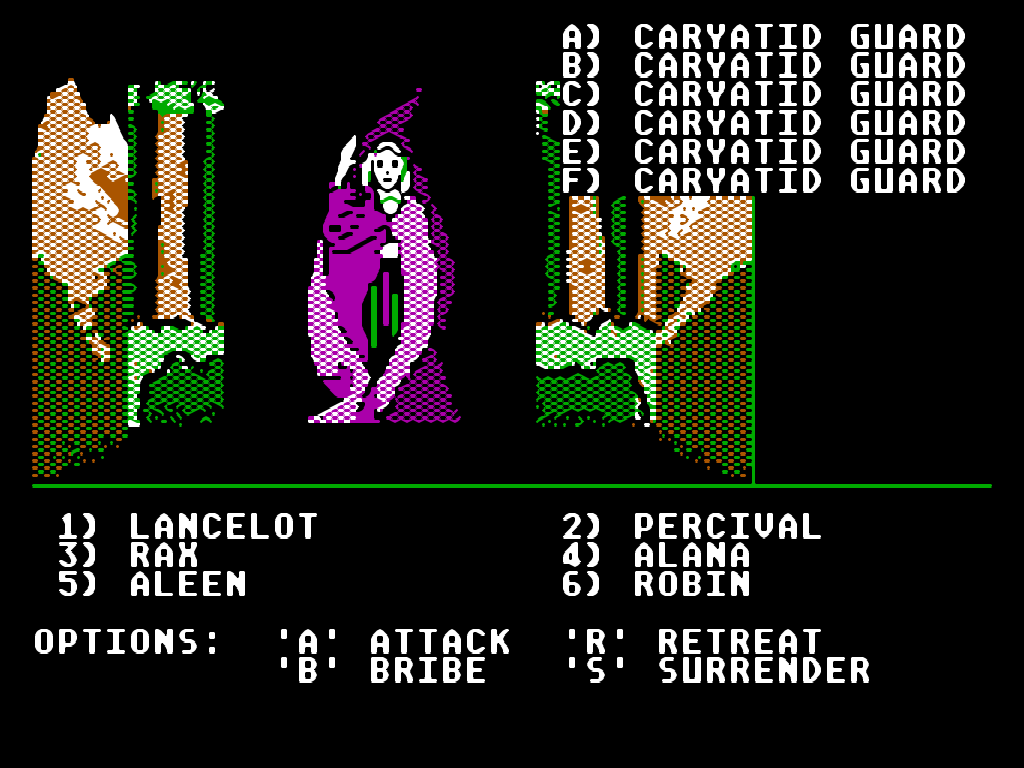
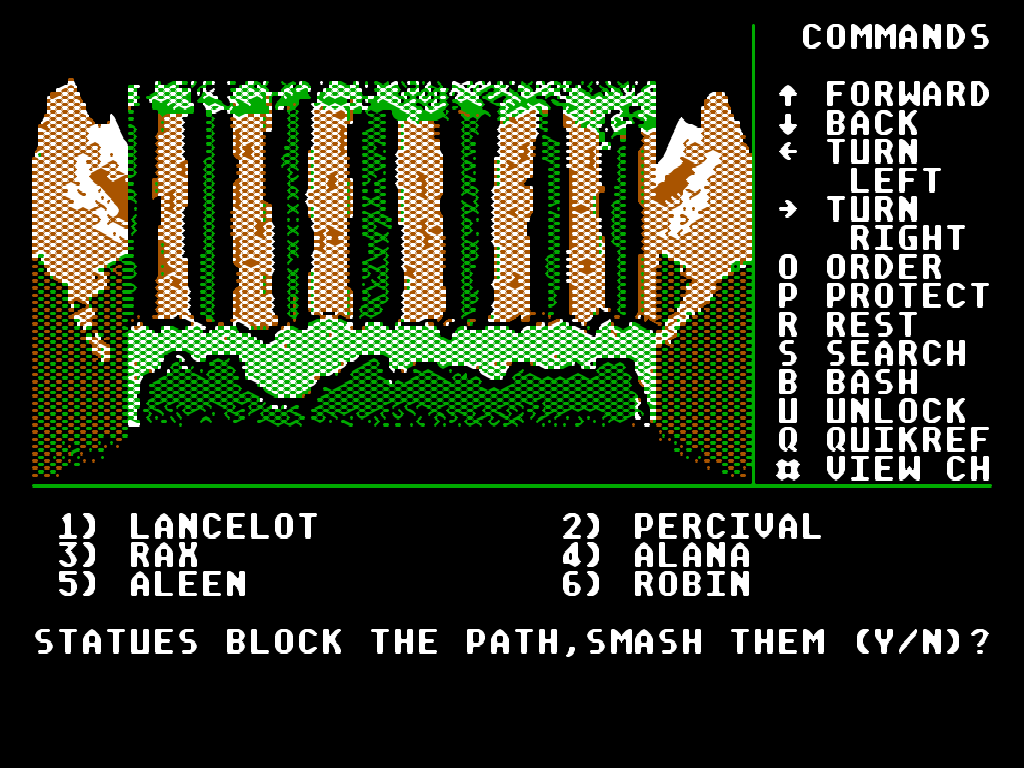
Caryatids are creatures I’m not familiar with, but they sure are tough.
I also found a wall of statues which I could decide to destroy. Doing this would trigger a fight against a group of Caryatid guards. These guys needed to be hit with enchanted weapons, I think, and they were very tough, so I lost my first battle with them. I was only able to beat them later, once the whole area was explored and my party was mostly level 4 and 5. Defeating them got me 400 experience and option to go further west through the passage they were guarding, to a whole new region.
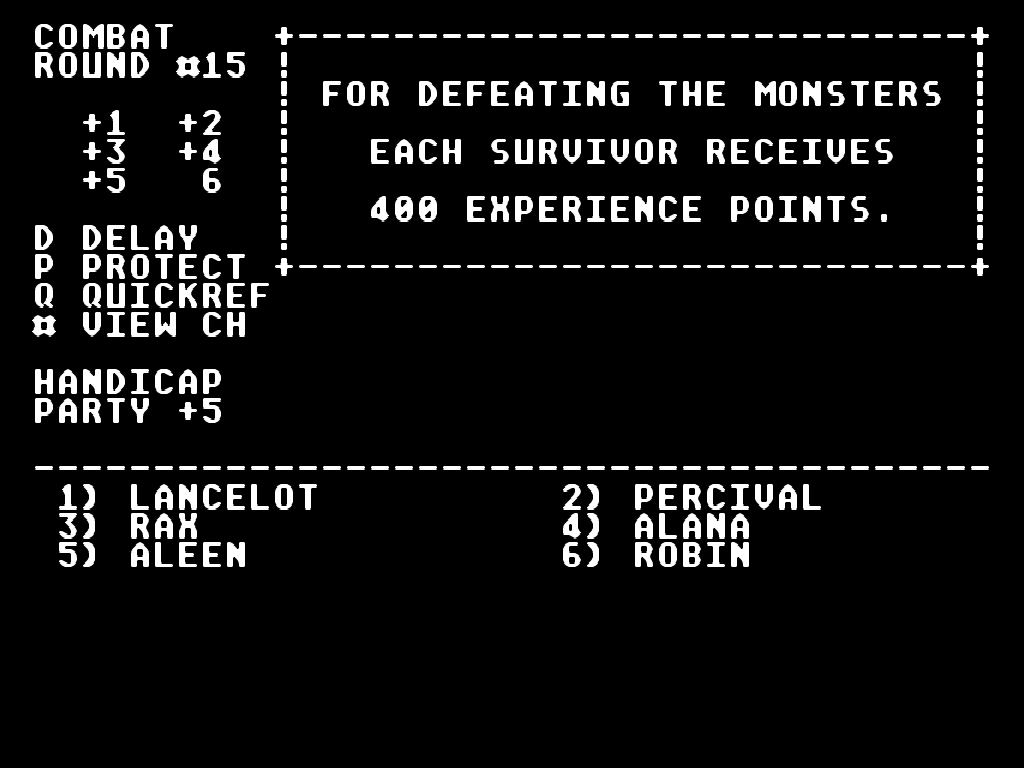
Caryatid are also worth a lot of experience, once you CAN defeat them.
The Fountains
Finally, I went north of the gypsy, where I discovered a secret passage quite early in the game. This took me through a long, narrow passage which goes west and then wraps around south. There was a seemingly nothing at the end of it, but bumping in to walls helped me discover three secret “rooms”. One of them had a fixed encounter and two of them had a fountain each. Drinking from the fountains just said “Cheers” and nothing else appeared to happen. I’m not sure what the fountains are for, but they might be important later.
The Spoils of War
The encounters in the wilderness of Sorpigal were quite lucrative. I upgraded most of my equipment, got a Great Bow for Robin, a Long Sword + 1 for Percival and several armor upgrades for my entire party. Aleen is the only one that needs some upgrades urgently now, everyone else seems to be holding well. I also got a large amount of experience and got most of my party to level 5.

Here’s the full map with notes I took of the Sorpigal wilderness (C-2).
As usual, you get the maps I drew. The images are already linked above, but I also supply the DOCX files for editing, as well as the PDF for printing.
- Might and Magic I – Sorpigal Wilderness, Map + Notes, A4 DOCX
- Might and Magic I – Sorpigal Wilderness, Map + Notes, A4 PDF
- Might and Magic I – Sorpigal Wilderness, Map + Notes, A5 DOCX


