As I said, I’ve got the sword, but Zelda was captured by the wizard.

I got back to the Sanctuary, where the priest was already dying. He told me the wizard took Zelda to the castle, so that’s where I went. The sword helped me break the seal I’ve seen at the beginning of the game and I entered the dungeon.

This one was pretty much straightforward and simple. I’m not going to say it’s easy, though, because it took a while to get to the end, but only because of the length. I got to the wizard just as he was apparently teleported himself and Zelda away.

A Link to the Past, Wizard

“Bwahahahaa! I waited so I could tell you you’re too late!”

The reality was, while Zelda was transported away, he actually hid in a room behind the curtain, so that’s where I’ve found and fought him. Thanks to a tip provided by the elder through a communication tablet in the castle, I knew I can’t hit the wizard directly. Instead, I had to hit the missiles he was launching at me to deflect them back at him. This was extremely simple, once I figured out the pattern. Basically, I needed to stand still and swing my sword on every shot, unless he teleported to the top center of the area. In that case, I needed to go up and to the side of him, to avoid the lighting.

I’ve beaten him, but he transported both of us to the dark world and that’s when I realized the game was only beginning. The elder contacted me immediately and told me I need to defeat him in the dark world to rescue Zelda and restore everything. In order to beat him, I need to find the seven maidens who can help me, each in one of the dangerous dungeons in this dark world.

A Link to the Past, The Dark World

Time to actually start the game, I guess.

Basically, I only got through three tenths of the game, if even that far. Oh well, time to get to the first dungeon. What I’m hoping at this point is that I will be able to go back to the light world before the game is over, so I can pick up everything I missed. I rushed to get to the castle, so I’m bound to have missed something.

By using the gauntlet, I managed to get to a semi-flooded area in the northeast, filled with those fireball spitting enemies that live in the water. As it turns out, these are the Zoras. Their king was there and he offered me swimming flippers for 500 rupies. Obviously, I wanted those, so I gave him the money. I was at 999 rupies for a while now anyway.

A Link to the Past, Flippers

I’d say something like “costly, but worth it”, but really, you HAVE to buy the flippers.

It was time to get to the third dungeon now. The map was clearly showing it as the tower to the north, so that’s where I went. My gauntlets allowed me to lift a stone and clear the way to a dark cave. Exploring it, I soon met an old man who asked me to guide him through it. It seemed more like he was guiding me, since he told me which direction to go to on several occasions. Eventually, we got out of the cave and to his house, which is now one of my “bases”, allowing me to start the game there upon loading.Using the flippers, I’ve found a couple of heart pieces, bringing me to 8 total (I believe) as well as a hidden cave with a pond. Throwing my boomerang in the pond caused a fairy to appear who then gave me an upgraded version of it. This one can travel a distance equal to the width of the entire screen. Hoping to get something else, I threw various items in and it worked. I got my shield upgraded to and I filled an empty bottle as well, getting a green potion this way.

I explored around his house and found a couple more heart pieces. I also found a magical platform which transported me to a dark version of the mountain and turned me into a bunny. In this dark dimension, I’ve found two other creatures and one of them told me I need the magical pearl from the tower to retain my original form upon teleporting to the dark dimension.

A Link to the Past, Dark Dimension

The dark dimension, and a bunny.

It took me a while, but eventually I figured out I could use the mirror the old man gave me to go back to my original dimension and my original shape. I used this feature to get another heart piece and then to get access to the tower, our third dungeon.

A Link to the Past, Third Dungeon Entrance

The entrance to the third dungeon.

This dungeon was relatively small in area, but had several floors I needed to explore. I didn’t get any new weapons or tools, sadly, but I did get the magical pearl I’ll need for the dark world. The boss of the dungeon was extremely annoying. He moves randomly and the only way to damage it is to hit its tail. The hard part is that the battle takes place on a platform you can fall off of and the boss pushes you around when you get hit, so it’s extremely easy to fall. Of course, if you do fall, he gets back to full health, so you have to start all over. Eventually, I somehow managed to beat it and got the third medallion, as well as my ninth heart container.

A Link to the Past, the Master Sword

The Master Sword

I now had everything I needed to get the Master Sword, so I went directly to the Lost Woods. The sword was where I’ve seen it before and now it was mine. As soon as I pulled it out of the stone, though, I got a message from Zelda, saying the Sanctuary is under attack.

Time to go rescue Zelda again.

After clearing the first dungeon, it took me a while to reach the second, even with all of the hints.

Well, as a matter of fact, the hints, at least the hints I’ve been getting from fortune tellers, weren’t really helpful. They keep telling about a Zora I’ll be meeting at the source of the river. This made me think the next dungeon is on the northern location, out of the two marked on my map, when it fact, it was the southern, in the middle of a desert. Eventually, I got there, but not before finding a bunch of heart pieces, putting me one short of a full extra heart.

A Link to the Past, Forest Clearing

Exploration revealed a spot in the woods, probably important for later.

The new dungeon, naturally, had a desert theme. Many of the enemies would hide in the sand emerging later, usually at an inconvenient moment. After a while, though, I got used to the patterns and started clearing rooms. The map was easy to find, with the compass second, quite far away from the map.

After a while, I’ve reached what I thought was a dead end, but then I realized I had to use one of the side exits from the dungeon to reach the second area. The big key allowed me to also get a new item, the Power Glove. This one allows me to lift the greenish rocks scattered around the world, but wasn’t really helpful with beating the boss.

A Link to the Past, Final Room of the Second Dungeon

The second medallion is mine!

The boss was familiar to me, even though I haven’t played the game. Pin, a boss from the Binding of Isaac, was heavily inspired by this one. The behavior is slightly different though. It moves much more slowly, since I have to hit him with a sword, instead of from range. Once he was beaten, I got the second medallion, the Medallion of Strength, as well as another heart container, bringing me up to a total of seven (and three quarters).

My session time was nearing an end, but before I saved, I took a quick search around the area, just to see what I can access with my new ability to lift rocks. I found a couple of hidden rooms, mostly containing minor treasures. All the way to the east, thanks to a tip I got from a bandit in a secret cave, I’ve found the Ice Rod, which allows me to freeze enemies, I’m guessing for longer than the boomerang, but at the cost of magic power.

After that, I returned to town and saved my game.

Remember my “Complete every Zelda game” challenge? The one I “started” months ago, but only got through the first game. Well, a person on reddit said they’re considering the same thing, so this made me think about continuing my own. I’ll be skipping Zelda 2 for now and going straight for “A Link to the Past”. Zelda 2 is not really like other Zelda games, so I’m not that eager to play it yet.

Compared to the original, there has been a lot of improvements in playability and user friendliness in the SNES sequel. You now have a proper, usable in game map as well as something akin to an objective tracker. There are also ways of learning where you should go next by spending rupies and hints on where the hidden rooms and items are. Overall, it’s much more polished and really allows you to focus on the game, instead of going around hardware and software limitations.

At the start, Link wakes up in his house in the middle of the night, with his uncle going somewhere. He hears the voice of princess Zelda in his head, asking for help, so he listens. The castle has been attacked and the castle mage is behind it. The game leads you to the castle and teaches you how to find your very first hidden passage, a hole beneath a bush.

A Link to the Past, Castle Door

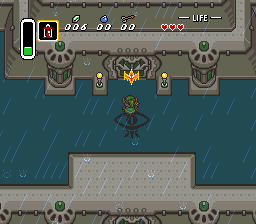
The door to the castle was locked, and it will probably stay locked for a while.

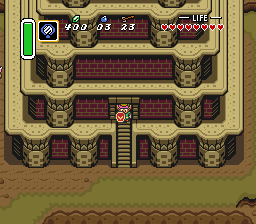
Once Link jumps through, he finds his uncle injured and takes his sword. The area beneath the castle then serves as an intro dungeon. You learn some of the mechanics, find your first map and finally fight something of a mini-boss guarding Zelda’s cell. Link frees her and she follows him to the ground floor where they uncover a hidden passage. After some more dungeoneering, they finally reach the Sanctuary, where she will be safe. At this point, Link earns his first extra heart container.

A Link to the Past, The Sanctuary

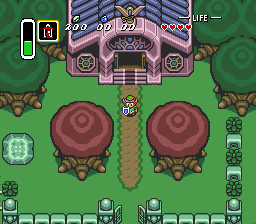
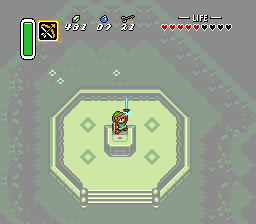
This is the Sanctuary.

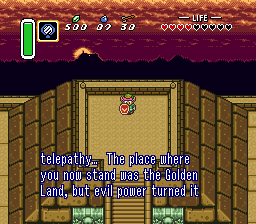
She asks Link to find a way to defeat the wizard called Agahnim. Apparently, he’s trying to open something called “The Seven Wise Men Seal”, which he shouldn’t do. To stop him, I’ll need the master sword and the people of the nearby village should know something about that. This is how the game leads you around throughout, so there’s no guessing, no map drawing, you just play.

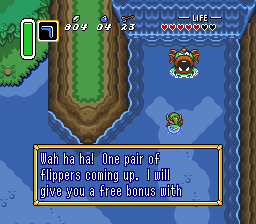
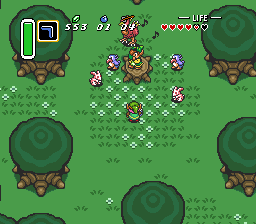
I got to the village and was told their elder is in a place to the east. Before I went there, I explored everything and found a bunch of items. I got a total of four heart pieces, which gave me my fifth container, some bombs, some arrows, a bottle which allows me to store fairies in it and a net which allows me to catch faeries. Back in the dungeon, I already got the boomerang and back at home, I got the red lamp. All in all, I already have a nice assortment of items.

Once I was done exploring, I went to the east and spoke to the elder. He said he knows how to get the Master Sword, but Link needs to prove himself worthy first, which means he needs to find three magical medallions. The first is the medallion of Courage and it’s located in a dungeon nearby. Now, at this point, I’ve already found the Master Sword at the Lost Woods north of the village, but I couldn’t pull it out of the stone. I guess that’s why I need the medallions.
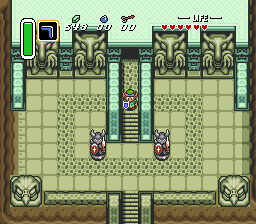
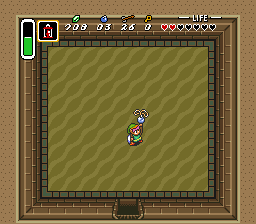
A Link to the Past, The First Dungeon

The first dungeon.

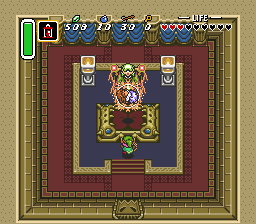
I got to the first dungeon fast enough and started exploring it. It wasn’t to difficult, but it takes time to get used to the game, so I had to restart at the first room several times. Thankfully, the mechanics work in such a way that the important part of your progress isn’t lost when you die, so eventually, I got the map, the compass, the big key and eventually, the Bow, which is the primary reward of the first dungeon. I used the bow to kill the first boss and got another heart container for it, as well as the Medallion of Courage. I returned to the elder and got information on where to find the next two medallions.

He also gave me Pegasus shoes, which allow me to charge enemies and knock things down. I immediately remembered a book on top of a shelf in the village library, so i went straight there to get it. The book allows me to read the ancient language inscribed, among other places, on the stone the Master Sword is stuck in.

I’m guessing I have to go to the next dungeon now, but before that, I’ll be doing some exploring, to see if my new shoes can get me anything else.