The Review: Is A Link to the Past as Good as They Say?

Amazing! The Legend of Zelda: A Link to the Past is absolutely amazing!

I never properly experienced the SNES console era, and after this game, I truly am sad that I haven’t.

A Link to the Past Screen 1

Awww!

Legend of Zelda – A Link to the Past is truly an amazing example of what good game design and imagination can do. It looks beautiful and plays beautifully. It provides you with a sense of achievement every time you get past an obstacle it throws at you. It makes you feel stronger and more skillful, but at the same time, it constantly provides an adequate challenge.

By the way, I loved the ending and how all of the game’s characters basically say goodbye to you once you’re done. It makes for a bunch of extremely nice screenshots.Not many games get close to perfection as this one, and mind you, this isn’t nostalgia talking, since I never played it as a kid. Truly, truly, an amazing game. There really isn’t anything about it I would like changed.

A Link to the Past Screen 2

…or until the next game!

The music! I can’t believe I forgot about the music. The Legend of Zelda, the Final Fantasy and the Mario series probably have the most iconic music in all of gaming and for good reason. Most people remember the main theme of Zelda games, but the final victory theme is just as good, if not better.

The Verdict

It’s awesome! Play it!

Meaningless Score: 999/1

Once I approached the equivalent of Hera’s Tower in the dark world, the crystals broke the seal and opened the entrance. This was a huge dungeon, with several bosses of the previous dungeon reappearing to fight again. This is another way of the game showing me how strong I got since I started. Thanks to my sword and armor upgrades, most of these bosses died in just a couple of hits, without even touching me.

A Link to the Past, Red Mail

The game’s strongest armor!

Even though it’s the last dungeon, this one also had a special item – The Red Mail. It’s another armor upgrade, just as the blue mail was. I actually got the boss key and the armor quite early in the dungeon, even before the compass, which was very helpful and basically required to advance far enough before dying.

Eventually, I got to the wizard. The strategy to fighting him was still the same, except he now made three copies of himself to add extra attacks. I still only had to beat the real wizard, though, so it didn’t take long. After about five of his shots deflected back at him, he was down. Then, Ganon rose up from his dead body, turned into a bat and disappeared. Link followed him all the way to the Pyramid of Power, where the bat crashed through the roof.

A Link to the Past, Ganon

Ganon! Who knew!?

In the first phase, Ganon was just throwing his trident around, which was easy to avoid. After a few hits, he added a spinning fire circle and fire bats to his arsenal, which was much, much harder to get away from. I used the staff for some protection and kept hitting him until he started jumping around. I still had some magic, so I continued with the staff and the sword swings until he went invisible.Before I entered, I used my mirror to go to the light world and then my ocarina to get to the potion shop. I already had two bottled fairies, so I bought two blue potions to stock up completely. Then I entered the dark world and used the “Save and Quit” shortcut to get to the pyramid for the final battle.

At that point, I used one blue potion to refill my magic and hearts and then started using the Fire Rod to light up two torches, which made him visible for a few seconds. I kept hitting him with a sword, but it didn’t seem to go anywhere.

A Link to the Past, Ganon Defeated

I’m guessing it becomes less and less surprising in later games.

Then I remembered what I had to do in the original Legend of Zelda. I hit him with a sword, which got him stunned and then fired a silver arrow at him. This seemed to hurt him, so I kept repeating it for another three or four times and then it was over.

I won!

Before I went to get the final crystal, I decided to do my last bit of exploring. First of all, I went to the bomb shop in the dark world, which is located on the same spot where Link’s house was in the light world. The shop sold red bombs for one hundred rupies a piece. The bomb was not an item. It actually just followed me around like the chest I’ve already found did.

I bought it because I thought it would be an upgrade for my bombs, so I didn’t really know what to do with it at first. Then I remembered that cracked wall at the pyramid. I made the bomb followed me there and then ditched it at the crack. It exploded and opened a passage to another magical pond that accepts items.

A Link to the Past, Fat Fairy

I sure did!

I threw my bow and arrow and got the silver arrow upgrade. Then I tried my bottle and got a green potion. After that, I tried pretty much every item I could and it worked on just one. Boy did it work, though. The pond actually upgraded my sword!

After that, I used the light world transportation to get to the mountains and went to explore the area past the ruined bridge, which I could now access with the hook shot. I managed to find a lot of loot, but most of it was just bombs, arrows and rupies. Still, there was a heart piece, so it wasn’t all for nothing. Eventually, I got to the entrance of the last crystal dungeon, the Turtle Rock. In order to enter it, I had to solve a puzzle in the light world and then use Quake on the platform, to open the door.

Turtle Rock made me use the Cane of Somaria extensively. The Cane could be used to create platforms on certain spots of the level, which would then let me travel along the existing route. It also contained plenty of spiked floors and button puzzles.

A Link to the Past, Turtle Rock Boss

The middle head was the most dangerous one.

The boss made good use of my green potion. It was a turtle with three heads. The red head was hurt by the Ice Rod, while the blue head was hurt by the Fire Rod. First, I used the fire Rod to kill that one, then a combination of the Ice Rod and the sword to kill the red head. Once the two were dead, it turned into a snake which I had to finish off with my sword. Luckily, I saved up some magic, so I used the protective staff in the last phase to make it easier.

In any case, I got my last heart container and my last crystal. It was time to go and defeat the wizard.

Since I didn’t go to the area of the next dungeon yet, I decided to explore around it for a bit. Misery Mire is located where the desert dungeon was located in the light world, but it was a swamp in the dark dimension. The exploration was worth it, netting me another two heat pieces as well as a bunch of rupies.

I couldn’t enter the dungeon yet, though. I was definitely at the entrance, but I couldn’t see any doors. What I did see was a small glyph on the floor nearby, which had the same yellow and brown coloring like the two spells I collected previously. This one, however, I didn’t have.

I started looking for it and it took me a good hour, but I finally found it west of the Tower of Hera. The spell is called Ether and it’s obviously lightning based, if the icon is any indicator. I got back to the Misery Mire entrance and used it on the platform to open the entrance.

A Link to the Past, Misery Mire Entrance

This is where you use the Ether to open the Misery Mire

Misery Mire required plenty of keys to get ahead, but the dungeon was designed so the key you needed was almost always nearby, usually attached to one of the enemies. Basically, the dungeon was way more focused on fighting than on puzzles.This dungeon was a lot harder and longer compared to the Icy Palace. The most annoying part was the large number of those laser shooting pillars from one of the earlier dungeons. I’m pretty sure these do a heck of a lot more damage than the ones I’ve seen before, though.

The second floor was in complete darkness, meaning I had to navigate slowly, and carefully. Of course, I didn’t really do that, so I had to restart in the first room plenty of times before I finally got through it. Eventually, I got to a room with a button that needed something placed on it, but no blocks nearby, nor any blocks or holes on the floor above.

A Link to the Past, Misery Mire Room

There’s a lot of projectile dodging in Misery Mire

I moved on and finally got the item of Misery Mire – The Cane of Somaria. This was what I needed for that button. The cane creates a movable block on the ground. Another use of the cane while the block is placed destroys it and causes missiles to shoot in the four basic directions, so it’s basically a bomb on a manual trigger. I placed the block on the button and was finally able to get to the boss.

A Link to the Past, Misery Mire Boss

I present to you, the Googly Eyes Boss

I got another crystal and another heart container. It was time for the next dungeon.The boss was, again, relatively straightforward. First I had to use the sword to destroy a bunch of floating eyes, while avoiding hits from the body. Once the small eyes were gone, the large one started following me around the room. I used my sword and the protection staff the name of which I keep forgetting, until my magic was gone. After that, another few hits with the bow and arrow were enough to beat it.

Since I pretty much stumbled into the Ice Palace entrance by accident, I decided to just go for it. Right at the start, I had plenty of trouble. The enemy in the first inhabited room wasn’t getting hurt by my sword. It took me a while, because I somehow apparently went blind, but eventually, I figured out that the Fire Rod kills it in one hit. After it was dead, I realized there’s a sign on the wall that flat out said the enemies are hurt by fire.

A Link to the Past, Ice Palace Spikes

These spikes can hurt a lot.

Another new enemy appeared a few rooms later, after I got the compass. I’m not sure what they’re called, since I don’t have the game manual, but they’re giant skeletons which crumble with a single sword hit, but get back up seconds later. This time, I immediately noticed a sign on the wall, which said I need to use a different weapon once they’re down. It wasn’t too hard to figure out the bomb was what I needed.

The Ice Palace, of course, had plenty of ice tiles I had to walk on, which means plenty of rooms with spikes and those spinning fire things to crash into due to the slippery ice floor. Suffice to say, it was hard and annoying, but eventually, I managed to get through most of it.

The puzzles consisted of finding holes in upper floors to jump through, so I could access more areas on the lower floors. One of them even involved pushing a block through the hole, so it lands on a button on the lower floor.

The contents of the boss chest were my favorite part of the dungeon. The chest contained the Blue Mail. It’s a stronger armor which increased my defense and severely reduced damage I was getting from enemies. As I said, A Link to the Past really knows how to make you feel more powerful while not lowering the difficulty of the game at later areas.

A Link to the Past, Ice Palace Boss

This boss was more of a skill challenge then a puzzle.

The boss was relatively easy, though I needed enough magic to defeat its first form. I used the Fire Rod to destroy his outer frozen shell and then the same item against his second form. Once I was finally out of magic, I continued to hit him with the sword, while avoiding the stuff coming at me. The fight was simple and straightforward, but still not too easy. I picked up another heart container and another crystal, so I was ready for my next dungeon.

As I said, getting the Titan Gauntlet in the last dungeon meant I had some exploration to do. First of all, I went down to where the race mini-game was in the light world. In the dark world, it’s replaced with the digging mini-game where you play 80 rupies for 30 seconds of digging. Since my experience tells me these sort of mini-games contain special bonuses like heart pieces, or even heart containers, I decided to try my luck for a while, but I didn’t get lucky enough. After a couple of hundred rupies spent, I decided to give up for the time being.

Instead, I went to talk to the frog one screen before the mini-game. The route to it was blocked by an extra heavy boulder, so I couldn’t do it before. The frog asked me to take it to its partner, somewhere in the village. I went through every house, but nothing. Then I went one screen east, where I remember a dwarf was missing a friend in the light world. The dark version of the house was destroyed, but I got an idea.

A Link to the Past, Dwarf Frog

The frog was a dwarf. Is that racism?

I used the mirror and it worked, which makes me wonder why I couldn’t use it with the kid in the forest, instead of him turning into a tree. I guess you shouldn’t think to hard about Zelda games. In any case, the dwarves were reunited and they offered to temper my sword for 10 rupies. I had to move a couple of screens before the sword was ready, but it was well worth it. The Master Sword is even stronger now.

A Link to the Past, Upgraded Master Sword

Master Sword +1

In the dark world, their house was ruined, but a chest was in it. I couldn’t unlock it, though. Instead, the chest started following me. Now, I’ll be honest here, I had no idea what to do with it, so I succumbed to the Internet. The chest was supposed to go to the light world, to the man at the entrance to the desert area. He unlocked it for me and it contained an extra bottle. Great, now I have four empty bottles because I keep forgetting to fill them up.

Since I was relatively close to the lake, I decided to go spend my 999 rupies to upgrade my bomb and arrow containers. You see, I forgot to mention this, but at the central island in the lake, there was a pool where you can throw rupies in for luck. For every 100 you get rid of, a fairy pops up and offers to increase your maximum bomb or arrow storage by five. Since I can’t go above 999 anyway, it’s a god place to spend extra money at. I upgraded both of my containers to fifty and then lifted the one heavy rock on the island.

It uncovered a portal to the dark world, which led to the area right in front of the next dungeon. A happy coincidence?

I love the way this game plays out.

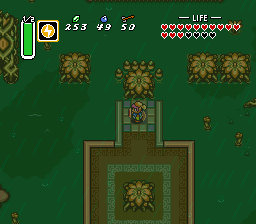
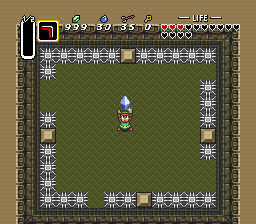
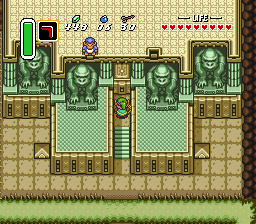
The next dungeon took me a bit to find, but it wasn’t too hidden. The statue at the village square had a trident I could grip and pull out, which opened the entrance. Again, this dungeon was different.

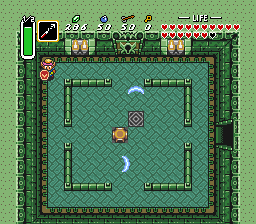
The first area consisted of four huge rooms, both with two different levels and randomly interconnected passages. It required plenty of walking back and forth to get access to different parts via alternate routes. I got the map, the compass and the boss key, all in the same room. There were also a couple of other chests containing rupies and other random items.

A Link to the Past, Fourth Crystal Dungeon

Compared to the last, this dungeon was a lot more homely.

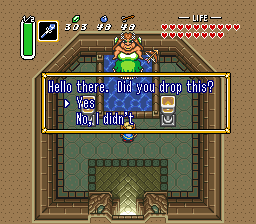
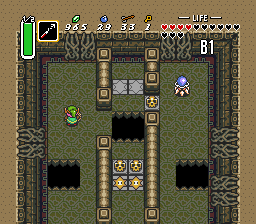
Once that was out of the way, the next area had a second floor, as well as a basement. I went to the second floor and cleared it, but there was nothing there, that I could see. Then I went to the basement and found a girl trapped in a cell. I was supposed to escort her out, but I decided to explore the rest of the cellar first. It was worth it.

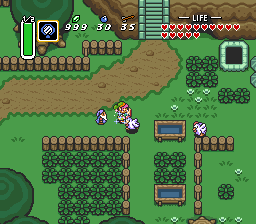
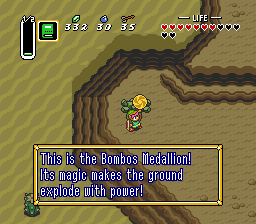
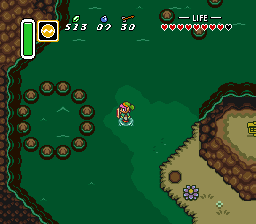
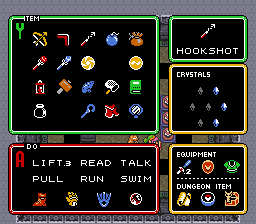
In one of the rooms, I found the Titan Gauntlet. This one allows me to lift even the heaviest rocks and boulders, so there will be a lot of exploring after this dungeon. I wasn’t done yet, though. I escorted the girl to the ground floor and then stopped by the boss room before taking her out. Nothing was there, though. I tried to go back to the second floor, since something was bound to be there, but the girl left me before I climbed the stairs.

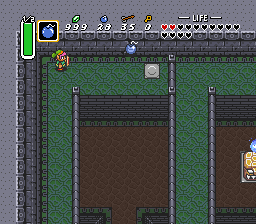
Because of this, I was sure something was there. That’s when I realized one of the most basic things. You can lift and throw bombs. I have no idea if the Titan Gauntlet allowed me this, or if I was just clueless, but this was honestly the first time I figured it out. With that knowledge, I knew what I had to do.

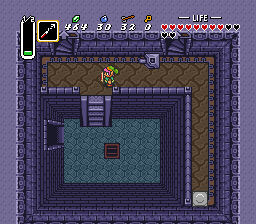
The second floor had a room at the end of it. Part of the floor there was crumbling, but it was surrounded by walls, so I couldn’t place a bomb on it. I could, however, throw one. Since the room was right above the boss room, I went back there next, but the boss was still absent. The light from the hole above was shining through, though, so that bomb definitely did something.

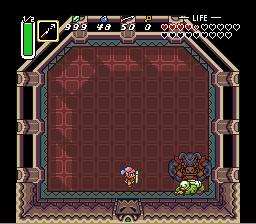
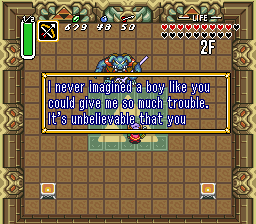
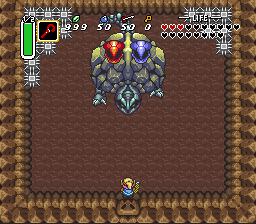
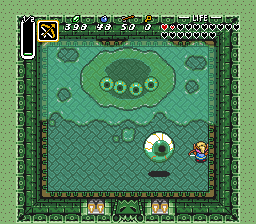
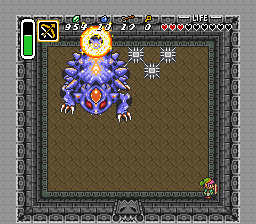
I was thinking the girl might have something to do with it, so I went back to the cellar to pick her up again. I got her to the boss and the relatively predictable thing happened. When she walked over the light, she turned into the boss.

This one gave me a lot of trouble, because again, I forgot about using my defensive items. After a couple of failed attempts, I finally remembered to use the protective staff and after that, the boss was easy. I just had to hit his head and avoid the rest of him. To be more precise, I had to hit the one attached to his body, because by the end of it, he had two extra floating around.

A Link to the Past, Inventory Screen

I guess I’m almost done gearing up.

So why do I love how the game plays out? Because when I first entered the dark world, it was hard as hell. Now that I got some gear and familiarity, I actually feel more powerful playing through it. I love when the game works that way instead of just making everything harder as you get stronger.

I love how each dungeon has a peculiarity attached to it. The Skull Woods dungeon had a different way of navigating through it.

Basically, there was no main entrance. Instead, it had several different entrances, as well as holes you can fall through to access different areas. The navigation was still relatively linear, though. I fell down one hole, which got me access to an exit, which got me access to another hole, and so on. Eventually, I got to the map, as well as the compass, and finally, I got the boss key.

A Link to the Past, Skull Woods

Lots of switches and pits in Skull Woods

The boss was a moth, so it was also weak to fire. It was moving fast, however, so I ran out of magic mid-battle. All in all, it took around seven or eight hits with the rod, as well as a couple of hits with the master sword to kill it.This unlocked an awesome new item – the fire rod. The toughest enemies in the dungeon were mummies and these would now go down in one hit of the fire rod, at the cost of a tiny bit of magic. Getting the rod also gave me an ability to burn the obstacle keeping me from the boss area.

A Link to the Past, The Third Crystal

Crystal #3

In any case, I killed the boss, got another heart container and another crystal. The fifth dungeon is supposed to be in the middle of the Outcast Village.The thing I keep forgetting is to use all of my items. I probably would have done better against the boss, had I used the protective staff and just stick to my sword for offense. I just keep forgetting to use all the awesome items the game gives you, which is making my life a lot harder.

Today, I’ve mostly spent a lot of time exploring both the light and the dark world. I realized I can use the mirror to switch to the light world at will, so I’ve been using it to go back and forth. For a short time, a portal back to the dark world remains on the spot where I use the mirror and if that goes away, I can always use one of the fixed portals scattered around the light world.

I’ve been picking up some heart containers as well as heart pieces, but mostly, I’ve been looking for areas I can access through world transfer. For instance, there’s an island at the lake with a heart piece on it, but I could only get to it by standing on that spot in the dark world and then using the mirror.

A Link to the Past, Quicktravel, Map

Quicktravel existed even in the classics.

I got there and found is grandfather at the inn. He told me to go and play it at the village square. This caused the bird statue there to come alive. Now, every time I play the flute, the bird can transport me to one of several areas of the light world.Eventually, I got to the forest where a kid was playing a flute in the light world. In the dark world, the same kid was there, but transformed into an animal. He said he missed his flute very much and asked me to retrieve it from the light world, using the shovel he gave me. I got there and eventually found it, after lots of digging. Sadly, he couldn’t play it anymore due to the transformation, so he decided to let me keep it and asked if I could maybe return it to his family at the village.

After this, I did some more exploring in both dimensions and managed to get two more items. One was a magical cloak that drains my magic power, but keeps me invisible for the duration. The other was a magical staff which creates a protective shield around me. For this one, I had to use the magical cloak to get it.

Both of these drained magic power like crazy, but luckily, I’ve found a cauldron just east of the village in the light world. Using the magical powder on it caused a creature to appear, which cast a spell on me, halving my magic power expenditure, regardless of items.

A Link to the Past, Bombos Medallion

The Bombos Medallion casts a useful fire spell.

The dungeon wasn’t too bad. I’d even say it was easier than the previous one. The best part about it, though, was the loot. I finally got the hook shot. This awesome item can pull me towards pots, skulls, chests and other similar items, allowing me to get across gaps or just move very fast.Eventually, I decided it was time to go clear the next dungeon – the Swamp Castle. I had to find the entrance first, though. It was at the same place where I could drain part of the swamp in the light world. After some messing around, I realized that draining the lake also transfers to the dark world, so that’s how I discovered the entrance.

A Link to the Past, One-way Switch

A new type of switch was introduced here.

The boss was easy enough. The first phase required me to use the hook shot, while the second phase was just the standard “avoid and hit until it’s dead”. I got my heart container and the third crystal. The next dungeon is supposed to be at the Lost Woods, or Skull Woods, as they are called in the dark world.

After some exploring of the dark world and getting used to the new enemies and the damage they deal, I finally decided to go to the Dark Castle, the next dungeon I’m supposed to go to. Before that, I’ve found a circle of stones in water, at about the same spot where the Zoras are in the light world. I threw a skull in it and a creature gave me a new weapon; Quake Medallion, I believe it was called. This spends close to a quarter of my magic power, but it does some serious damage to all the enemies on the screen.

A  Link to the Past, Quake Medallion

It looked like a target, so I threw a skull in it.

On the way to the dungeon, while going through a maze, a talking monkey started following me. He asked for 10 rupies in order to follow, which I accepted, thinking it isn’t much and it might be worth it. He followed me all the way to the dungeon entrance, which was closed. Then he offered to open it for another 100 rupies. Of course, I accepted this as well.

A Link to the Past, Monkey

As usual, I forgot the monkey’s name.

The dungeon was full of hard enemies and some pretty tricky puzzles that gave me some trouble, but I managed to get through it. I was stuck at one part for an especially long time, though. You see, you get a new item in this dungeon, a magical hammer. It allows you to defeat one of the dungeon’s enemies and it allows you to hammer various things into the ground in order to open up passages.

Well, one of the rooms contained a button which wouldn’t stay pressed no matter how many times I walked over it. Once I finally got the hammer and explored all of the other rooms, I was sure the hammer would “fix” the button. It didn’t work, though. I went back and forth, trying various ways of using the hammer, trying other items, basically all I could think of, but I kept focusing on the hammer. It never even occurred to me to try and push one of the statues in the room on top of the button. Sure enough, the closest statue was movable and I was able to continue.

A Link to the Past, Boss

Took me a while, but I managed to beat the boss.

Eventually, I got to the boss and lost to it several times. Again, the game confused me a bit. The very first hit with the hammer destroys part of his mask. The next several hits do nothing to it, even though they do damage, so I thought I was doing something wrong. Still, the boss did make a “I’m damaged” noise, so eventually I decided to just stick to it and keep hitting him. After about 10 or so hits, his mask was destroyed and then I finished him off with the bow.

I got another heart container, as well as the first crystal, containing the first maiden. She told me where to go next and marked it on my map.