By using the gauntlet, I managed to get to a semi-flooded area in the northeast, filled with those fireball spitting enemies that live in the water. As it turns out, these are the Zoras. Their king was there and he offered me swimming flippers for 500 rupies. Obviously, I wanted those, so I gave him the money. I was at 999 rupies for a while now anyway.
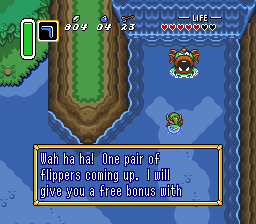
I’d say something like “costly, but worth it”, but really, you HAVE to buy the flippers.
It was time to get to the third dungeon now. The map was clearly showing it as the tower to the north, so that’s where I went. My gauntlets allowed me to lift a stone and clear the way to a dark cave. Exploring it, I soon met an old man who asked me to guide him through it. It seemed more like he was guiding me, since he told me which direction to go to on several occasions. Eventually, we got out of the cave and to his house, which is now one of my “bases”, allowing me to start the game there upon loading.Using the flippers, I’ve found a couple of heart pieces, bringing me to 8 total (I believe) as well as a hidden cave with a pond. Throwing my boomerang in the pond caused a fairy to appear who then gave me an upgraded version of it. This one can travel a distance equal to the width of the entire screen. Hoping to get something else, I threw various items in and it worked. I got my shield upgraded to and I filled an empty bottle as well, getting a green potion this way.
I explored around his house and found a couple more heart pieces. I also found a magical platform which transported me to a dark version of the mountain and turned me into a bunny. In this dark dimension, I’ve found two other creatures and one of them told me I need the magical pearl from the tower to retain my original form upon teleporting to the dark dimension.
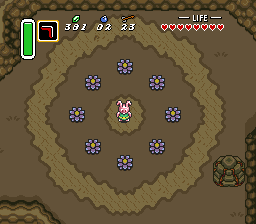
The dark dimension, and a bunny.
It took me a while, but eventually I figured out I could use the mirror the old man gave me to go back to my original dimension and my original shape. I used this feature to get another heart piece and then to get access to the tower, our third dungeon.
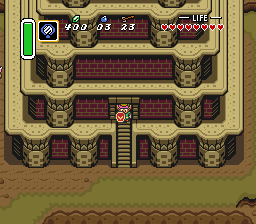
The entrance to the third dungeon.
This dungeon was relatively small in area, but had several floors I needed to explore. I didn’t get any new weapons or tools, sadly, but I did get the magical pearl I’ll need for the dark world. The boss of the dungeon was extremely annoying. He moves randomly and the only way to damage it is to hit its tail. The hard part is that the battle takes place on a platform you can fall off of and the boss pushes you around when you get hit, so it’s extremely easy to fall. Of course, if you do fall, he gets back to full health, so you have to start all over. Eventually, I somehow managed to beat it and got the third medallion, as well as my ninth heart container.
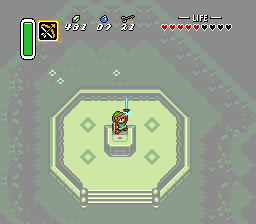
The Master Sword
I now had everything I needed to get the Master Sword, so I went directly to the Lost Woods. The sword was where I’ve seen it before and now it was mine. As soon as I pulled it out of the stone, though, I got a message from Zelda, saying the Sanctuary is under attack.
Time to go rescue Zelda again.


