I love how each dungeon has a peculiarity attached to it. The Skull Woods dungeon had a different way of navigating through it.

Basically, there was no main entrance. Instead, it had several different entrances, as well as holes you can fall through to access different areas. The navigation was still relatively linear, though. I fell down one hole, which got me access to an exit, which got me access to another hole, and so on. Eventually, I got to the map, as well as the compass, and finally, I got the boss key.

A Link to the Past, Skull Woods

Lots of switches and pits in Skull Woods

The boss was a moth, so it was also weak to fire. It was moving fast, however, so I ran out of magic mid-battle. All in all, it took around seven or eight hits with the rod, as well as a couple of hits with the master sword to kill it.This unlocked an awesome new item – the fire rod. The toughest enemies in the dungeon were mummies and these would now go down in one hit of the fire rod, at the cost of a tiny bit of magic. Getting the rod also gave me an ability to burn the obstacle keeping me from the boss area.

A Link to the Past, The Third Crystal

Crystal #3

In any case, I killed the boss, got another heart container and another crystal. The fifth dungeon is supposed to be in the middle of the Outcast Village.The thing I keep forgetting is to use all of my items. I probably would have done better against the boss, had I used the protective staff and just stick to my sword for offense. I just keep forgetting to use all the awesome items the game gives you, which is making my life a lot harder.

The garden flew, and then it crashed in the ocean. It still worked fine, but the problem was, no one knew how to control it. After this, the game makes it seem like quite a long time has passed. Everyone’s bored, not knowing what to do or where to go next and Squall is getting slightly annoyed.

Since the game wants downtime, I decided to take some downtime myself. I started walking around the garden, playing the card game with everyone I could, turning the extra cards into items. Eventually, I used the various Refine abilities to make a stock of higher level spells for each party member. By “each party member”, I mean the three active slots I can have, of course, not the actual player characters.

I basically got my party to around 1500 health each and upped their damage to around 300-400 on average. It’s not extremely overpowered, but considering they’re all at around level 15, it’s pretty decent. I didn’t get to train my GFs yet though.

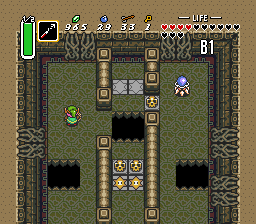
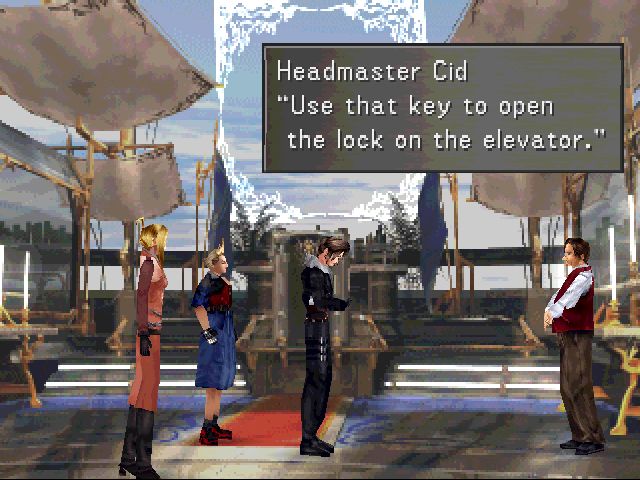
The chance for that appeared soon. Once I made a round around the Garden, I was summoned to the B1 level by a staff member. Cid was already there, arguing with the Garden master. Master? But I thought Cid was headmaster. Well, the next part was extremely confusing. A lot of stuff was said in a very short time span and a lot of it was not at all clear.

There was this Norg guy. He wasn’t human, looked yellow and overweight and was hooked to a huge machine. He’s the master of the Garden and Cid is working for him. Also, Cid is Edea’s husband. Edea is what the sorceress is called, by the way. ALSO, the master is a coward and wants to turn in the team involved in the assassination, as well as the headmaster, to Galbadia, hoping it would appease them. I had to fight him, naturally.

Final Fantasy VIII, Master NORG battle.

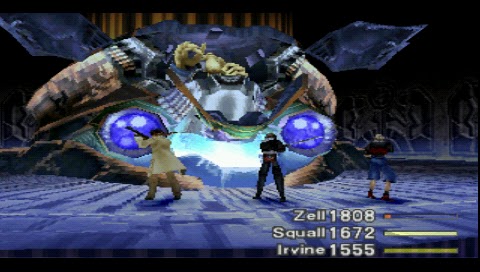
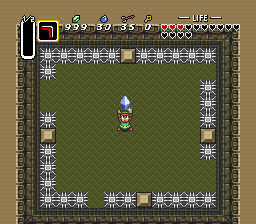
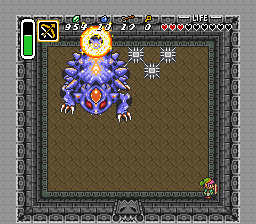
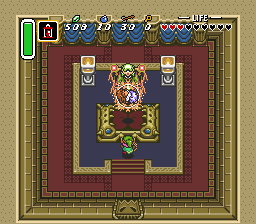
Master NORG was easy to deal with, especially considering the two monsters I had to fight earlier.

Apart from the gimmick that was simple to follow, the fight was not hard at all, especially compared to the last one against the two monsters. I just had to hit the two orbs in order to make them go back to blue and then focus on the boss. The orbs would switch from blue to yellow and then to red, at which point they would start casting powerful spells, but it never got to that.

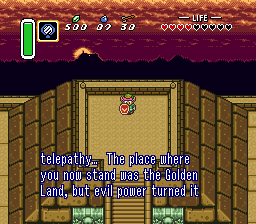
Anyway, the fight was over and I went to see Cid at the infirmary. He tried to explain everything, but it was still a lot of information to take in. Basically, SeeD and the Gardens were created to fight sorceresses. Edea was one and she knew it since birth, as did Cid. They married and decided to from the Gardens. Eventually, something changed Edea. As for Norg, he was just a rich guy who provided most of the funds for the Gardens. Eventually, he pushed the administration into using SeeDs as mercenaries and it wall went to hell. Now that Edea has turned evil, the SeeD’s true mission is active again.
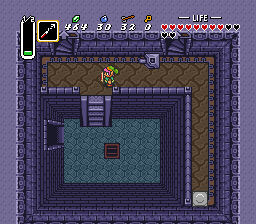
Final Fantasy VIII, White SEEDs

White SEEDs

You might also like:When I got out of the infirmary, Xu reported that a ship was approaching. It turns out, it was a SeeD ship. Apparently, Edea has a personal ship full of SeeD’s and they were assigned to protect Ellone, so they came to pick her up. I went to get her at the library and had even more information thrown at me. Ellone and Squall know each other, but he doesn’t remember, for some reason. The dreams the group had are also reals and are actually visions of the past. Laguna is also very much real. Other than that, she didn’t say anything else. The white SeeDs took her and Squall went back to moping.

Today, I’ve mostly spent a lot of time exploring both the light and the dark world. I realized I can use the mirror to switch to the light world at will, so I’ve been using it to go back and forth. For a short time, a portal back to the dark world remains on the spot where I use the mirror and if that goes away, I can always use one of the fixed portals scattered around the light world.

I’ve been picking up some heart containers as well as heart pieces, but mostly, I’ve been looking for areas I can access through world transfer. For instance, there’s an island at the lake with a heart piece on it, but I could only get to it by standing on that spot in the dark world and then using the mirror.

A Link to the Past, Quicktravel, Map

Quicktravel existed even in the classics.

I got there and found is grandfather at the inn. He told me to go and play it at the village square. This caused the bird statue there to come alive. Now, every time I play the flute, the bird can transport me to one of several areas of the light world.Eventually, I got to the forest where a kid was playing a flute in the light world. In the dark world, the same kid was there, but transformed into an animal. He said he missed his flute very much and asked me to retrieve it from the light world, using the shovel he gave me. I got there and eventually found it, after lots of digging. Sadly, he couldn’t play it anymore due to the transformation, so he decided to let me keep it and asked if I could maybe return it to his family at the village.

After this, I did some more exploring in both dimensions and managed to get two more items. One was a magical cloak that drains my magic power, but keeps me invisible for the duration. The other was a magical staff which creates a protective shield around me. For this one, I had to use the magical cloak to get it.

Both of these drained magic power like crazy, but luckily, I’ve found a cauldron just east of the village in the light world. Using the magical powder on it caused a creature to appear, which cast a spell on me, halving my magic power expenditure, regardless of items.

A Link to the Past, Bombos Medallion

The Bombos Medallion casts a useful fire spell.

The dungeon wasn’t too bad. I’d even say it was easier than the previous one. The best part about it, though, was the loot. I finally got the hook shot. This awesome item can pull me towards pots, skulls, chests and other similar items, allowing me to get across gaps or just move very fast.Eventually, I decided it was time to go clear the next dungeon – the Swamp Castle. I had to find the entrance first, though. It was at the same place where I could drain part of the swamp in the light world. After some messing around, I realized that draining the lake also transfers to the dark world, so that’s how I discovered the entrance.

A Link to the Past, One-way Switch

A new type of switch was introduced here.

The boss was easy enough. The first phase required me to use the hook shot, while the second phase was just the standard “avoid and hit until it’s dead”. I got my heart container and the third crystal. The next dungeon is supposed to be at the Lost Woods, or Skull Woods, as they are called in the dark world.

While Selphie, Rinoa and Quistis were doing their thing at the military base, the guys were just arriving at Balamb Garden.

Something was up, though. The students were all fighting each other and those strangely dressed staff members were giving half of them orders to hunt down the other half. Apparently, some guy named Norg decided to try and take over and the staff members are working for him. The students have divided between Cid and Norg supporters, so there was a full on war.

I explored a bunch of the side areas, trying to find Cid, but he wasn’t in any of them. I did, however, get a few goodies and took the opportunity to do some training. I’m still not getting EXP willingly, but Ifrit started to learn the Strength Bonus ability, so I’m getting to the point where this will be an option. For now, I was “carding” monsters and converting the cards to useful items. Slowly, but steadily, I was getting a nice supply of higher level spells.

Final Fantasy VIII, Headmaster Cid

It’s getting hard to find screenshots. I should set up the screenshot plugin for my PSP.

After taking plenty of stairs and doing plenty of walking, I finally got down to the bottom of it, where I got attacked by a couple of boss monsters. On my first attempt, I forgot to bind my abilities properly, so I got my butt kicked, but the second time around, I managed to beat them, thanks to Ifrit and some fire spells junctioned to Irvine’s attack.I did a full circle around the Garden and finally saw Xu heading for the central elevator. I followed and met her at the second floor, where she told me Cid was in his office, hiding. He just wanted the enemy to think he was somewhere else. I got up there and spoke to him. He gave me a special key which allowed the elevator to go down to the MD floor.

I got to the controls at the bottom and then one of my favorite parts of this game happened. The Garden flew!

The base was uneventful. I was basically just walking back and forth, disguised as a Galbadian soldier, trying to find a way to mess things up. Some lazy maintenance guys decided not to do their job, so they asked me to replace them. This got me access to an area that was off limits, so I managed to do some things there which put everyone on alert.

After some fights, I finally got access to a missile control station. I couldn’t change the target, but I did manage to set the error ratio to the maximum, which, I’m guessing, would make the missiles fire in a wider spread, instead of focusing on a single area.

Final Fantasy VIII, Selphie, Here Goes Nothing

Indeed.

I was doing all of this at around 3:00 in the morning, because I got some sort of cold, which woke me up. I had that annoying sensation of being extremely thirsty which you get when you have a bad cold, so I decided to make myself some chamomile tea. While the water was heating up and while I was drinking the tea, I was destroying a Galbadian army base. Fun stuff!After that, I got to the central control room and managed to activate the base self-destruct. I decided to be bad-ass and set up a minimal time limit of 10 minutes. I got back outside and was attacked by a tank of some kind. The fight wasn’t hard, but the time limit was making it very exciting. In the end, I’ve managed to beat it with less than 30 seconds to spare. The game keeps the group trapped in the base, though, so it looks as though they are gone in the explosion.

After some exploring of the dark world and getting used to the new enemies and the damage they deal, I finally decided to go to the Dark Castle, the next dungeon I’m supposed to go to. Before that, I’ve found a circle of stones in water, at about the same spot where the Zoras are in the light world. I threw a skull in it and a creature gave me a new weapon; Quake Medallion, I believe it was called. This spends close to a quarter of my magic power, but it does some serious damage to all the enemies on the screen.

A  Link to the Past, Quake Medallion

It looked like a target, so I threw a skull in it.

On the way to the dungeon, while going through a maze, a talking monkey started following me. He asked for 10 rupies in order to follow, which I accepted, thinking it isn’t much and it might be worth it. He followed me all the way to the dungeon entrance, which was closed. Then he offered to open it for another 100 rupies. Of course, I accepted this as well.

A Link to the Past, Monkey

As usual, I forgot the monkey’s name.

The dungeon was full of hard enemies and some pretty tricky puzzles that gave me some trouble, but I managed to get through it. I was stuck at one part for an especially long time, though. You see, you get a new item in this dungeon, a magical hammer. It allows you to defeat one of the dungeon’s enemies and it allows you to hammer various things into the ground in order to open up passages.

Well, one of the rooms contained a button which wouldn’t stay pressed no matter how many times I walked over it. Once I finally got the hammer and explored all of the other rooms, I was sure the hammer would “fix” the button. It didn’t work, though. I went back and forth, trying various ways of using the hammer, trying other items, basically all I could think of, but I kept focusing on the hammer. It never even occurred to me to try and push one of the statues in the room on top of the button. Sure enough, the closest statue was movable and I was able to continue.

A Link to the Past, Boss

Took me a while, but I managed to beat the boss.

Eventually, I got to the boss and lost to it several times. Again, the game confused me a bit. The very first hit with the hammer destroys part of his mask. The next several hits do nothing to it, even though they do damage, so I thought I was doing something wrong. Still, the boss did make a “I’m damaged” noise, so eventually I decided to just stick to it and keep hitting him. After about 10 or so hits, his mask was destroyed and then I finished him off with the bow.

I got another heart container, as well as the first crystal, containing the first maiden. She told me where to go next and marked it on my map.

Disc Two starts with another dream sequence starring Laguna. It’s six months after the events at the mine (if ti was a mine) and he’s now pretty much recovered from the injuries. He was recovering at the village of Winhill. His new love interest is a woman named Raine and he’s also taking care of a little girl called Ellone.

Kiros visits him so they go on a monster hunt through the village. It’s obvious he has gotten a bit complacent, so Kiros keeps hinting in that direction to. Other than that, nothing is really happening. The only other thing of note is that we find out Julia got married to Caraway, meaning she’s Rinoa’s mother. Also, Esthar soldiers seem to be abducting little girls, trying to find a successor for their sorceress.

The flashback is soon over and the game switches to Zell, Selphie and Quistis, imprisoned in the D-District prison. Zell gets beat up by guards and then the game switches again, to Squall. He’s at the same prison, being tortured by Seifer. Back to Zell, he realizes he doesn’t really need weapons, being a martial arts expert and all, so he beats up the guard and recovers the groups’ weapons.

Final Fantasy VIII, Zell's Chance to Shine

Hell yeah! Some people hate Zell because they’re hipster like that. Not me!

There was some more switching back and forth, but eventually, I managed to get Squall with the group and then, just as it was about to end, Irvine and Rinoa came to the rescue. I got control of Squall back and teamed him up with Zell and Rinoa to get to the top of the prison, where the exit was. There was a short and easy boss battle and we were out.

During the escape, I took some time off to play the card game against some of the prisoners. I finally had a good, strong set of cards, so I used the opportunity to get a bunch of extra mid-level cards so I could possible refine them into items in the future. I think it’s about time I started seriously accumulating stronger spells for junction.

After the escape, I was finally told that Galbadia is targeting Balamb and Trabia Garden with missiles. I had to split the group into two, with Selphie, Quistis and Rinoa (if I remember correctly) going for the missile base, while Squall and the rest went to warn Balamb Garden.

As I said, I’ve got the sword, but Zelda was captured by the wizard.

I got back to the Sanctuary, where the priest was already dying. He told me the wizard took Zelda to the castle, so that’s where I went. The sword helped me break the seal I’ve seen at the beginning of the game and I entered the dungeon.

This one was pretty much straightforward and simple. I’m not going to say it’s easy, though, because it took a while to get to the end, but only because of the length. I got to the wizard just as he was apparently teleported himself and Zelda away.

A Link to the Past, Wizard

“Bwahahahaa! I waited so I could tell you you’re too late!”

The reality was, while Zelda was transported away, he actually hid in a room behind the curtain, so that’s where I’ve found and fought him. Thanks to a tip provided by the elder through a communication tablet in the castle, I knew I can’t hit the wizard directly. Instead, I had to hit the missiles he was launching at me to deflect them back at him. This was extremely simple, once I figured out the pattern. Basically, I needed to stand still and swing my sword on every shot, unless he teleported to the top center of the area. In that case, I needed to go up and to the side of him, to avoid the lighting.

I’ve beaten him, but he transported both of us to the dark world and that’s when I realized the game was only beginning. The elder contacted me immediately and told me I need to defeat him in the dark world to rescue Zelda and restore everything. In order to beat him, I need to find the seven maidens who can help me, each in one of the dangerous dungeons in this dark world.

A Link to the Past, The Dark World

Time to actually start the game, I guess.

Basically, I only got through three tenths of the game, if even that far. Oh well, time to get to the first dungeon. What I’m hoping at this point is that I will be able to go back to the light world before the game is over, so I can pick up everything I missed. I rushed to get to the castle, so I’m bound to have missed something.

With Brothers in the bag, I got back to Deling and spoke to Caraway. I somehow forgot about this, but it turns out, Caraway is Rinoa’s father. They have the typical “rebelling child, overprotecting father” relationship which was, honestly, sort of annoying. As expected, he keeps her there, so she goes out of the party for a while.

His plan is to give us access to a high spot on a carousel near the large gate in the middle of the city. The party would split in two groups. The first gets to the carousel with the sniper and waits, while the other gets to the get to close both sides of it at the right moment, trapping the sorceress in there for the sniper to have an easier shot.

I have to be honest here, I always hated this part. The plan is extremely simple, but stuff keeps happening that messes with it. That’s not the part I hate, though. I hate the fact that the game keeps switching you between the two groups, so it all feels like one long cut scene instead of actual game play.

Basically, Quistis, Zell and Selphie get to the gate but decide to go back fast to talk to Rinoa. Meanwhile, Squall and Irvine wait in the middle of the audience. At the same time, Rinoa has a plan to give the sorceress some sort of jewelry which is supposed to block her powers. She leaves the Caraway mansion and gets Quistis and the others locked in there so now they can’t get to the gate.

Rinoa gets to the sorceress, tries to trick there and fails as expected, so she gets attacked by some lizard-like statues that the sorceress brings to life. Squall and Irvine see this, so they rush to help her. They get rid of the lizards, but not before I remember to draw another GF from them – Carbuncle. Carbuncle is the first GF that doesn’t do damage. Instead, it casts Reflect on the entire party, which is extremely useful in the boss battle soon to come.

Final Fantasy VIII, Carbuncle

Carbuncle’s Ruby Light is extremely useful, especially against Edea.

As the battle is over, you switch again to Quistis and the rest. They find a secret passage through the sewers and navigate through it to get to the gate, pulling the switch just in time. Irvine freaks out at first, but manages to get a perfect shot anyway. Of course, he’s shooting at a sorceress, so she blocks it. Squall charges in and beats Seifer easily thanks to the 1000 Curaga i refined from 10 Tents and junctioned to his HP. Then the fight against the sorceress starts.

Rinoa and Irvine join in. As I said, Carbuncle is extremely useful here. I summoned it to Rinoa every second turn, which caused the sorceress to just constantly cast dispel on my group, instead of doing any attacks. Soon enough, I won with almost no damage done to me. In the cut scene that follows, the sorceress summons a shard of ice and hits Squall with it, piercing him straight through. Everything goes to black and disc one ends.

I got to Deling quickly, using a train from Galbadia. However, I didn’t enter the city right away. Instead, I decided to save me some time and go to the nearby tomb right away, in order to save me some time. You see, my contact, a military official named Caraway, would send me there anyway, before even meeting me in Deling.

I got to the tomb and read the ID from a sword on the ground. As far as I know, this number changes in every game, but it was 155 in mine. I might be wrong, though. I really can’t remember what it was last time. This is all that needs to be done in the tomb, but most players opt for getting the extra GF hidden in there, so I did the same.

Final Fantasy VIII, Tomb Map With Route

This is the correct route, I went in the opposite direction.

The brothers are Sacred and Minotaur. They’re an earth based GF and pretty much impossible to beat by a low level party unless you figure out the trick. They get healed every few seconds. Sacred got healed by about 100HP at my level. This was easy enough to offset in the first battle against him, so I could do it in the team battle as well. His brother, however, was healing close to 500HP every turn.It feels like a maze at first, but once you understand the layout, it’s easy enough to navigate. Sadly, I went in the wrong direction at first, so I did an extra unneeded lap around the tomb before doing all I needed to do. At the east side of it was Sacred – the first half of the GF. He was easy to beat, but he always runs away to the center. To get to the center, I had to first go north to open a floodgate and then west to lower the drawbridge. Then I got out to save and returned to the tomb, going straight forward towards the central chamber. That’s where the battle against the GF “Brothers” starts.

Final Fantasy VIII, Minotaur Scan

Scan tell you all you need to know.

It was time to go to Deling.A cast of the Scan spell hints on how to get past that. They get healed through their connection to the ground. Casting float on them stops the healing. Luckily, you can draw float straight from them, so all the tools to beat them are available in the battle. Soon enough, they were dead and another GF was mine.