I Restarted the Campaign
So yeah. My High Elven Archmage was absolutely not fun to play. There’s no point to having access to more than one or two magic schools, really and I kept losing him in battles because he was squishier than an Ancient Wisp. Being forced to babysit something that’s supposed to be your most powerful unit makes Warlords Battlecry 3 not very fun. Because of this, I decided to restart the campaign with a different hero. I took the easy way out. I made an assassin and picked the Ssrathi as his race.
Meet Dux, the Ssrathi Assassin
Assassins get extremely powerful once you get their Assassination skill high enough. Assassination, you ask? Well, this skill starts out with giving each of your auto-attacks a 4% chance to outright kill the target and it increases by 1% with each skill point invested. After about 15 to 20 points invested here and with a fast attack speed, you can basically take out whole armies. Of course, you’ll still have issues with buildings, but we have Strength and Crushing or Fire damage for that, not to mention the excellent Ssrathi Fire Priests.

Seeing screens like this one makes me happy for some reason.
Ssrathi Fire Priests
The Fire Priests are the sole reason I picked the Ssrathi. You see, I suck at strategy games. I can do some nice micro management, but I always neglect my economy and macro, so I end up losing to most human opponents. I can deal with AI, for the most part, but it still makes it sort of a stressful experience. Well, with the Ssrathi, macro is easy. You build the home base and a couple of Worker Sects, followed by a rush to tier 2 and tier 3 soon after. Then you just train Fire Priests and upgrade their range once you reach level 3. These things, combined with some retinue generals and my assassin hero are basically unstoppable. They’re cheap, outrange towers and do fire damage. They also have a healing spell to help them.
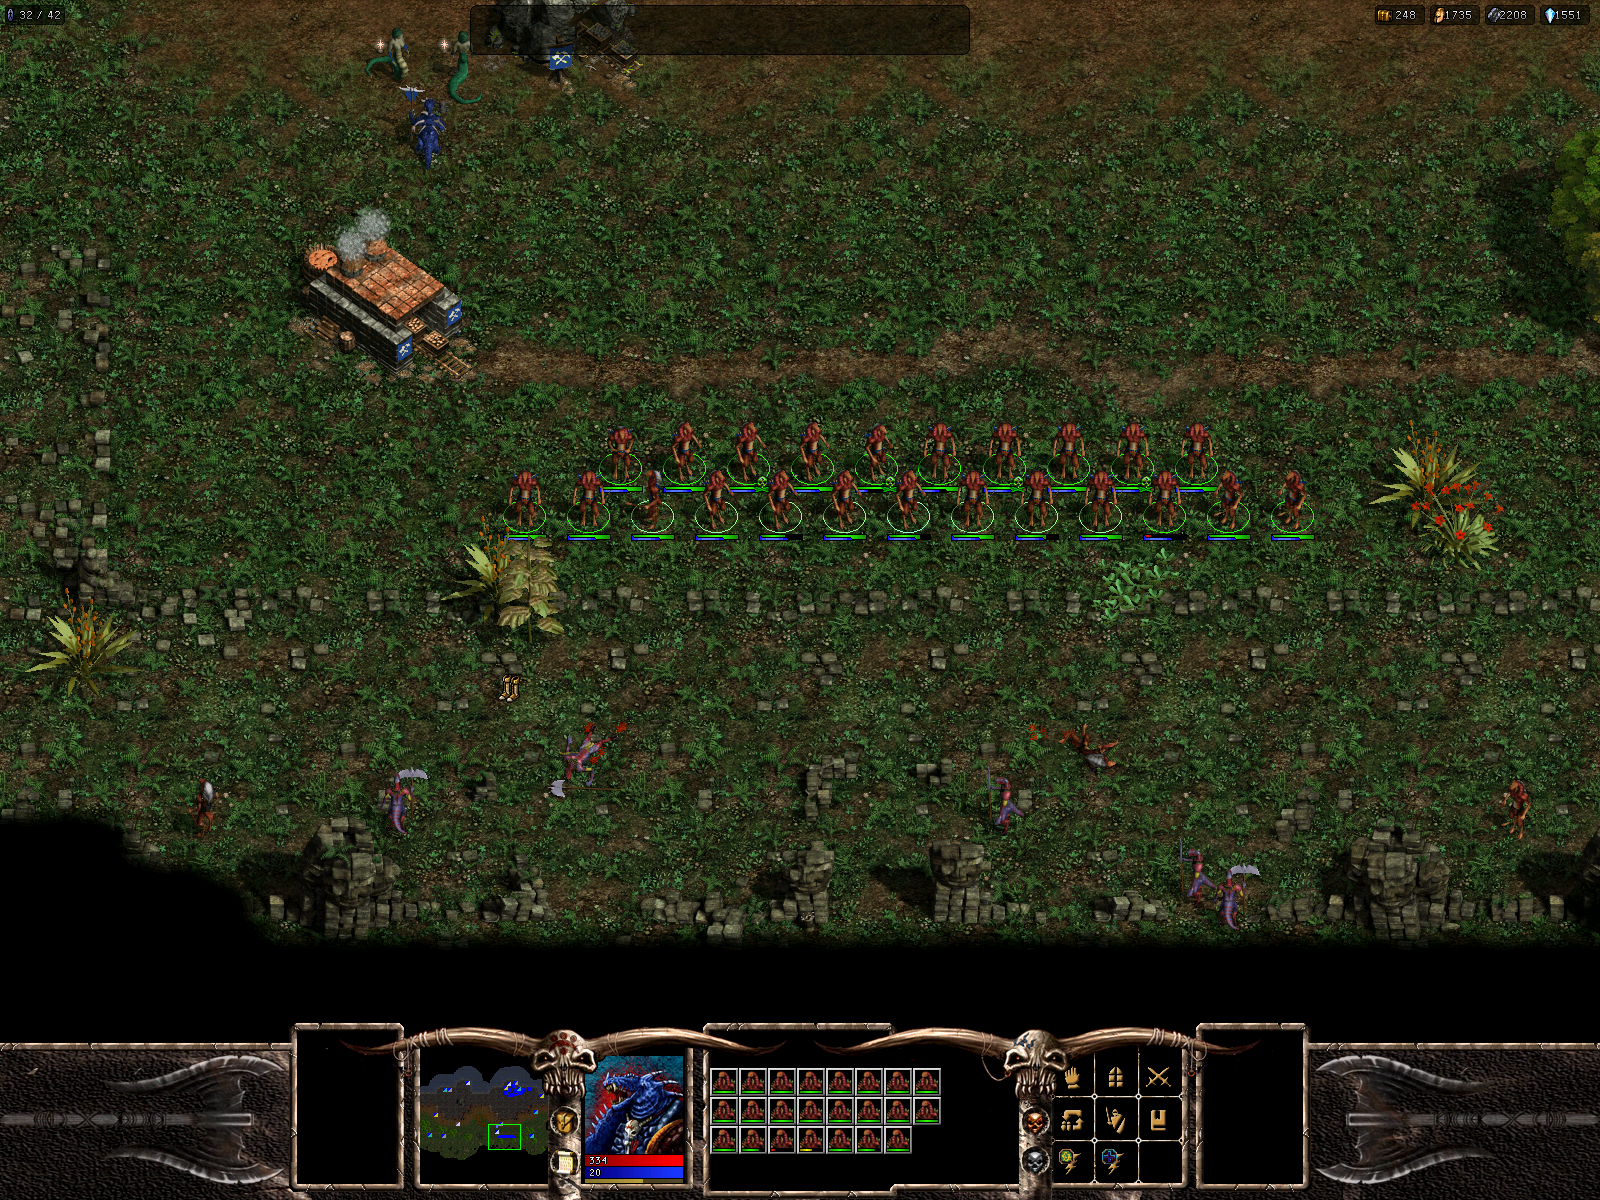
Formations in this game are mostly useless, but there are exceptions.
The Campaign
I started out mostly focusing on Dexterity, with a couple of points into Strength just to make it easier to stay alive at early levels. I put most of my points into Assassination, with a couple of points into Running to increase my movement speed.
I was having a hard time figuring out what to actually write about, but once I got to the map node called Dragon’s Maze, I decided to just keep a log of all of my missions and what happened. Here goes…
Dragon’s Maze
I had three treasure hunting missions here. They were basically just regular skirmish battles against Minotaur and Barbarians, but each of the enemy bases had a couple of chests with minor treasures in them. My strategy was the usual – train fire priests, kill enemy heroes early and eventually obliterate everything. I got all the way to level 8 during these missions and started to get assassination kills on a regular basis.
Al-Diraq and Daros
I had a couple of battles where building weren’t allowed. My Naga generals are extremely helpful in these, due to their shield ability which increases the armor of nearby units. The trick is to dodge the enemy long enough for their mana to charge. This can be an issue on smaller maps, though, since the AI just loves to charge you in a straight line.
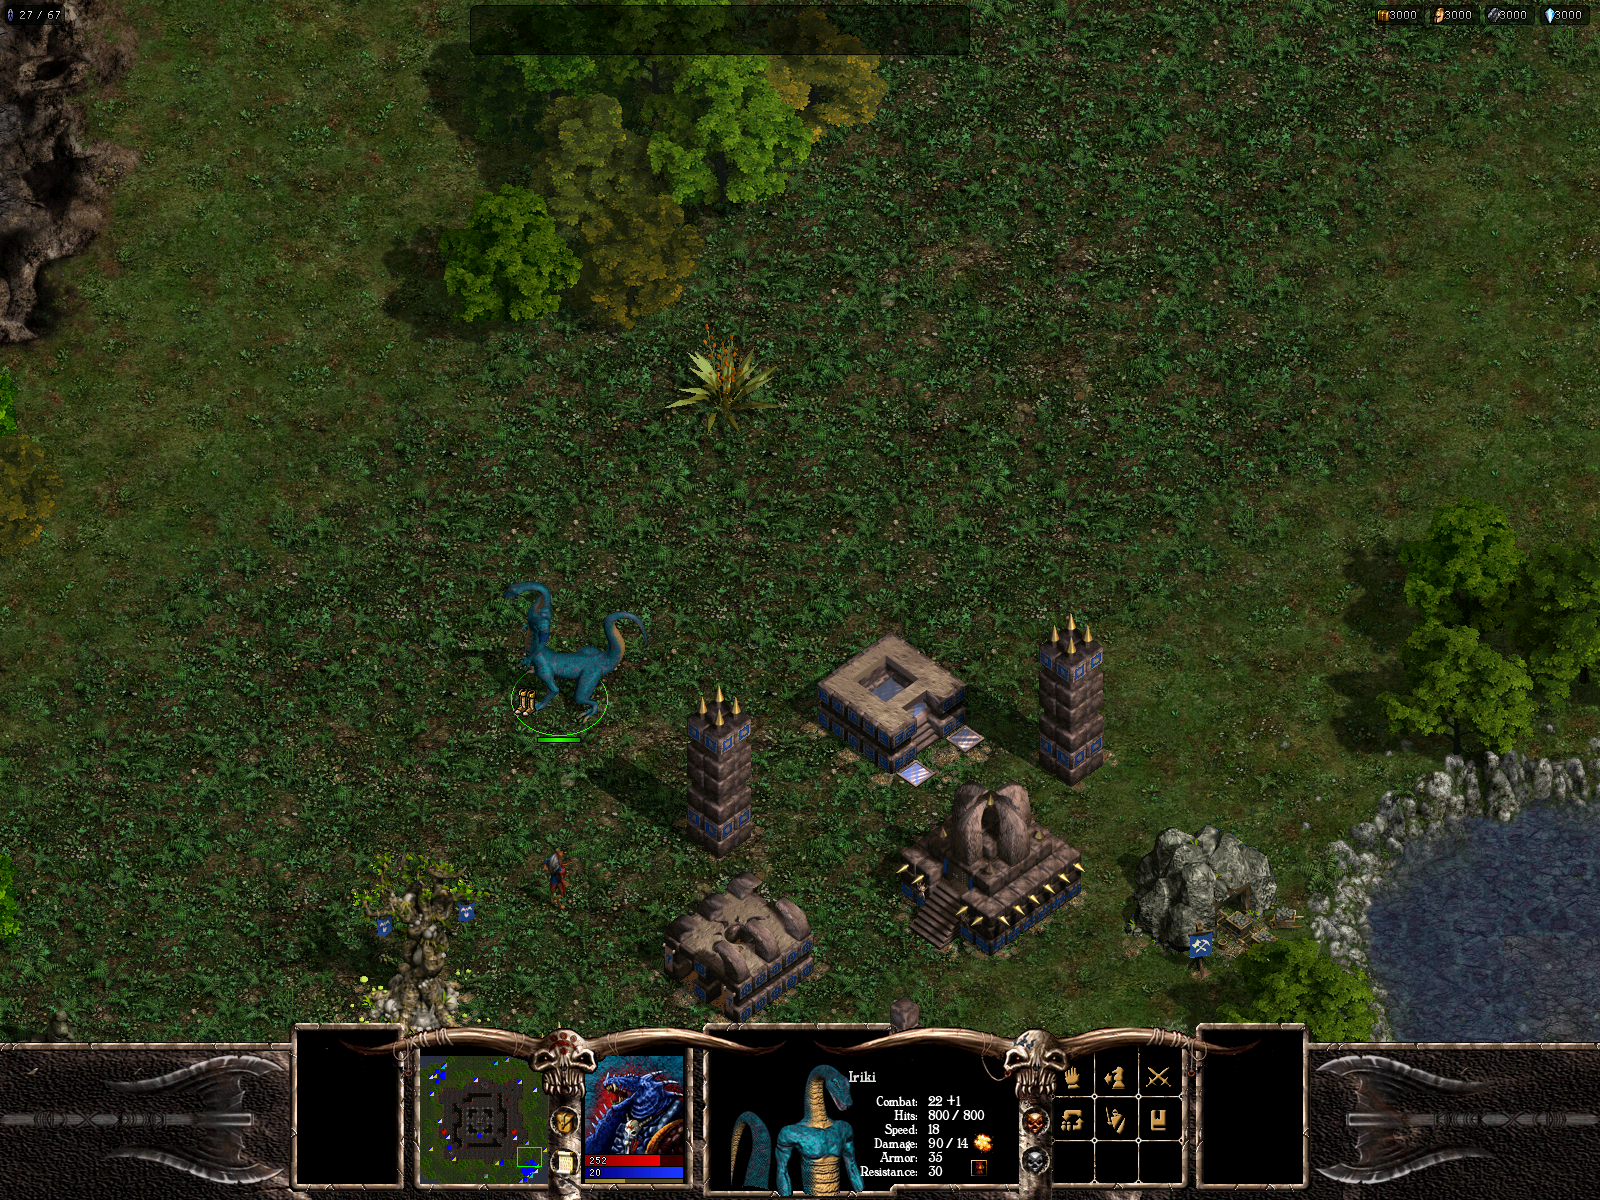
Titans are the game’s ultimate units, extremely expensive and strong. This is the Ssrathi Sun God
I started fighting the Swarm in this area, which is annoying since some of their units have poison attacks. Thanks to one of the missions here, I can hire level 6 Warlords for my retinue when I need them. I got to level 10 in this area and found two awesome items. The Ice Blade adds 25 frost damage to my auto-attacks and the Giant’s Helm provides mi with a whopping 12 extra combat.
Tongu, Kalpaxotl and New Selentia
I fought my own people in these areas – the Ssrathi. It was worth it, though. The Gifts of Couatl mission sequence gave me a bunch of nice items and I got an artifact which gave me permanent +2 to the sight range of all of my units. The items I got were strong, but sadly (or luckily) I quickly replaced them.
Northern Diraq and the Realm of Famine
I got into a couple of Swarm ambushes here, which was actually awesome because one of the enemy heroes dropped an awesome new cloak. It was an upgrade to the armor I wore in every aspect and it didn’t have the penalty to Spellcasting that the armor had.

The game tracks statistics in something like a basic achievement/ title system.
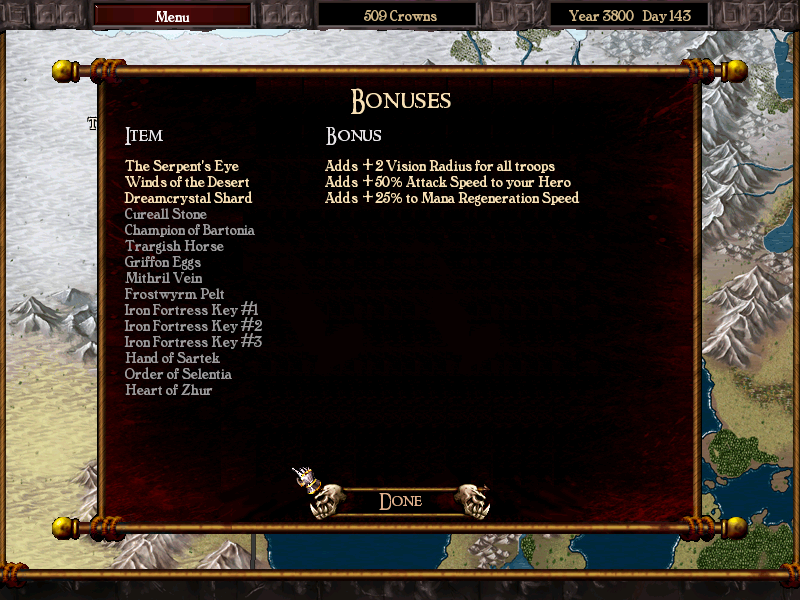
In Northern Dirax, I allied myself with the Barbarians, so I can lead them now if I want to. I also got another awesome artifact during the Desert Winds mission, called “The Winds of the Desert”. This thing gives my hero a 50% attack speed bonus, which is probably the greatest thing I can get for an assassination hero.
Twilight Woods
This was the Fey area. I had to protect them from the Dark Dwarves and the Swarm during several missions. This gave me the ability to train one of my Reaver generals to level 10 and gave me another artifact – The Dreamcrystal Shard. This artifact gives me a 25% bonus to mana regeneration, which is pretty much useless for me right now.
This is the most artifacts I’ve ever gotten in this game.
In the final mission, I had to defeat some banshees in a trial and this got me an alliance with the Fey. I might actually use them in the future, since as a race, they might be even easier to play than the Ssrathi. Other than the alliance, I can now also trade gold for experience by talking to the Queen of the Fey and I can hire level 5 Unicorns at the Unicorn Grove.
Khazdul, Ragnar’s Pass and The Wastes
At Khazdul, I improved my relations with the Dark Dwarves after burying them into the ground during the Twilight Woods missions by helping them with an Orc slave rebellion.
In Ragnar’s Pass, I met a Frost Dragon who agreed to join me if I helped him clear the Orcs, Dark Dwarves and the Undead from his home. It took me two missions to do this and I still had to pay him 100 Crowns to get him to join. The best part? It costs a total of 26 army points to get him into the battle – NOT worth it.
Finally, at the Wastes, I went to search for Gorgon, the Fifth Horseman. This was a mission where my hero wasn’t supposed to die, so naturally, I decided to be an idiot, risk to much and have him killed. The worst part about it was that I lost my two high level generals – a Reaver and a Naga.
This was too much for me, so I decided to take a break for now. I’ll find Gorgon some other day.


