Pokemon Platinum - Cover, Box Art

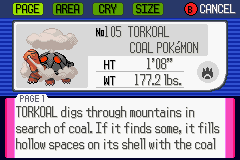
With the choice of my next game in the “follow Ash” Pokemon challenge being between Pokemon Diamond, Pearl and Platinum, I decided to go with Platinum, mostly because I’m assuming it’s the most polished and full-featured of the three. As with Pokemon Ruby, I decided to do the research beforehand and make a proper plan of attack.

How to Follow Ash in Pokemon Platinum

Ash’s Pokemon in the Sinnoh Region

Other than Pikachu, Ash primarily uses six (or seven, depending on how you look at it) other Pokemon. These are

  • Starly/Staravia/Staraptor
  • Turtwig/Grotle/Torterra
  • Chimchar/Monferno/Infernape
  • Aipom
  • Buizel
  • Gliger/Gliscor
  • Gible

The Starly, Turtwig and Chimchar line are heavily used and Ash gets all three of these before the first gym. He also brings in Aipom from his earlier journey during the Johto Battle Frontier. He then trades his Aipom for Dawn’s Buizel between the second and third gym which is also heavily used from that point on.

Other than these three, he catches a Gliger, which soon evolves into Gliscor, but is also left behind in a similar fashion to Charizard sometime after the seventh gym. Additionally, he catches a Gible, but barely uses it and it doesn’t evolve.

Ash’s Pokemon in Pokemon Platinum

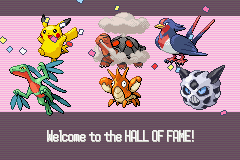
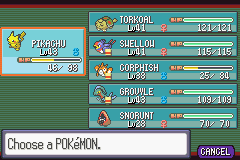
This means I’ll end up with a Staraptor, Torterra, Infernape, Pikachu and Buizel as my final team in the Sinnoh League, called Lily of the Valley Championship, or something like that, by the way.

The procedure is simple. I’ll edit my save to start with Pikachu and Aipom, while also Picking Turtwig. Right after the beginning, before I get to Oreburgh, I’ll catch a Starly and add a Chimchar to my party as well. Basically, I’ll have all the members of my team before the first gym and replace one of them right after the second gym. After the seventh gym, I’ll go below the cycling road to catch a Gible and I might train it for a bit, but I don’t think I’ll be using it to much.

Pokemon - Aipom

I think Aipom is the first Pokemon Ash trades away for good.

This time, I’ll also try to only use the moves the Pokemon in the anime learn after evolving to their proper forms. This might feel unclear, but I’ll explain it in the following paragraphs.
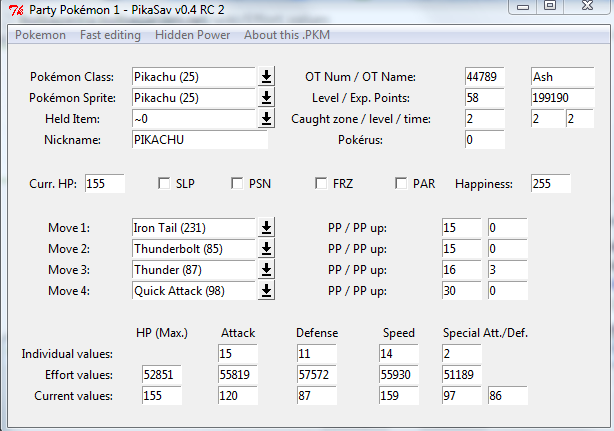
Pikachu

Moves

  • ThunderSchock
  • Thunderbolt
  • Quick Attack
  • Volt Tackle
  • Iron Tail
  • Thunder
  • Electro Ball
  • Agility
  • Double Edge
  • Tackle
  • Leer

I already gave up on Tackle, Leer, Double Edge, ThunderShock and Agility from the previous games, so I won’t even try to learn these. Thunder, Thunderbolt, Quick Attack and Iron Tail carry over from the previous games, but I’ll probably lose Thunder in favor of Volt Tackle. I think Pikachu only learns Electro Ball in Black and White, so I’ll have none of that.

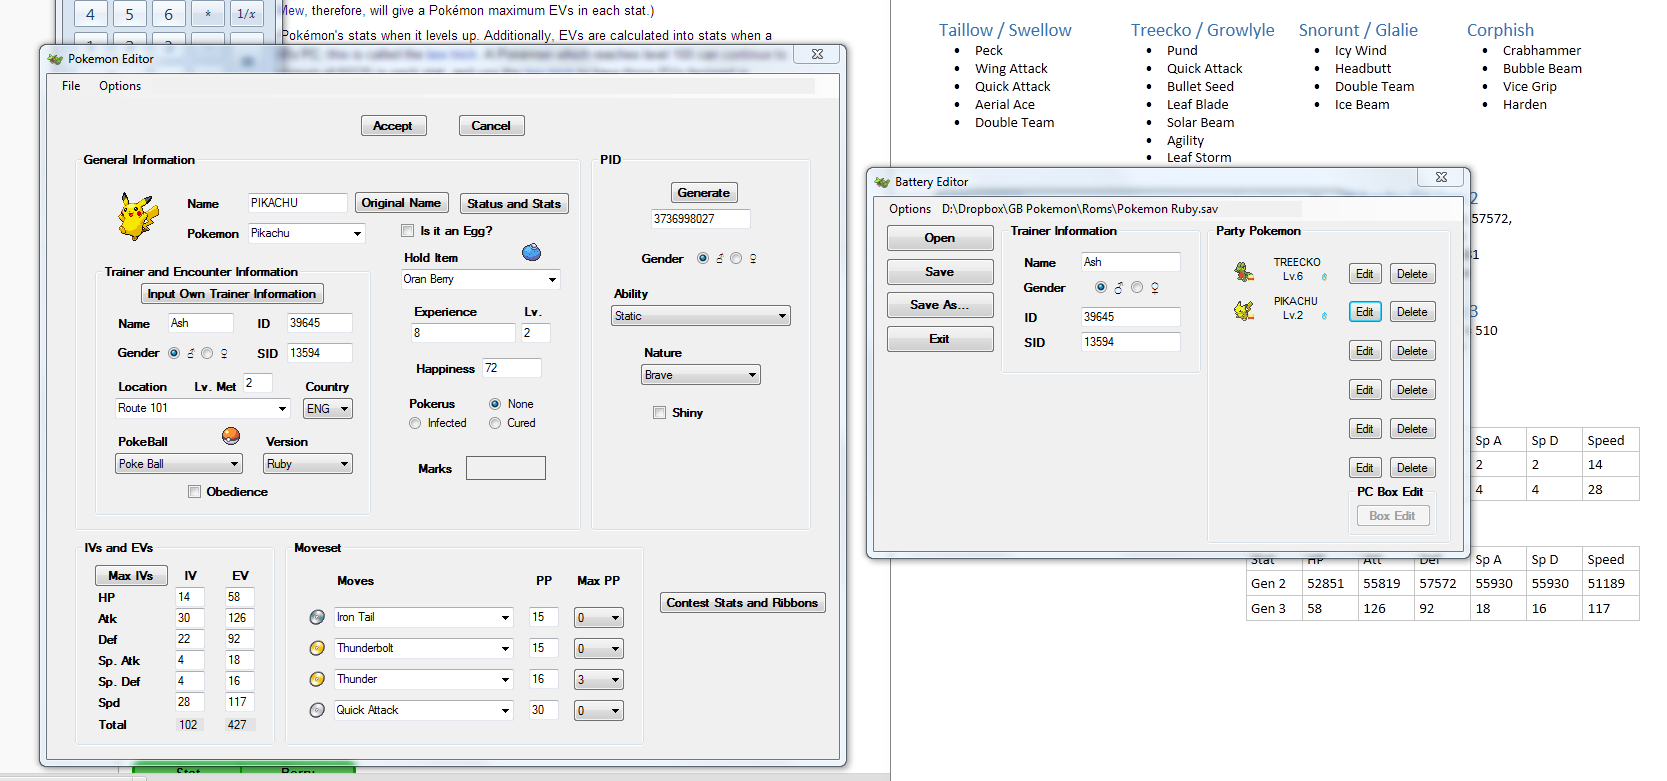
Also, I will rearrange his individual and effort values in this game, since I feel they were all wrong in Ruby.

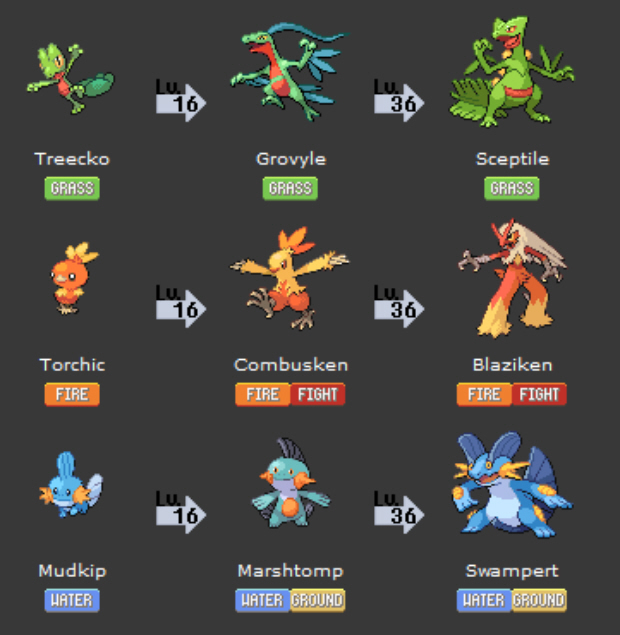
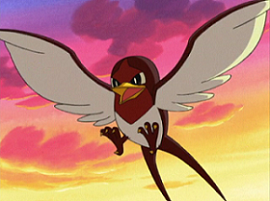
Starly – Staravia – Staraptor

Moves

  • Gust
  • Wing Attack
  • Quick Attack
  • Aerial Ace
  • Brave Bird
  • Close Combat

Starly evolves to Staravia before the first gym, which is awesome. Once it evolves, it learns Aerial Ace and Brave Bird, so I wont even try using it before that. I will learn it, of course, but I wont use it if I can avoid it. Sadly, I’m going to need Fly, so I’ll sacrifice a move slot for that. Once it evolves into Staraptor, it finally learns Close Combat.

Pokemon - Staraptor

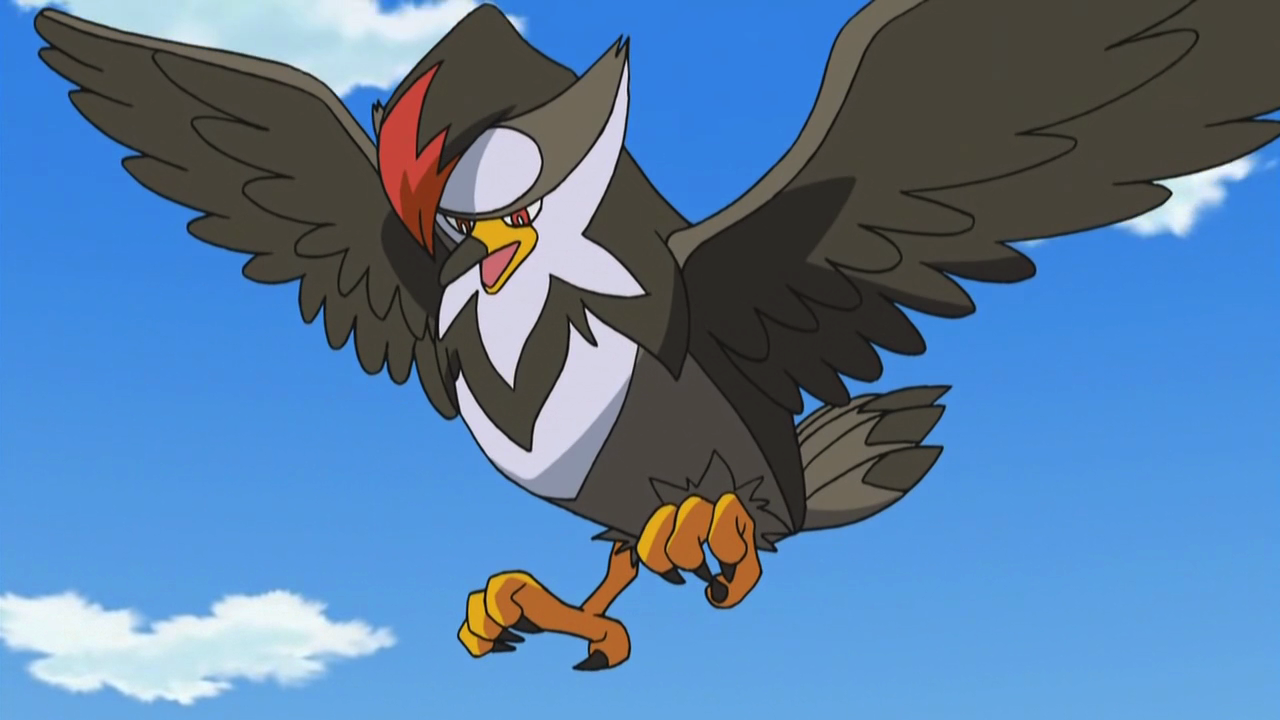
Starly evolves extremely early, so that’s great. Flying types are quite good in general.

Staravia evolves to Staraptor between the Canavale and the Snowpoint Gym.

Turtwig – Grotle – Torterra

Moves

  • Tackle
  • Razor Leaf
  • Bite
  • Synthesis
  • Energy Ball
  • Rock Climb
  • Leaf Storm

Rock Climb is a HM in platinum, which means I don’t lose a slot to it for once. Other than that, Turtwig’s move list in the anime doesn’t fit with the game very much, so I’ll have to be creative. It learns Rock Climb after evolving to Grotle and Leaf Storm only in its final form.

I’ll pick this one as my starter. It evolves after Pastoria for the first time and right before Sunnyshore for the second time.

Chimchar – Monferno – Infernape

Moves

  • Ember
  • Flame Wheel
  • Scratch
  • Dig
  • Fire Spin
  • Flamethrower
  • Mach Punch
  • Flare Blitz

This is sort of sucky, because he’s only able to use a fighting move after evolving to Monferno, which happens after the seventh gym, but it’s still a pretty awesome fire type, so I’ll deal with it. He will use Flare Blitz only as Infernape, and I’ll probably have to sacrifice a slot for Rock Smash.

It’s supposed to join my team before the first Gym. It evolves twice, both after the Snowpoint Gym, which is gym number 7.

Aipom

Moves

  • Scratch
  • Swift
  • Focus Punch
  • Double Team

These are the four moves Aipom knows while with Ash, but I’m not sure I’ll even be able to learn all four before abandoning it in favor of Buizel. Aipom will be with me only until after the Eterna Gym.

Buizel

Moves

  • Water Gun
  • Aqua Jet
  • SonicBoom
  • Water Pulse
  • Ice Punch
Pokemon - Buizel

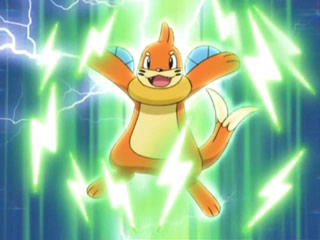
Buizel will be simple to handle, once I give it an Everstone.

This one will be straightforward, since it doesn’t evolve. I’ll pick three out of these five moves and add Surf to the list. I might have to sacrifice another slot for Waterfall to.

Gliger – Gliscor

Moves

  • X-Scissor
  • Sand-Attack
  • Steel Wing
  • Screech
  • Fire Fang
  • Giga Impact
  • Stone Edge

He only uses the first three attacks as Gliger, so I’ll hold on with the rest of them until after it evolves. I’ll have to abandon it after the Snowpoint Gym, sadly. I’m supposed to catch it right after Eterna and let it evolve sometime after Pastoria.

Gible

Moves

  • Dig
  • Draco Meteor
  • Dragon Pulse
  • Rock Smash

Gible evolves into an awesome Pokemon, but sadly, this doesn’t happen in the anime. Instead, even though Ash actually catches it, unlike Larvitar, it remains heavily underused (i.e. not at all) in battles. I’ll catch it and keep it in my party, but I probably won’t train it at all.

Pokemon - Gible

This one has a huge amount of potential, but it never reaches it in the anime.

Then again, Ash does use it in the League battles, so I might have to train it anyway.

How is it Overall?

Well, on the positive side, I won’t need to make any hard choices on which Pokemon to use in Pokemon Platinum. On the negative side, I might have some trouble in the final areas. Still, it’s nothing some grinding won’t cure. Other than having two starters and the Gyms and locations being slightly out of order in the anime, it’s quite possible to follow Ash throughout Pokemon Platinum or Generation IV in general very accurately.

Well, you also need to “transfer” Pikachu, but that’s probably a given.


Legacy of Kain: The Soul Reaver

Minor Exploration

In my previous posting, I said I was going back to the Silenced Cathedral because I remembered there being an obstacle I can get through with my new force projectile power, so that’s exactly what I did. I got all the way to the proper area, which I found at random, because I couldn’t exactly remember where it was.

NOTE: Silenced Cathedral – Secret Area

In case anyone needs this information later, you need to get to the first huge floor fan in the area and then, instead of floating upwards from it, go through the passage at the bottom.

Soul Reaver - RIng the Bell

I forgot to take a screenshot of the destroyable door, so here’s a screen of me hitting the bell.

In any case, I found the place, but whatever I did, I just couldn’t hit the target with my force projectile. You can’t jump and shoot and the auto targeting just wouldn’t lock on to it. I’ll admit, I got a bit desperate, but eventually, I figured it out.

You can manually target and look around in Soul Reaver

I know, it’s probably ridiculous that I haven’t figured it out, because it’s the one feature I really wanted, but yes, you can actually do it. If you hold down both of the camera rotate buttons, you can move the camera around with the arrow buttons. If you’re also charging the force projectile (or preparing to throw a weapon), then you’re also able to target your shot.

My main gripe with the game up until now was that I wasn’t able to look around to see where to go next. I guess that issue is gone now!

The Sound Glyph

The area behind the now destroyed gate was another puzzle with a glyph at the end of it. I had to take some sort of drumstick from a wall in one part of the huge room, jump across tall pillars to a bell with the drumstick. The issue was that I had to switch between the material and spectral realm in order to jump from one pillar to the other, so I also had to throw the drumstick towards the bell first, since I can’t carry anything in the spiritual realm.

Soul Reaver - Sound Glyph

Switching realms here causes the pillars to move, but you need to throw the drumstick across first.

From what I can tell, the sound glyph stuns nearby enemies. It’s about as useful as the other glyphs I collected up to this point – not very much. Still, I’m sure it can be convenient when I’m surrounded by a bunch of enemies.

The Drowned Abbey

Once a sanctuary against the vampire menace, this abbey has been drowned by the deluge spilling from this wounded land. Your brother Rahab and his brood, devastated even by the feeble rays of Nosgoth’s sun, overcame their vulnerability to water and retreated from the surface. Now they haunt these ruins, and glide in the darkness of its stagnant depths.

[soundcloud url=”http://api.soundcloud.com/tracks/82457430″ params=”” width=” 100%” height=”166″ iframe=”true” /]

It took me a while to figure out how to get to the Drowned Abbey. The answer was back in the Tomb of the Serafan, hidden behind a switch in the boss room. When I killed Morlock, I thought that switch was what opened the gate and the way back out of the Tomb. It turns out, the gate opened by itself and the switch wasn’t really a switch. It was a block which I had to hit it with the force projectile more than once in order to push it out of the way and open a new passage.

Soul Reaver - Ship

A hint: The Ship changes when switching realms.

The Drowned Abbey was, naturally, completely covered in water. For an ex-vampire who still has issues with liquids, this was a problem. It also meant that this would be probably the most annoying area of the game.

Soul Reaver - Platforming

First you need to jump across these…

Basically, getting through the abbey involved lots of platforming sections where a single mistake would cause you to “switch” to the spectral realm, go back and start over. The first thing I did wrong was that I went through a passage that lead me through some bars in the spectral realm. The problem was that the bars didn’t have flat ground on the other side, so I couldn’t get back through them, and it turned out, they led me right back to the start of the area, so I had to go through the entirety of it twice.

Soul Reaver - Platforming 2

… and then across these, all in one, flawless attempt.

The second problem was the second platforming area, where I had to get through the physical realm and feast leap over a set of beams positioned over water. After that set of beams, there was also a set of stone platforms positioned over a slippery roof which, again, would send me into water. Each of those one its own was hard enough, but I had to do it both without any mistakes, or I would have to go right back to the start. I’m not the person that usually swears, but at this point, I really, really wanted to. Soul Reaver is not a platforming game.

How to Kill Rahab

Eventually, I somehow got through it and finally reached Rahab. The challenge of the Drowned Abbey was definitely not the end boss. Compared to what I just went through, Rahab was easy, though still slightly annoying.

Soul Reaver - Rahab

Lights on! You don’t really fight Rahab. You just hit “switches”.

The area he was in was circular, with a bunch of platforms positioned evenly throughout it. I had to jump from platform to platform, avoiding Rahab’s shots and keep firing my force projectiles at windows along the walls. Once all the walls were destroyed, the light destroyed Rahab. The annoying part was that getting hit by Rahab would usually throw me into the water, which would mean more annoying platforming to get to the top and back into the material realm.

Killing Rahab got me another very useful ability. Water wouldn’t hurt me anymore and I could now swim in the physical realm.

More Exploration

Of course, this meant I was now able to explore even further and get more upgrades. The first thing I did was to go back to the entrance of the Silenced Cathedral, where I’ve already seen a health upgrade I couldn’t reach before. Now, I could do it by swimming on the left side of the Silenced Cathedral moat.

While I was there, I also explored the right side of the moat, now knowing where it would lead me.

The Sun Glyph

The right side of the moat took me to a huge area with a bunch of Morlock enemies and giant machinery. The whole region, which is probably a more fitting name than “area”, was one huge puzzle, which eventually led to a room with the Sun Glyph, the most powerful glyph of the game.

I had to solve some block puzzles involving pipes, hit a bunch of switches to activate a lighthouse and then enter the room with the glyph and finally switch to the spectral realm at the right moment to pick it up.

Soul Reaver - Sun Glyph Beacon

Once you activate the beacon, the Sun Glyph is almost yours.

I think it was worth it, though. First of all, this means I probably cleared the hardest puzzle in the game without knowing it. Secondly, the sun glyph is extremely strong. It outright destroys most enemies around me when I use it. It costs a good chunk of my mana, but by now, I have plenty to use it twice or possibly even trice.

In any case, this is where I ended my game. Next time, I’ll probably do some more exploring, since there’s bound to be items I missed. I know for sure there are two glyphs I can still find, as well as some health upgrades.

Pokemon Ruby - Cover

Since last time in Pokemon Ruby, I did a lot of training. A lot!

Game Freak Is Full of Trolls

Seriously. Why would the developers decide it’s a good idea to give most Pokemon on the Victory Road, which is probably the best place to train before the Elite Four, a move which allows them to kick the player’s Pokemon out of combat.

Pokemon Ruby - Torkoal

I told you it was going to get strong.

Sure, after a while, most of my Pokemon were able to sweep through the encounters in Victory Road, but it was still annoying. There I am, hitting Hariyama three times with Ice Beam already, only to be kicked out of battle and wasting those 3 PP.

Training in Victory Road

It was annoying, but I did it anyway. Pikachu, Corphish, Glalie and Swellow eventually got easier to train, and Torkoal was a breeze right from the start, but my starter, Grovyle, wasn’t able to be effective at all. It had a type disadvantage against mos of the Pokemon in there, so I ended up going back to the overworld, fighting Tentacools for ages just go get to level 55.

After about an hour of fast-forwarding in total (gotta love GameBoy Advance emulators), I got most of all of my team members to either level 55 or 60, because I like round numbers. I decided to give it one more shot, stocked up on potions and went for it.

The Elite Four

Sidney was easy to deal with. I got rid of his Mightyena, Cacturne and Shiftry with Torkoal, switched with Pikachu for his Sharpedo and then brought back Torkoal for Absol.

Pokemon Ruby - Final Team

I could have trained even longer, but this would have to do.

Next up was Pheobe, who used Ghost Pokemon. This time, I didn’t have any type advantage, so I ended up using mostly Torkoal and Glalie, my two most powerful Pokemon. I had one of my team members faint, but I had plenty of items in stock to heal after the battle.

Pokemon Ruby - Glacia

It’s like she was destined to become an Ice trainer.

After that, it was time for Glacia, who used Ice types. Pikachu did some major damage here, but I had to switch him out for Growlyle, who handled the two Sealeos with Mega Leech. Overall, this member of the Elite Four was the hardest.

Finally, I fought Drake, who was, obviously, a Dragon Master. This part was the easiest. My Glalie swept through his entire team without any trouble.

The End of the GameBoy Advance Chapter

After the elite four, I went to the final room, but didn’t heal and ended up fighting Steven mostly out of PP on my most important moves. Even so, thanks to some switching around and item usage at key moments, I got through it and came out on top. I also had a type advantage against most of his Pokemon, so that helped a lot.

Pokemon Ruby - Victory Screen

I don’t have to manually edit the victory screen any more.

The League was, again, won, and the GameBoy Advance chapter of my Follow Ash challenge is now over. Even though I ruined my Pikachu, this will probably be my favorite part of the challenge.

Pokemon Ruby - Ending

There’s a proper ending sequence.

Sadly, I now have to move on to the Nintendo DS, which means I wont be able to fast-forward as much. What’s worse is that I probably won’t be able to play the game on weekends, since my laptop isn’t really up to par for DS emulation, so I can only play it on my PC, which I don’t have access to during weekends. What I’m saying here is, I won’t be completing Diamond/Pearl or Black/White as fast as I did the first three generations.

Pokemon Ruby - Cover

Last time in the GameBoy Advance part of my “Follow Ash” challenge I just beat Ruby’s dad (as Ash) and won the fifth gym badge.

Fishing for Corphish

As soon as I got the Petalburg badge and was able to use Surf, I went to Route 118 (I think), to get to Good Rod. I then spent some time fishing at Route 117 and finally got my Corphish, three gyms to late. Of course, I now had to train it until it caught up with the rest of my team, so that’s exactly what I did.

Pokemon Ruby - Corphish

Corphish wasn’t supposed to evolve, so it wouldn’t be very strong, but Surf helps.

Once that was over with, I went past Route 118 and 119 towards Fortree City, where my next gym was waiting. On the way there, I stopped by to Weather Institute to fight with Team Magma for a while. I got a Pokemon as a reward and sent  it directly to the PC, since Ash never had anything to do with Castform.

Fortree City Gym

I gotto Fortree City, but wasn’t able to enter the gym because something was blocking my way. Spoiler: It was an invisible Kecleon. I had to walk a bit past Fortree City on Route 120 to meet Steven and get an item which revealed the Kecleon and made it run away.

Pokemon Ruby - Fortree City

I love the way Fortree City looks.

The Fortree Gym was a Flying type gym, so Pikachu kicked some serious butt here. Once it was clear, I didn’t want to waste too much time, so I immediately went towards Lilycove city, where the next part of the story was waiting. Once there, I saw Team Magma stealing a submarine and entered their hidden lair nearby for a few moments, just so I could find out where to go next. The destination was Mount Pyre on Route 122. This was the graveyard area of Pokemon Ruby, but I wasn’t there for as long as in the previous games. I climbed to the top and fought the Magma Commander there, only to find out I now have to go to an underwater cave. However, to get there, I had to use Dive and I wasn’t able to use it without the next gym badge.

Mossdeep City Gym

Mossdeep City was relatively close by, so it didn’t take long to get there. This time, it was a Psychic gym, so it gave me some trouble, but thankfully, though psychic Pokemon can hit hard, they can’t take a lot of damage so I ended up sweeping through most of them. I got the badge and I was able to use Dive, but I didn’t have a Pokemon to teach it to.

Pokemon Ruby - Zigzagoon

And I just got rid of my first HM Slave…

Sadly, this meant I had to catch another HM Slave just for Dive and further deviate from the anime. I ended up catching a Tentacool, and using it to get to the underwater cave, where the Team Magma commander freed a legendary Pokemon. As I said, the legendary is different in the two games. For Ruby, it was Groudon and for Sapphire, it would be Kyogre.

The Pokemon disappeared and I had to go to the next city where the final showdown would happen and the final gym was at. Before going to Sootopolis, though, I remembered I have to go catch my final team member – Snorunt. For that, I went to Shoal Cave which was conveniently at low tide right now, so It didn’t take too long to find and catch a Snorunt.

Sootopolis City, The Cave of Origins and the Final Gym

Just like Fortree, Sootopolis was another cool looking city. The graphics of the Pokemon games were never top-notch, but the upgrade to Gameboy Advance really allowed the games to shine. The gym type was Water, but before I could challenge it, I had to go to the Cave of Origin and capture or defeat Groudon.  I ended up just using the Master Ball and sending it straight to the PC, since Groudon has nothing to do with my challenge. I also found the final HM of the game inside the cave – HM07, Waterfall.

Pokemon Ruby - Groudon

Not having a reason to save the Master Ball really helps.

Unlike the cave, the Sootopolis Gym gave me a lot of trouble. Technically, Pikachu would be perfect against Water but most of the Pokemon here also had secondary types and some hard hitting attacks, so my badly trained Pikachu couldn’t cope. In my next game, I’m definitely redistributing my IVs.

My Pikachu is now physically strong mainly because in the first generation, all damage was determined by the Attack stat and the Special affected defense only. Instead of duplicating the Attack IV and transferring it to Special Attack, I decided to copy the Special into both Special Attack and Special Defense which, in hindsight, makes no sense. Ash’s Pikachu is tough, but it also has extremely powerful Electric attacks, most of which are special based. In addition to this, the only way for Pikachu to learn a physical Electric type attack in Ruby is through breeding, meaning I’m stuck with what I have. In my next game, I’m giving him high Attack and Special Attack with medium Defense and low Special Defense. The only thing I got right was the speed.

I did some googling on EV training and found out the Spindas outside Fallarbor town give 1 Special Attack EV each. Since most of my Pokemon use special attacks and have high IV in those stats, I decided to spend some time training there.

It was well worth it. Torkoal became extremely powerful, Snorunt actually started to hold its own and Corphish was able to sweep a lot of its enemies thanks to Surf and the now much higher Special Attack. Still, I wasn’t able to evolve it yet, so he wasn’t to helpful against Sootopolis’ Dragon gym.

Pokemon Ruby - Team

Spindas also give a decent amount of experience.

Somehow, after some persistent reloading, I managed to get through it and was able to finally go to the Pokemon League. For that,. I had to use Waterfall to get to Ever Grande City, which can’t really be called a city, since it only had a Pokemon Center and nothing else. At this point, I got rid of all of my HM slaves, but kept Strength on Torkoal and Rock Smash on my Grovyle so I could get through the Victory Road ahead.

The two lower levels of the victory road were dark, so I was tempted to use Flash, but I ended up navigating through the area without it somehow. As soon as I got to the League building, I saved my game, spent all of my money and decided to just go for it.

Suffice to say, it didn’t work. Time to train.

 A GameBoy Advance of My Own?

By the way, I love the GameBoy Advance games so much, I’m actually thinking about buying a console. I’m not sure which one I should get, though. The GameBoy Advance SP supposedly has a better screen, but the regular version looks a lot sturdier. Anyone have any ideas?

Legacy of Kain: The Soul Reaver

Where to Go After the Cathedral

This time in The Soul Reaver, I took the opportunity the save system gave me by always putting me back in the first area to look around and explore some more. It was worth it to. I ended up wandering into the human citadel again and found a brand new upgrade. This time, it was an artifact that outright doubled my spell points, allowing me to use my two glyphs much more frequently.

The Soul Reaver - Mana Upgrade

This magic upgrade was the first I found and it doubled my spell points.

I then went back to the outdoors area with the huge skull, hoping to finally find the way further, but after a good half an hour of aimlessly looking around, I found nothing. Eventually, I gave up, saved my game and ended my session.

It kept itching at me, though, so I started the game up again and deiced to listen for the Elder God’s advice by standing on the platform in the starting area. This time, I listened carefully and realized he was telling me to go “past the pillars”. Then it dawned on me. The pillars are where I fought Kain. The outdoors area was just the place where I got my stone glyph, nothing else.

The Soul Reaver - Faces

Sometimes the graphics really shine. Not this time.

With this knowledge, I went back to the Sanctuary, talked to the spirit at the Pillars of Nosgoth and immediately found a climbable wall which led me to my next destination.

Tomb of the Sarafan

The ancient tomb of the Sarafan, once impenetrably sealed… Now, ravaged by Nosgoth’s upheavals, its mysteries lay exposed. In the time of Vorador, centuries before Kain was made, the Sarafan warrior priests waged a merciless war against the vampire tribes of Nosgoth. Emboldened by righteousness, they committed unspeakable and indiscriminate acts of violence – massacring fledglings and ancients alike, they decimated entire bloodlines in mere decades. Now their husks lay here – murderers enshrined.

[soundcloud url=”http://api.soundcloud.com/tracks/81929345″ params=”” width=” 100%” height=”166″ iframe=”true” /]

The Tomb of the Sarafan was a short area, but it represented a huge part of the story. It was also filled with the first class of vampire enemies I encountered in the game. I got some practice with the Soul Reaver, though, so getting rid of them was much easier now. All it takes is some patience and a single proper hit with the Soul Reaver, followed by a stab, to completely obliterate them.

The Soul Reaver - Raziel's Tomb

I guess Kain loves irony.

I ran through the passages, found and activated the portal and then finally entered the tomb by passing through a gate in the spectral realm. Once I got in and shifted back to the material realm, the realization happened. The Serapan heroes enshrined in the tombs, the humans celebrated as saints were Raziel and his brothers. Kain has a weird sense of humor, I guess. He raised his mortal enemies as his first lieutenants.

I shifted back to the spiritual realm inside the tomb chamber and fell to the area bellow, where I was able to get back to the material plane and fight the next boss.

Morlock

I’m not sure if I missed it, but I didn’t catch the game telling me the name of this boss. Instead, I googled it afterwards and found out it was Morlock. In any case, I’m not sure if I should even consider Morlock a proper boss. I hit him a few times with the Soul Reaver and then impaled him like any regular enemy. I’m not even sure he has more health than some of the slightly stronger versions of regular enemies.

The Soul Reaver - Morlock

I can’t really call this guy a boss.

The ability he gave me, on the other hand, was well worth the boss status. I can now emit some sort of ranged force projectile which stuns weaker enemies and activates various switches, the few of which I’ve already seen in the previous areas.

As soon as I got hold of the ability, I got back to the portal and went to back to the outdoors area, where I remembered one of these switches was blocking the way to a health upgrade. I had to climb all the way to the Stone Glyph tomb to get to it, but it was well worth it, since it was my tenth upgrade, meaning my health has now increased for the second time.

I’m also pretty sure I saw one of these back in the Silenced Cathedral, so I’ll probably go there next. For now, it was time to take a break.

Pokemon Ruby - Cover

If you play a Pokemon game on an emulator, trust me when I say this, you do not want to start it up on a weekend. Well, maybe you do, depends on your priorities. I started playing Pokemon Ruby on a Saturday and I ended up playing all the way up to the Petalburg Gym in a single sitting. Just to elaborate, this is the fifth gym.

The Start of Ruby

As I sad in my previous posting, I picked Treecko, just like Ash did and then I caught a Pikachu with cheats, before genetically modifying it to resemble my Pikachu from Pokemon Crystal (i.e., I used cheats). Because of this, I didn’t train Treecko to much on my way through the first three cities.

Pokemon Ruby  - Zigzagoon

I’ll admit it, I used an HM slave this time. It’s just to annoying without one.

Yup, the first gym you can challenge is way up in Rustoboro City, which is the fourth city of the game and also the large metropolis of Ruby. Little Root Town is the starter town of the game, while Oldale city is the next town over. Petalburg is the third city and it does contain a gym, but it’s owned by the main character’s dad and it can’t be challenged until you get four badges.

Mind Blown

This led me to a realization which, in hindsight, should have been obvious. In the anime, Petalburg is the first gym Ash challenges, but he doesn’t get a badge and also has to return to it later. The reason he doesn’t get it is because the gym leader’s son poses as a gym leader and ends up wasting everyone’s time, more or less. Basically, Ash ends up fighting and sort of defeating the main character of the third Pokemon game generation.

Catching Taillow

Overall, Pokemon Ruby allows for quite a faithful following of the anime’s story. I caught my Taillow in Petalburg Woods, just as Ash did in the anime. I also basically started with Pikachu and Treecko, just as Ash did. This means the first two gyms, Rustobro and Dewford had me in the exact same situation Ash was in.

Pokemon Ruby - Rustboro

Rustboro is the huge city of Ruby, but only in appearance. The important buildings are in later cities.

In Rustboro, I also had my first encounter with the game’s bad guys – Team Magma. Pokemon Ruby (and Sapphire) sort of mix things up when it comes to bad guys. There are actually two different teams – Team Aqua and Team Magma. While both teams have some strange ideas, in each of the two games, one of the teams is portrayed as the bad guys, while the other team fights them. This ties in nicely to each of the game’s colors, with the red Ruby going with Magma and the blue Sapphire going with Aqua. This also ties in to the two legendaries of the game.

The Rustboro gym was easy to deal with, since it was rock based.  The second gym, in Dewford Town, wasn’t as easy with mostly fighting types, but overall, picking the grass starter puts you in a very favorable early position compared to Pokemon Crystal, I think.

Cheating with Everstones

Of course, by this time, I had to start cancelling evolutions, so I ended up doing some more magic with Enciclopedia Pokemon and gave an Everstone to both Treecko and Taillow. Sure, it’s cheating, but it also means I won’t be using any attack boosting items, so it’s not like I’m actually improving my odds. I’m just making the circumstances less annoying.

Pokemon Ruby - Taillow

Taillow and its evolution, Swellow, have a good speed and attack.

The third gym was all the way in Mauville City, which means I did a half circle around the Hoenn region by now. This one was focused on the Electric type, so again, Treecko was very useful. Sadly, I had to deviate from the anime now. By this point, Ash already had a Corphish, but I can’t catch one until I get  the Good Rod, which only happens after the fifth gym.

Mauville City also contained a Game Corner as well as a bike shop, which offers two types of bikes in this game – the Mach Bike and the Acro Bike. I picked the Acro Bike at random, but I didn’t really care about it, since I won’t be using bikes for anything in this challenge.

Team Magma on Mt. Chimney

Before I could get to the next gym, in Lavaridge, I had to do almost an entire circle through the Hoenn region. First, though, I went to Verdanturf Town to try my luck with a contest (Pikachu won in the cool category) and to create a shortcut through the nearby cave with Rock Smash.

After that, I went back to Mauville and then further north towards Fallarbor town and further towards Meteor Falls. This is where I met up with Team Magma again, which then lead me to Mt. Chimney, where I finally had a proper boss battle with their commander. After that, I could access the Jagged Pass and finally get to Lavaridge.

Pokemon Ruby - Mt. Chimney

Cut scenes! A first in the series!

The Lavaridge Gym was, naturally, Fire based, so I didn’t have any type advantage. What I did have were a well-trained Pikachu and Taillow, so it wasn’t too hard. After I beat the gym, I immediately rushed back to the Fiery Path to get my next team mate – Torkoal.

Torkoal and Petalburg

Torkoal will be the heavy hitter and the tank of my team. It’s basically the first Pokemon with high level stat values I was able to get in this challenge, so I was very much looking forward to catching it. I spent some time to make him catch up in levels with the rest of my team, so now I had an amazing Fire sweeper.

Pokemon Ruby - Torkoal

This thing is amazing and it looks cool to.

It was now time to go to Petalburg to beat Ruby’s dad (remember, I’m Ash), so that’s exactly what I did. The Petalburg gym had a lot of Pokemon with varied types, but most of the trainers had only one Pokemon in their party, so I was able to go back and heal as often as I wanted. As expected, Torkoal was amazing in the final battle agains’t Ruby’s dad, being able to survive most of the hits which would one-hit any of my other Pokemon.

I had my fifth badge and I had about four or five hours of play behind me, so I finally decided to take a break here.

Grandia - Cover, Box Art

As I said last time, I was about to enter the Tower of Doom in Grandia, but before that, I had to go back to the village to advance the story for a bit and, more importantly, to teach Rapp a spell element. I decided to go with Wind for now, but I’ll end up teaching him all four of the elements eventually, since Rapp is one of the final four characters.

Grandia - Rapp about Lainians

The “monster” Rapp is talking about would be the Lainian Milda.

As soon as I got to the Tower of Doom, I got introduced to another awesome temporary character, who’s basically a replacement for Gadwin – Milda of Laine. According to Rapp, if you anger a Lainian, you’re as good as dead. Well, this one was really angry. In fact, she was so angry, she immediately attacked the party, but this time, it went a lot better than with Gadwin. She was relatively easy to defeat and she ended up joining the group, since she was there to destroy the tower to.

Milda can’t learn any spells, so I won’t be making any hard decisions about that. She also doesn’t have a lot of skills. What she does have is pure damage. Because of this, I gave her Justin’s Chain of Gems, which allows the wearer to attack three times in a single combo, basically increasing the damage output by 50%.

Grandia - Thor Cut

I’m still learning new moves, regardless of low experience gains.

The Tower of Doom wasn’t hard, probably because I’m still outleveling the area. I don’t know how exactly this happened, but since Virgin Forest, I barely get any skill or spell experience and most enemies die within a single area attack. I still gain a few skill levels thanks to generous SP and MP usage, but it slowed down to a crawl.

I had to get through several levels of the Tower of Doom and found some minor loot, but I didn’t get any mana eggs this time. That’s fine though, because it’s quite obvious I’ll get more than enough by the end of the game, so I’m in no danger of any of my characters not having all of their skills and spells.

Grandia - Gaia and the Spirit Stone

Grandia’s story is full of “convenience”. it works! The Spirit Stone protects the group from certain doom.

Once I got to the top of the Tower of Doom (I just love saying its name), I got to enjoy the shenanigans of the three Garyle officers again, while founding out that the Garyle forces are breeding monsters. I ended up fighting one of this monsters called Gaia, right after finding out it was responsible for turning Rapp’s village to stone. It would have ended up turning the party to stone as well, but Justin’s Spirit Stone protected them.

The fight was long, but not hard at all. After it was done, the monster turned into a sprout (?) and Justin picked it up to take it back to the village. I guess I was the only one here thinking that wasn’t a good idea, because the village elder didn’t seem to have a problem with it and actually took it from Justin to examine it. Of course, the same night, with Leen leading them, the Garyle forces attacked the village to take back the sprout. At this point, a major revelation happens – Leen is an Icarian!

Grandia - Leen is an Icarian

This raises so many questions!

How? Does that mean Leen isn’t Feena’s sister? Does it mean Feena is an Icarian to? These questions remain unanswered for now and since my memory about it is a bit hazy, I don’t want to say something that might turn out wrong later. In any case, the sprout was gone and it was time to go further east, towards Laine. For that, I had to cross the Zil desert and get to Zil Padon, Guido’s home town.

I immediately went to the desert and soon found a great new accessory for Justin, to replace the Chain of Gems I gave to Milda. The Energy Ring restores SP through normal attacks, to a greater degree than the Medal of Yore I previously used. This means Justin will be able to use his awesome moves more often, making me even stronger.

Grandia - Soldier's Graveyard Entrance

Get your finger out of there. That’s nasty!

The Zil Desert also contains the entrance to the first optional dungeon of the game – The Soldier’s Graveyard. I’m pretty sure I skipped the optional dungeons on my first playthrough, so I decided to explore it this time, just for the fun of it. I was also kind of hoping I’ll get more experience and stronger enemies in there, but the first few battles after the save point didn’t look promising. In any case, this is where I stopped playing.


Pokemon Ruby - Cover

In my last post about Pokemon Ruby, I made a plan I’ll be following during this part of the challenge, so after that, I’ve spent some time figuring out how exactly I can follow this plan. The issue is, while the DS games have an excellent set of save editors, even one that’s completely online and can create ready for use and completely legitimate Pokemon out of nothing, this isn’t the case with the GameBoy Advance games. Heck, even the GameBoy generation has a large selection of tools.

It took me a while, but eventually, I found the tool for me.

Enciclopedia Pokemon – A Generation III Save Editor

I tried a couple of different editors, most of which are Japanese in origin, clearly not made for the western region and very poorly translated. The Pokemon Encyclopedia, however, is perfect. It has a nice and simple interface with a bunch of extra features as well, it works, and it does what I need it to do.

Pokemon Ruby - Treecko

The choice of starters was much easier this time – there was no choice.

I did what I did with Pokemon Crystal. First, I started a fresh game in Ruby and picked Treecko as my starter, according to the plan. Then, I played through all the way to the point where I was able to freely roam between Littleroot and Oldale town. Then, I googled and found some Pokemon Ruby Gameshark cheats. Most importantly, the one for infinite pokeballs in the first PC slot, and the one which causes Pikachu to be the only Pokemon that appears in the wild.

The code for 99 Pokeballs in PC Slot 1:

[code]BCDEC2FB 74886C64[/code]

The code for making Pikachu appear in the wild:

[code]39E924C4 4136A9DD
9D4A1BFF 05120D39[/code]

With that, I had a brand new level 2 Pikachu in my party.

Pokemon - Pikasav

My Pikachu’s stats in Pokemon Crystal.

Next up, I opened up Pikasav and loaded my Pokemon Crystal save. I took note of Pikachu’s stats in there. The mechanics change a lot between Generations 2 and 3, so I had to do some calculations.

IV – Inherent Value

Believe me when I say I’m no expert and this might be completely wrong, but the way I understand it, Individual, or inherent value, the way I call it, means the potential a Pokemon has. In the first two games, the IV’s ranged from 0 to 15 for each stat, and the higher an IV was for a single stat, the higher that stat would be as the Pokemon gets stronger. In generation III, the IV range increases to 0-31, and the formula changes to, but instead of stressing about it to much, I just doubled all of the IV values for my “reincarnated Pikachu.

Thus, I ended up with 14 for his HP, 30 Attack, 22 Defense, 4 in both Special Attack and Defense and finally, 28 for speed. My Pikachu will end up being physically tough and extremely fast. All of this is translated from back

in Pokemon Yellow, where I assume Pikachu’s stats where the way the developers imagined them in the anime.

EV – Effort Value

Effort value, unlike inherent value, can be trained. Each wild Pokemon my Pokemon manages to defeat increases his effort value in some stat by a few points. Each Pokemon can collect a total of 510 effort value points combined, so hardcore Pokemon fans actually do EV training to maximize the strengths of their Pokemon. To maximize a single stat, you need to invest 252 points into it, so the option is to maximize two selected attributes of a Pokemon, or to spread the 510 points in some other way between the attributes.

Now, this mechanic was introduced only in generation 3 and before that, it was completely different, so I couldn’t really transfer what I had to the new game. Well, technically, I could have, but this would mean I would just end up evenly distributing all of my EVs between my Pikachu’s stats. Instead, I figured out how far along my  Pikachu was in Crystal and figured out this would translate to about 427 EV points earned up to that point. I then distributed those points between my attributes based on the already existing inherent values. Basically, the more inherent value a stat had, the more effort value it would get.

Enciclopedia Pokemon - Gen III Save Editor

The final stats of my “converted” Pikachu.

This got me 58 in HP, 126 in Attack, 92 defense, 18 in Special Attack, 16 in Special Defense and finally, 117 in Speed. I had some rounding errors, so I added the final two points to Special Attack, which is why it ended up being different from Special Defense. Now at this point, I have my doubts, since Pikachu is supposed to rock with Thunder attacks, but I have my math and I’m sticking to it. I can always grind some more if Pikachu ends up to weak.

How to Edit the Pokemon Ruby Save?

Well, as I said, I opened the Pokemon Crystal save in Pikasave, saw the stats and did the math. Then I opened the Pokemon Ruby save with Enciclopedia Pokemon and edited Pikachu’s values there. It really is as simple as that. I had one minor issue after I did this, though. Loading the game with Visual Boy Advance gave me a message about my save file being corrupted and reverting to the last save, but the game loaded up fine anyway and I didn’t find any issues.

Soul Reaver- Title Screen

Zephon

As I thought, the area with the next boss, Zephon, was right after the teleporter room I unlocked in the Cathedral, just before I saved my game and ended my last session. Teleporter room, you ask?

Soul Reaver has a method of navigating through the world similar to the Castlevania and Metroid series. Come to think of it, the game basically is a metroidvania. When you load your game, you start at the very beginning, but you can get to your last location relatively quickly thanks to the fact that you unlocked shorter routes by pushing blocks and hitting switches, but more importantly, because you enabled portals which take you from the portal room near the beginning to a portal room in one of several game regions.

Soul Reaver - Zephon

I guess “spider” was an understatement. I don’t know what that thing is.

In any case, I fought Zephon. I’d say he was even slightly easier than Melchiar, since he didn’t push me into the spectral realm even once. All I had to do was dodge his claws and hit them when they get stuck in the ground. This would cause an egg or something like that fall out of his body. I had to set the egg on fire and throw it at him. After three of this, he was down and I got a new ability – I can now climb certain walls.

Exploration

With a new ability, it was time to get new stuff, so that’s what I did. Sadly, I couldn’t find anything decent in the Cathedral, but I distinctly remember there being some health upgrades in Melchiar’s area, so I went there. I also decided to go check out the entrance to the Cathedral but the one health upgrade on the tall cliff next to the shore was still unreachable.

Soul Reaver - Climbable Wall

The walls which can be climbed with the new ability are clearly marked.

I was going to get a few more upgrades I vaguely remembered previously seeing, but I ended up taking a route which I thought would take me to a secret area, but actually took me to the next region of the game. I’m not sure what this new region is called, but it contains a skull of some giant creature. I ended up climbing right to the very top of the area, where another block puzzle was waiting for me.

The Giant Skull Area

The objective was to first flip all of the blocks to their correct orientation and then push them into their respective slots on a large fresco (check me out, I’m using smart words!). The puzzle alone was not hard to figure out, but my problem was finding the last two blocks in the lower area of the room, where the statue was.  I found the first block in one of the corners of the room, but the second one was nowhere to be seen. After some walking about, I finally found it in the previous room, on top of a balcony.

The Stone Glyph


It turns out this wasn’t a new area, though. Solving the puzzle “just” gave me a brand new spell. Oh, and by the way, the spells in this game are actually called glyphs. This one was the stone glyph.

Soul Reaver - The Stone Glyph

I solved the puzzle, but I can’t yet say it was worth it.

What happened next was that I made a huge mistake. I went outside the stone glyph area and figured out I had to glide to my next destination, but I missed the jump and ended up all the way back at the bottom, next to the giant skull. It took me about fifteen minutes to get back up there, mostly due to the difficult jumps I needed to do half way through.

Eventually, I got back up there and this time used the camera and jumping in place to look around for a bit, before I made another attempt at jumping. I found the right spot and ended up right next to another portal room. This is where I saved the game.

Also, I didn’t get the chance to try out the stone glyph yet, so I have no idea what it does.

Pokemon Ruby - Cover

It’s been some time since my last part of the “Follow the Anime” challenge, so I think it’s time to start planning for another one. Since I’ve recently attempted a Nuzlocke Challenge in Pokemon Emerald, I decided to go with Pokemon Ruby as my third generation game of choice.

The Pokemon

In the Hoenn region, Ash manages to acquire even fewer Pokemon than in the Johto region, with me being able to count only four in total. Three of those evolve during his travels through the region, but even so, that’s a tiny number. On the other hand, this might also mean I’ll have an easier time with outleveling my enemies. We will see.

The Starters in Pokemon Ruby

The three starters of the Hoenn region are Treecko, Torchic and Mudkip. While I had a tough choice in Pokemon Crystal, what with either having to start with all three of the starters via cheats or step away from the anime by only picking one, which is what I did in Crystal, there really is no choice in Ruby.

Pokemon Hoenn Starters

The hoen starters have the coolest grass type, in my opinion, though as a combatant, it still sucks.

From the three starters, Ash only gets Treecko. This means my choice is simple and I actually won’t have to cheat to have my roster follow that of the anime in this game. Of course, I’ll have to cheat to transfer Pikachu over, but that’s about it.

Treecko’s Moves

  • Pound
  • Quick Attack
  • Bullet Seed
  • Leaf Blade
  • Solar Beam
  • Agility
  • Leaf Storm

Treecko will evolve some time between gyms number four and five – Lavaridge and Petalburg. He doesn’t evolve to its final form during the Hoenn journeys.

Taillow / Swellow

The rest of the Pokemon are also relatively easy. I probably wont be able to catch all of them at the right moment, but outside of that, all of them are available in all three of the Hoenn games, I believe.

Pokemon - Taillow

I always need a flyer in my team.

The first of the remaining Pokemon is Taillow. I’ll have to catch him in Petalburg Woods if I want to follow the anime, though I could do it earlier in the game. This is well before the first gym, so I’ll have three Pokemon by the time I get there. Taillow will evolve into Swallow some time between gyms number five and six – Petalburg and Fortree.

Taillow/ Swellow’s Moves

  • Peck
  • Wing Attack
  • Quick Attack
  • Aerial Ace
  • Double Team

Of course, I’ll need a Pokemon which can learn Fly, so Taillow will have to sacrifice a move slot for that.

Corphish

Corphish will be my surfer, provided I don’t miss to Good Rod needed to catch it. Ash catches it on the way from Dewford City and gym number three, to Mauville City and gym number four. I can fish for it on routes 102 and 117, or even in Petalburg Town, but I need a good rod to do it, which I can get at route 118, so I’ll probably catch it in Petalburg, after I beat its gym, which is gym number five.

Pokemon - Corphish

I can only get Corphish a bit later in the game, after I get the Good Rod.

Corphish’s Moves

  • CrabbHammer
  • Bubble Beam
  • Vice Grip
  • Harden

Harden will, of course be replaced with Surf the first chance I get.

Snorutn / Glalie

Snorunt is the final Pokemon Ash catches in Hoenn and this happens between gyms seven and eight – Mossdeep and Sootopolis. It evolves to Glalie only after gym 8, so if Phanty has anything to say about it, Glalie will probably be useless throughout the game. Then again, it’s an Ice type, which means it might be useful against any dragon masters, so I hope I’ll be pleasantly surprised.

Snorunt / Glalie’s Moves

  • Icy Wind
  • Headbutt
  • Double Team
  • Ice Beam

With such a poor list of moves used in the anime, I’m seriously considering to abandon this “rule” I made up in the last game. I need variety in my team and it seems the team I’ll have in Ruby wont have it. We will see.

Pokemon - Glalie

Despite the lame appearance, an Ice type might be fun.

Torkoal

Though Snorunt is the final Pokemon Ash catches in Hoenn, I decided to save the best for last while writing this. Ladies and gentlemen, we might actually have a proper powerhouse in the Ruby part of the challenge. Torkoal is a tough Pokemon which I’ll be able to raise quite well, since I get it about half way through the game. I’m looking forward to this one.

Pokemon - Torkoal

I’m looking forward to getting this one.

Torkoal’s Moves

  • Flamethrower
  • Overheat
  • Iron Defense
  • Body Slam
  • Heat Wave

It’s a tough Pokemon with great moves. What else is there to say? It also get’s Flamethrower very early, so it will be kicking ass  throughout the game.

In any case, this is the plan for Pokemon Ruby. Right now, I need to figure out the best way to import my Pokedex and my Pikachu into a fresh Ruby save. Hopefully, it’s no harder than it was for Crystal, which I think was already hard enough.