I returned to the tower base and spoke to everyone, as usual when I’m stuck. One of the students told me of a secret area in one of the rooms in Silent Sands. I went there and found a demonic ring. Hoping it would help me get past the gate, I brought it to the small tower. However, the ring was depleted of its power, so it didn’t work. Hugo did notice how the design similar to some of the undead enemies in Silent Sands. Sure enough, killing a few of those charged the ring. Now the problem was, if I wear the ring, it would kill me outright, but that blue necklace I used to get past the trap in the early game stopped that from happening. I put the necklace and the ring on and approached the gate. The ring was destroyed completely, but the gate opened.
Yunica has a tendency to just do things, without overthinking it.
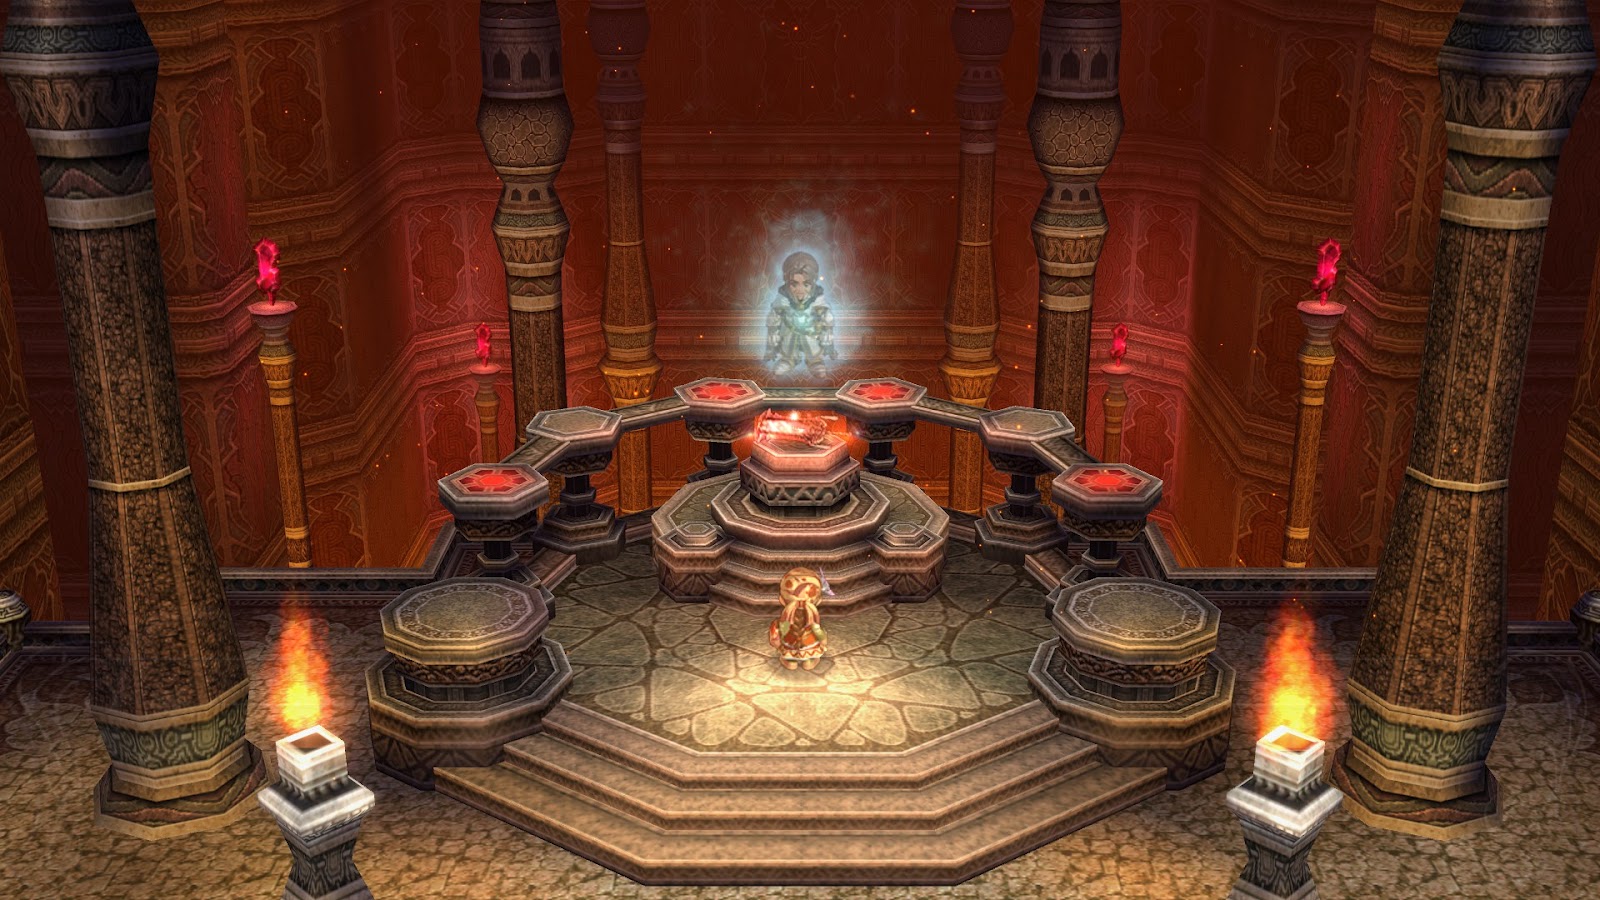
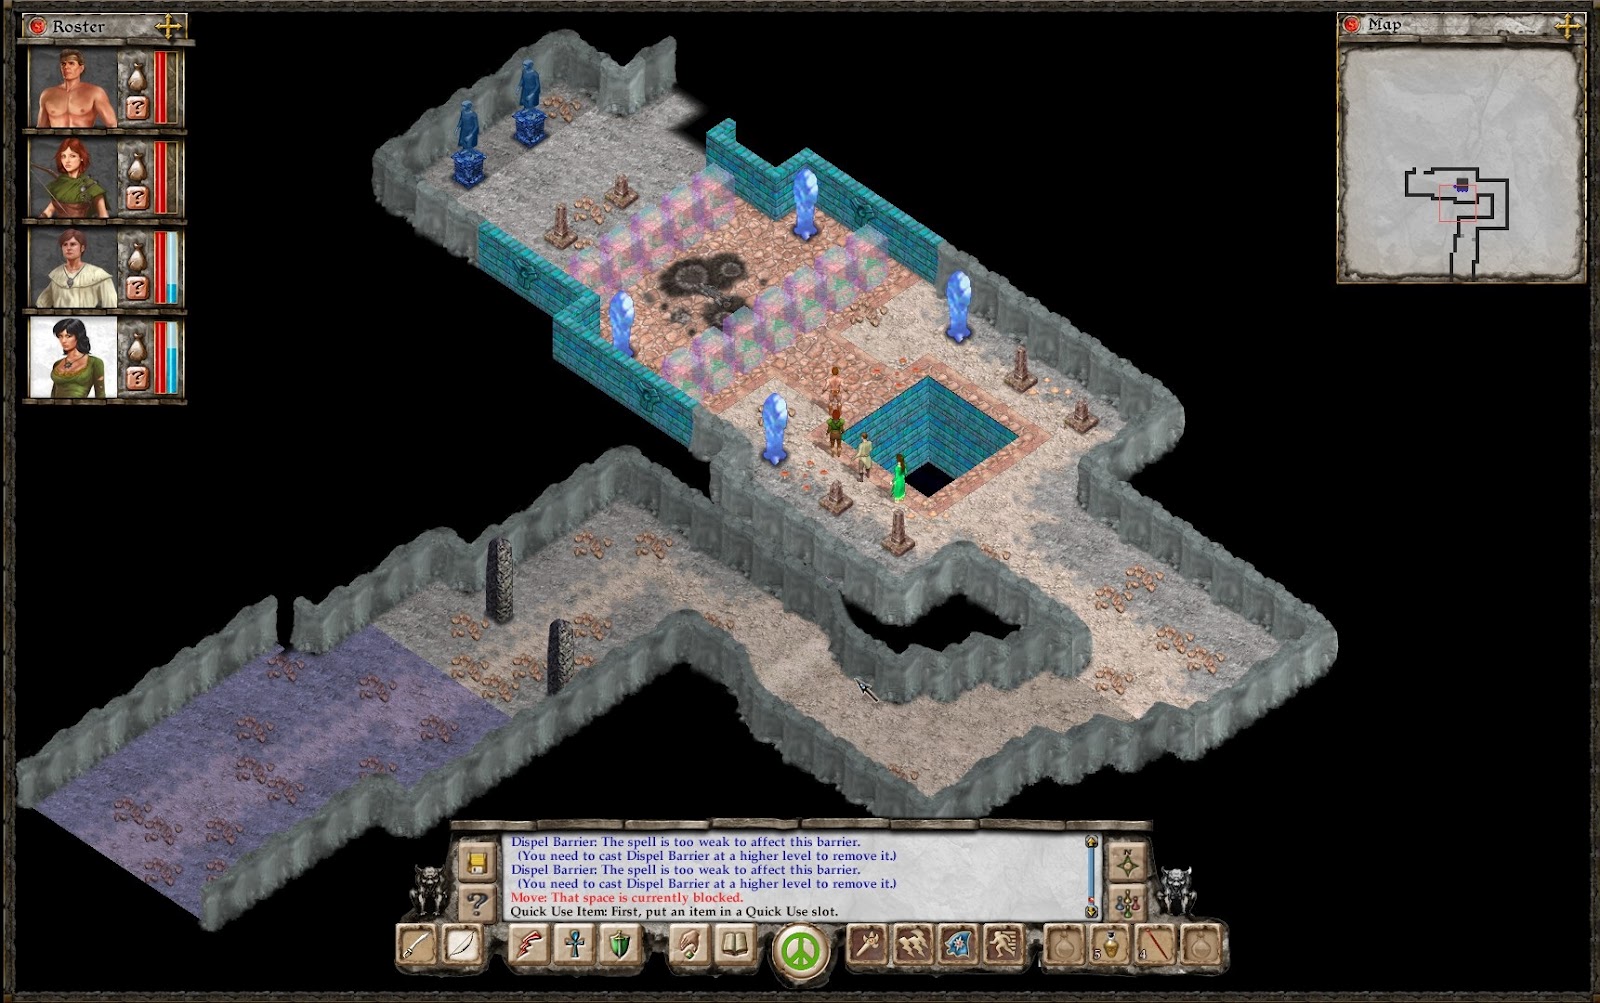
As expected, Lady Feena was there. She was trapped under a force field, but fine otherwise, so she finally filled Yunica and the rest of the party in on what was happening. The black pearl and its magic is what created the demons. While it does give plenty of advantages to everyone in Ys, this is an unavoidable side effect of using it. The goddesses were hoping they could destroy both the pearl and the demons by bringing it to the tower. This is why it’s imperative to find and help Lady Reah.
The commander ordered the sorcerers of the party to stay and find a way to remove the force field, while the knights, including Yunica, were ordered to continue the search for Lady Reah. Before that, thanks to what she did, Yunica got promoted to a full-fledged knight.
I continued exploring the Silent Sands and soon got to the boss. This one was a plant like monster and I had a really hard time defeating it. There was so much damage coming from so many sources, I just couldn’t avoid getting hit well enough. After several failed attempts, I decided to take the easy way out and do some training before fighting the boss. Gaining a total of three levels seemed to do the trick and the boss was then easy to deal with.
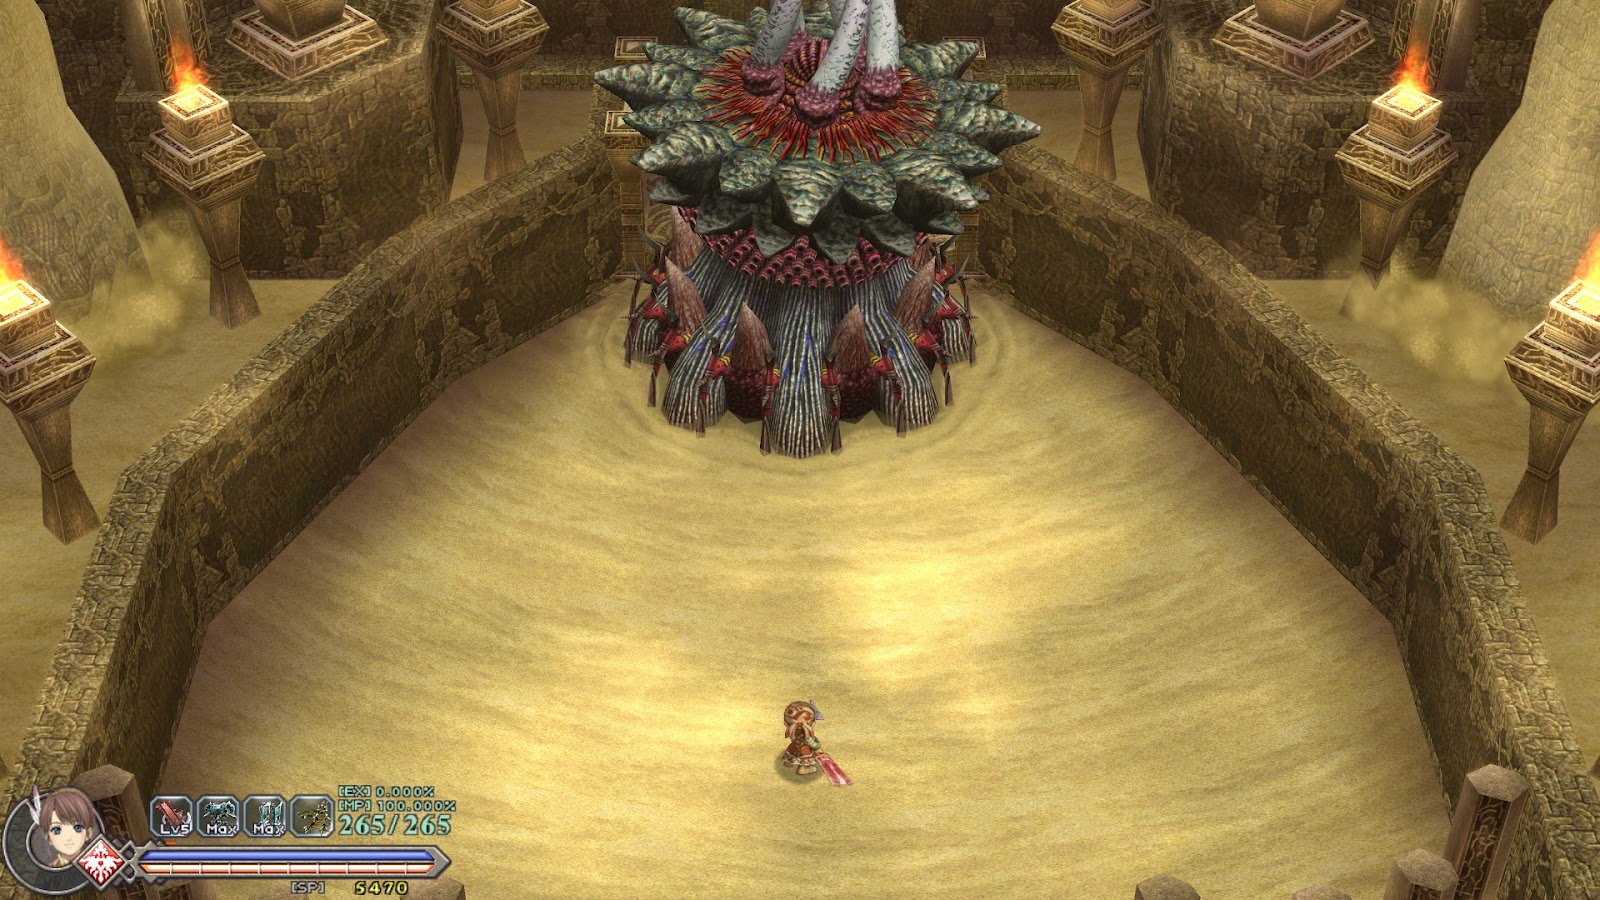
This was an extremely annoying and difficult battle.
The next area was called Blighted Blood and it had a high-tech/corrupted nature theme. Tanks to the extra levels, the monsters there were easy to deal with, and the traps and puzzles were more skill oriented, so they weren’t hard to get past. Eventually, I’ve found the save point and encountered Lord Dalles in the next room. The rest of the knight squad used the opportunity to try and ambush him, but nothing worked. He played with us for a bit, but finally decided he was sick of it and turned everyone but Yunica to stone. After he teleported away, I contacted the tower base via the magical shell I got at the start, and was told to get advice from the priest or Lady Feena on what to do next.
I was tired, though, so I decided to end my session here.
Ys: Origin [3] – Rado’s Annex
Silent Sands, as the new area was called, was difficult at first, but after I gained a few levels, I had no problems handling it. This time, all the different areas intersected to a great degree, so there was a lot of backtracking. This was all made simpler once I’ve found an item which allowed me to double-jump. With this in hand, I’ve found some secret items, including a new pair of boots, and encountered Lady Reah (I mistook the other twin for Reah, when in fact she was Feena, so I’ll correct that in my previous logs). She had the pearl with her and told me she needs to get to the top of the tower to do something important. She was also very obviously sad, so I’m guessing she’s hiding something big.

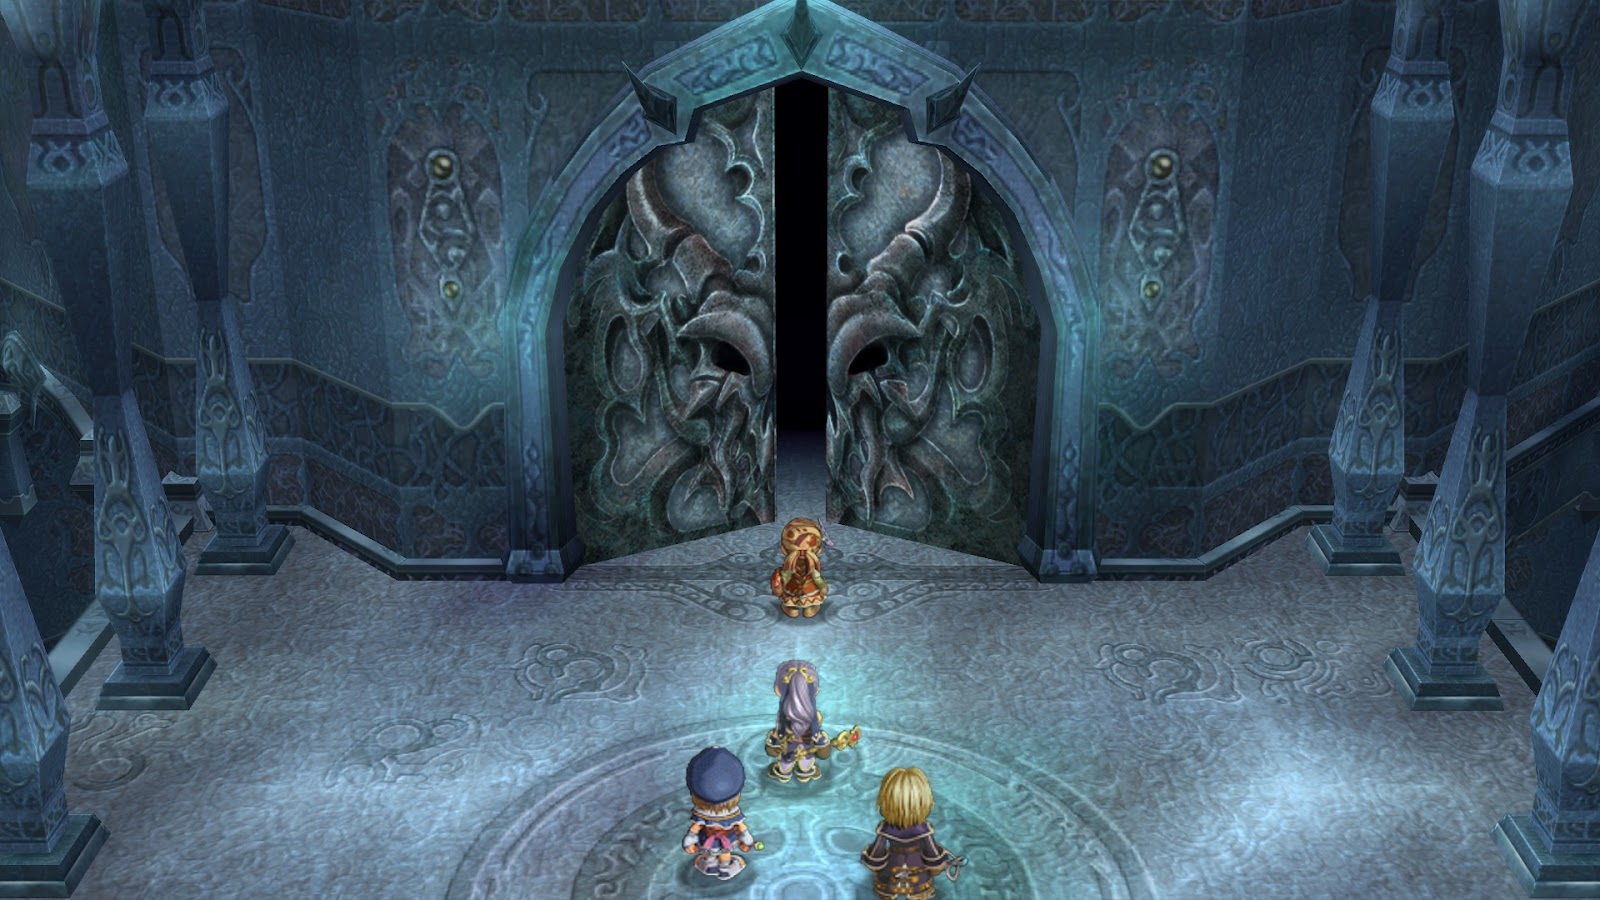
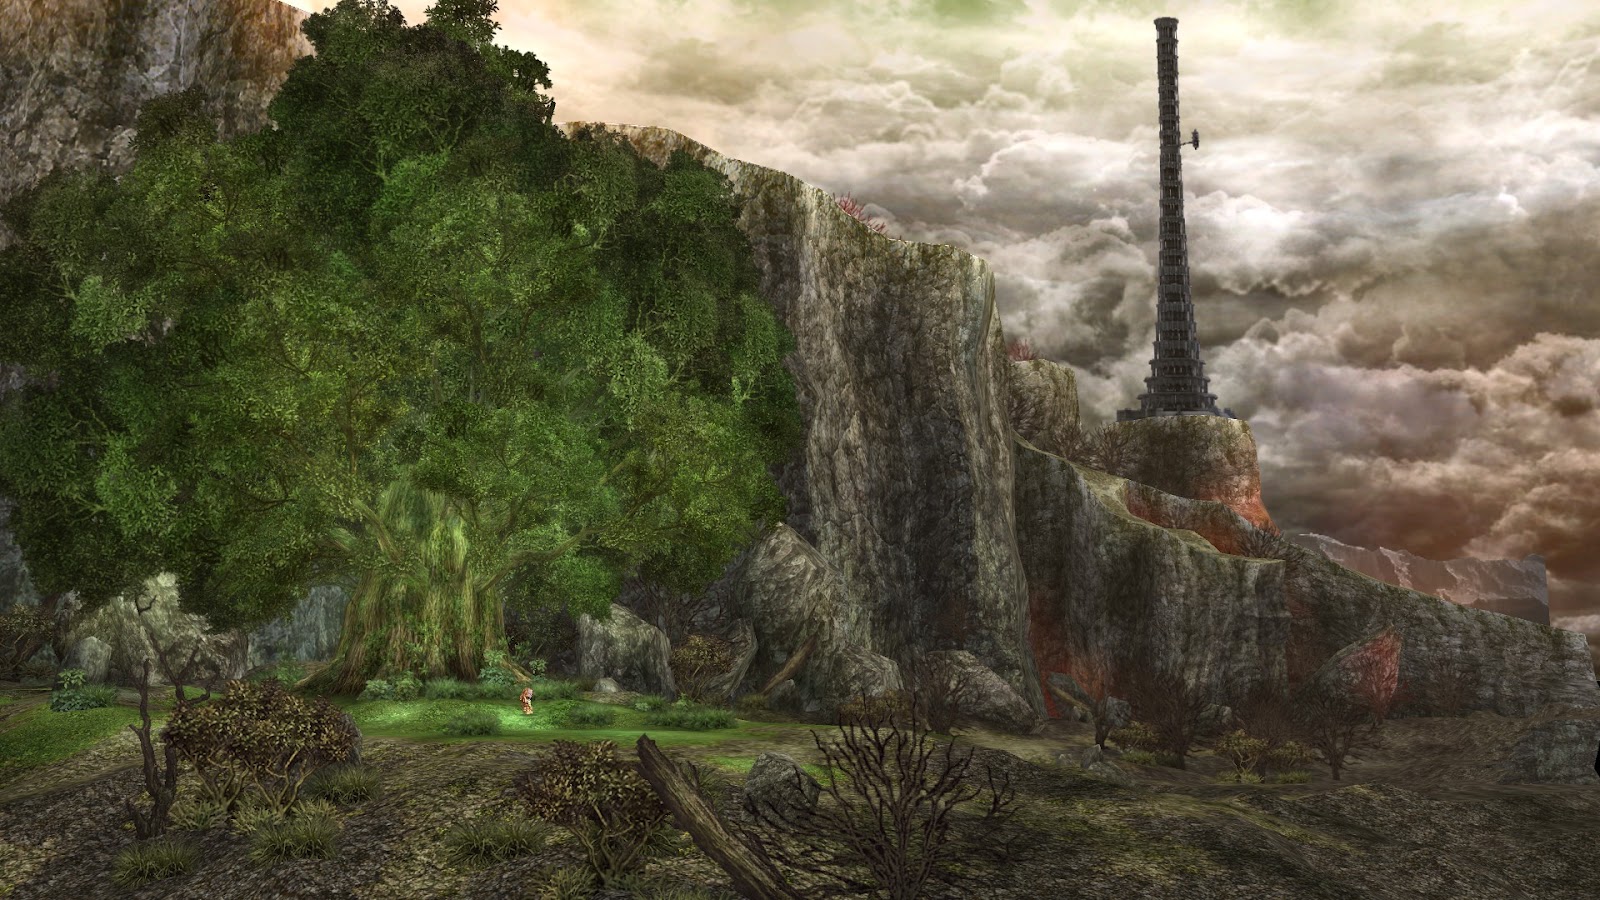
That tower doesn’t look sinister at all.
She also said her captured sister was kept in a smaller floating tower connected to the main structure via a bridge. I soon got to that bridge and met two of the mages from the search party, as well as another mage who I’ve been hearing a lot about up until now – Hugo Fact. I believe he’s the other playable character and is supposed to be an extremely powerful magic user. He sensed something powerful and evil in the small tower so they were all hesitant to go there without knowing what it is. Since Yunica doesn’t have such issues with magic, she decided to go first. The gate sealed behind here the moment she entered, and the sorceress from the hostile party revealed herself. I believe her name is Zava, but I can’t remember right now. If you haven’t realized it by now, I’m really bad with names.
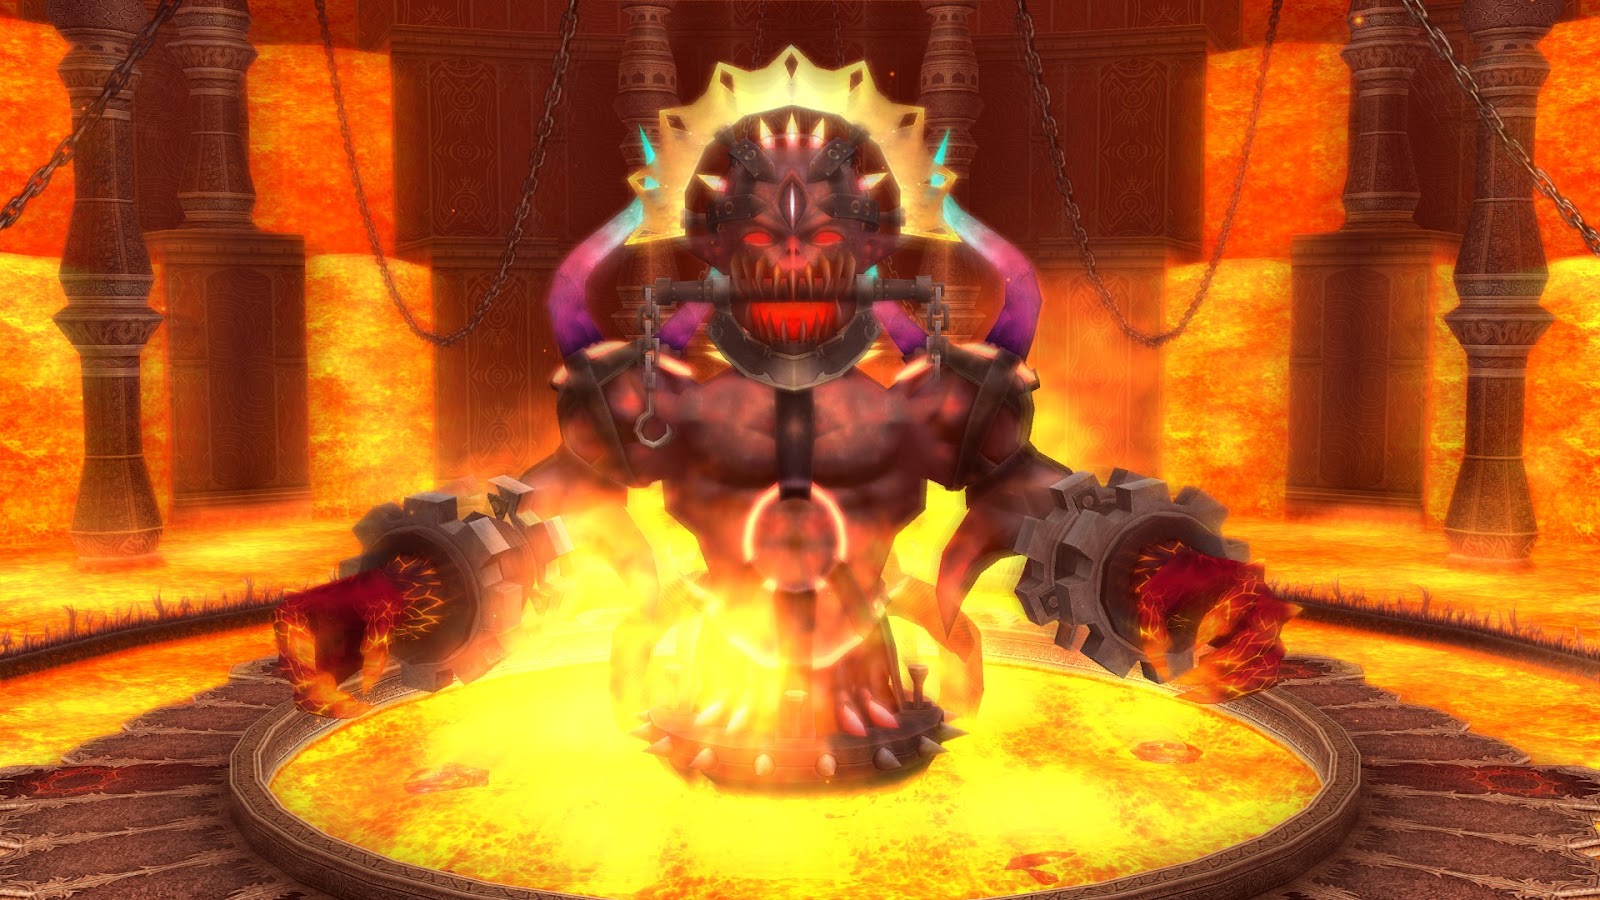
Anyway, Zava summoned a demon to attack me. The fight wasn’t too complicated. All I needed to do was to dodge everything on the ground trying to hurt me and hit it every chance I had. Since I played a lot of World of Warcraft in the past, it wasn’t hard to move out of stuff on the ground. I guess I learned something from that game. The demon was soon destroyed and Zava was about to attack me, but then a sinister sounding voice told her to retreat. She referred to the voice as Lord Dalles (or something similar – bad with names), so I’m guessing he is their actual leader.
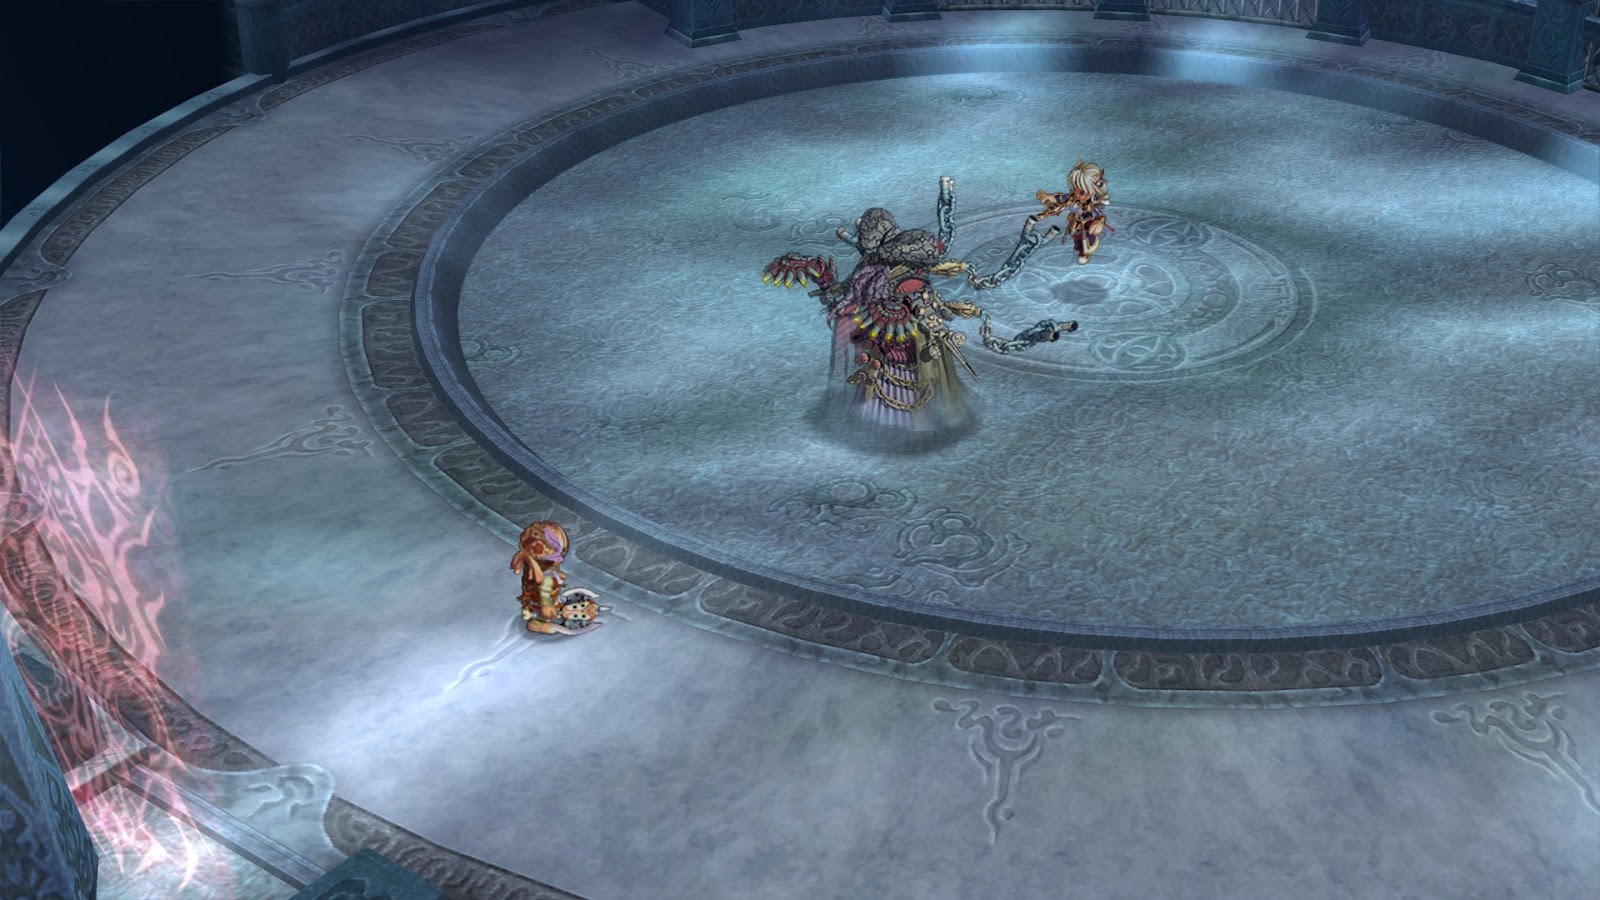
Surprise, surprise! Another demon!
She retreated and the rest of the party came in after me. On the floor above, there was a demonic gate with a strong enchantment, blocking the way to Lady Feena. One of the mages said the enchantment only allows demons through, so I’ll need to trick the gate into thinking I’m a demon.
Ys: Origin [2] – Getting Past Devil’s Corridor
My last session was long, and I wrote what I did from memory, so it wasn’t one of my best posts. This time, I’m writing along as I play, so it should be better.
I loaded the game up at the end of the fire level of the tower. The very next room was called the Devil’s Corridor and it was a tough one. As soon as I entered, I started losing health. At first, I tried to run through it, but it didn’t work. I ran back to the save point and was told by Yunica I needed to go consult someone. I returned to the bottom floor and talked to everyone.
No one seemed to offer any good advice apart from one of the students saying I should befriend some small cute furry demon creatures I’ve already met before. I thought this was just general advice, but after looking all over, I returned to the Devil’s Corridor and tried to make it to one of the adjacent rooms. One of the creatures was there so I gave him some fruit. As thanks, it taught me a melody I could play on my flute to disperse the miasma causing me damage in the Corridor.
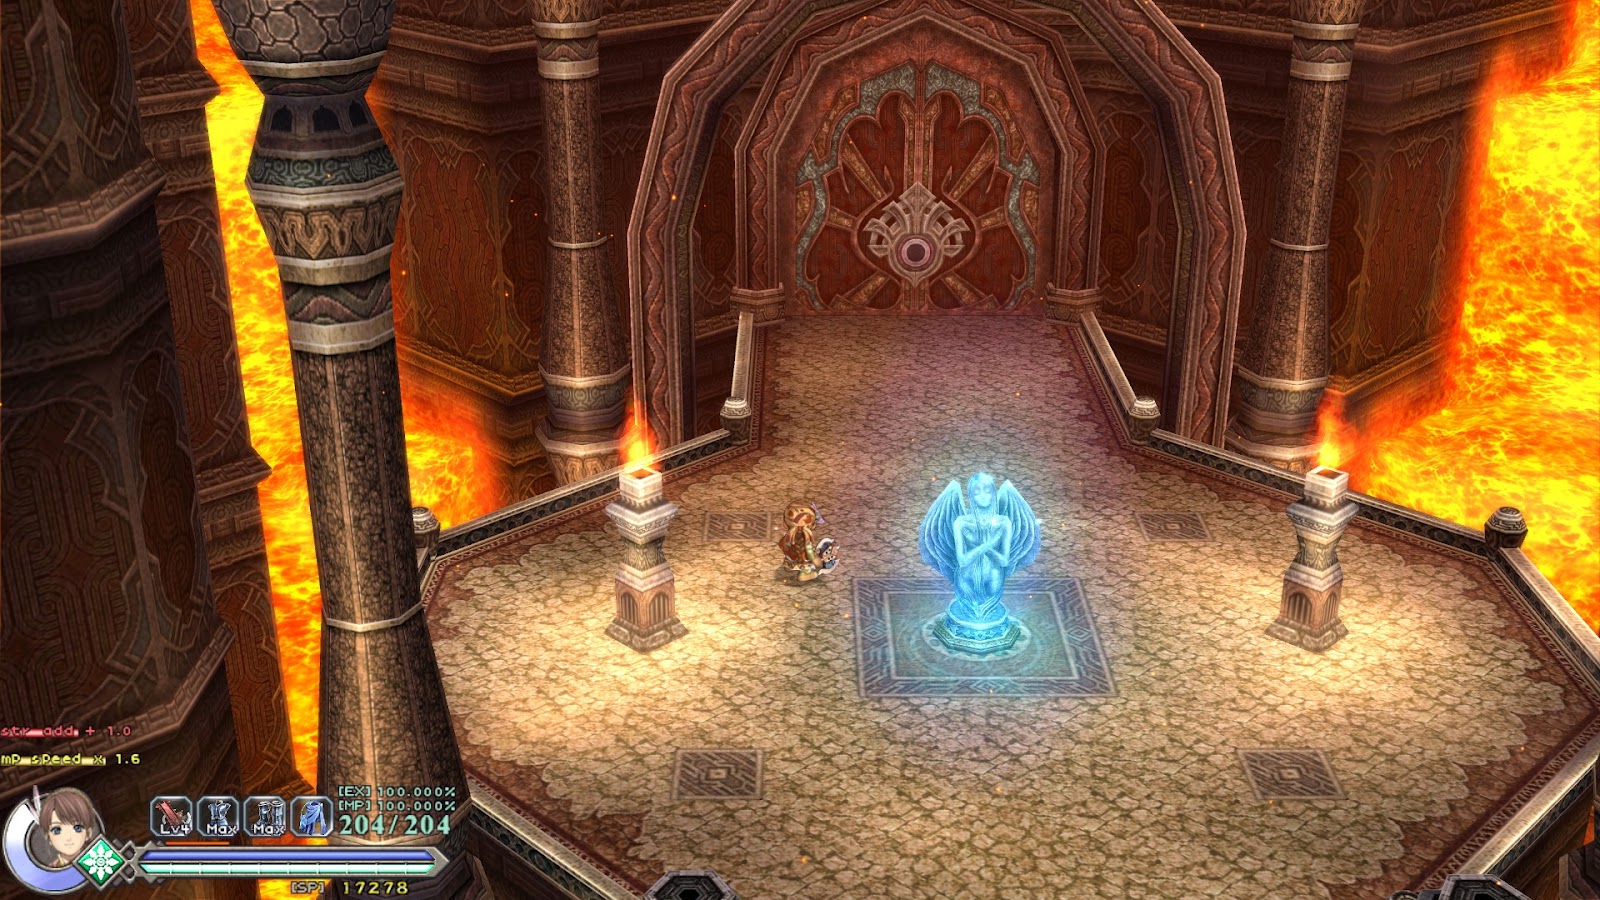
I needed the key…
I continued exploring the next fire area and quickly found a chest I needed to open in order to get the key to the next boss. In order to do this, I needed to relight four torches located at different locations on the level. The first two were ease, but the second pair gave me trouble. I didn’t realize I could jump up to the platform above one of the rope bridges. It wasn’t very visible, but both sides of the platform had areas with the fence removed, so I could use my Whirlwind to jump up there. With the last two torches lit, the chest opened and I got the key.
The boss looked impressive and difficult, but was surprisingly easy once I figured out his pattern. All I needed to do was to run in circles, hit both of his arms until they wall off and then hit his head. On several occasions, the boss would destroy the floor, causing me to take some damage, but it was low enough that I didn’t even have to avoid it. With the monster out of the way, I went to the next area, this time with a desert theme, saved my game and completed this session.
All bark and no bite. This was one of the easier bosses.
Side note: I won’t be able to write as I play unless I use real pen and paper or play windowed. It seems the game crashes if I try to alt-tab out of it. Oh well, shorter sessions should be enough to remember most of what I did.
Ys: Origin [1] – Yunica
Thanks to a friendly and generous person from /v/, this is another game I got for free during this sale. You see, I had enough money to get the other Ys game on steam, but I couldn’t afford this one, so someone hooked me up.It’s been a while since I played a proper JRPG on the big screen, and I knew I would enjoy this one from the start. I played a lengthy session yesterday and I’m actually delaying today’s session by writing this, so I’ll try to keep it short.
Ys: Origin is a prequel, taking place several centuries before the first game of the series. For a long time, the land of Ys was prospering. People worshipped the benevolent twin goddesses Reah and Feena. With their six high priests, the goddesses showered the land with happiness. They also created a powerful artefact, the black pearl, which allowed everyone in Ys to use magic.
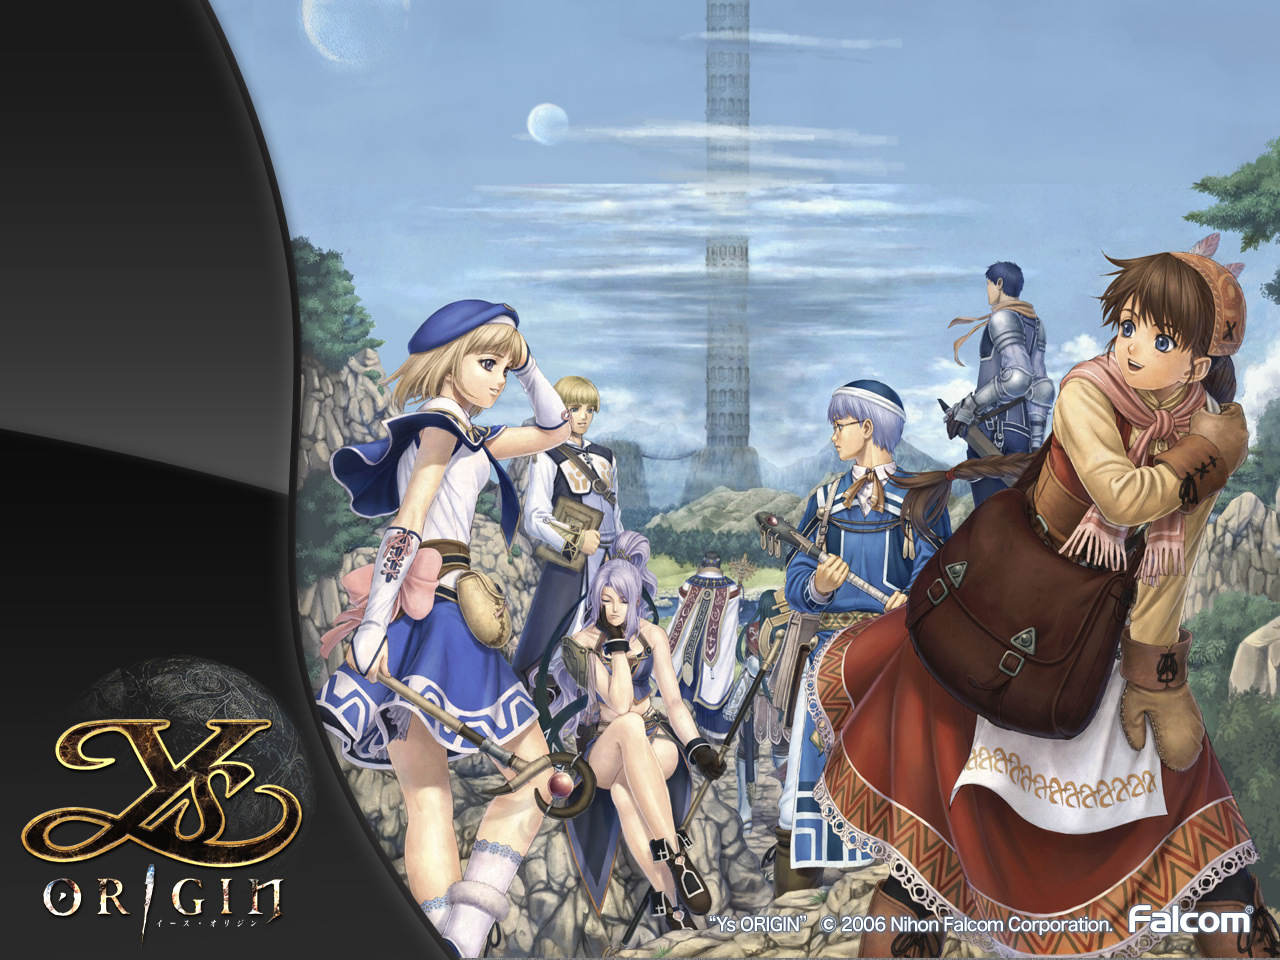
Ys: Origin is as JRPG as you can get.
The happiness lasted for a long time, but eventually, something horrible happened. Suddenly, out of nowhere, demons invaded Ys. The land fell almost instantly due to sheer numbers of the invading creatures. As a last resort, the remaining survivors gathered at the shrine where the artefact was kept and, using it’s magic, they rose the shrine and the surrounding area to the sky. However, it was soon obvious that this was just a brief delay, as the demons began building a tower to reach the shrine. At this time, the twin goddesses disappeared, together with the artefact. A search party was sent to the surface, in hopes of finding and rescuing them.
As the first character I’ll finish the game with, I picked Yunica. She’s the granddaughter of one of the 6 high priests and the only known person in Ys that’s unable to use magic at all. The game described her as a melee fighter using a heavy axe, so I assumed she would be tough enough for someone new to the game like me.
The graphics are a combination of 3D environments and nicely animated 2.5(?)D sprites. It looks very nice.
I woke up next to a huge talking tree. It told me it can sense the goddesses, as well as most of the search party in the area of the demon tower. Sadly, it also said Yunica’s father is probably dead, defeated in the battle during the ascension of the shrine. Yunica pretty much expected this, so she wasn’t very shocked. She decided to get to the tower as soon as possible. I got there soon and immediately encountered a priest with two students being attacked by some demons. After saving them, the priest said we should wait for everyone else to regroup, but upon my request, he sent me to do some reconnaissance around the base of the tower.
I started exploring the rooms on the first level and soon found an artefact which taught me how to use a special attack called Whirlwind. It’s a wind based attack and as close to magic as Yunica could get. With some more exploring, I’ve found a couple of strange people – a young bratty girl and a large muscular man. They turned out to be hostile and summoned a large demon to attack me. After defeating the demon, I did some more exploring and found an injured party member. He gave me his family heirloom, which allowed me to get past a trap set by the group I encountered.
Once I passed the trap, I fought another huge demon. This one was a bit harder, but I managed to beat it after a couple of tries. I explored several floors, disposed of another couple of demons, acquiring another attack skill, all the while learning more about the mysterious couple I encountered. They weren’t from Ys at all, but from some other land. The girl introduced herself as Epona at one point, right before she attacked me. I managed to beat her quite easily, but she escaped.
After exploring for a while longer, I managed to find one of the goddesses, Lady Reah Feena, but she was hesitant to go back with me. While trying to talk her into going back, the enemy party tracked us down and revealed their intentions. They want to capture the goddesses as well as the black pearl they had with them. The muscular man revealed himself as the person who killed Yunica’s father. She attacked him in a fit of rage, but the man defeated me easily and the enemy party was gone with Reah in their captivity.
The Sword goes to its rightful owner.
Luckily, Yunica was saved by the rest of the search party and brought back to the tower entrance. After regrouping, I was told by Yunica’s childhood friend he has seen her fathers sword close to there she met the goddess. I went there to take the sword, which taught me a third attack skill. While the second one was lighting based, the element of this one was fire. I used my new skill to gain access to the next floor and decided to stop my session here.
Saint’s Row: The Third – Pure Fun
During the summer sales on Steam, I got lucky and won a free copy of Saint’s Row: The Third on reddit. Well, technically, I won a free game for $10 or less, so I picked Saint’s Row as the game for me. Suffice to say, I did not regret my choice.
I always liked the idea of GTA, but I also found it a bit too constricting and dull. What’s worse, while the sandbox is still passable, even with those flaws, it affects the actual storyline gameplay badly, making it shallow and clunky. GTA IV improved on this with better controls and more complex actions you could do with your character (cover shooting, proper targeting, etc.), but for me, it was to series and thus less fun in the sandbox department.

Because it’s cool to be cool.
Saint’s Row does not take itself seriously even for a moment. It’s just mindless fun and nothing else. You can do whatever you want, however you want, whenever you want, and even if you die, nothing really happens. Most of the activities are fun and unique (driving around with a tiger in the back seat, for instance) and the controls are simple and responsive, while not being so simple they would cause you annoyances.
It took me around 20 hours to go through the main story, while doing plenty of optional activities on the side, and I enjoyed most of it. Sure, a couple of missions weren’t as good as the rest, but overall, I feel it’s a much more fun game on average than any of the GTA series. Now, I haven’t played the two previous games because I did not own a good enough system, so I don’t know if it’s a good sequel, but it’s definitely a great game on its own.
To take you through the story, the Saints are a gang who got so big they entered the mainstream public and started getting movie, music and various other contracts. The story starts with the core gang taking a movie star for a bank robbery, so he could do some research for his role. They get ambushed by another gang called the Syndicate. The Syndicate is big, and they want to get bigger, so the saints are in the way. One of the big guys of the Saints gets killed in the encounter, and the Saints get all their assets taken away from them.
Basically, you have to rebuild the Saints’ empire and take down the Syndicate along the way. You do this by buying of their properties, killing their gang members every time you see them and completing completely ridiculous missions in order to shut down their operations. Eventually, you take down most of their bosses (and recruit a few) and finally run them out of the city. While all this is happening, you also have to defeat them on the Internet, take down a high-tech military group and deal with a zombie infestation. In the end, you chase the final boss to mars and kill him there. Well, that’s what happens in the movie.

You’re not my father, Killbane!
Anyway, I managed to complete the main story and capture all the districts over the last week or so. I still have the alternative ending to see, and there are still a whole lot of achievements to unlock, so the game will remain on my hard drive for now. I’m sure I’ll return to it occasionally, but for now, I still have some other games to play, including the several I’ve bought and won during the sale.
Avernum: Escape from the Pit [13] – Final Thoughts and Advice
As you might know, I’ve completed Avernum a while ago. Since then, I haven’t written much about it, but I did play it for a little while longer. I decided I want to finish up some of the simpler, quicker achievements and simply wrap up some loose ends.
Shovel Master
One of the achievements requires finding at least 40 of the various hidden caches scattered around the underworld. It took me a while, but I managed to find the 40 I needed. I’m not sure if there’s more than 40 in total, but the achievement requires no more than that, so the map I created on my search should help others with the game. So here it is, the map with locations to 40 hidden caches across the caves.
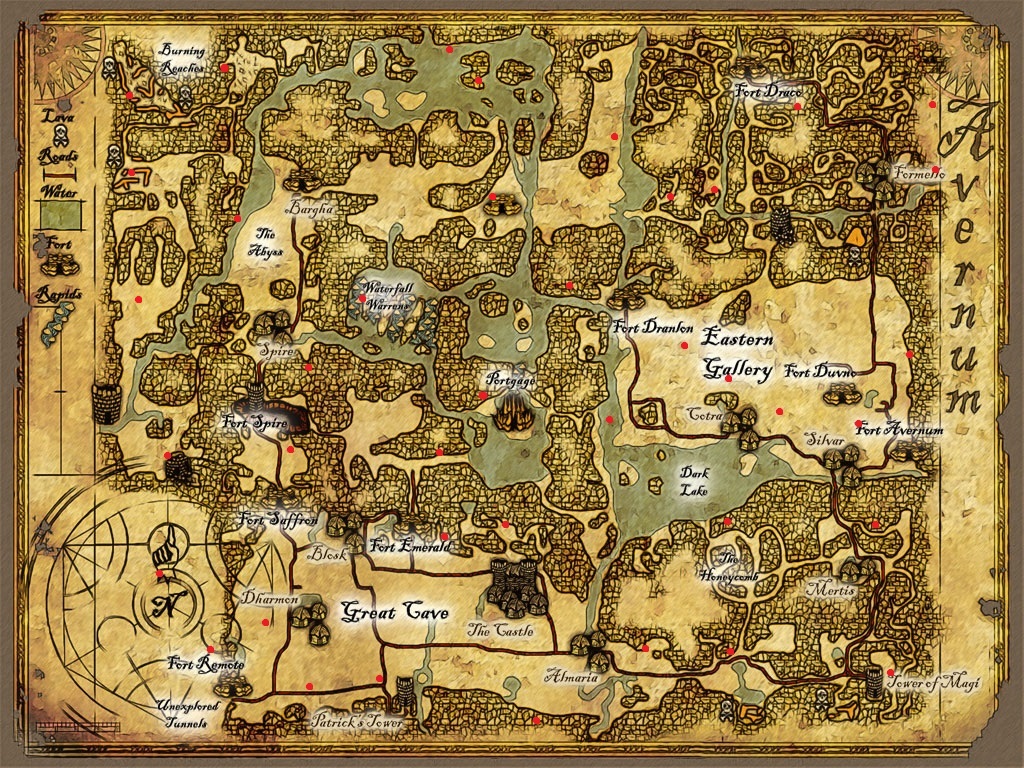
The map of Avernum, with treasure shoveling locations.
Gameplay Tips
Since I have the entirety of the game behind me now, I can also give you some quick tips on character builds, skills, and various other things. The game is not to difficult, so no amount of power play is needed, but for those who prefer to play that way, or even for those who are just slightly interested, the following advice might be helpful.
First of all, don’t worry about class choice if you’re playing on the normal difficulty. As long as you play remotely smart, you’ll do just fine with any class and any reasonable build. It’s only on higher difficulties that this becomes important.
If you prefer to play on the higher difficulties, or if you just want to feel powerful, here are some tips:
- Archer’s are weak. Seriously, ranged classes are the weakest characters, no matter the build. They will be good enough for normal, but you should probably not be taking them on hard unless you want a bigger challenge.
- Two melee and two spellcasters is the way to go. Spellcasters are by far the more powerful, but with more than two, you might have trouble getting enough money to learn all the important spells.
- Dual wield is better than a two handed weapon or a sword and shield combination. You will do more damage and you won’t lose so much on defence that it becomes a handicap. Likewise, melee weapons are superior to spears and ranged weapons.
- Teach some basic healing spells to one of your melee characters. It can help a lot to be able to throw an extra heal every now and then. It’s in no way essential, though.
- Get Adrenaline Rush for everyone. Each of your characters should pickup enough base weapon skills to get this discipline. It seriously boosts the power of your mages and can end most fights before the enemy even has a chance to act. Use training NPCs and items for those couple of extra points.
Skills
There are three different utility skills in game, which allow you to find more items, learn spells and get past certain points:
- Tool Use – You need an 8 minimum to actually finish the game. 11 is enough to get all the good and useful items. 13 is needed to escape from a dragon in late game and 14 is needed to get the loot in the final dungeon. I recommend you get to 14 on your first run, to get and see everything, but 11 is enough for all the future runs.
- Cave Lore – This one isn’t really needed at all. It’s required to get the hidden caches and 10 is enough to get all of them. This is why I recommend 10 points on the first run, and no points at all for future runs.
- Arcane Lore – Required to learn spells from books. 12 points is needed to be able to decipher every tome in the game. 10 is more than enough for future runs. Be sure to make use of the feat Sage Lore, which lowers the Arcane Lore requirement by 3 per point invested.
There’s plenty of combat skills in the game, but not all are as effective, so be sure to prioritize increasing the better ones first.
- The Melee Weapons skill is needed for everyone to get Adrenaline Rush, but especially needed for your fighters. However, you can learn two levels of each other weapon skill (Spear, Bow, Missile) at a trainer, so there is no need to invest more than 10 points here.
- Likewise, the Bow skill is needed by your archer, if you really want to use one. While both archers and missile weapon specialists are weak, bows are slightly better than missile weapons. I still recommend not using an archer, though.
- Hardiness should probably be maxed out for most characters by the end of the game. Fighters should do it sooner, of course.
- Increase Parry last, only if you have maxed out all of your other skills.
- For offensive skills, Blademaster is strongest, followed by Lethal Blow and Dual Wielding. Increase them in that order.
As for magic skills, you won’t have as many here, but for those you do, max all of them out.
- Mage Spells should go to 17 in order to get all the important ones. Priest Spells should go to 6-16, depending on which spells you would like. Of course, you should get them higher on first run, in order to be able to get the achievements.
- Spellcraft should be maxed out soon. Put points into it while still increasing your Mage/Priest Spells skill.
- Resistance is almost as good as Hardiness, so everyone should max it out eventually.
Traits
There are many different traits/feats available, but most are not worth taking. The notable ones are Improved Strength, Ambidextrous, Mighty Blows and Dual Blade Mastery for your fighters. You should probably prioritize taking all of those. For your magic users, get some Sage Lore, but prioritize Improved Intelligence. Your mages especially should get Elemental Focus, which is even better than Spellcraft.
Everyone should take a point in Negotiator as soon as it’s available (at level 8, I believe). This improves your income significantly. A good idea for power gamers would be to delay selling anything until level 8. As for other utility traits, Negotiator can be useful, but not much else. Good, Robust and Perfect Health traits are a must for all your characters.
Avernum: Escape From the Pit [12] – Black Spire and Hawthorne
I entered the Black Spire fortress and started with the procedure. I used the Royal Seal on the north wall, which removed the trap on the switches, but also summoned a bunch of demons. After the fight, I turned the wheel and the way through the first tower was open. At the second tower, I had the option the remove the barriers using the ritual Koth taught me, but I decided to fight instead. It was a tough battle against two very powerful eye beasts, but I managed to defeat them. The second tower was clear as well.
The entrance to Black Spire. This is where the final mission begins.
I continued through the passages, fighting several hosts of demons along the way and avoiding various traps. Eventually, I’ve reached the augmenter and summoned Erika. She used the brooches I collected and activated the portal. I stepped through it and I was at the Royal spire, with alarms activating all around me.
I fought my way through the halls, climbing up the spire towards the royal chambers. After every step, there were more and more royal guards running after me. Eventually, I got to the chambers of the royal wizard. I fought him and his lackeys, but once he realised I could kill him, he stepped aside, agreeing it might really be time for the crazed king to die. I rushed on to the royal throne room and found the king there, behind an unbreakable shield and guarded by several sentinels. No matter how hard I would hit him the shield would block my every attack, so I started focusing on the sentinels instead. This was also in vain, as every time a sentinel would almost be destroyed, Hawthorne would use his shield to restore it completely. However, each time he would do this, his shield would noticeably weaken.
The End!
After several rounds of this, Hawthorne’s shield completely dissipated and my archer shot a single arrow at him. It was enough to kill him outright. His sentinels shattered instantly upon his death and his guards started running away in a panic. The portal in his room changed colour and I decided to try my luck and enter it. I made the right choice, as it brought me back to the augmenter, with Erika waiting for me. My mission was finally over.
Avernum: Escape From the Pit [11] – Finding the Surface
With my mission complete, it was time to focus on the tasks of killing emperor Hawthorne and finding a way to leave the caves. For this, I had to go to the Abyss, to Spire. I already had the Onyx Scepter, but I still needed the Silver Circlet and I remembered the mayor of Spire has a circlet she treasures greatly. I talked to some shady guy there who had a beef with the mayor, and he told me how to get the circlet.
I took great pleasure in killing Sulfras, though I reloaded the game after I won.
With both the circlet and the sceptre, I returned to Sulfras. As promised before, I decided to try and kill him first. He was much, much tougher than Pyrog, but as he died, he whispered something, making me think he was important later somehow, so I decided to reload my game. I took a screenshot with me killing him anyway, just so it’s official. I gave him the sceptre and the circlet, and the way was open for me.
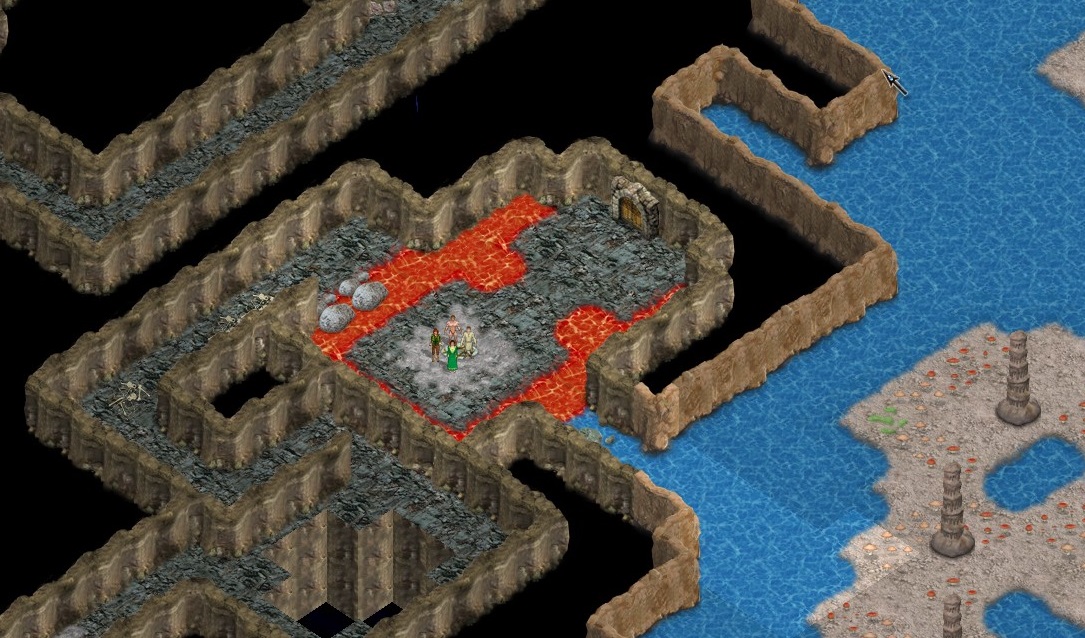
After a series of long passages, I’ve finally reached some sort of facility filled with strange looking giant creatures. Room after room, I was faced with different physical and mental challenges, but eventually, I’ve reached the end of it and then I saw it. Grass! Light! The Sun! I’ve found an exit to the surface. I’ve spent a few hours wandering around and exploring, but then I returned. My job was not yet done. The emperor is still alive. The way out is here now, and it won’t go away anytime soon.
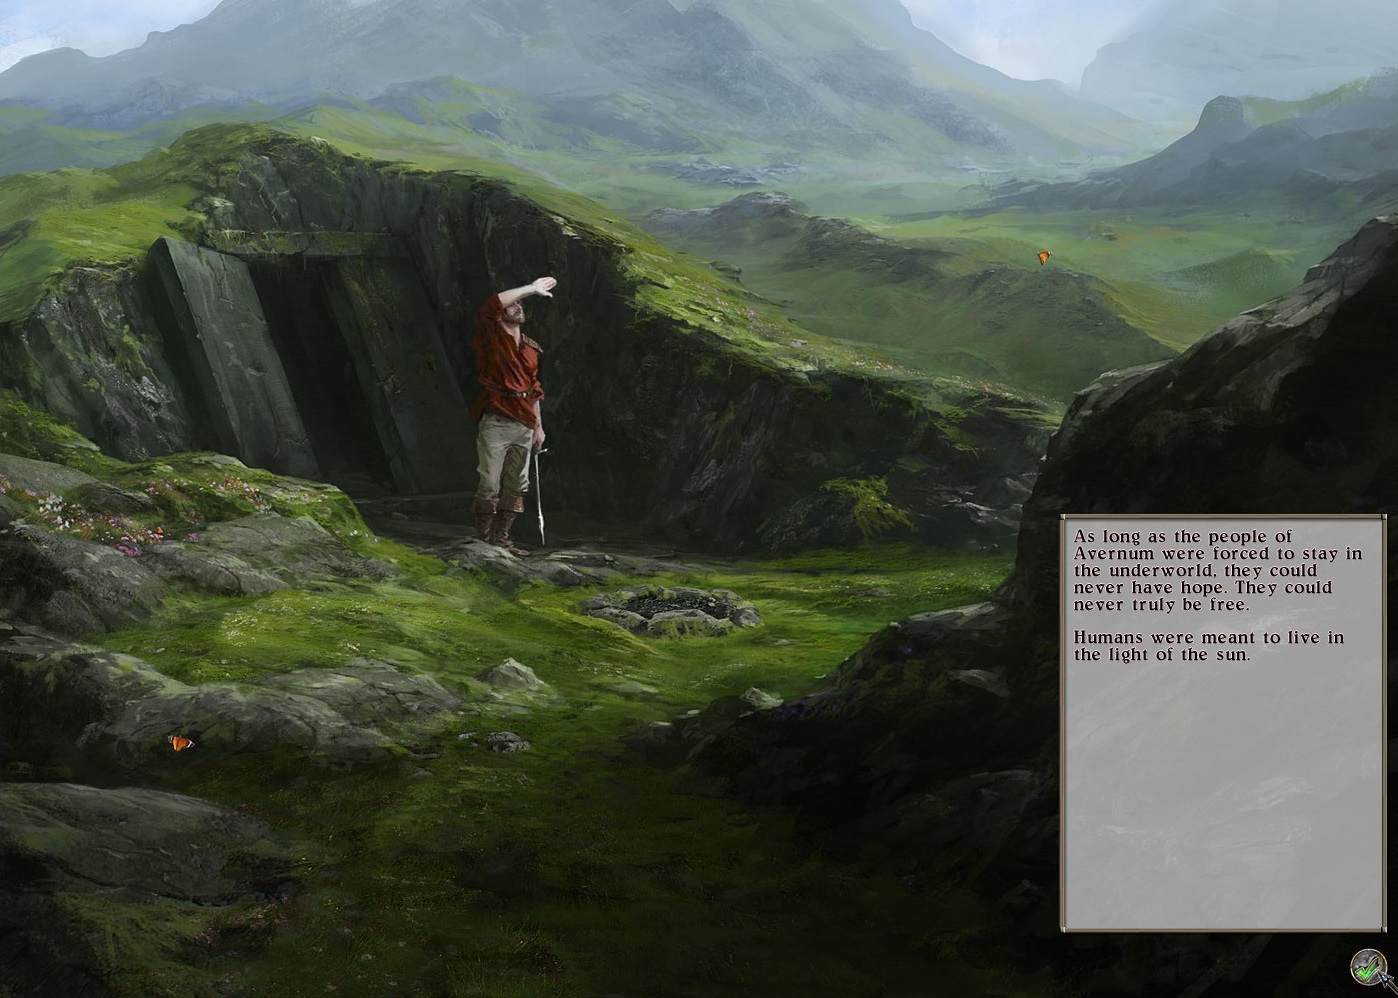
This scene of finding the exit is by far my favorite illustration in Avernum: Escape From the Pit.
I returned to Erika and told her of my discovery. Now it was time to kill Hawthorne. To do this, I needed to find Aydin, so I returned to the northern waters. I kept thinking about that imperial tower with the trap, so I decided to go back there. Upon some exploration, I realized it was possible to get through the trap by drinking from a magical pond nearby. As it turns out, it wasn’t an imperial tower at all. It belonged to Aydin. As it turns out, he was an imperial mage, but got exiled. Even worse, the Empire want’s him dead, so they are constantly sending assassins after him. This is why he wants to help me kill Hawthorne.
Apparently, there is an imperial fort with a teleportation augmenter in the area. Using the right rituals, and with the help of a mage casting the spell, it could be possible for me to teleport anywhere, including Hawthorne’s chambers. The problem is, the augmenter is guarded by two towers. One of them was warded by the dragon Koth, though he might not have issues with removing the word, now that I’ve returned his scroll. The other contains a magical trap which requires a Royal Seal of the Empire to disable. There was a seal that came with the First Expedition, so Rone might know something about that.
Koth was nearby, so I went to visit him immediately. He was more than willing to teach me the ritual which removes his wards, after what I did for him. With that out of the way, I returned to Erika to update her on the matters. She told me that, apart from the Royal Seal, I would still need four out of five magical brooches belonging to the First Expedition. They are required to recalibrate the augmenter, in order for me to be sent close to Hawthorne upon use. Luckily, I already found four of those on my travels. However, it would be optimal to get all of them, so that’s what I’m going to do. According to Erika’s notes, the last one should be in Pyrog’s lair, so I must have missed it somehow.
I like Pyrog far more than Sulfras
I went to the castle to speak to Rone. He told me the First Expedition seal should be in Akhronath, the shattered fort west of the Tower of Magi. Patrick already told me how to access the back chambers of the fort as a token of gratitude for helping his wife, so I went there directly. I soon found the seal in one of the back rooms, guarded by a host of demons. With the seal in my possession, all I needed were the two brooches. I returned to Pyrog’s lair and soon realized I missed a hidden switch on my previous visit. It revealed a room where the brooch was kept, guarded by a bound haakai demon. With this, I had everything I needed to complete my mission. I wasn’t ready just yet, though. I still had to decide what to do with the Freehold of Kyass.
I decided to let them be. True, resources are limited. True, unity would be preferable. True, they Kyass might have secret intentions, but the fact remains – the Freeholds has done absolutely nothing wrong yet. Instead of eradicating them, I helped them with their various recruitment tasks and then left them to themselves. There was just one last thing for me to do. I went to the Lost Bahssikava colony and descended to the depths, to find their lost expedition. I soon found most of them dead, but their warrior was still alive. He said their singing stone was lost and the way to it was barred by a lock. I’ve soon found what he was talking about and figured out the lock requires 6 triangular objects. The first three, I already had, while the last three were on an altar nearby. After getting those, and fighting some undead guardians, I’ve found the gate to the depths the Slithzerikai were banished from. It was still locked, and a voice said they have yet to redeem themselves. With the key in my hands, I opened the passage to the singing stone and brought it back to the colony.
It was now time to kill Hawthorne.
Avernum: Escape From the Pit [10] – Grah-Hoth
I got stuck for a while, trying to find a water route to the northwestern caverns with one of my boats, but then I remembered a locked gate near the giant’s castle. As expected, the key I got within the castle unlocked the gate and opened a way to the castle docks, where two new boats were waiting for me. I started exploring the new area and very soon found the sage who was in possession of the last piece of the password.
Slowly continuing to the west, exploring every possible area, I’ve stumbled into a hidden tower with the only approachable way blocked by an energy barrier. I tried passing through it, but I died instantly. Thankfully, the game saved automatically just before I made this completely uncalculated choice.
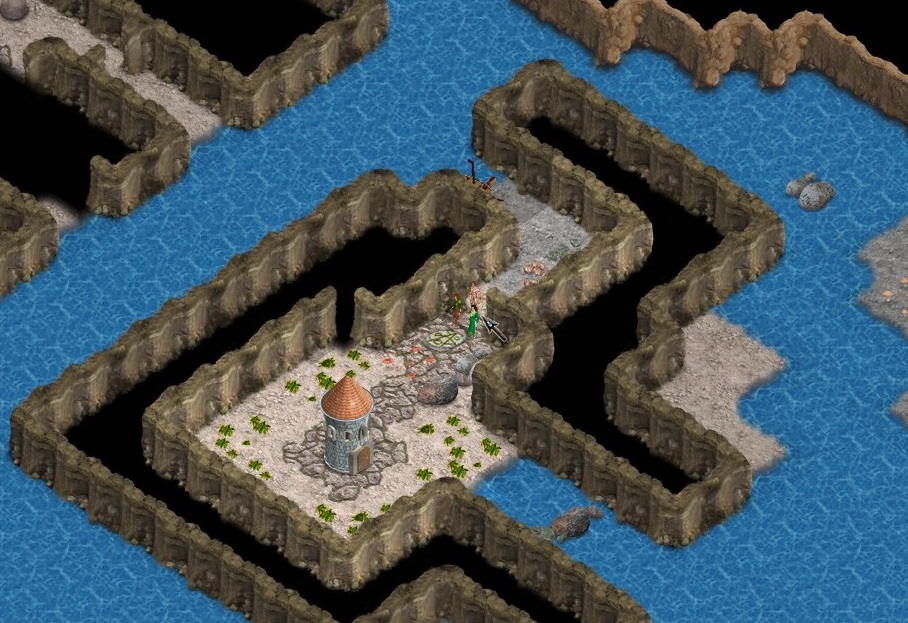
I never got this far in the original Exile or Avernum, so I have no idea if some of these locations are actually new or not.
Other than that, the exploration was rather uneventful, with only a bunch of minor encounters and nothing of real importance. As I was approaching the abyss, I again stumbled into a concealed Imperial base called the Black Spire. I explored what I could of it, but parts were inaccessible or hidden behind impassable traps. From what I could tell from the documents I’ve found there, the fort is used as a protection for the Empire. What kind of protection and from what, I have no idea.
Eventually, I’ve sailed my boat all the way back to Erika’s tower. The problem is, I’ve never found the man she wanted me to find. I either didn’t look well enough, or there was some sort of a misunderstanding.
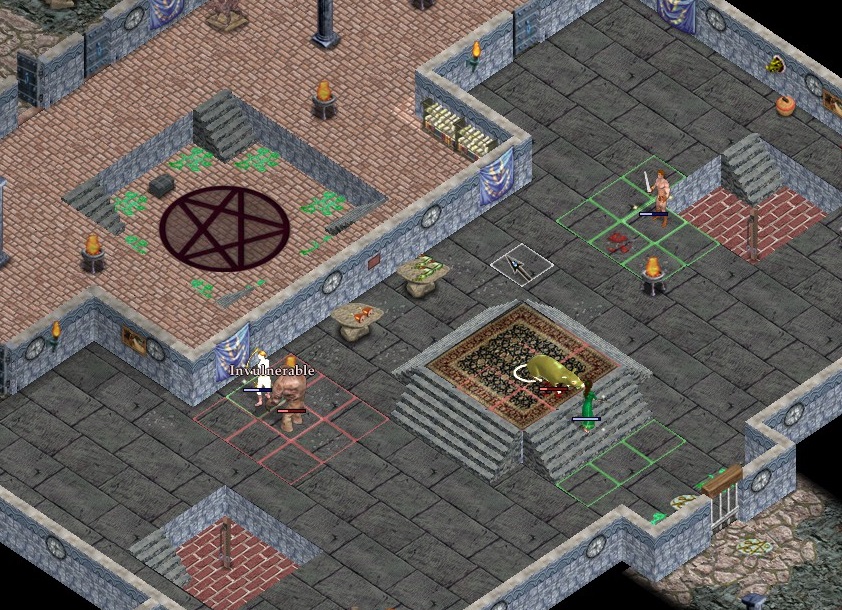
I decided to clear out my quest log for a bit, so I started roaming around Avernum finishing up minor tasks. Once the log started to look decent, it was time to go have some fun with Grah-Hoth. I spoke to Rone, the castle mage, who told me the demon is trapped in a bottle, in his fortress. In order to kill him, I have to first free him and I need a blessed athame to do that. If there is one in Avernum, someone at the Tower of Magi should know about it. The tower has its own problems, though. It seems that Linda has an unhealthy infatuation with demons and is keeping a haakai lord captive at the tower. Since Solberg, the responsible member of the Triad is away, this could be a problem. Luckily, Solberg left a message embedded in a crystal in a cavern nearby, saying if there’s any trouble, to contact him at his tower near Formello.
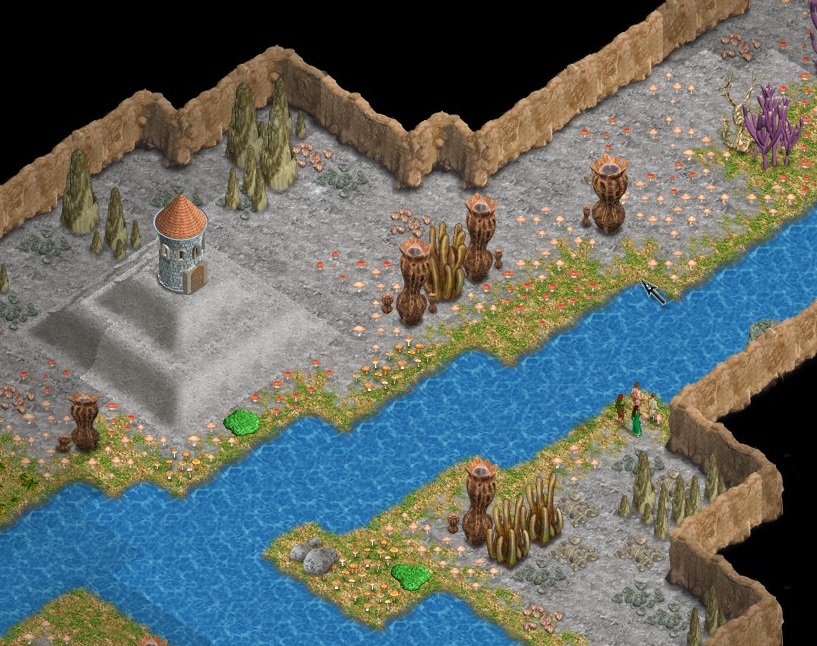
The story took me back to Erika’s tower on several occasions.
I’ve already been at Solberg’s tower before, but I needed a password to get in. Now that I had it, that wasn’t an issue anymore. Solberg explained what was going on. The mages at the tower are being slightly power hungry. They want the haakai lord to lead them as a chieftain. Of course, dealing with demons never ends well, so this needs to be stopped. He gave me a key I needed to access the place where the haakai is held and sent me on my way. I returned to the tower of magi and started going through the central, yet unexplored area.
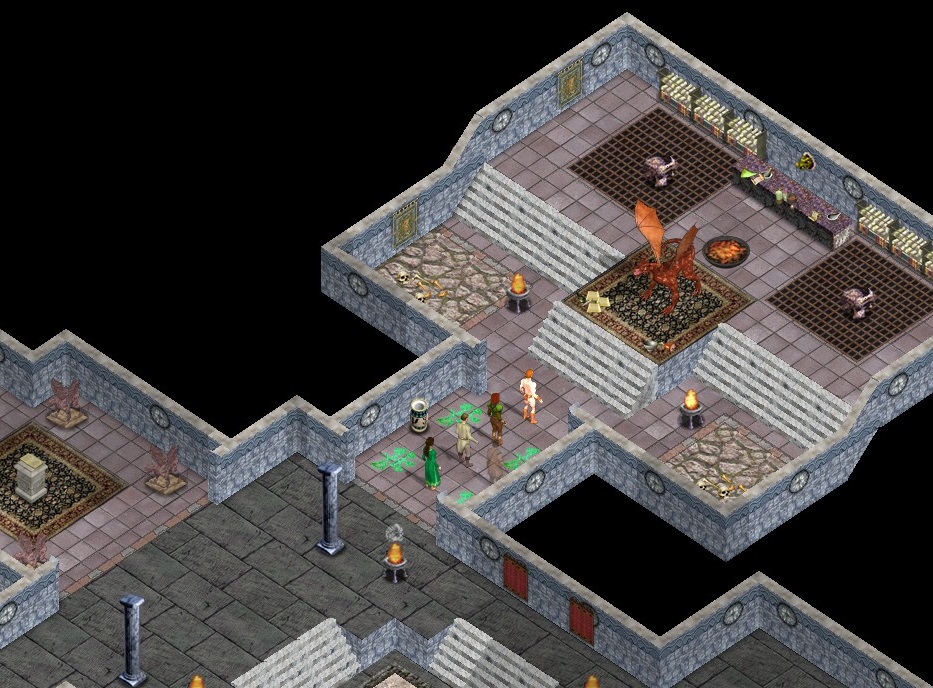
The place was filled with minor and greater demons. Speaking to one of them revealed the trapped haakai lord is Adze-Haakai. In a room nearby, after killing a couple of demons, I’ve found the Blessed Athame. Adze-Haakai was on the top floor, waiting for me with the Onyx Sceptre next to him. Mostly in thanks to Demonslayer, he wasn’t impossible to deal with. The battle lasted a long time, but I emerged victorious. I’ve reported the events to Linda and, as expected, she wasn’t very happy about it. With the Athame in hand, it was time to go to Skarragath, to free Grah-Hoth so I could kill him.
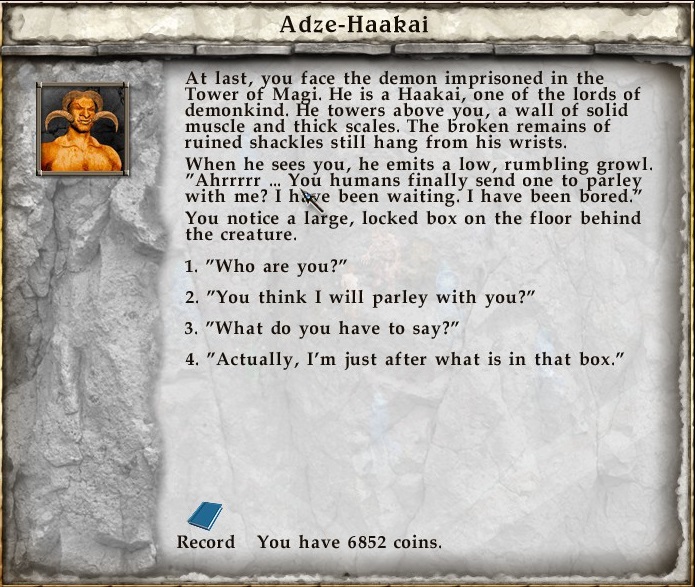
The Haakai are the highest cast of demons in the world of Avernum.
Skarragath was southeast of Erika’s tower. In order to gain access to it, I had to open the gate at the guard post before it. When I did that, the defences activated, causing a host of undead guardians to attack me. Once that fight was over, Grah-Hoth prison was open for me. I went there and used the Athame on the vessel containing the demon. There was an explosion, and he was free. Now it was time to find him in his fort and kill him.
His fortress was to the north. I had a hard time even getting to it, fighting host after host of demons. Eventually, I got to the entrance, where I killed one of the demon king’s lieutenants. I got a key from its body, which allowed me to enter through the service gate. It seems Grah-Hoth’s imp slaves really dislike him, because they’ve pointed me in the direction of a secret passage to the inner area.
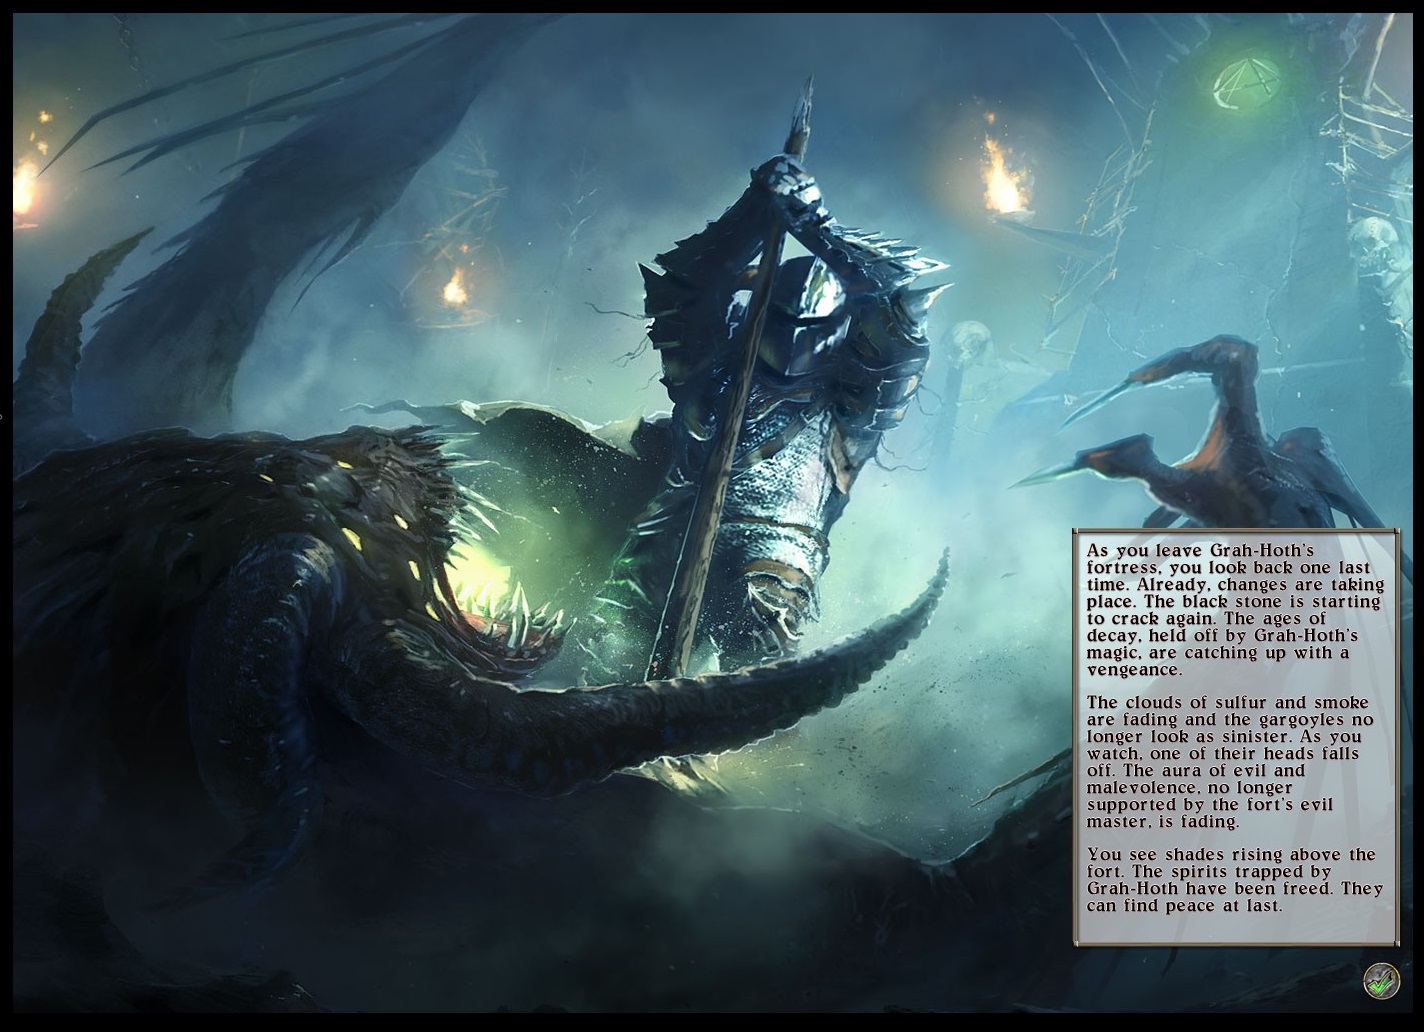
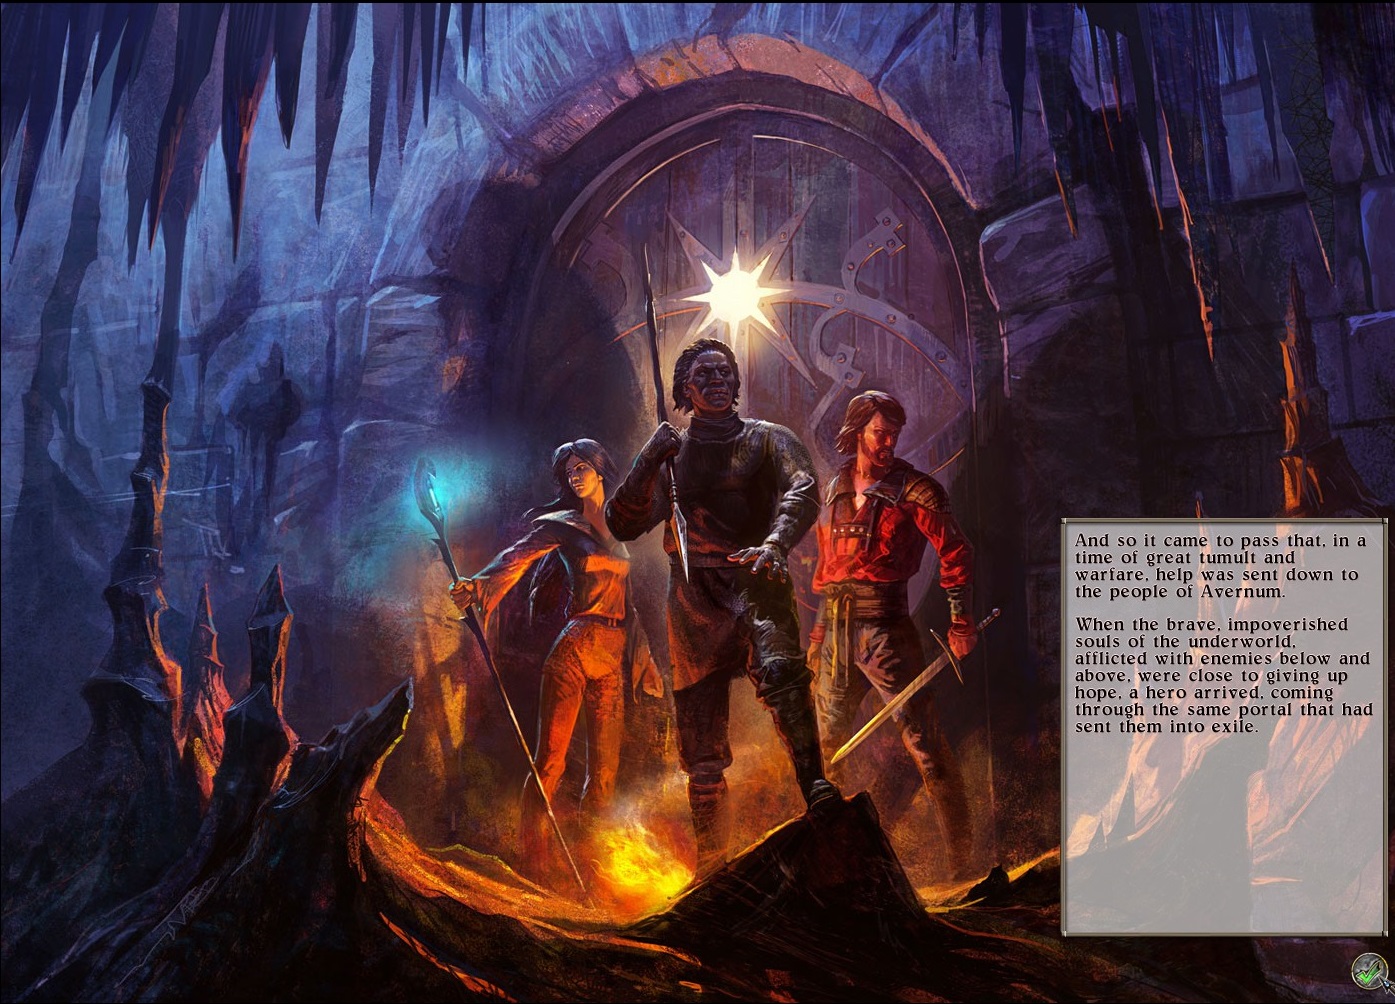
I quite like these textual “cutscenes”. They introduced them in Avadon, I believe. It’s a pretty effective, while still cheap way to tell the story.
After a long series of battles with tough demons, I’ve finally found Grah-Hoth’s throne room. He started summoning waves of demons and undead, but I kept my focus on bringing him down. Eventually, thanks to Demonslayer and some powerful spells, he fell and it was over. I’ve gathered all of his treasures and left the fortress. King Micah was pleased that this great threat to Avernum is finally gone for good.
Avernum: Escape From the Pit [9] – Tomb of Drath
I had the choice of giving the spellbook from the dragon’s lair to either Avernum, the imperial agent under Formello, or to a sage in Kyass. I picked Avernum and was immediately given another task, to find another spell book in the tomb of Drath. I was already there earlier, so I remembered I needed a key from Mothrax’ lair. He was willing to give it to me, so that part was over quickly. I also visited Erika to ask her for one part of the password for the exit from the caverns. She gave it to me willingly, and also listed a few powerful denizens of Avernum, who might hold the other pieces. Patrick had one piece, and the dragon Athron had another. The last part should be in the possession of the dragon Koth, or a sage to the north, both of whom I haven’t met yet.
With all of this done, I went back to the tomb of Drath. I didn’t remember the location correctly, so I took a wrong turn and ended up near the aranea cave. This turned out well, because I managed to kill the aranea queen, which got me a very nice shield for my archer. I also eradicated a village of giants nearby. Among the rubble, I’ve found a bow belonging to the First Expedition.
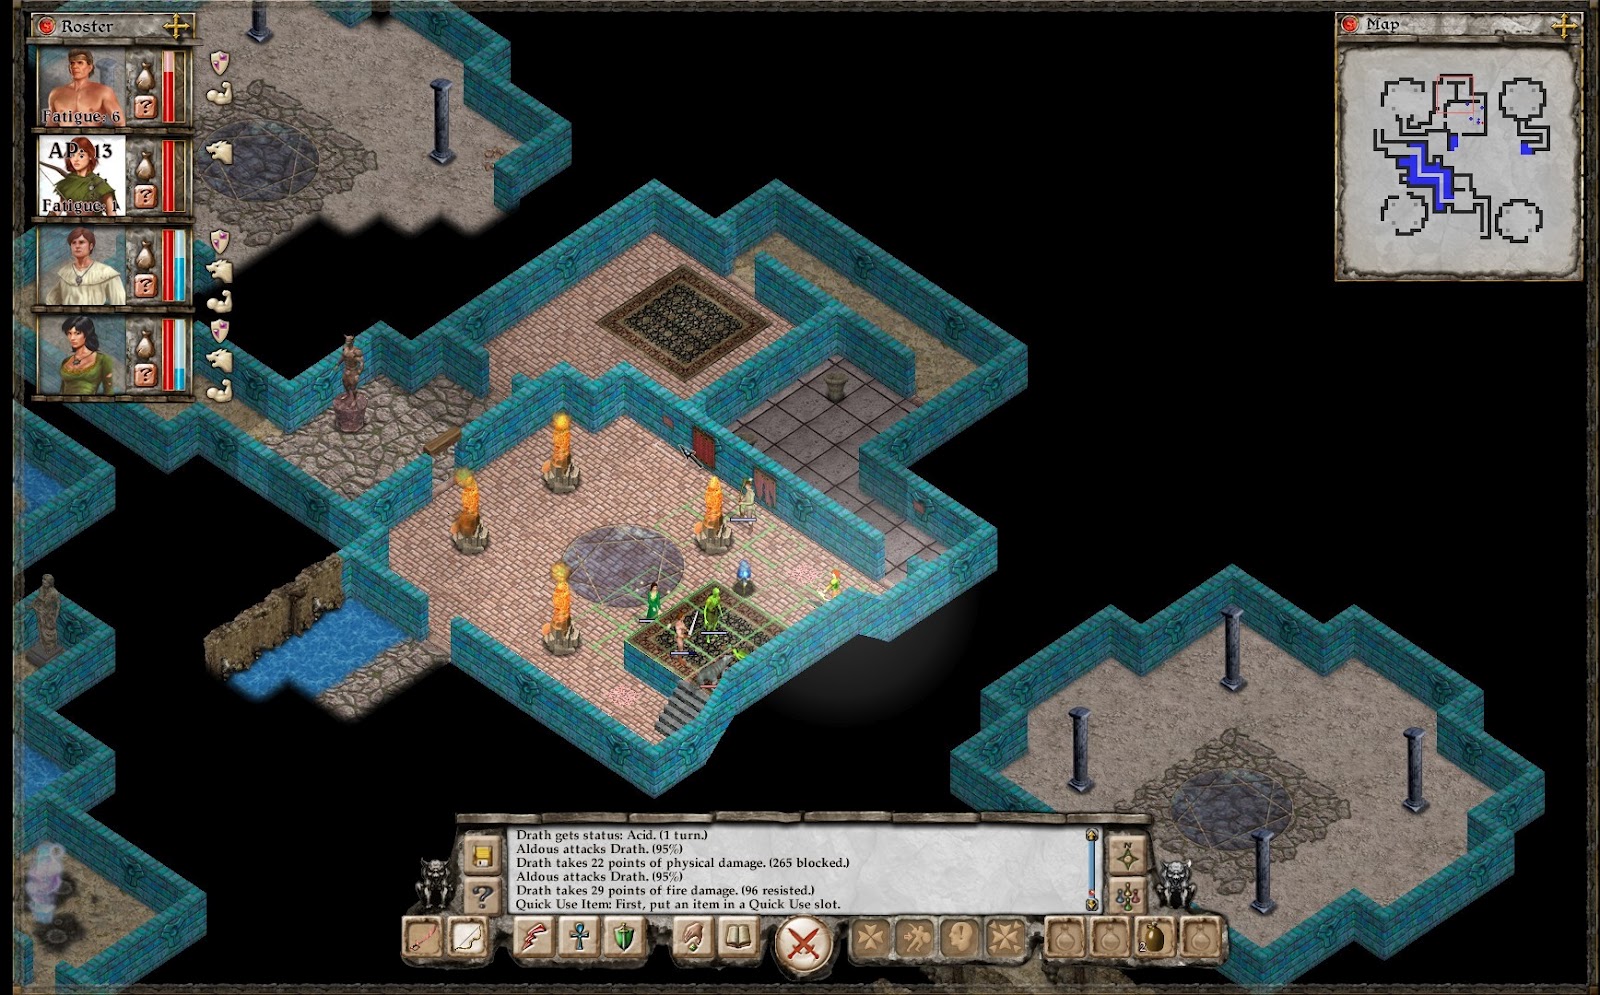
The layout of the room usually warns you of impending doom.
Drath wasn’t difficult to dispose of, but he had plenty of health, so the fight lasted a while. I was even given the opportunity to let him escape, but I don’t have any mercy for the undead, so he died soon after. He left me the Robe of the Magi, which I believe is another item from the First Expedition, and in his coffin, I’ve found the last piece of the Demonslayer. I immediately went to Draco to restore it and now I’m holding the most powerful sword in the game.
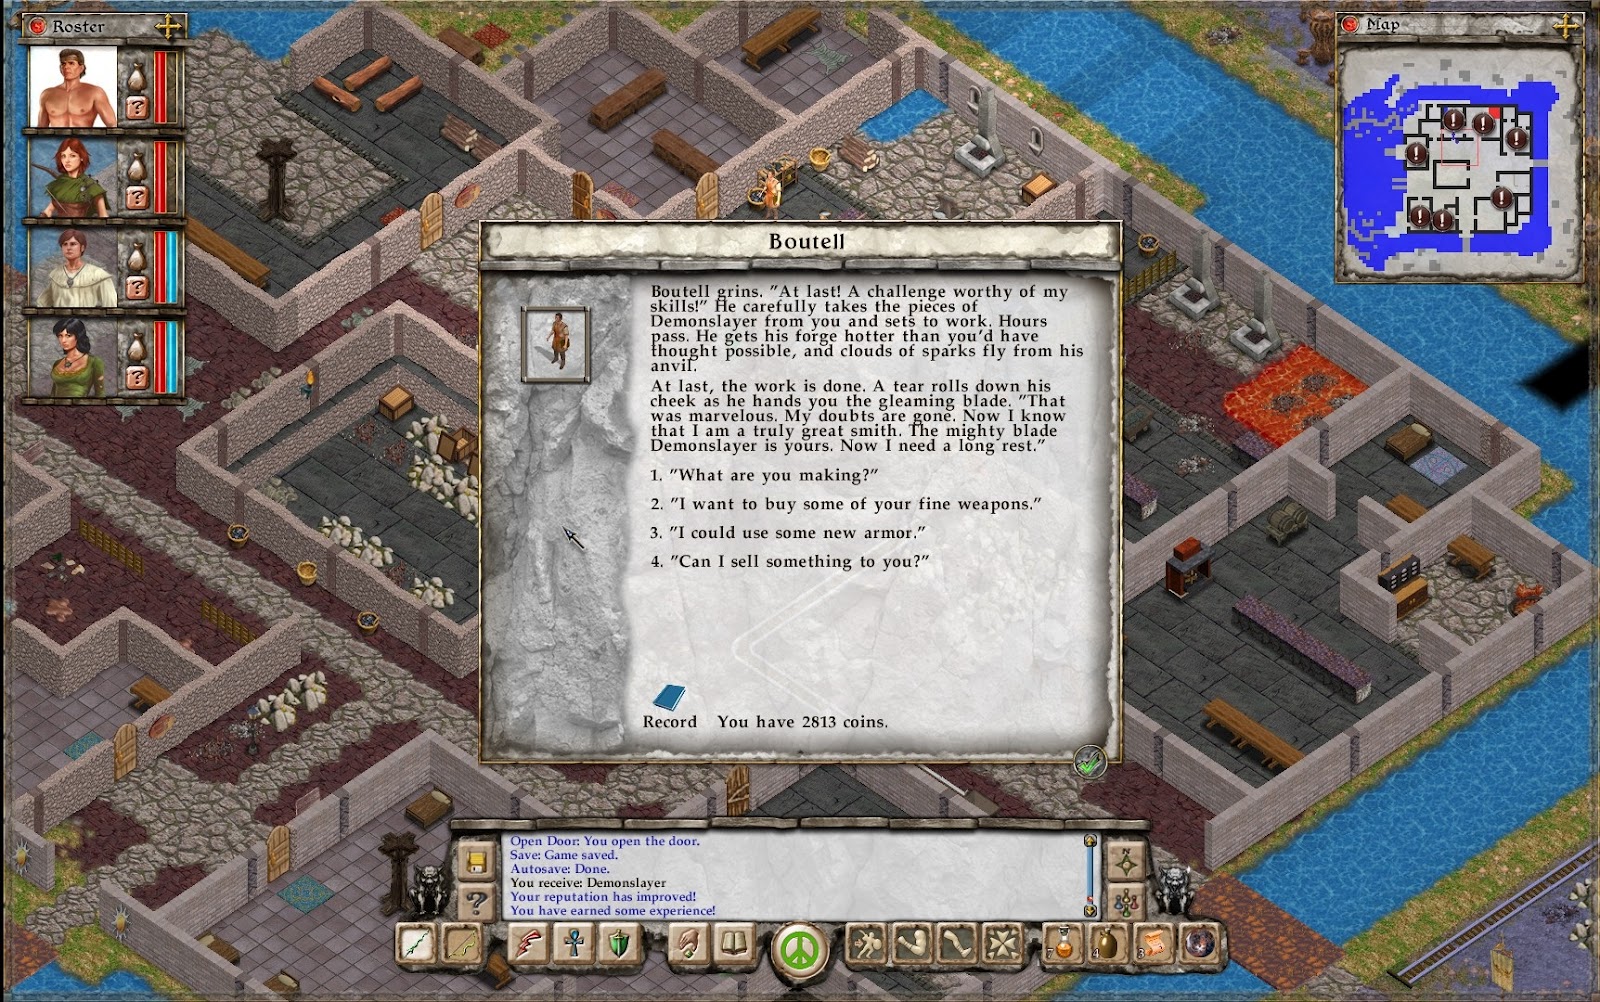
The Demonslayer is one of the legendary artifacts, known even back in the Exile series.
With the sword in hand, I returned to further explore the area near Erika’s tower. There was a ruined fort there built by the Empire. Among the rubble, I’ve found the commanders log, describing how they stole a scroll from a dragon’s lair to the north. They transferred the scroll to a base in the east, but the dragon came and destroyed everything. I assumed they were talking about Koth and the scroll I already recovered from the chasm fort.
Near the ruined fort, I’ve found a mysterious cavern blocked by barriers. A set of runes at the entrance indicated it was a Vahnatai crypt. It seems the Vahnatai aren’t really extinct, as it has been several times now that they have been described as “sleeping”. I’m not sure if I’ll encounter any that are awake, but they seem like an interesting race.
One advantage of remakes is that you can reference things from the future. The Vahnatai were not mentioned in the original Exile, since they were only added in Exile II.
Pretty soon, I’ve found Koth’s lair and returned him the scroll. He didn’t give me anything for it, but I’m hoping it will pay out later. I also asked him about the final piece of the password, but he said he didn’t know. I guess the sage on the northern islands has it. I’ve also found a tome which taught me the third level of the Dispel Barrier spell, so it was time for some backtracking, as I’ve encountered unbreakable barriers several times already.