Legend of Zelda: Link's Awakening - Cover, Box Art

Key Cavern, the third dungeon of Link’s Awakening, was definitely a big jump in difficulty compared to the first two. I started dying on a regular basis here, mostly because some of the enemies started doing larger amounts of damage, compared to the half hearts I was losing up to now.

Zelda - Link's Awakening DX  - Bomb Enemies

These Bomb Enemies are annoying. Once hit, they bounce around the room and explode.

Even so, I somehow managed to get both the map and the compass, though I only got the compass when I already explored most of the dungeon. The focus of the dungeon was getting four keys in order to gain access to the boss area. The boss area was a separate area of the dungeon, connected with the main area by a side scrolling part, hidden behind a total of four lock blocks. Basically, it was all about getting keys. I needed to get one key to enter a room with another key, etc., until I got into a series of rooms where I could get more than key at a time.

Mini-Boss: Dodongo Snakes

Zelda - Link's Awakening DX  - Dodongo Snakes

It’s easy to waste bombs in the Dodongo Snakes battle, but if you waste more than two, you lose.

The mini-boss was a pair of worms that swallow bombs, so that was the only way to kill them. The difficulty there was that I could only carry ten bombs at a time, and I needed 8 in total to kill both of them. They love to change movement directions, so it was easy to waste a bomb. After several attempts, I managed to do it with one bomb left. This got me one more key and I was finally able to enter the room with the item of the dungeon – the Pegasus Boots.

Item: Pegasus Boots

The Pegasus Boots allow link to dash, which allows him to kill some enemies more easily, break through some objects, such as those green crystal pillars, and when combined with the Rock Feather, jump greater distances. The last ability was the crucial to get the Nightmare Key and eventually, get to the boss room.

Zelda - Link's Awakening DX  - Pegasus Boots

Pegasus Boots were key in getting the last key!

Boss: Slime Eyes

The Key Cavern boss was a giant blob with an eye in the middle. It was actually easy, compared to the rest of the dungeon and the Bottle Grotto’s boss. In the first phase, I had to dash into it until I managed to split it in two. On each hit, Link gets knocked back, so the difficult part was staying on top of the boss and dashing into him before he recovered.

Zelda - Link's Awakening DX  - Slime Eyes

The Slime Eyes were actually easy, considering how hard the dungeon was.

Once the first phase was over, I just had to kill each of the two halves. The key here was not to spam-attack both of them, because then both would jump into the air, jump back down, stun Link and then damage him. Focusing on one at a time on my second attempt made the second phase extremely easy and the fight was one.

Zelda - Link's Awakening DX  - Switch Room

This room is easy to clear, it’s close to some stairs, and it contains a heart or two. Great for healing!

I got another heart container and another instrument – a Bell. Now, it was time to explore the world with my new dashing ability. I already have a couple of locations in mind. The Key Cavern is done for.


Legend of Zelda: Link's Awakening - Cover, Box Art

I was hoping to write one posting per dungeon, but either my time isn’t as free as I thought, or the game is longer than I expected. This time, I only got access to the Key Cavern, which is the third dungeon in Link’s Awakening, but I didn’t get a chance to get in yet.

Exploration

When I got out of the Bottle Grotto, I started to explore again, what with having the Power Glove and all. First, I got all the way north and actually found the Wind Fish egg. I hope no one spoils this for me, but I’m gonna say it – I think the Wind Fish might actually be a bird. Look how smart I am!

Zelda - Link's Awakening - Secret Seashell

I found quite a lot of these.

After that, I used the glove to get the heart piece from that cave in the woods I mentioned in my first article. This was apparently my fourth heart piece, so I got an extra heart container. The thing is, I can account for only three. I know I got one from the well in the village, as well as the one surrounded by chasms right next to the Mysterious Woods. This is obviously the fourth one, but I can’t remember where I got the third.

I got back to the village and gave Bow Bow back to Madam Meow Meow. She gave Link a kiss and that was about it. This means I won’t be entering the Bottle Grotto in any foreseeable future, since I need Bow Bow to clear the way.

Zelda - Link's Awakening DX - Key Cavern Entrance

Finding the entrance was easy. The key? Not so much.

During the exploration, I came back to the two bomb rooms (the one on the beach and the one in Tail Cave) and opened up a chest behind a green skull in the Mysterious Woods. This got me three extra secret seashells. At this point, I had four, but I had no idea what the seashells are for, except that it’s for something good. This will change soon.

Find Richard in the Southeast

I spoke to everyone in the village and they told me to go and find Richard, who’s living in a house southeast of the village. This seemed important, so it gets a note.

  • See Richard, Southeast of the Village

On the way southeast, I stopped by at Sale’s again. He told me about a raft in Tal Tal Heights. I have no idea where Tal Tal Heights are, but that’s another note.

Zelda - Link's Awakening DX - Sale

This is Sale, by the way.

  • There’s a raft in Tal Tal Heights

This is a bit blurry, but I think I went in the wrong direction to find Richard. The route past Sale’s was a dead end, so I went back to the village and headed east, for the Savannah first. I found another seashell while exploring and then found the Seashell Manor. In there, I was finally told what the seashells are for – if I get enough of them, I get a sword.

Zelda - Link's Awakening DX - Seashell Manor

It doesn’t really look like a manor, but that’s what it’s called – the Seashell Manor.

The Castle and Richard

I finally got to a castle, but the gates were closed. On the eastern side, I found a monkey who wanted some bananas. Luckily, I had some from the start of the game and gave them to the monkey. He called in his friends, and they created a bridge for me, so I now had access to more areas. They also left behind a stick, which I picked up.

Zelda - Link's Awakening DX - Monkey

So the bananas were meant for a monkey, just not the one on the coconut tree.

I couldn’t do much about the castle, so I kept exploring and finally found Richard. It turns out I did this the other way around. I was supposed to find Richard first, because he hinted at the monkey and asked me to find him five golden leaves scattered around the castle, so he would give me the key to the Key Cave – the next dungeon.

Zelda - Link's Awakening DX - Richard

A good guy would just give me the key. I don’t trust Richard.

I got back to the castle and started exploring it this time. I found four of the five leaves easily, with some being given to me by dead enemies, some hidden in the walls of the mini-dungeon and other more or less obvious places. The last one gave me trouble, not because I couldn’t find it, but because it took some skill to get it.

The Five Leaves and the Crow

The western courtyard of the castle had a crow on top of a tree. There was no way for me to hit it with a sword while it was stationary, so I had to use a bomb. As soon as I did, it would fly across the screen and disappear. I knew I had to kill it somehow, because it was the last enemy I wasn’t able to kill at the castle.

Zelda - Link's Awakening DX - Secret Stairs

Did I mention I got the shovel?

I first thought there was some trick, but as it turns out, I just had to be good enough. I threw a bomb at the tree, which caused the crow to trigger and then I hit it twice with my sword before it got away. That was enough to get the last leaf.

Zelda - Link's Awakening DX - Slime Key

Richard didn’t outright give me the key for the leaves. He just told me where it was.

I gave the five leaves to Richard and got the key. I went and used the key at the dungeon entrance, but I actually had to go the long way around to reach the door from the key lock. I even managed to go in the wrong direction one more time and go all the way back, before I finally entered the dungeon. On the plus side, I found a bee hive as well as another seashell.

  • There’s a bee hive close to the Key Cavern dungeon

Next up, I’ll get through the dungeon.


Legend of Zelda: Link's Awakening - Cover, Box Art

I’ve noticed Link’s Awakening is a bit less formulaic compared to the original Legend of Zelda and A Link to the Past. I got out of the dungeon, with the owl immediately telling me the swamp is my next goal and as I got back to the village, I was told there was a moblin attack. The game pointed me in the direction of madam Meow Meow, where I wound out they took her dog.

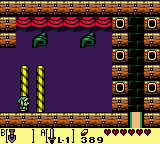
Before I forget this, I took a note of something in the Tail Cave

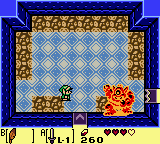
  • There’s a bomb-able wall in one of the rooms in the Tail Cave dungeon

Rescuing Madam Meow Meow’s Dog

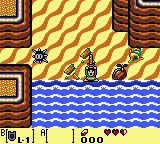
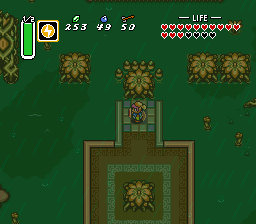
In any case, again, various hints within the game told me I can find the moblin lair somewhere in the highlands. I made the mistake of going straight for the swamp, though, so I spent some time looking for the place. With my new jumping ability, I found some chests with rupies, so I was getting close to buying the shovel from the village shop, but I couldn’t find the moblin lair anywhere.

Where is the Moblin Dungeon in Link’s Awakening?

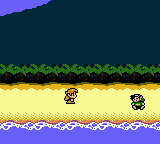
I decided to go back to the village and start looking from the start again. This turned out to be a good idea. I found there’s a chasm I can jump over on the screen with the witch’s hut and that was finally the route I needed to take. The moblin cave was a few screen’s after that.

Zelda - Link's Awakening DX - Moblin King

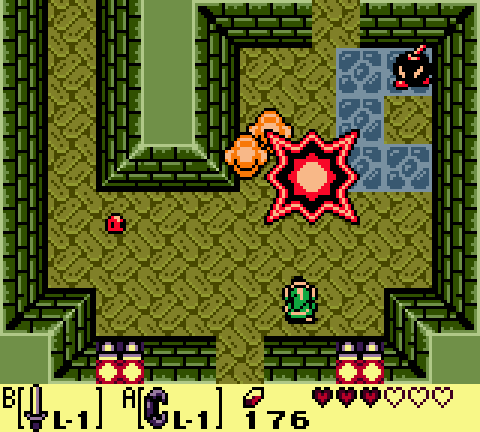
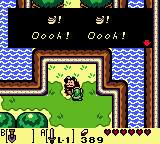
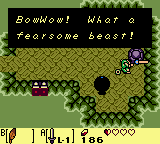
Yes, I must be an assassin. The magic acorn I got in the previous room helped with this boss fight.

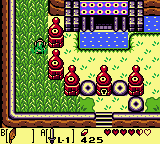
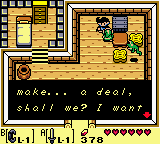
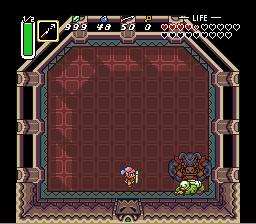
The moblin lair was basically a smaller dungeon, with a couple of rooms where I needed to defeat all the enemies and a mini-boss in the final room. The boss was easy to defeat, but I’m not used to following patterns and playing carefully (to few games these days ask for this), so I managed to lose on my first try. The trick was to just dodge the boss until it crashes the wall and then hit him once. Doing this a couple of times was enough to defeat him.

Exploration

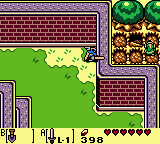
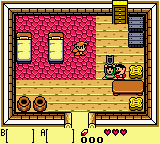
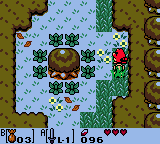
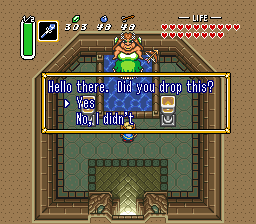
I got madam Meow Meow’s dog and I loved having it with me. It was basically a companion which attacks enemies nearby automatically and can even kill enemies I can’t hurt. This turned out to be the key in entering the next dungeon – Bottle Grotto, but more on that later.

Zelda - Link's Awakening DX - Bow Bow

What a cute puppy!

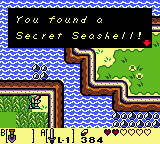
I spent some time exploring and found a few more items. I got another heart container near the area with the witch’s hut, in a very obvious place. I can’t be sure,  but I think I also found another one somewhere nearby. I need to take better notes. I also got several chests with rupies, so I got more than enough for the shovel, but I didn’t buy it yet, mostly because I didn’t get around to going back to the village.

Finally, I got to the next dungeon, the Bottle Grotto. I stumbled into it earlier on, but I couldn’t enter it because it was surrounded by plant enemies I couldn’t hurt (but they sure could hurt me). As I said, the key to entering was the dog. It had no problem devouring the plants and clearing a path.

Link’s Awakening Dungeon #2 – The Bottle Grotto

The Bottle Grotto was definitely harder than the Tail Cave. The layout was circular, with two basic paths I could explore. The left path was shorter, required a key and took me to the room with the Owl Beak.

Owl Beak, you ask? I forgot to mention this in my previous posting, but some of the rooms int he dungeons have beakless Owl statues. Finding the beak gives Link the ability to get hints from the statues, which was extremely helpful in the Bottle Grotto.

Zelda - Link's Awakening DX - Cyclops

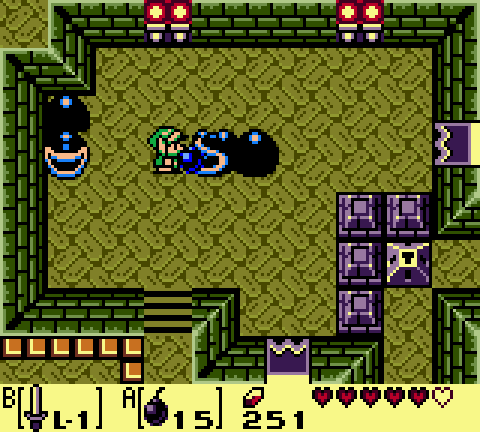
The cyclops was easy to beat. You need to dodge the bombs and hit him when he calms down. That’s it.

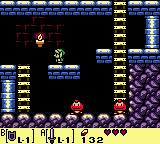
The right path was much longer and it lead me to a side scrolling area, which then lead me to the second half of the dungeon and a cyclops mini-boss. Throughout all of this, I was mostly fighting bats and skeletons with a couple of those enemies that mimic Link’s actions. The cyclops was easy to beat. I just had to dodge his bombs and movement, while hitting him when I had the chance.

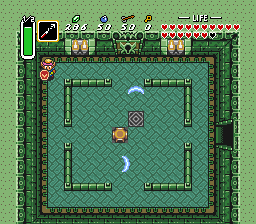
Next up was an annoying room with bats and a “magnet” which pulled everything towards it. Of course, the room was also full of chasms, so I ended up losing a lot of health in that one.

The Power Bracelet

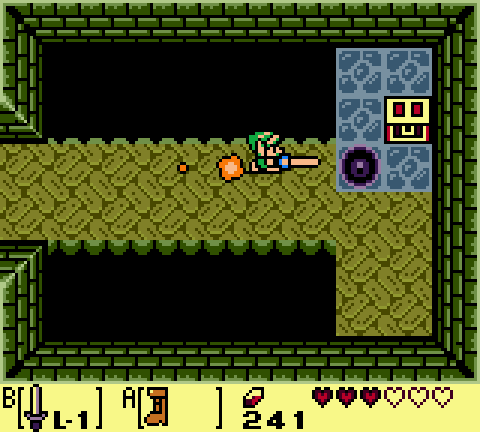
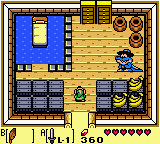
A few rooms after the cyclops room, I finally found the treasure of the dungeon, the Power Bracelet. A few moments after that, I found one of the game’s annoyances. For some reason, the designers decided that every time I run into a lift-able object without having the power bracelet equipped, I would get a dialogue box slowly telling me “I can’t just lift this object with my bare hands”. In a dungeon where you constantly have to switch between the Power Bracelet and the Roc Feather, this got really annoying, really fast.

Zelda - Link's Awakening DX - The Power Bracelet

The Power Bracelet is needed to lower this platform.

After getting the bracelet, I explored the rest of the area and spent a lot of time being lost, trying to figure out where the Nightmare Key was.

The Bottle Grotto Nightmare Key

Thanks to the Compass and it’s new ability to chime every time I enter the room with a hidden key, I found the room where the Nightmare Key was supposed to be. It was the room with a cloaked swordsman enemy, a bat and one of those rabbit enemies. Again, since I’m bad with names, I had to google the name of the bat enemies. The bat enemies are called Keese. As for the other two, the game told me their names. The rabbits are called Pols Voice and the swordsmen are Stalfos.

As I said, an Owl statue was important in the Bottle Grotto. There was a side scrolling area connecting the Nigthmare key room and an Owl statue room. The Owl statue outright told me I need to kill the “Trapped Polls Voice” first and the Stalfos last. Logically, this meant the killing order in the Nightmare key room was

  1. Pols Voice (the rabbit)
  2. Keese (the bat)
  3. Stalfos (the skeleton)

Killing them in this order made a chest appear and I finally had the nightmare key. Two rooms later, I was in the room with the Nightmare door. A few more rooms and another side scrolling area after that and I was in the boss room.

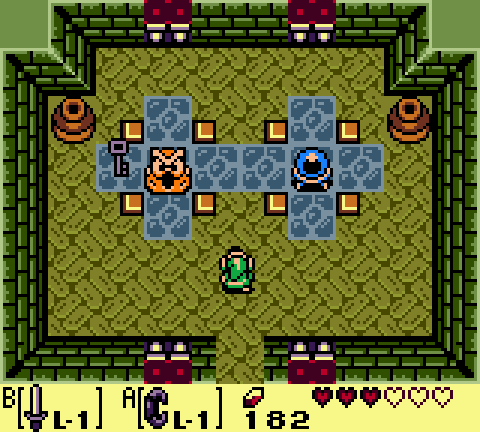
The Genie Boss of the Bottle Grotto

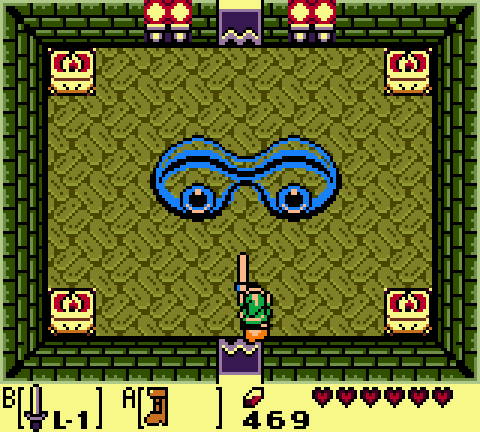
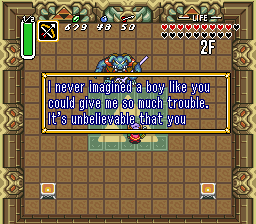
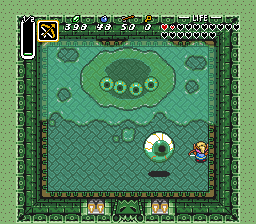
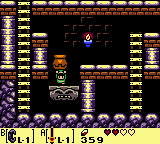
OK. It’s possible Link’s Awakening DX is giving me a few hints to many, because the Genie almost outright told me what I needed to do to kill it. The pattern was easy to figure out. First, the Genie is out of it’s bottle, throwing fireballs at me. After dodging 8 of those, he goes back into the bottle. Picking the bottle up and throwing it does some damage and causes the Genie to come back out and throw fireballs again. Repeating this four time destroys the bottle.

Zelda - Link's Awakening DX - The Genie

The first part of the Genie fight is easy to master.

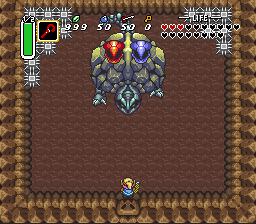
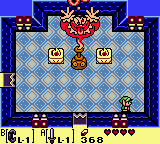
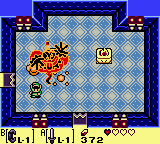
After that, the Genie floats around and throws fireballs. Hitting it causes it to go invincible, split up and move around in a spiral for a while, before being hit-able again. A few more of these hits and the battle is over.

Simple, but again, I’m out of practice. I probably had to repeat the battle ten or so times before I finally got it right. I got annoyed to, because it’s quite a trek to get from the entrance to the boss room, even with the warp shortcut. Even worse, I had to switch between the Bracelet and the Feather a couple of times on the way there, which meant there was a lot of dialogue cancelling.

Zelda - Link's Awakening DX - The Genie

The second phase of the battle is harder, but Link has plenty of health if the first part is done right.

Still, knowing you’re getting better at the game with each try is a great feeling and part of why I decided to do this Legend of Zelda challenge. Eventually, I got to the point where I could go through the bottle phase without getting hit and finally, I beat the Genie with one heart remaining.

I got the second instrument, the Conch Horn and the Bottle Grotto was clear. Next up, the Savannah.

Legend of Zelda: Link's Awakening - Cover, Box Art

I’m bad with names. I’m really bad with names. When I meet someone for the first time, I don’t think their name even enters my memory. I have to make a conscious decision to remember and repeat the name in my head just so It doesn’t go away immediately. The same goes with any other name.

Because of that, I couldn’t remember the name of the first dungeon of Link’s Awakening, nor the name of most of the characters in the game, other than Link, of course. Luckily, some quick googling helped with that, so I can now say I cleared the first dungeon – Tail Cave.

Koholint Island

Link’s Awakening is something of an off-shot of the main story arc of the Legend of Zelda series, the way I understand it. According to the story, After the previous games, Link is now a hero. He travels on his ship, ends up in a storm and crashes on the shores of the Koholint Island. To get off the island, he needs to wake up the Wind Fish.

Zelda - Link's Awakening DX - Castaway

This is how the game begins. Marin finds Link on the beach.

I can’t really understand how they do it, but the Zelda series manages to have a very minimal story in each game, but it all adds up to a complex and extremely interesting overall story arc. What I wrote above is pretty much everything the player needs to know about Link’s Awakening. There’s the backstory and the motivation and that’s it. Of course, stuff is added to it throughout the game, but no more than needed, which is very little.

Getting the Sword and the Shield

Link wakes up at the home of Marin, who he mistakes for Zelda for a moment, and her father Tarin. Taring gives him the shield and points him towards the beach where Marin found him, hinting something important might be there.

Zelda - Link's Awakening DX - The Shield

Tarin gives Link his shield, saying his name is written on it.

Before I went to the beach, I explored the village, checked out the shops and talked to everyone. I decided to do this playthrough completely walkthrough free, so instead, I’ll be taking notes (thank you, OneNote).

Talking to the NPCs made me realize the game is self-referencing a lot. The kids in the village give me tips about the gameplay and then finish with “I don’t know what that means, I’m just a kid”, there’s a Yoshi doll I can get at a game store, and there’s a lot of tips I can read up on on various signs and in the Village Library. There’s also a building with a phone in it. On the other side of the phone line is a person named Ulrira, who seems to be telling me what my next objective is. Overall, Link’s Awakening is the most approachable Legend of Zelda game yet.

Zelda - Link's Awakening DX - Load Menu

I’m behind in postings, of course. My writing sessions are about as long as my playing sessions.

It also seems to control much more easily and fluently. The movement and the actions are less rigid, so I can dodge more easily. I still get hit, but it feels more like my fault when it happens and not that I’m not used to the controls, liked it felt in the past.

Anyway, I talked to everyone, took some notes and finally got to the beach, where I found my sword. I have two items now. Here are the notes I took:

  • Papahl’s wife wants the Yoshi doll for their kid.
  • Papahl will be lost in the hills later on in the game (this is more self-referencing).
  • Sale at the Sale’s House O’ Bananas is interested in any canned food.
  • One of madam Meow Meow’s dogs is interested in jewelry and accessories.
  • There’s a monkey on a tree near Sale who throws coconuts at me.
  • There’s a bomb-able wall on the beach near where the sword was.
  • There’s a book on the top shelf in the village library that I can’t reach
  • There’s another book in the library that apparently needs a magnifying glass.

After getting the sword, I immediately went back to the village to deal with some of the requests. I got the Yoshi doll and got a ribbon as a reward for that. I gave the ribbon to the dog and got a can of dog food. I then gave the dog food to Sale, who gave me bananas. I tried somehow giving those to the monkey, but they aren’t a select-able item and I don’t know how to talk to it.

Zelda - Link's Awakening DX - The Sword

Getting the sword plays the famous Zelda tune. It’s also definitely Link’s sword because his name is written on it.

I also got a heart piece from the well above the library. Getting four heart pieces in a Zelda game gives Link an extra heart container, so those are always great to pick up.

An owl (yes, we finally have the annoying owl) told me to go to the Mysterious Woods next, so that’s exactly what I did.

The Mysterious Woods

The screen went darker when I got to the Mysterious Woods. I don’t this happens on the original GameBoy, so it’s a nice touch on the color version. I had to fight a lot of Moblins while there, and I also find an item or two I wont be able to get until later, so I took some notes, or a note:

  • There’s a heart piece in a cave that I can’t get to. I need to be able to lift giant skulls

I found a toadstool and a witch’s hut, so I gave her the mushroom. I got a bag of magical powder. I used this magical powder on a raccoon  who turned out to be Tarin, transformed by a toadstool he ate (the circle of life). I’m not sure what the importance of this is, but I did it. The witch told me to bring her more toadstools if I need more powder, so I’ll probably be doing that later. I also tried using the powder on other stuff. It lights up braziers and temporarily stuns that invulnerable enemy that electrifies me when I attack it, but I didn’t discover anything else.

Zelda - Link's Awakening DX - Tarin the Raccoon

Mushrooms are bad, kids. This is Tarin on mushrooms.

I was supposed to find the key for the first dungeon in the Mysterious Woods, so that’s what I eventually did, but it took me a while to find it. The place is pretty much a maze, so I got lost once or twice.

Link’s Awakening Dungeon #1 – The Tail Cave

The Tail Cave was located to the south of the village, north of the beach. I actually stumbled into it before I ever got to the Mysterious Woods, but I had to get the key to enter it.

Zelda - Link's Awakening DX - Tail Cave

I wonder why it’s called the Tail Cave…

The dungeon itself was easy, as I expected, since it’s the first dungeon. I found the compass and the map within the first few rooms and I beat the mini-boss a few rooms after that. The compass got a bit of an upgrade since A Link to the Past, or at least I think it did. It now creates a sound every time I enter a room where I can get a key. This can be useful with rooms where there’s a trick to get it. I don’t think the compass did this in A Link to the Past, but I might be wrong.

The item of the dungeon was the Roc Feather, which allows link to jump. It can even be used in the short side scrolling sections within the dungeons, which turns this part of the game into a full-fledged platformer. While we’re on the subject of the side scrolling sections, there are goomba and piranha plant enemies from the Super Mario series in those, which is a great touch.

Zelda - Link's Awakening DX - Goombas

Real goombas! Awesome!

Defeating the mini-boss involved jumping over things he sends at me, so I immediately got an opportunity to practice the jumping. The final boss of Tail Cave was more familiar and straight forward, but also far more annoying. It was the snake/worm boss with a vulnerable tail from the previous games. As before, if he hit me the wrong way, he would send me to the floor bellow, though this didn’t take away my health this time, and I had a much easier time getting back to the boss than in A Link to the Past. Still, it’s a very annoying boss.


Zelda - Link's Awakening DX - First Boss

I will always hate this boss, always!

Killing it got me my first heart container and the first of the 8 instruments needed to awaken the Wind Fish, which by the way, apparently is neither wind or a fish. The first instrument was a cello.


Legend of Zelda: Link's Awakening - Cover, Box Art

My plan was to take my Gothic save with me over the weekend, so I could play it on my laptop. I copied it to my flash drive, but I left my flash drive plugged into my primary PC in Varaždin, so that plan is out of the picture. I thought about my options and then realized I have a challenge that’s sort of in progress, but I haven’t touched it in months – my Legend of Zelda challenge. Because of this, I got a Link’s Awakening rom and loaded up VisualBoyAdvance. Before I get to that, though, let me tell you a story or two.

Challenge Part 3, Link’s Awakening

Link’s Awakening is a Legend of Zelda game I actually played as a kid. As I already wrote on this blog, early gaming in Croatia was nowhere near the level of the West. We were always a generation or more behind the modern world when it comes to consoles and games and even then, we mostly bought pirated software and hardware due to a multitude of reasons.

So with all that in mind, how did I get my hands on an actual GameBoy and an actual game? I didn’t. I had a cousin who did.

Cousin #1, Waterworld and Link’s Awakening

Somehow, my cousin got his hands on an actual GameBoy and owned two games with it – Waterworld and Link’s Awakening. Both were in German and both were a bit advanced for us. At that time, Tetris and simple LED games were about the only thing we experienced as gamers, so an actual adventure game with puzzles, dialogue, equipment and a save option. All of those things confused the hell out of us.

Zelda - Link's Awakening DX - Title

I decided to go with the DX Color version. It’s a straight graphical upgrade with nothing lost.

Because of that, I’m embarrassed to say, I considered Waterworld to be the better game. I considered it, but I still ended up itching to play Link’s Awakening more often. I guess good games are good no matter what you think. In hindsight, I probably annoyed the hell out of my cousin because I kept hanging out at his place. I was the annoying kid obsessed with games, and he was the cool kid who only plays to waste some time every now and then. I guess gaming was my hobby before I even owned a proper console of my own.

I remember an instance where we somehow managed to delete a saved game and then couldn’t understand why Link didn’t have a sword anymore. We actually looked at the manual, not understanding any of it and then tried to create two new save files, named Ganon and Zelda, because we thought that’s what we saw on the screenshots in the booklet, hoping that would somehow give as the sword. Yes, we actually though Zelda was the name of the character we controlled.

I remember how proud I was when I finally figured out where to get the sword on a fresh save. Even then, neither of us understood the concept of saving the game and continuing later. The game we played before that just didn’t have that feature.

Cousin #2 and just Link’s Awakening

I also remember my cousin’s GameBoy somehow just disappeared one day. I never found out where it went, but that was it for Link’s Awakening for a while. My cousin then got an actual Nintendo Entertainment System, with Super Mario, Wild Gunman, Duck Hunt and a few more games, but The Legend of Zelda was gone and we went back to regular, simple games, without dialogue or saved progress.

Zelda - Link's Awakening DX - Intro

The game actually looks really nice, even on the big screen, thanks to a great style and VBA’s smoothing.

About a year later, another cousin, this one some 20 years older than me, also got his hands on a GameBoy and a copy of Link’s Awakening. This time, I managed to figure out you can save your game and continue later and I figured out the concept of equipment. I remember getting to the point where I could jump, lift rocks and even swim, so from what I know now, it’s might be that I was about half done with the game, but I never managed to complete it. My cousin only lent me the GameBoy for a few days and once the third set of batteries was dry, so was my battery fund, so that was it.

In any case, Link’s Awakening was the only Zelda game that I played when it was current and probably the only video game before the PlayStation was out that I played when it was current. Sure, I talked about owning a Genesis, but even that, as ahead of this region as it was, was still nearly a generation behind. It’s a nice memory to have.

The Review: Is A Link to the Past as Good as They Say?

Amazing! The Legend of Zelda: A Link to the Past is absolutely amazing!

I never properly experienced the SNES console era, and after this game, I truly am sad that I haven’t.

A Link to the Past Screen 1

Awww!

Legend of Zelda – A Link to the Past is truly an amazing example of what good game design and imagination can do. It looks beautiful and plays beautifully. It provides you with a sense of achievement every time you get past an obstacle it throws at you. It makes you feel stronger and more skillful, but at the same time, it constantly provides an adequate challenge.

By the way, I loved the ending and how all of the game’s characters basically say goodbye to you once you’re done. It makes for a bunch of extremely nice screenshots.Not many games get close to perfection as this one, and mind you, this isn’t nostalgia talking, since I never played it as a kid. Truly, truly, an amazing game. There really isn’t anything about it I would like changed.

A Link to the Past Screen 2

…or until the next game!

The music! I can’t believe I forgot about the music. The Legend of Zelda, the Final Fantasy and the Mario series probably have the most iconic music in all of gaming and for good reason. Most people remember the main theme of Zelda games, but the final victory theme is just as good, if not better.

The Verdict

It’s awesome! Play it!

Meaningless Score: 999/1

Once I approached the equivalent of Hera’s Tower in the dark world, the crystals broke the seal and opened the entrance. This was a huge dungeon, with several bosses of the previous dungeon reappearing to fight again. This is another way of the game showing me how strong I got since I started. Thanks to my sword and armor upgrades, most of these bosses died in just a couple of hits, without even touching me.

A Link to the Past, Red Mail

The game’s strongest armor!

Even though it’s the last dungeon, this one also had a special item – The Red Mail. It’s another armor upgrade, just as the blue mail was. I actually got the boss key and the armor quite early in the dungeon, even before the compass, which was very helpful and basically required to advance far enough before dying.

Eventually, I got to the wizard. The strategy to fighting him was still the same, except he now made three copies of himself to add extra attacks. I still only had to beat the real wizard, though, so it didn’t take long. After about five of his shots deflected back at him, he was down. Then, Ganon rose up from his dead body, turned into a bat and disappeared. Link followed him all the way to the Pyramid of Power, where the bat crashed through the roof.

A Link to the Past, Ganon

Ganon! Who knew!?

In the first phase, Ganon was just throwing his trident around, which was easy to avoid. After a few hits, he added a spinning fire circle and fire bats to his arsenal, which was much, much harder to get away from. I used the staff for some protection and kept hitting him until he started jumping around. I still had some magic, so I continued with the staff and the sword swings until he went invisible.Before I entered, I used my mirror to go to the light world and then my ocarina to get to the potion shop. I already had two bottled fairies, so I bought two blue potions to stock up completely. Then I entered the dark world and used the “Save and Quit” shortcut to get to the pyramid for the final battle.

At that point, I used one blue potion to refill my magic and hearts and then started using the Fire Rod to light up two torches, which made him visible for a few seconds. I kept hitting him with a sword, but it didn’t seem to go anywhere.

A Link to the Past, Ganon Defeated

I’m guessing it becomes less and less surprising in later games.

Then I remembered what I had to do in the original Legend of Zelda. I hit him with a sword, which got him stunned and then fired a silver arrow at him. This seemed to hurt him, so I kept repeating it for another three or four times and then it was over.

I won!

Before I went to get the final crystal, I decided to do my last bit of exploring. First of all, I went to the bomb shop in the dark world, which is located on the same spot where Link’s house was in the light world. The shop sold red bombs for one hundred rupies a piece. The bomb was not an item. It actually just followed me around like the chest I’ve already found did.

I bought it because I thought it would be an upgrade for my bombs, so I didn’t really know what to do with it at first. Then I remembered that cracked wall at the pyramid. I made the bomb followed me there and then ditched it at the crack. It exploded and opened a passage to another magical pond that accepts items.

A Link to the Past, Fat Fairy

I sure did!

I threw my bow and arrow and got the silver arrow upgrade. Then I tried my bottle and got a green potion. After that, I tried pretty much every item I could and it worked on just one. Boy did it work, though. The pond actually upgraded my sword!

After that, I used the light world transportation to get to the mountains and went to explore the area past the ruined bridge, which I could now access with the hook shot. I managed to find a lot of loot, but most of it was just bombs, arrows and rupies. Still, there was a heart piece, so it wasn’t all for nothing. Eventually, I got to the entrance of the last crystal dungeon, the Turtle Rock. In order to enter it, I had to solve a puzzle in the light world and then use Quake on the platform, to open the door.

Turtle Rock made me use the Cane of Somaria extensively. The Cane could be used to create platforms on certain spots of the level, which would then let me travel along the existing route. It also contained plenty of spiked floors and button puzzles.

A Link to the Past, Turtle Rock Boss

The middle head was the most dangerous one.

The boss made good use of my green potion. It was a turtle with three heads. The red head was hurt by the Ice Rod, while the blue head was hurt by the Fire Rod. First, I used the fire Rod to kill that one, then a combination of the Ice Rod and the sword to kill the red head. Once the two were dead, it turned into a snake which I had to finish off with my sword. Luckily, I saved up some magic, so I used the protective staff in the last phase to make it easier.

In any case, I got my last heart container and my last crystal. It was time to go and defeat the wizard.

Since I didn’t go to the area of the next dungeon yet, I decided to explore around it for a bit. Misery Mire is located where the desert dungeon was located in the light world, but it was a swamp in the dark dimension. The exploration was worth it, netting me another two heat pieces as well as a bunch of rupies.

I couldn’t enter the dungeon yet, though. I was definitely at the entrance, but I couldn’t see any doors. What I did see was a small glyph on the floor nearby, which had the same yellow and brown coloring like the two spells I collected previously. This one, however, I didn’t have.

I started looking for it and it took me a good hour, but I finally found it west of the Tower of Hera. The spell is called Ether and it’s obviously lightning based, if the icon is any indicator. I got back to the Misery Mire entrance and used it on the platform to open the entrance.

A Link to the Past, Misery Mire Entrance

This is where you use the Ether to open the Misery Mire

Misery Mire required plenty of keys to get ahead, but the dungeon was designed so the key you needed was almost always nearby, usually attached to one of the enemies. Basically, the dungeon was way more focused on fighting than on puzzles.This dungeon was a lot harder and longer compared to the Icy Palace. The most annoying part was the large number of those laser shooting pillars from one of the earlier dungeons. I’m pretty sure these do a heck of a lot more damage than the ones I’ve seen before, though.

The second floor was in complete darkness, meaning I had to navigate slowly, and carefully. Of course, I didn’t really do that, so I had to restart in the first room plenty of times before I finally got through it. Eventually, I got to a room with a button that needed something placed on it, but no blocks nearby, nor any blocks or holes on the floor above.

A Link to the Past, Misery Mire Room

There’s a lot of projectile dodging in Misery Mire

I moved on and finally got the item of Misery Mire – The Cane of Somaria. This was what I needed for that button. The cane creates a movable block on the ground. Another use of the cane while the block is placed destroys it and causes missiles to shoot in the four basic directions, so it’s basically a bomb on a manual trigger. I placed the block on the button and was finally able to get to the boss.

A Link to the Past, Misery Mire Boss

I present to you, the Googly Eyes Boss

I got another crystal and another heart container. It was time for the next dungeon.The boss was, again, relatively straightforward. First I had to use the sword to destroy a bunch of floating eyes, while avoiding hits from the body. Once the small eyes were gone, the large one started following me around the room. I used my sword and the protection staff the name of which I keep forgetting, until my magic was gone. After that, another few hits with the bow and arrow were enough to beat it.

Since I pretty much stumbled into the Ice Palace entrance by accident, I decided to just go for it. Right at the start, I had plenty of trouble. The enemy in the first inhabited room wasn’t getting hurt by my sword. It took me a while, because I somehow apparently went blind, but eventually, I figured out that the Fire Rod kills it in one hit. After it was dead, I realized there’s a sign on the wall that flat out said the enemies are hurt by fire.

A Link to the Past, Ice Palace Spikes

These spikes can hurt a lot.

Another new enemy appeared a few rooms later, after I got the compass. I’m not sure what they’re called, since I don’t have the game manual, but they’re giant skeletons which crumble with a single sword hit, but get back up seconds later. This time, I immediately noticed a sign on the wall, which said I need to use a different weapon once they’re down. It wasn’t too hard to figure out the bomb was what I needed.

The Ice Palace, of course, had plenty of ice tiles I had to walk on, which means plenty of rooms with spikes and those spinning fire things to crash into due to the slippery ice floor. Suffice to say, it was hard and annoying, but eventually, I managed to get through most of it.

The puzzles consisted of finding holes in upper floors to jump through, so I could access more areas on the lower floors. One of them even involved pushing a block through the hole, so it lands on a button on the lower floor.

The contents of the boss chest were my favorite part of the dungeon. The chest contained the Blue Mail. It’s a stronger armor which increased my defense and severely reduced damage I was getting from enemies. As I said, A Link to the Past really knows how to make you feel more powerful while not lowering the difficulty of the game at later areas.

A Link to the Past, Ice Palace Boss

This boss was more of a skill challenge then a puzzle.

The boss was relatively easy, though I needed enough magic to defeat its first form. I used the Fire Rod to destroy his outer frozen shell and then the same item against his second form. Once I was finally out of magic, I continued to hit him with the sword, while avoiding the stuff coming at me. The fight was simple and straightforward, but still not too easy. I picked up another heart container and another crystal, so I was ready for my next dungeon.