Warlords Battlecry 3 - Cover

Another GOG.com sale

This weekend, GOG.com had another sale with a couple of great games in it. I promised myself not to succumb to the urge again, but my willpower is weak. I bought Warlords Battlecry 3.

I’ve owned the first two of the Warlords Battlecry games, both in German and greatly enjoyed both of them. I also played Warlords Battlecry 3, but only ever had a pirated copy. I remember greatly enjoying that one as well, especially since it was in English, but I also remember it being quite difficult. Warlords Battlecry is definitely not one of the best series I ever played, but it will always be one of my favorites. This is why, when I saw it on sale, nostalgia got me and I decided to spend the three bucks it cost.

What is Warlords Battlecry

Warlords Battlecry is an RTS with a twist. It plays sort of like the older Age of Empires games, but without as much economy. You take over mines, build buildings and train your military to destroy your enemies. The twist is that you also have a hero of your own making. He gains levels, learns spells, acquires items and transfers from game to game, including the Campaign, the skirmish battles and I believe even the multiplayer.

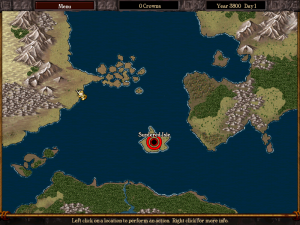
Warlords Battlecry 3 - Campaign Map

Large and content-rich, just like a good campaign map should be.

The campaign in Warlods Battlecry is something special to. There’s a large world map with locations you can travel to. Each location can have quests, battles, merchants, units to hire and many other things. Other than your hero, a bunch of other stuff also remains persistent in the campaign. You can find artifacts which provide a global effect to your team. You can gather retinue units, which can also gain levels, though not as complexly as your here. You can also somehow gain control of races other than your own, allowing you to take them to battle. Overall, Warlords Battlecry 3 has heaps of replayability thanks to initial hero and race selection, as well as the path you take on the campaign map.

It might not have been a great buy back in the day, but for 3 bucks, it’s well worth your time and money now. There are negatives, though. It’s an old game, using the old RTS control system. It can be clunky and annoying at times, since it doesn’t have the polish of modern control systems like the one in Starcraft II. It’s difficult to micromanage units, so a lot of the times, you just end up clashing your units against the enemy’s. In spite of those things, the game is great.

The Early Campaign

In the two days since I bought it, I played the game for a couple of hours. I decided not to go with any guides or anything like that. Instead, I’ll play how I like it and if it turns out being less than effective, I can always restart the game. I picked a High Elf Archmage as my hero.  I started out with investing points mostly into Alchemy, with a few into Summoning. During the early campaign levels, I got him to level 16.

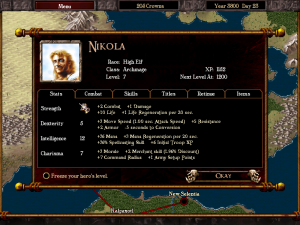
Warlords Battlecry 3 - Hero Screen

I love menus with lots of numbers in them.

At first, I used the Create Item spell to quickly fill all of my slots with items. Now that I have more mana, I usually spend it on creating golems, for early rushes against enemy buildings. Other than that, I invested a bit into charisma for a bigger command radius, as well as a couple of points into strength, just so I can stay alive long enough to run away from battles.

High Elves are sort of a rounded race, with a moderate emphasis on spellcasting. They need a bit more crystal in the early game, as well as some extra iron in the later game to build their most powerful units. I worked a bit on expanding my retinue to, but most of the time, my retinue units die before getting strong enough. My most successful unit until now was a lich I got from a quest.

I also have to confess I failed miserably on my first two attempts of the first level of the game. I forgot how squishy a spellcaster hero can be, so I lost him to random enemy units a couple of times. He still gains some experience after the battle, though, so most of the time, you can still finish the level. The exception are the levels where one of the conditions is that your hero must not die, such as the first level of the game.

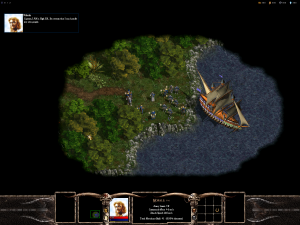
Warlords Battlecry 3 - First Level

It took three attempts to get through the first level. I got rusty.

My usual strategy is to turtle and build up my defenses until I can start training the tougher units. I also constantly create wisps (the High Elven worker unit) and merge them into ancient wisps who provide an extra income of crystals just by being in the game. During the turtling phase, I keep an eye out for straggling enemy heroes trying to convert mines. If I can, I ambush and kill them which severely cripples the AI.

Once I can build proper flying units and constantly train knights, I start gathering up larger groups of units and attacking the enemy bases, focusing on towers first and then on the other buildings. It usually takes a few assaults to completely destroy the enemy, but that’s just a matter of time. If I ever get to a point where my income is large enough to use my special healing ability (costs 400 crystals per use), then one solid assault is more than enough to clear the whole map.

More to Come

I’m not sure how often I’ll play this one, but I can promise I definitely will be playing more of Warlords Battlecry 3 very soon. It’s sad there aren’t any games like this one today. The closest thing to it is Starcraft II, but that one is designed in a way that almost completely removes the replayability of the campaign. Don’t get me wrong, it seems fun, but it just isn’t the same.
Grandia - Cover, Box Art

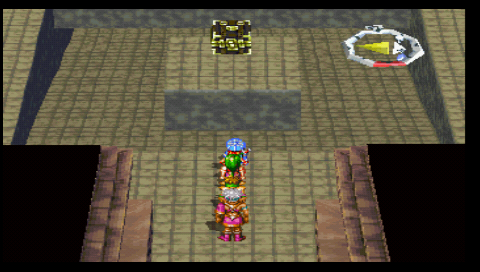
I’m not sure if I got a lot better with JRPGs, or if my memory is just completely wrong, but none of the PlayStation JRPGs I returned to in this blog gave me the challenge I remembered from my youth, Grandia included. The mechanics seemed just so much more clear to me now, compared to back then and the enemies so much easier.

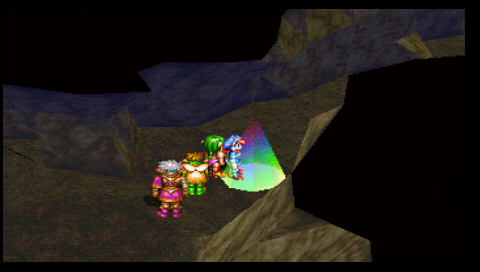
Grandia - Soldier's Graveyard Save

The first and only save point was right at the entrance.

Well, Soldier’s Graveyard changed that, at least for a while. Soldier’s Graveyard is an optional dungeon in Grandia, with some slightly tougher enemies and a very tough boss at the bottom of it. Recently, I only got to play the game on my train ride to and from Varaždin, which means I’ve been playing it for about two hours per week. It took me about that much to get through Soldier’s Graveyard.

The experience in the dungeon was just as low as it was in the non-optional areas, which means I was overtrained for this place as well. Still, it was far more challenging than the outside areas. The only save point in there was at the entrance and there was five (or six) floors in total I needed to clear, with a boss at the end of it.

The number one problem I had was that I didn’t take any resurrection items with me. Sadly, I lost Rapp due to a foolish mistake on floor 3, which means I had to clear the rest of the place with just three characters.

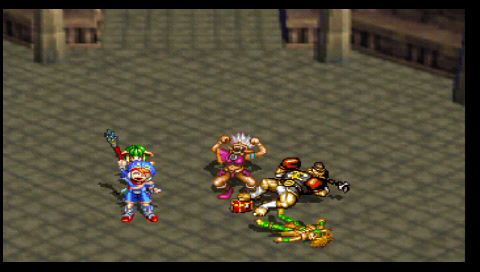
Grandia - Kung Fu Master II

The boss was challenging, but I did it, just in time for Justin to survive.

Getting to the boss wasn’t the hard part; that followed once I got there. The boss was a much, much stronger version of the Kung-Fu Master from the early moments in New Parm. He hit like a train, chaining several hits with 30-70 damage each and he healed himself about once or twice per round, for well over 200 HP.  With just three characters, one of them being forced  to completely focus on healing, it was hard to keep up with that amount of regeneration. I actually had to buff my party to give myself the needed edge. Just so you get an idea about how much damage that was, Milda, by far my strongest character, had about 270HP, and she was hitting him for a total of 250HP, depending on how lucky she was. Justin, on the other hand, was hitting bellow 200.

Near the end of it, I thought everything was lost,because Justin was at near zero health and about to get hit, but somehow, I managed to hit the boss before his hit landed and I won the fight. It wasn’t over, though. The dungeon’s grand  prize was in a room behind the boss, and I had to find four items named Soldier’s Souls in secret rooms throughout the area to finally be able to get to the item. Of course, during all of this, I got a bunch of other great items to.

Grandia - Energy Charm

The box with the Energy Charm.

I got the Ice Blade, which is an awesome sword with the ice element, but I couldn’t use it here,since a lot of the enemies were resistant to ice. I also got the Godspeed Knife, an awesome knife for Feena which I could freely use. There was also the Expensive Jewel, which doesn’t do anything, but can apparently be sold for a nifty sum, several usable items which increased all of my stats, as well as some other minor equipment. I gave the stat items to Feena, just so she could keep up with Justin, who got insanely strong.

The grand prize was the Energy Charm. This amazing item half’s SP use of anyone wearing it in the accessory slot. Of course, I immediately equipped it on Justing, since his special moves are by far the strongest. Before that happened, though, I managed to lose Feena in a random battle.

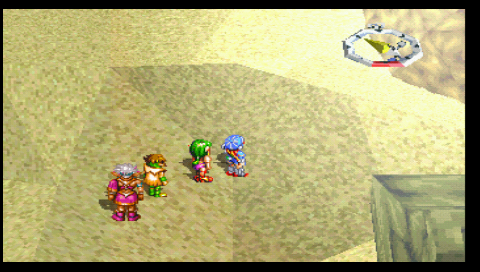
Grandia - Outside Soldier's Graveyard

My PSP’s battery was just about to go out, so I was glad to see the sunlight.

I carefully started my way back out of the place and finally got out about five minutes later, thanks to the fact that I cleared most of the random battles on the way in. I got to the save point at the entrance, recovered and with relief, saved my game.
Pokemon Platinum - Cover, Box Art

Before the Oreburgh Gym

As I already said in my previous posting, I had to get to Sandgem town in Pokemon Platinum, to be able to properly form my starting party with PokeSav. I started out with Pikachu, Aipom, picked Turtwig as my starter and also added Chimchar.

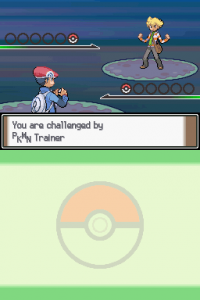
Pokemon Platinum - Rival

My rival is extremely annoying in this one, but at least he’s not a complete brat.

I then made my way towards Jubilife City, where I talked to Dawn and met Looker, the “bonus” character of Pokemon Platinum, who introduced me to the game’s bad guys, Team Galactic. Soon after, I was introduced to the concept of Poketch Apps, made by the Poketch Company. I talked to the three clowns to get my first few apps, the most important one being an app that shows all my party Pokemon and their health on the lower screen. Well, technically, it shows them on my right screen, since I’m playing on a wide screen monitor, so the screens are placed side by side.

Next up, I had to go east, via route 203 and through a cave, to finally get to Oreburgh City, the location of the first gym. I got there soon enough, but then I realized I made my first mistake. I forgot to catch a Starly. I went back through the cave to catch one on route 203 and then went back to Oreburgh and to route 207 to train.

Ash and the Oreburgh Gym

The thing is, I decided to try and stick to the Pokemon Ash used in gym battles, so I had to train up my Pikachu, Aipom and Turtwig. Sure, a well-trained Turtwig could definitely sweep the rock gym, but Ash preferred using Pikachu for the bigger part of the match, so I had to get him to a higher level to. It took me quite a while to train, since I can’t fast forward as quickly on an NDS Emulator compared to the older generations, but eventually, I got most of my team to level 15 and evolved Starly, as I was supposed to before I even got to Oreburgh City.

Pokemon Platinum - Roark

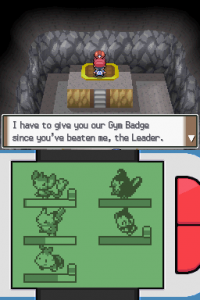
Roark was easy to beat, even if I did use Pikachu in a rock gym. Aipom barely made it, but he made it.

The gym battle was easy, as expected. I cleared the trainers with Turtwig and then switched to Pikachu at the start of the boss battle. He defeated the first Pokemon, then I switched to Aipom as Roark was sending his second Pokemon, Onyx, into battle. Aipom didn’t do much, so I switched him with Turtwig mid-battle via Baton Pass. Turtwig handled Onyx and then Pikachu dealt with Roark’s last Pokemon, Cranidos with a single hit from Iron Tail.

Floaroma Town and the Valley Windworks

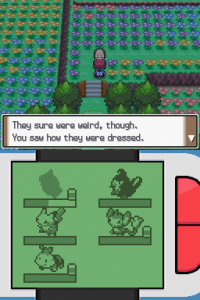
I got the first badge, so now I needed to go all the way to Eterna City. I went back to Jubilife City, where I got my next Poketch App and then went north, fighting team rocket with Dawn along the way and soon arriving at Floaroma Town. This is where I had to deal with Team Galactic, at the nearby Valley Windworks, which didn’t take long. The only trouble I had was with a high level Purugly, which managed to faint one of my team members.

Pokemon Platinum - Floaroma Town

Floaroma Town was nice and relaxing, even with Team Galactic in the way.

With the Valley Windworks cleared, I went further north, but took a short stop near a house where I could rest and heal, to catch a Buizel in a nearby grass patch. In the anime, Ash trades his Aipom for Dawn’s Buizel after the gym at Eterna City, so I thought I might as well get one now. I won’t be using it until Aipom is safely stored in my PC, of course, but this saved me some time and gave me a chance to train some more. I finally went through Eterna Forest and got to Eterna City. When I got there, I saved my game and that was it.

During all of this, only Starly evolved and that was before Oreburgh City. For now, I’ve been following the anime as well as I could, so there aren’t many differences, other than my Pokemon’s move sets, which really can’t be followed at all, without cheating. Whenever I’m able to learn a new move or obtain a TM, I make sure to check which moves that Pokemon uses in the anime and act accordingly, but other than that, there isn’t much I can do. My next evolution won’t happen until after the fifth gym, but at least now my team is full, so I’ll have plenty to do until then.

Surprise!  I didn’t have to use cheats to add Pokemon to my party this time. The DS generation of Pokemon games, including Pokemon Platinum, has a well-developed set of tools for save editing, so I didn’t have a lot of issues with editing my saves.
Tools to Edit Pokemon Platinum Saves

Probably the most popular tool to edit saves and create Pokemon for all of the Nintendo DS Pokemon games, including Platinum, is actually usable online. You can find it at
It works nicely, can create Pokemon out of thin air, basically, and can do a lot of other things. However, it’s really meant to be used to create level 100 teams for multiplayer matches. This is why I opted for their less powerful, offline tool – PokeSav.
I did use it in combination with the online version, though. I used the online version to create a Chimchar, Pikachu and Aipom at level 100, because I didn’t feel like figuring out how to create a fresh Pokemon at a low level. Instead, I just copied the three level 100 Pokemon to my first PC Box in the save and then reduced their level and stats to the proper values. I actually went on the extreme here and dropped all three of them to level one, just to see how that feels in the game.

Pokemon - PokeSav

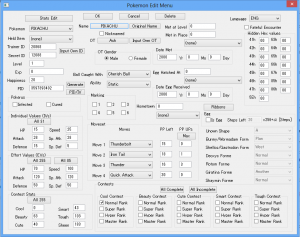
PoSav looks complicated, but all the stuff is mostly in the same place as with the previous tools.

The issue here was figuring out how to get the save out of DeSmuME, which is the probably the most advanced emulator out there right now. The thing is, PokeSav doesn’t detect the emulator’s save format (.dsv). However, selecting “All Files” in the file dialog and selecting the save that way worked fine and PokeSav could read it without issues.

I edited all three of my Pokemon and while I was at it, also gave Aipom and Chimchar, as well as the starter I picked, Turtwing an Everstone each, just so I don’t have to cancel its evolution any more.

How to Import a Save to DeSmuME

Once that was done, I had a new problem. I’m not sure how the emulator works exactly, but it doesn’t read it’s saves from the Battery folder where it stores them. It seems these files are only used as backup for the real save, which is stored somewhere internally. Some googling helped me figure out that I had to use the DeSmuME’s Import function, located in

[code]File > Import Backup Memory[/code]

This function can actually import a .sav file directly, which is a nifty feature, because it means I can transfer a save from a DS Flash cart, or a different emulator, such as No$GBA. I didn’t need that, though. All I needed was to import my edited save, reset the emulator and load my game.

Pokemon Platinum - Turtwig

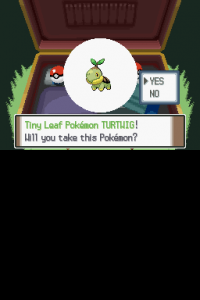
I picked the grass type again, though, I started with Chimchar as well.

By this point, I was already in Sandgem City, since I needed to go there to access a PC.  Why a PC? Because for some reason, adding Pokemon to my party directly didn’t work. PokeSav would see them just fine, but my in game party remained empty no matter what I did. Adding them to a PC Box worked like a charm, though.

In any case, that was it. I had four Pokemon already, on my way to get the fifth one, and I didn’t even get to the first gym. This part of the challenge will definitely be different.


Legacy of Kain: The Soul Reaver

I know the title of this posting is a major spoiler so I’ll get right to it. I’ve completed Legacy of Kain: Soul Reaver. Bear with me, though. I’d still like to write about it.


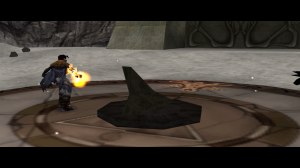
Soul Reaver - Sun Dial

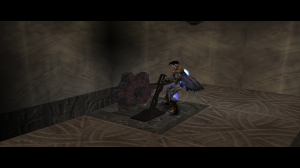
I had to use my new ability to turn the sun dial and open the passage.

I didn’t really feel like exploring anymore, so I went right for the next area after killing Dumah. I remembered there was a fork in the path next to the last portal I activated, so I went back there and took it.

Oracle Caves

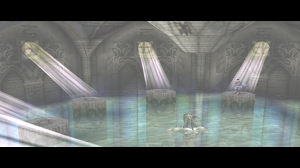
I ended up in an extremely long and pretty linear area. Based on what the Elder God told me, it was supposed to be cold, so I guess the initial cavernous part of the region was supposed to be covered with snow or ice, but it’s really hard to figure it out on graphics alone. In any case, it was colorful, so I liked the region.

Soul Reaver - Oracle Caves

The walls might be ice or snow, but I’m not sure.

I basically had from room through room, connected with extremely long hallways and with a relatively straightforward puzzle in each one. One of them involved pushing blocks to open a door, another involved leavers or using force projectile to push blocks, etc.

The slightly annoying part was fighting a lot of those Morlock enemies. The developers apparently have a sick sense of humor, because they absolutely love placing them in blind spots, so they’d hit me, causing me to lose the Soul Reaver and face them without a weapon. What I ended up doing was just to ignore most of them and run past them.

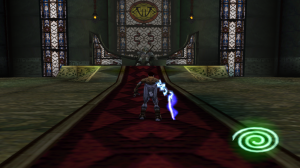
Eventually, I got to a part that was even more linear. I just walked through a large hallway, interrupted by flashbacks of the past story events. Eventually, those flashbacks turned into premonitions, or hallucinations, Raizel was unsure about that. Finally, I got to the last room of the game, where I had to face Kain again.

The Second Battle with Kain

The second battle with Kain worked basically in the same way as the first one, except it was much harder, or easier, depending on how you look at it. Again, I had to hit him three times before he would hit me and teleport away.

Soul Reaver - Second Battle with Kain

The method to beat Kain is the same as the first battle, but it’s harder this time.

The part that was easier was that a single hit didn’t send me to the spectral realm this time. Instead, I could get through two or even three hits. The harder part was that he started out much further away from me, and with each hit, the distance increased. By the third hit, I wasn’t able to do it in time.

It took me about fifteen minutes of trying before I finally got to him in time and hit him for the last time. To be fair, I did spend a big part of those fifteen minutes trying to figure out the underlying mechanic and somehow trick the game my predicting where he would appear next. Eventually, I gave up on that and just got lucky enough to be facing the side of the room where he appeared.

To Be Continued

This might be a major spoiler, though I personally don’t think so. The game ends with a cliffhanger. I’m not saying the story isn’t complete, I’m saying the game literally shows you a black screen with “To Be Continued” written on it.

Soul Reaver - Final Scene

This is where the game ends. I’m not gonna tell you who the other guy is.

Now that I think of it, Defiance has Raziel chasing Kain to, so it’s quite possible the story stretches all the way to that game, which means it doesn’t end during the two games in-between.

In any case, Soul Reaver is completed. I think Soul Reaver 2 is next, or possibly Blood Omen 2. I need to check. Alternatively, I could also try the first game in the series – Blood Omen: Legacy of Kain. I never did play through that one.

Is Legacy of Kain: Soul Reaver Any Good?

Yes, yes it is. In fact, it’s an excellent game. It has graphics which haven’t aged to badly, fun and engaging mechanics, amazing music, sounds, atmosphere and voice acting and an extremely intriguing story.

The downside? Well, I guess the camera could use some work. Heck, it could use a lot of work. The thing is, this was a 90s game. Back then, the camera in most third person games needed a lot of work. It was a new concept. I can forgive a slightly annoying camera if everything else is great.

You should play Soul Reaver. You really should.

Legacy of Kain: The Soul Reaver

As promised, the first thing I did when I booted up The Soul Reaver again was to go exploring. Last time, I got the final Sun Glyph and I can now reliably say that I can cast it three times before I’m finally out of mana. This time, I got an upgrade that’s even more awesome than the Sun Glyph.

The Fire Reaver

I went back to the Drowning Abbey. The first location I visited there was the huge cave lake with a stranded ship. I used my new swimming ability to get to a plateau on one side of it which, after a lot of swimming finally lead me to a mana upgrade.

After that, I moved on to the room where the annoying platforming section starts. This time, I could swim instead of switching to the spectral realm, so I was able to destroy the stained glass door in the middle of the large room. This opened another set of passages infested with the swimming enemies. Once I finally got to the end of it (without dying, even), I entered a room with a large brazier.

Soul Reaver - Fire Reaver

I finally got the Fire Reaver, and I almost missed it!

Using my Soul Reaver on the brazier turned it onto the Fire Reaver. This version of the sword burns enemies and turns my force projectiles into fire projectiles, enabling me to outright kill enemies at a distance, after a few hits. I lose the upgrade every time I enter water, but now that I have it, I can get it back at any larger fire source in the game, meaning all of those bonfires and braziers I used to kill enemies are now even more useful.

The Fire Glyph

After getting the Fire Reaver, I continued my exploration and eventually got to the early rooms of the Malchia clan area. I remembered there was a sunken passage there which apparently lead to a dead end in the spectral realm. Now that I could swim and look around, it turned out there was actually a way to get through it, which lead me to a large area decorated with fire emblems.

Soul Reaver - Fire Glyph

I got the Fire Glyph to. Just one more Glyph left.

There was a puzzle there which I had to solve. It involved turning a crank to open a door, switching to the spectral realm to get through that door and then opening up a bunch of shortcuts which allowed me to get to an area with an altar without leaving the physical realm. Once I got to that point, I set my Soul Reaver on fire and used it to activate the altar, which unlocked the Fire Glyph. This meant I only have one more glyph left.

I explored some more, but I didn’t find anything of note, so I finally went to the next area – The Ash Village.

The Ash Village

To get to the Ash Village, I first had to go back to the Lake of the Dead, the large whirlpool at the beginning of the game. From there, I could now take the last available route by jumping out of the water and climbing the ledge. The route soon took me to the entrance of the Ash Village, where I immediately found and unlocked the portal.

Soul Reaver - Ash Village

The Ash Village, or the Ruined City, looked like a hub at first.

The Ash Village looked huge, with a lot of twisting passages and puzzles which involved pushing blocks and switches to open up new routes, allowing me to more freely navigate through the area. Close to the end of it, I had a huge scare which took me back to the early days of the blog, when I encountered a game breaking bug in Legacy of Kain: Defiance.

I Can’t Push the Lever in Ash Village!

Well, I can now!

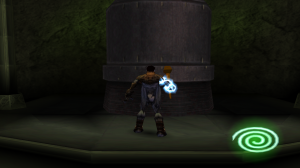
I climbed to the top of a large room, where I was supposed to flick a lever. The problem was, no matter what I did, Raziel wouldn’t touch the lever, just swinging his sword instead. I couldn’t damage myself in any way and the method of getting there meant I always had full health one I was on the lever platform.

Soul Reaver - Lever Bug

I had to reload my game to finally push the lever – a nasty bug.

I googled for a bit and other people had the same problem, but most of them ended up fixing theirs at random. Luckily, the same happened to me. I saved and quit the game, and then immediately reloaded. I walked back to the room, which didn’t take long thanks to all the shortcuts I unlocked and I was finally able to flick the lever by standing with my back towards the wall.

This was pretty much the final puzzle I needed to solve, before I could fight the boss.

How to Kill Dumah

My brother, Dumah – a powerful warrior, in life. He would have burned with shame, to have me find him here like a stuck pig.

[soundcloud url=”http://api.soundcloud.com/tracks/82801683″ params=”” width=” 100%” height=”166″ iframe=”true” /]

You don’t really kill Dumah, just like you don’t really kill Rahab. Instead, once I got the three spears out of his body, I started running away from him, all the while making sure he stays on me and keeps following. I lead him through the entire area and into the huge room with the gas valve I previously triggered to blast open the door.

Soul Reaver - Dumah

I had to revive Dumah in order to kill him and get his soul.

Once I got him into the room, I activated the valves again and basically incinerated him. Killing him gave me my next ability, which sort of tells me the developers were running out of ideas at this point.

Dumah’s ability allows me to create some sort of energy by running in circles around objects and enemies. This energy then allows me to trigger and move objects I can’t otherwise and hurt enemies, I guess. I’m not really sure about the enemies’ part, since I didn’t get the chance (or the desire) to try it out that way.

What I did was to go to a nearby courtyard with a statue and switch it around to clear out three surrounding rooms. Two of them just contained enemies, but one actually had another health upgrades. However, I need three more before my health goes up, so I won’t be getting any benefit from that for a while yet.


Pokemon Platinum - Cover, Box Art

With the choice of my next game in the “follow Ash” Pokemon challenge being between Pokemon Diamond, Pearl and Platinum, I decided to go with Platinum, mostly because I’m assuming it’s the most polished and full-featured of the three. As with Pokemon Ruby, I decided to do the research beforehand and make a proper plan of attack.

How to Follow Ash in Pokemon Platinum

Ash’s Pokemon in the Sinnoh Region

Other than Pikachu, Ash primarily uses six (or seven, depending on how you look at it) other Pokemon. These are

  • Starly/Staravia/Staraptor
  • Turtwig/Grotle/Torterra
  • Chimchar/Monferno/Infernape
  • Aipom
  • Buizel
  • Gliger/Gliscor
  • Gible

The Starly, Turtwig and Chimchar line are heavily used and Ash gets all three of these before the first gym. He also brings in Aipom from his earlier journey during the Johto Battle Frontier. He then trades his Aipom for Dawn’s Buizel between the second and third gym which is also heavily used from that point on.

Other than these three, he catches a Gliger, which soon evolves into Gliscor, but is also left behind in a similar fashion to Charizard sometime after the seventh gym. Additionally, he catches a Gible, but barely uses it and it doesn’t evolve.

Ash’s Pokemon in Pokemon Platinum

This means I’ll end up with a Staraptor, Torterra, Infernape, Pikachu and Buizel as my final team in the Sinnoh League, called Lily of the Valley Championship, or something like that, by the way.

The procedure is simple. I’ll edit my save to start with Pikachu and Aipom, while also Picking Turtwig. Right after the beginning, before I get to Oreburgh, I’ll catch a Starly and add a Chimchar to my party as well. Basically, I’ll have all the members of my team before the first gym and replace one of them right after the second gym. After the seventh gym, I’ll go below the cycling road to catch a Gible and I might train it for a bit, but I don’t think I’ll be using it to much.

Pokemon - Aipom

I think Aipom is the first Pokemon Ash trades away for good.

This time, I’ll also try to only use the moves the Pokemon in the anime learn after evolving to their proper forms. This might feel unclear, but I’ll explain it in the following paragraphs.

Pikachu

Moves

  • ThunderSchock
  • Thunderbolt
  • Quick Attack
  • Volt Tackle
  • Iron Tail
  • Thunder
  • Electro Ball
  • Agility
  • Double Edge
  • Tackle
  • Leer

I already gave up on Tackle, Leer, Double Edge, ThunderShock and Agility from the previous games, so I won’t even try to learn these. Thunder, Thunderbolt, Quick Attack and Iron Tail carry over from the previous games, but I’ll probably lose Thunder in favor of Volt Tackle. I think Pikachu only learns Electro Ball in Black and White, so I’ll have none of that.

Also, I will rearrange his individual and effort values in this game, since I feel they were all wrong in Ruby.

Starly – Staravia – Staraptor

Moves

  • Gust
  • Wing Attack
  • Quick Attack
  • Aerial Ace
  • Brave Bird
  • Close Combat

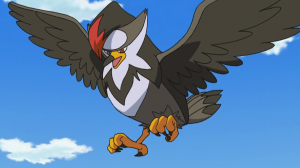
Starly evolves to Staravia before the first gym, which is awesome. Once it evolves, it learns Aerial Ace and Brave Bird, so I wont even try using it before that. I will learn it, of course, but I wont use it if I can avoid it. Sadly, I’m going to need Fly, so I’ll sacrifice a move slot for that. Once it evolves into Staraptor, it finally learns Close Combat.

Pokemon - Staraptor

Starly evolves extremely early, so that’s great. Flying types are quite good in general.

Staravia evolves to Staraptor between the Canavale and the Snowpoint Gym.

Turtwig – Grotle – Torterra

Moves

  • Tackle
  • Razor Leaf
  • Bite
  • Synthesis
  • Energy Ball
  • Rock Climb
  • Leaf Storm

Rock Climb is a HM in platinum, which means I don’t lose a slot to it for once. Other than that, Turtwig’s move list in the anime doesn’t fit with the game very much, so I’ll have to be creative. It learns Rock Climb after evolving to Grotle and Leaf Storm only in its final form.

I’ll pick this one as my starter. It evolves after Pastoria for the first time and right before Sunnyshore for the second time.

Chimchar – Monferno – Infernape

Moves

  • Ember
  • Flame Wheel
  • Scratch
  • Dig
  • Fire Spin
  • Flamethrower
  • Mach Punch
  • Flare Blitz

This is sort of sucky, because he’s only able to use a fighting move after evolving to Monferno, which happens after the seventh gym, but it’s still a pretty awesome fire type, so I’ll deal with it. He will use Flare Blitz only as Infernape, and I’ll probably have to sacrifice a slot for Rock Smash.

It’s supposed to join my team before the first Gym. It evolves twice, both after the Snowpoint Gym, which is gym number 7.

Aipom

Moves

  • Scratch
  • Swift
  • Focus Punch
  • Double Team

These are the four moves Aipom knows while with Ash, but I’m not sure I’ll even be able to learn all four before abandoning it in favor of Buizel. Aipom will be with me only until after the Eterna Gym.

Buizel

Moves

  • Water Gun
  • Aqua Jet
  • SonicBoom
  • Water Pulse
  • Ice Punch
Pokemon - Buizel

Buizel will be simple to handle, once I give it an Everstone.

This one will be straightforward, since it doesn’t evolve. I’ll pick three out of these five moves and add Surf to the list. I might have to sacrifice another slot for Waterfall to.

Gliger – Gliscor

Moves

  • X-Scissor
  • Sand-Attack
  • Steel Wing
  • Screech
  • Fire Fang
  • Giga Impact
  • Stone Edge

He only uses the first three attacks as Gliger, so I’ll hold on with the rest of them until after it evolves. I’ll have to abandon it after the Snowpoint Gym, sadly. I’m supposed to catch it right after Eterna and let it evolve sometime after Pastoria.

Gible

Moves

  • Dig
  • Draco Meteor
  • Dragon Pulse
  • Rock Smash

Gible evolves into an awesome Pokemon, but sadly, this doesn’t happen in the anime. Instead, even though Ash actually catches it, unlike Larvitar, it remains heavily underused (i.e. not at all) in battles. I’ll catch it and keep it in my party, but I probably won’t train it at all.

Pokemon - Gible

This one has a huge amount of potential, but it never reaches it in the anime.

Then again, Ash does use it in the League battles, so I might have to train it anyway.

How is it Overall?

Well, on the positive side, I won’t need to make any hard choices on which Pokemon to use in Pokemon Platinum. On the negative side, I might have some trouble in the final areas. Still, it’s nothing some grinding won’t cure. Other than having two starters and the Gyms and locations being slightly out of order in the anime, it’s quite possible to follow Ash throughout Pokemon Platinum or Generation IV in general very accurately.

Well, you also need to “transfer” Pikachu, but that’s probably a given.


Legacy of Kain: The Soul Reaver

Minor Exploration

In my previous posting, I said I was going back to the Silenced Cathedral because I remembered there being an obstacle I can get through with my new force projectile power, so that’s exactly what I did. I got all the way to the proper area, which I found at random, because I couldn’t exactly remember where it was.

NOTE: Silenced Cathedral – Secret Area

In case anyone needs this information later, you need to get to the first huge floor fan in the area and then, instead of floating upwards from it, go through the passage at the bottom.

Soul Reaver - RIng the Bell

I forgot to take a screenshot of the destroyable door, so here’s a screen of me hitting the bell.

In any case, I found the place, but whatever I did, I just couldn’t hit the target with my force projectile. You can’t jump and shoot and the auto targeting just wouldn’t lock on to it. I’ll admit, I got a bit desperate, but eventually, I figured it out.

You can manually target and look around in Soul Reaver

I know, it’s probably ridiculous that I haven’t figured it out, because it’s the one feature I really wanted, but yes, you can actually do it. If you hold down both of the camera rotate buttons, you can move the camera around with the arrow buttons. If you’re also charging the force projectile (or preparing to throw a weapon), then you’re also able to target your shot.

My main gripe with the game up until now was that I wasn’t able to look around to see where to go next. I guess that issue is gone now!

The Sound Glyph

The area behind the now destroyed gate was another puzzle with a glyph at the end of it. I had to take some sort of drumstick from a wall in one part of the huge room, jump across tall pillars to a bell with the drumstick. The issue was that I had to switch between the material and spectral realm in order to jump from one pillar to the other, so I also had to throw the drumstick towards the bell first, since I can’t carry anything in the spiritual realm.

Soul Reaver - Sound Glyph

Switching realms here causes the pillars to move, but you need to throw the drumstick across first.

From what I can tell, the sound glyph stuns nearby enemies. It’s about as useful as the other glyphs I collected up to this point – not very much. Still, I’m sure it can be convenient when I’m surrounded by a bunch of enemies.

The Drowned Abbey

Once a sanctuary against the vampire menace, this abbey has been drowned by the deluge spilling from this wounded land. Your brother Rahab and his brood, devastated even by the feeble rays of Nosgoth’s sun, overcame their vulnerability to water and retreated from the surface. Now they haunt these ruins, and glide in the darkness of its stagnant depths.

[soundcloud url=”http://api.soundcloud.com/tracks/82457430″ params=”” width=” 100%” height=”166″ iframe=”true” /]

It took me a while to figure out how to get to the Drowned Abbey. The answer was back in the Tomb of the Serafan, hidden behind a switch in the boss room. When I killed Morlock, I thought that switch was what opened the gate and the way back out of the Tomb. It turns out, the gate opened by itself and the switch wasn’t really a switch. It was a block which I had to hit it with the force projectile more than once in order to push it out of the way and open a new passage.

Soul Reaver - Ship

A hint: The Ship changes when switching realms.

The Drowned Abbey was, naturally, completely covered in water. For an ex-vampire who still has issues with liquids, this was a problem. It also meant that this would be probably the most annoying area of the game.

Soul Reaver - Platforming

First you need to jump across these…

Basically, getting through the abbey involved lots of platforming sections where a single mistake would cause you to “switch” to the spectral realm, go back and start over. The first thing I did wrong was that I went through a passage that lead me through some bars in the spectral realm. The problem was that the bars didn’t have flat ground on the other side, so I couldn’t get back through them, and it turned out, they led me right back to the start of the area, so I had to go through the entirety of it twice.

Soul Reaver - Platforming 2

… and then across these, all in one, flawless attempt.

The second problem was the second platforming area, where I had to get through the physical realm and feast leap over a set of beams positioned over water. After that set of beams, there was also a set of stone platforms positioned over a slippery roof which, again, would send me into water. Each of those one its own was hard enough, but I had to do it both without any mistakes, or I would have to go right back to the start. I’m not the person that usually swears, but at this point, I really, really wanted to. Soul Reaver is not a platforming game.

How to Kill Rahab

Eventually, I somehow got through it and finally reached Rahab. The challenge of the Drowned Abbey was definitely not the end boss. Compared to what I just went through, Rahab was easy, though still slightly annoying.

Soul Reaver - Rahab

Lights on! You don’t really fight Rahab. You just hit “switches”.

The area he was in was circular, with a bunch of platforms positioned evenly throughout it. I had to jump from platform to platform, avoiding Rahab’s shots and keep firing my force projectiles at windows along the walls. Once all the walls were destroyed, the light destroyed Rahab. The annoying part was that getting hit by Rahab would usually throw me into the water, which would mean more annoying platforming to get to the top and back into the material realm.

Killing Rahab got me another very useful ability. Water wouldn’t hurt me anymore and I could now swim in the physical realm.

More Exploration

Of course, this meant I was now able to explore even further and get more upgrades. The first thing I did was to go back to the entrance of the Silenced Cathedral, where I’ve already seen a health upgrade I couldn’t reach before. Now, I could do it by swimming on the left side of the Silenced Cathedral moat.

While I was there, I also explored the right side of the moat, now knowing where it would lead me.

The Sun Glyph

The right side of the moat took me to a huge area with a bunch of Morlock enemies and giant machinery. The whole region, which is probably a more fitting name than “area”, was one huge puzzle, which eventually led to a room with the Sun Glyph, the most powerful glyph of the game.

I had to solve some block puzzles involving pipes, hit a bunch of switches to activate a lighthouse and then enter the room with the glyph and finally switch to the spectral realm at the right moment to pick it up.

Soul Reaver - Sun Glyph Beacon

Once you activate the beacon, the Sun Glyph is almost yours.

I think it was worth it, though. First of all, this means I probably cleared the hardest puzzle in the game without knowing it. Secondly, the sun glyph is extremely strong. It outright destroys most enemies around me when I use it. It costs a good chunk of my mana, but by now, I have plenty to use it twice or possibly even trice.

In any case, this is where I ended my game. Next time, I’ll probably do some more exploring, since there’s bound to be items I missed. I know for sure there are two glyphs I can still find, as well as some health upgrades.

Pokemon Ruby - Cover

Since last time in Pokemon Ruby, I did a lot of training. A lot!

Game Freak Is Full of Trolls

Seriously. Why would the developers decide it’s a good idea to give most Pokemon on the Victory Road, which is probably the best place to train before the Elite Four, a move which allows them to kick the player’s Pokemon out of combat.

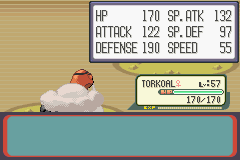
Pokemon Ruby - Torkoal

I told you it was going to get strong.

Sure, after a while, most of my Pokemon were able to sweep through the encounters in Victory Road, but it was still annoying. There I am, hitting Hariyama three times with Ice Beam already, only to be kicked out of battle and wasting those 3 PP.

Training in Victory Road

It was annoying, but I did it anyway. Pikachu, Corphish, Glalie and Swellow eventually got easier to train, and Torkoal was a breeze right from the start, but my starter, Grovyle, wasn’t able to be effective at all. It had a type disadvantage against mos of the Pokemon in there, so I ended up going back to the overworld, fighting Tentacools for ages just go get to level 55.

After about an hour of fast-forwarding in total (gotta love GameBoy Advance emulators), I got most of all of my team members to either level 55 or 60, because I like round numbers. I decided to give it one more shot, stocked up on potions and went for it.

The Elite Four

Sidney was easy to deal with. I got rid of his Mightyena, Cacturne and Shiftry with Torkoal, switched with Pikachu for his Sharpedo and then brought back Torkoal for Absol.

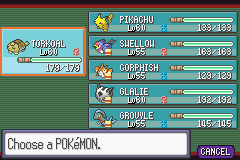
Pokemon Ruby - Final Team

I could have trained even longer, but this would have to do.

Next up was Pheobe, who used Ghost Pokemon. This time, I didn’t have any type advantage, so I ended up using mostly Torkoal and Glalie, my two most powerful Pokemon. I had one of my team members faint, but I had plenty of items in stock to heal after the battle.

Pokemon Ruby - Glacia

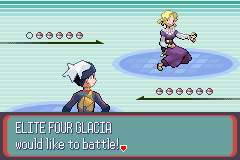
It’s like she was destined to become an Ice trainer.

After that, it was time for Glacia, who used Ice types. Pikachu did some major damage here, but I had to switch him out for Growlyle, who handled the two Sealeos with Mega Leech. Overall, this member of the Elite Four was the hardest.

Finally, I fought Drake, who was, obviously, a Dragon Master. This part was the easiest. My Glalie swept through his entire team without any trouble.

The End of the GameBoy Advance Chapter

After the elite four, I went to the final room, but didn’t heal and ended up fighting Steven mostly out of PP on my most important moves. Even so, thanks to some switching around and item usage at key moments, I got through it and came out on top. I also had a type advantage against most of his Pokemon, so that helped a lot.

Pokemon Ruby - Victory Screen

I don’t have to manually edit the victory screen any more.

The League was, again, won, and the GameBoy Advance chapter of my Follow Ash challenge is now over. Even though I ruined my Pikachu, this will probably be my favorite part of the challenge.

Pokemon Ruby - Ending

There’s a proper ending sequence.

Sadly, I now have to move on to the Nintendo DS, which means I wont be able to fast-forward as much. What’s worse is that I probably won’t be able to play the game on weekends, since my laptop isn’t really up to par for DS emulation, so I can only play it on my PC, which I don’t have access to during weekends. What I’m saying here is, I won’t be completing Diamond/Pearl or Black/White as fast as I did the first three generations.

Pokemon Ruby - Cover

Last time in the GameBoy Advance part of my “Follow Ash” challenge I just beat Ruby’s dad (as Ash) and won the fifth gym badge.

Fishing for Corphish

As soon as I got the Petalburg badge and was able to use Surf, I went to Route 118 (I think), to get to Good Rod. I then spent some time fishing at Route 117 and finally got my Corphish, three gyms to late. Of course, I now had to train it until it caught up with the rest of my team, so that’s exactly what I did.

Pokemon Ruby - Corphish

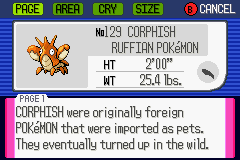
Corphish wasn’t supposed to evolve, so it wouldn’t be very strong, but Surf helps.

Once that was over with, I went past Route 118 and 119 towards Fortree City, where my next gym was waiting. On the way there, I stopped by to Weather Institute to fight with Team Magma for a while. I got a Pokemon as a reward and sent  it directly to the PC, since Ash never had anything to do with Castform.

Fortree City Gym

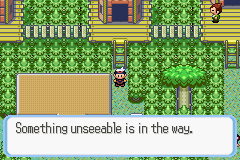
I gotto Fortree City, but wasn’t able to enter the gym because something was blocking my way. Spoiler: It was an invisible Kecleon. I had to walk a bit past Fortree City on Route 120 to meet Steven and get an item which revealed the Kecleon and made it run away.

Pokemon Ruby - Fortree City

I love the way Fortree City looks.

The Fortree Gym was a Flying type gym, so Pikachu kicked some serious butt here. Once it was clear, I didn’t want to waste too much time, so I immediately went towards Lilycove city, where the next part of the story was waiting. Once there, I saw Team Magma stealing a submarine and entered their hidden lair nearby for a few moments, just so I could find out where to go next. The destination was Mount Pyre on Route 122. This was the graveyard area of Pokemon Ruby, but I wasn’t there for as long as in the previous games. I climbed to the top and fought the Magma Commander there, only to find out I now have to go to an underwater cave. However, to get there, I had to use Dive and I wasn’t able to use it without the next gym badge.

Mossdeep City Gym

Mossdeep City was relatively close by, so it didn’t take long to get there. This time, it was a Psychic gym, so it gave me some trouble, but thankfully, though psychic Pokemon can hit hard, they can’t take a lot of damage so I ended up sweeping through most of them. I got the badge and I was able to use Dive, but I didn’t have a Pokemon to teach it to.

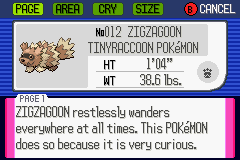
Pokemon Ruby - Zigzagoon

And I just got rid of my first HM Slave…

Sadly, this meant I had to catch another HM Slave just for Dive and further deviate from the anime. I ended up catching a Tentacool, and using it to get to the underwater cave, where the Team Magma commander freed a legendary Pokemon. As I said, the legendary is different in the two games. For Ruby, it was Groudon and for Sapphire, it would be Kyogre.

The Pokemon disappeared and I had to go to the next city where the final showdown would happen and the final gym was at. Before going to Sootopolis, though, I remembered I have to go catch my final team member – Snorunt. For that, I went to Shoal Cave which was conveniently at low tide right now, so It didn’t take too long to find and catch a Snorunt.

Sootopolis City, The Cave of Origins and the Final Gym

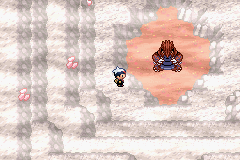
Just like Fortree, Sootopolis was another cool looking city. The graphics of the Pokemon games were never top-notch, but the upgrade to Gameboy Advance really allowed the games to shine. The gym type was Water, but before I could challenge it, I had to go to the Cave of Origin and capture or defeat Groudon.  I ended up just using the Master Ball and sending it straight to the PC, since Groudon has nothing to do with my challenge. I also found the final HM of the game inside the cave – HM07, Waterfall.

Pokemon Ruby - Groudon

Not having a reason to save the Master Ball really helps.

Unlike the cave, the Sootopolis Gym gave me a lot of trouble. Technically, Pikachu would be perfect against Water but most of the Pokemon here also had secondary types and some hard hitting attacks, so my badly trained Pikachu couldn’t cope. In my next game, I’m definitely redistributing my IVs.

My Pikachu is now physically strong mainly because in the first generation, all damage was determined by the Attack stat and the Special affected defense only. Instead of duplicating the Attack IV and transferring it to Special Attack, I decided to copy the Special into both Special Attack and Special Defense which, in hindsight, makes no sense. Ash’s Pikachu is tough, but it also has extremely powerful Electric attacks, most of which are special based. In addition to this, the only way for Pikachu to learn a physical Electric type attack in Ruby is through breeding, meaning I’m stuck with what I have. In my next game, I’m giving him high Attack and Special Attack with medium Defense and low Special Defense. The only thing I got right was the speed.

I did some googling on EV training and found out the Spindas outside Fallarbor town give 1 Special Attack EV each. Since most of my Pokemon use special attacks and have high IV in those stats, I decided to spend some time training there.

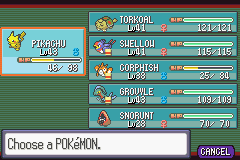
It was well worth it. Torkoal became extremely powerful, Snorunt actually started to hold its own and Corphish was able to sweep a lot of its enemies thanks to Surf and the now much higher Special Attack. Still, I wasn’t able to evolve it yet, so he wasn’t to helpful against Sootopolis’ Dragon gym.

Pokemon Ruby - Team

Spindas also give a decent amount of experience.

Somehow, after some persistent reloading, I managed to get through it and was able to finally go to the Pokemon League. For that,. I had to use Waterfall to get to Ever Grande City, which can’t really be called a city, since it only had a Pokemon Center and nothing else. At this point, I got rid of all of my HM slaves, but kept Strength on Torkoal and Rock Smash on my Grovyle so I could get through the Victory Road ahead.

The two lower levels of the victory road were dark, so I was tempted to use Flash, but I ended up navigating through the area without it somehow. As soon as I got to the League building, I saved my game, spent all of my money and decided to just go for it.

Suffice to say, it didn’t work. Time to train.

 A GameBoy Advance of My Own?

By the way, I love the GameBoy Advance games so much, I’m actually thinking about buying a console. I’m not sure which one I should get, though. The GameBoy Advance SP supposedly has a better screen, but the regular version looks a lot sturdier. Anyone have any ideas?